Adding Standalone Tape Drives
The process of adding a standalone tape drive to NAKIVO Backup & Replication includes the following steps:
-
Note
Vendor drivers should be installed on tape devices prior to adding them to the NAKIVO Backup & Replication Inventory.
Launching Wizard
To add a standalone tape drive to the system:
-
Go to Settings and click the Tape tab.
-
Go to the Devices tab.
-
Click the Add (+) button and select Standalone tape drive.

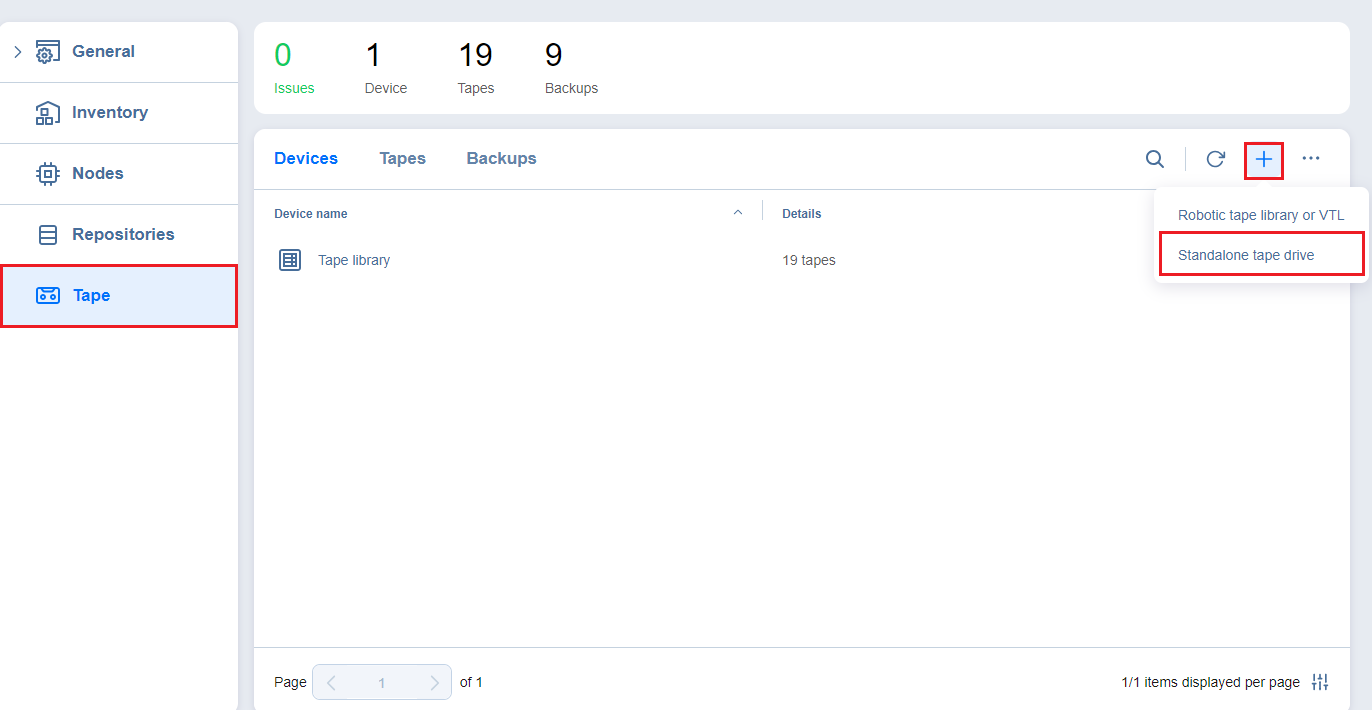
The Add New Standalone Tape Drive wizard opens. Follow the steps below to add a new tape drive.
Note
Before adding a new tape drive to NAKIVO Backup & Replication, you need to deploy or add an existing Transporter on a machine that is physically connected to the tape drive. For more information on theTransporter deployment, refer to Deploying Transporter as VMware Appliance and Adding Existing Nodes.
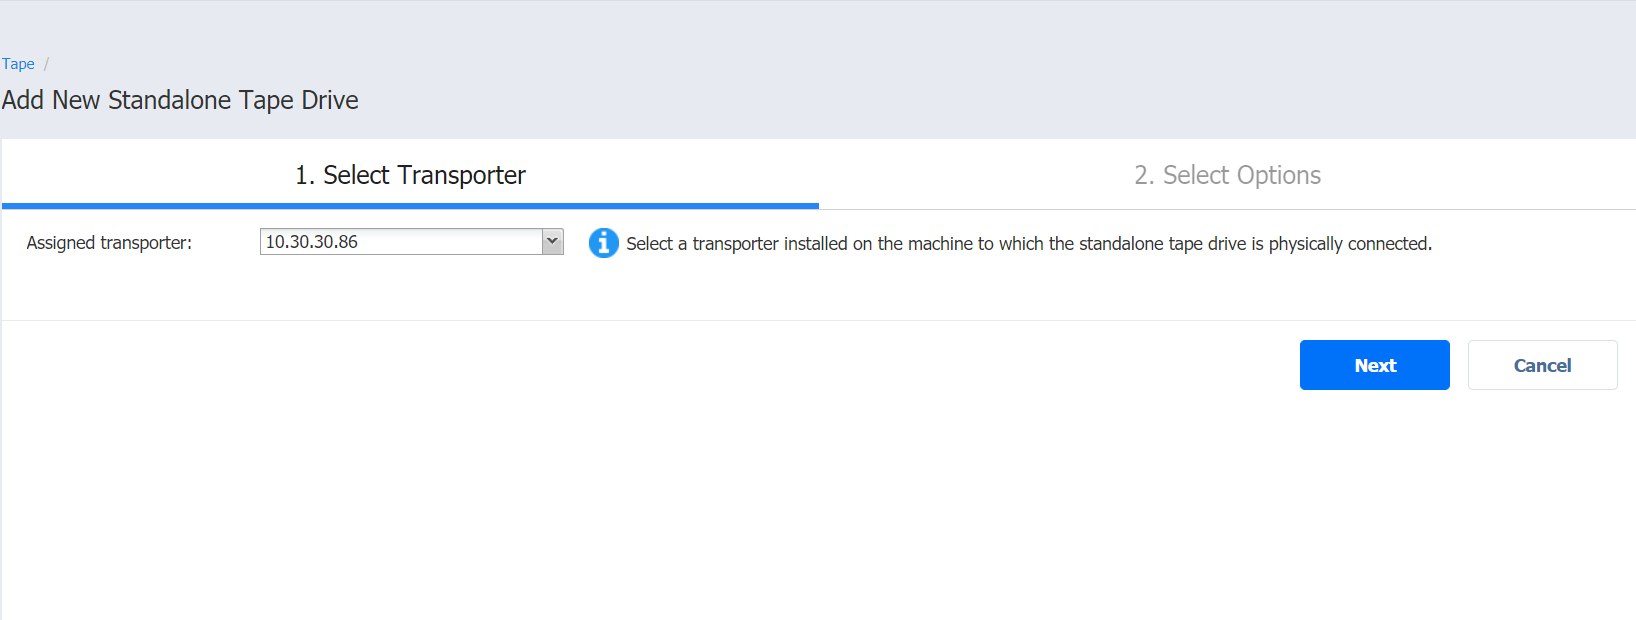
Selecting Transporter
During the Select Transporter step, you need to specify a Transporter assigned to the drive that you would like to add. This Transporter acts as a network appliance that manages traffic between the tape drive and NAKIVO Backup & Replication.
-
From the Assigned Transporter drop-down list, select the relevant installed Transporter. You can also select a physical machine agent installed on the host connected to the tape device.
-
Click Next.

Selecting Options
The last step of adding a tape drive is selecting its options.
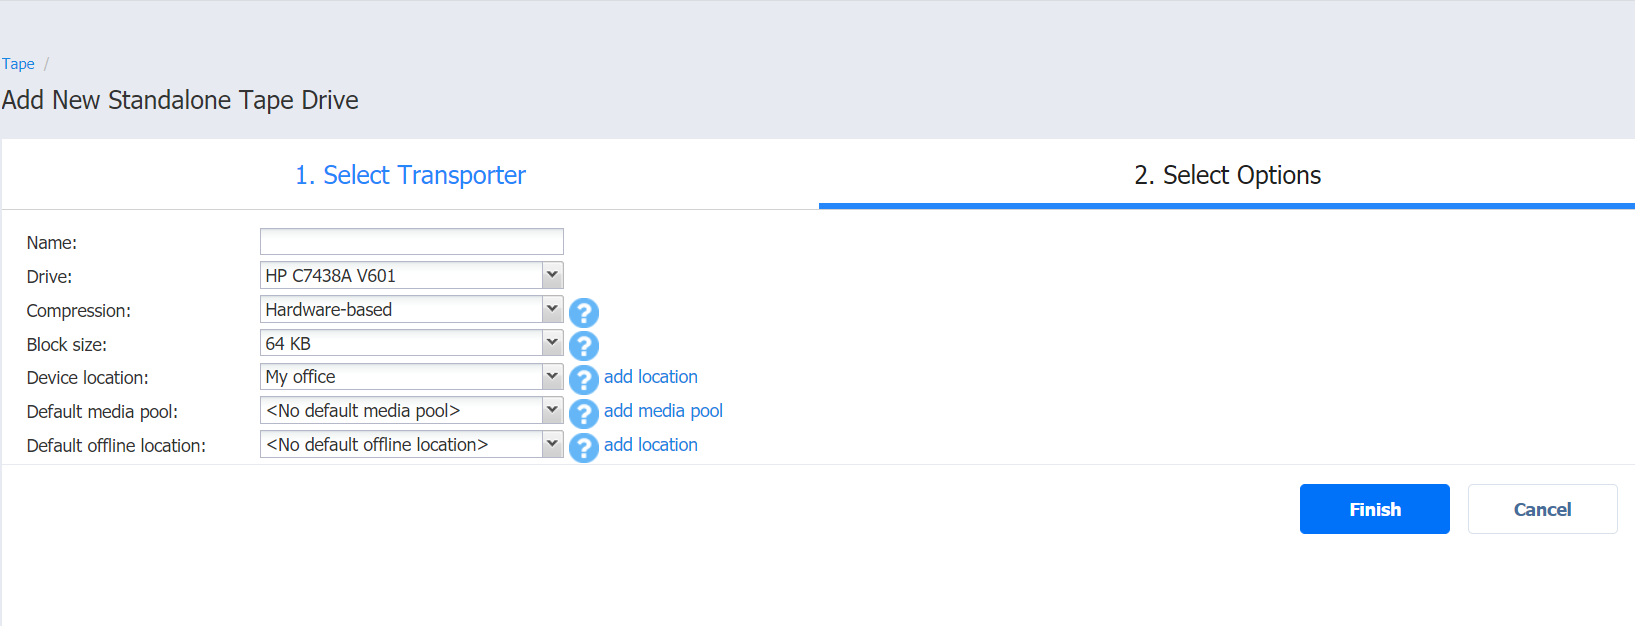
1. Specify the following parameters:
-
Name: Enter the name of the tape library
-
Drive: Select one of the standalone tape drives on the assigned transporter
-
Compression: Select a compression level of the tape device:
-
Software-based (fast) (default)
-
Hardware-based
-
Software-based (medium)
-
Software-based (best)
Note
Setting hardware compression is not recommended to avoid the issue of increased data size during transfer and long backup/recovery times. Having different types of compression for the tape device and a source/target Backup Repository during backup or recovery can also lead to this issue. For more information, see this article.
-
-
Block size: Select the block size of the tape device:
-
32 KB
-
64 KB (default)
-
128 KB
-
256 KB
-
512 KB
-
1 MB
Note
The system does not automatically detect the block size; make sure to use the correct block size when importing backups.
-
-
Device location: Select the location of the device and all tapes inserted into this device. The automatically created My office location is selected by default. To create another location, click Add Location. For more information on locations management, refer to Managing Locations.
-
Default media pool: Select a default media pool for all new tapes inserted into this device. Optionally, you can select No default media pool if you want to skip this step. To create another media pool, click Add Media Pool. For more information on media pools management, refer to Managing Media Pools.
-
Default offline location: Select a default location for all tapes ejected from this device. Optionally, you can select No default offline location if you want to skip this step.
2. Click Save to start adding the tape drive to NAKIVO Backup & Replication. After successful addition, the tape drive will become available in the Devices tab.
Managing Added Tape Drives
Clicking the name of the tape drive opens its Parameters page. Apart from giving details on the selected tape drive, the Parameters tab provides the following functionality:
-
Refresh: Allows for refreshing the device by initiating the process of updating information regarding the content of the tape device.
-
Manage: Allows for performing the following actions with the tape drive:
-
Edit: Selecting this option opens the same wizard as described in previous sections, but with all fields already predefined. All fields, apart from Compression and Block size, can be changed.
-
Detach/Attach: Allows for performing manual tape library attach/detach. Tape cartridges contained in a detached tape device become offline.
-
Remove: Removes the device from NAKIVO Backup & Replication. This option is unavailable in case the device is currently in use by a job or other process.
-
-
Tapes: Clicking this link opens the Tapes screen where you can view and manage tape cartridges in the device.