Logging in to NAKIVO Backup & Replication
Getting to the Login Page
To open the NAKIVO Backup & Replication login page, enter the machine’s IP address or DNS name in your web browser, followed by the HTTPS port (default port is 4443).
Note
If you selected a custom HTTPS port during installation, replace 4443 with the custom value.
Creating a User Account
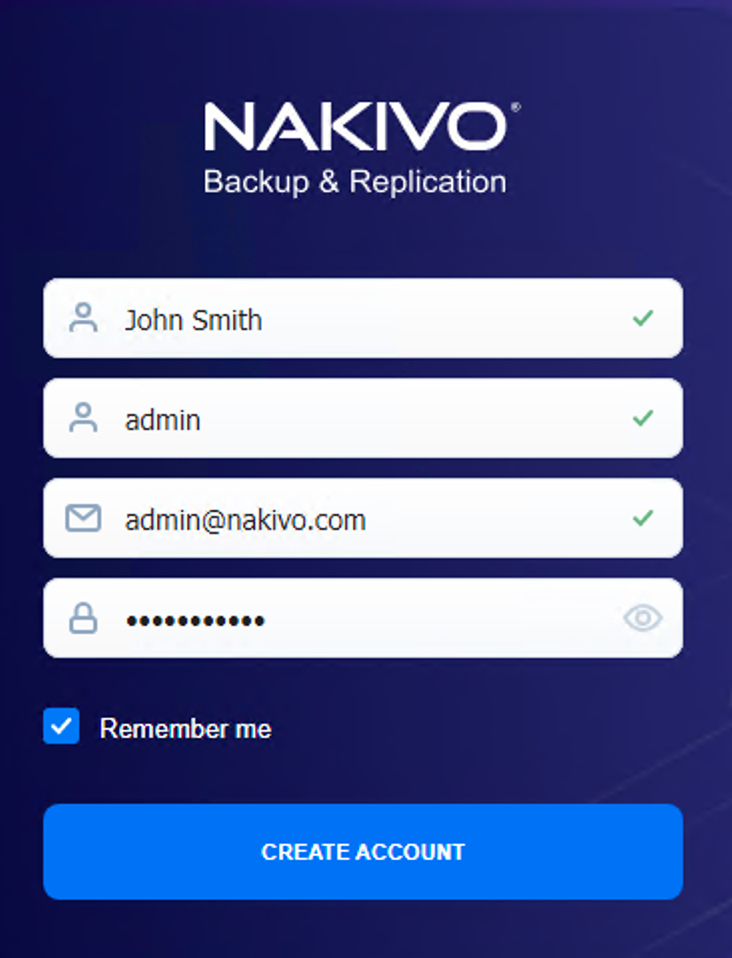
When you open the NAKIVO Backup & Replication login page for the first time, you are prompted to create a new user account. This user account is the admin account to be used to access your instance of NAKIVO Backup & Replication. Fill out the fields in the form:
-
Name: Provide your real name.
-
Username: Enter an admin username to log in to NAKIVO Backup & Replication.
-
Email: Provide an email.
-
Password: Enter a password.
-
Optionally, you can select Remember me to save your credentials.
-
Click CREATE ACCOUNT.

Note
If NAKIVO Backup & Replication is deployed in an Amazon EC2 instance, you will first be prompted to enter the Amazon EC2 instance ID.
NAKIVO Backup & Replication opens in your browser displaying the configuration wizard. Refer to First Steps with NAKIVO Backup & Replication to learn how to start using NAKIVO Backup & Replication.
To log out, click Logout in the bottom left corner.
Resetting Password
If you forget the password used to log in to NAKIVO Backup & Replication, you can restore it by following the steps below:
-
Go to NAKIVO Backup & Replication login page.
-
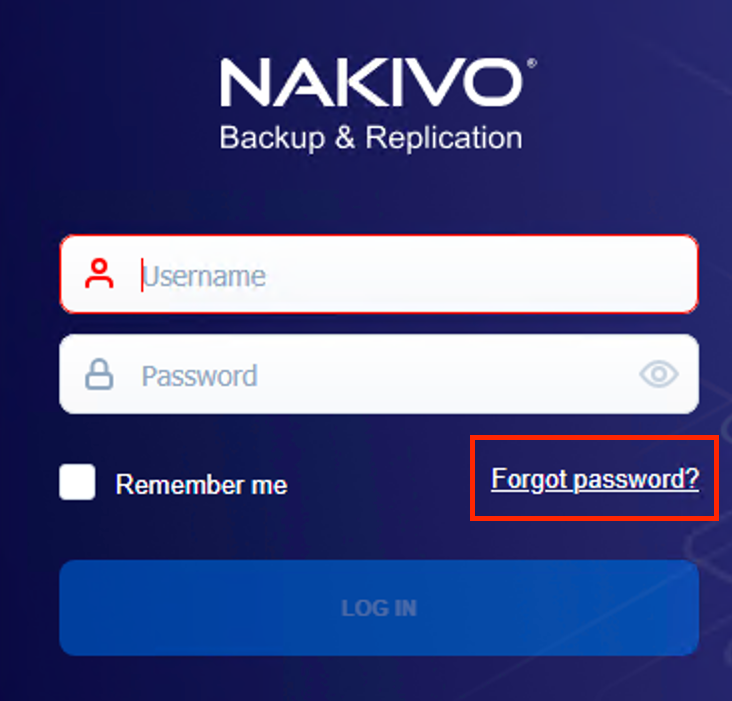
Click the Forgot password link.

-
Do one of the following:
-
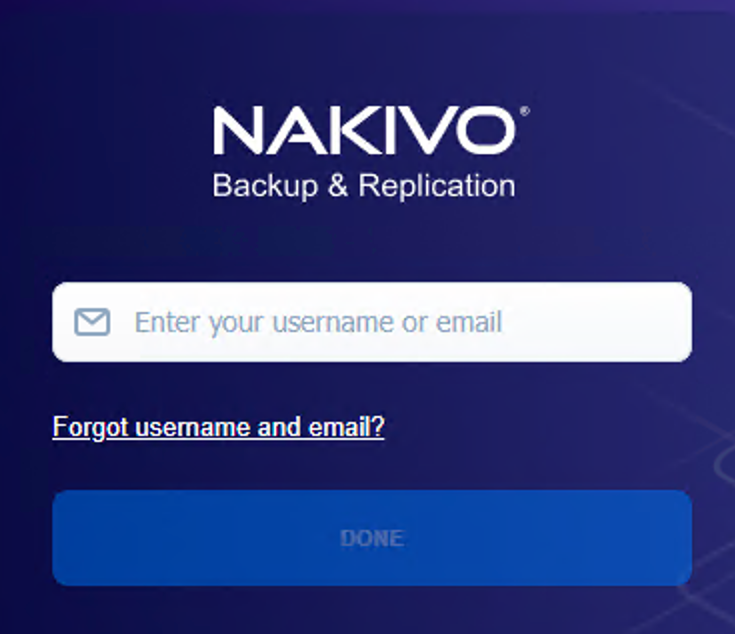
If you have set up email settings in NAKIVO Backup & Replication, enter your email address and click Done.

A temporary password, which is a security string, is sent to your inbox. Enter this password the next time you log in to your NAKIVO Backup & Replication instance. Once you are logged in, it’s recommended that you change the temporary password for your user account. To change the temporary password:-
Click Logout in the bottom left corner.
-
Select Profile.
-
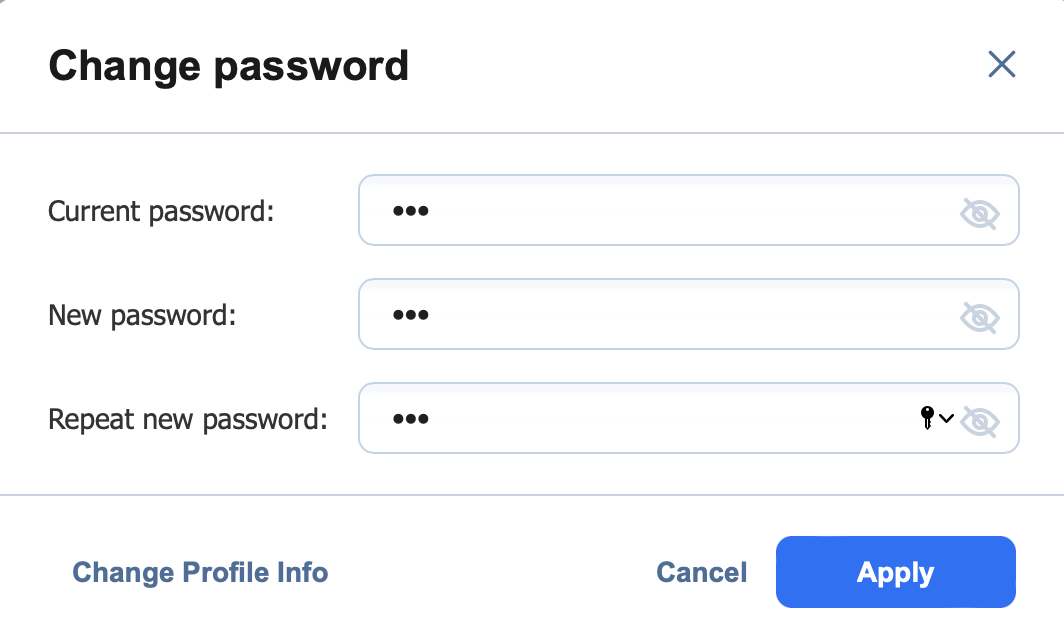
Click Change password.
-
In the dialog box that opens, fill out the following fields:
-
Current password: Enter the temporary password that you received to your inbox.
-
New password: Enter a new password.
-
Repeat new password: Enter the new password again.
-
-
Click Change.

You can also change your temporary password in Settings>General>Users and Roles
-
-
-
If you have not set up email settings in NAKIVO Backup & Replication:
-
Enter your username and click Done.
-
Go to the product installation folder and locate the “forgot_password.txt” file.
Important
For security reasons, only a root user (Linux) or a member of the Administrators group (Windows) is allowed to access the installation folder and the "forgot_password.txt" file. -
Paste the security string from the file in the appropriate field.
-
Click Done.
Notes
-
If you are using a Virtual Appliance (VA), go to the VA console, then go to the command line and enter:
cat /opt/nakivo/director/forgot_password.txtThe security string will be displayed on the screen. You can copy and paste it into the web interface. -
For Windows OS, you can find forgot_password.txt file in the following default installation folder: C:\Program Files\NAKIVO Backup & Replication. Please note that if you changed the installation path, the file will be located in the folder you specified.
-
If you are using a NAS, open an SSH connection to your device and read the forgot_password.txt file in the following folders:
-
For ASUSTOR NAS:
/usr/local/AppCentral/NBR -
For NETGEAR NAS:
/apps/nbr -
For QNAP NAS:
/share/CACHEDEV1_DATA/.qpkg/NBR -
For Synology NAS:
/volume1/@appstore/NBR -
For Western Digital NAS:
/mnt/HD/HD_a2/Nas_Prog/NBR
-
-
To learn how to open an
SSHconnection to your NAS device and read text files, refer to the NAS vendor documentation.
-
-
Default Password in Amazon EC2
If you have deployed NAKIVO Backup & Replication as an Amazon machine image in Amazon EC2, use the following default credentials to log in:
-
Username: admin
-
Password: The password is the ID of the NAKIVO Backup & Replication instance in Amazon EC2.
Passing Verification
If two-factor authentication was configured, verification needs to be passed after entering the credentials to access your NAKIVO Backup & Replication instance. This can be done in one of the following ways:
-
Google Authenticator code from the mobile app
-
A code sent to the specified email address
-
One of the single-use backup codes
If Two-factor authentication was enabled but never configured, it must be configured now. Do the following:
-
Click Continue.
-
Optionally, click on the change your email link to enter the new email address for the user. Select Continue to proceed.
-
Enter the verification code that was sent to the specified email and click Continue. Optionally, click Resend email in case you did not receive it.
-
Optionally, enter the alternative email address that can be used in case the primary one becomes unavailable, and select Continue. Alternatively, select Skip this step.
-
If you have entered the alternative email address for the previous step, enter the verification code that was sent to the specified email, and click Continue. Optionally, click Resend email in case you did not receive it.
-
Follow instructions on screen to download and install Google Authenticator, and click Continue.
-
Add your NAKIVO Backup & Replication user account to Google Authenticator. Use one of the following methods:
-
Select Scan QR Code option and scan the QR code in the popup window.
-
Select Enter a Code option and follow the instructions to enter the shown code into the Google Authenticator app.
-
-
Enter the 6-digit verification code from Google Authenticator into the field. Note that the verification code is time-based. Click Continue to proceed.
-
A pairing key is displayed which can be used to add multiple devices to your account.
Important
It is highly recommended that you save the pairing key or write it down.You have the following options:
-
Optionally, click on the Copy the key link to copy your key and save it for future use.
-
Optionally, click on the Download pairing information link to download and save instructions on how to use the pairing key.
-
Click Continue when you’re done.
-
-
Four backup codes are displayed on the next page. These one-time codes can be used to log in when you are unable to provide a verification code. Click on the Save as PDF link to download and save these codes in PDF format or write them down. Click Continue.
-
Enter one of the backup codes in the next popup window to confirm that you have saved them, and click Finish.
Google Authenticator Verification
If you have selected the Google Authenticator verification method on the Managing Two-Factor Authentication page, do one of the following:
-
Enter the verification code from Google Authenticator into the field, and click Proceed.
-
Enter one of the one-time backup codes.
-
Click More verification options to use email verification.
Email Verification
If you have selected the Email verification method on the Managing Two-Factor Authentication page, do one of the following:
-
Select one of the email addresses verified previously, and click SEND VERIFICATION CODE. Then click OK.
-
Enter one of the one-time backup codes.
-
Alternatively, click More verification options to choose a different email for verification.