Using a VM Agent
With NAKIVO Backup & Replication, you can install a permanent virtual machine agent (VMA) rather than injecting a temporary agent for every job run. This agent simplifies OS quiescing and file-level recovery to the source virtual machine by eliminating the need to provide credentials for the VM’s guest OS.
Notes
The VM agent is used for OS quiescing if the relevant job option is enabled and only for Hyper-V. For other hypervisors, VMA is used only for file recovery.
With the File Restore through Permanent Agent feature, you can manually select the proxy transporter to mount the backups and communicate with the auto-detected permanent virtual machine agent at the target destination for File Level Recovery to Source jobs. For more information, see Mounting a backup to a transporter.
For information on VMA system requirements, see Feature Requirements. For information on installing a VMA, see Installing a VM Agent.
After installing a VM agent inside a VM and adding it to the Nodes tab, you may proceed with configuring it for use in jobs. See the sections below:
Setting Default Credentials
To configure a default master password for VM agents, do the following:
-
Go to Settings > Inventory > Manage > Credentials.
-
Click Add Credentials.
-
In the Type drop-down list, select Master password.
-
Enter a Name and Password.
-
Optionally, add a Description.
Enabling VM Agents
To enable your installed VM agents (VMAs) to be used in jobs, proceed as follows:
-
Click on a job containing the VM in which you have installed a permanent agent.
-
Go to Manage > Edit > Options.
-
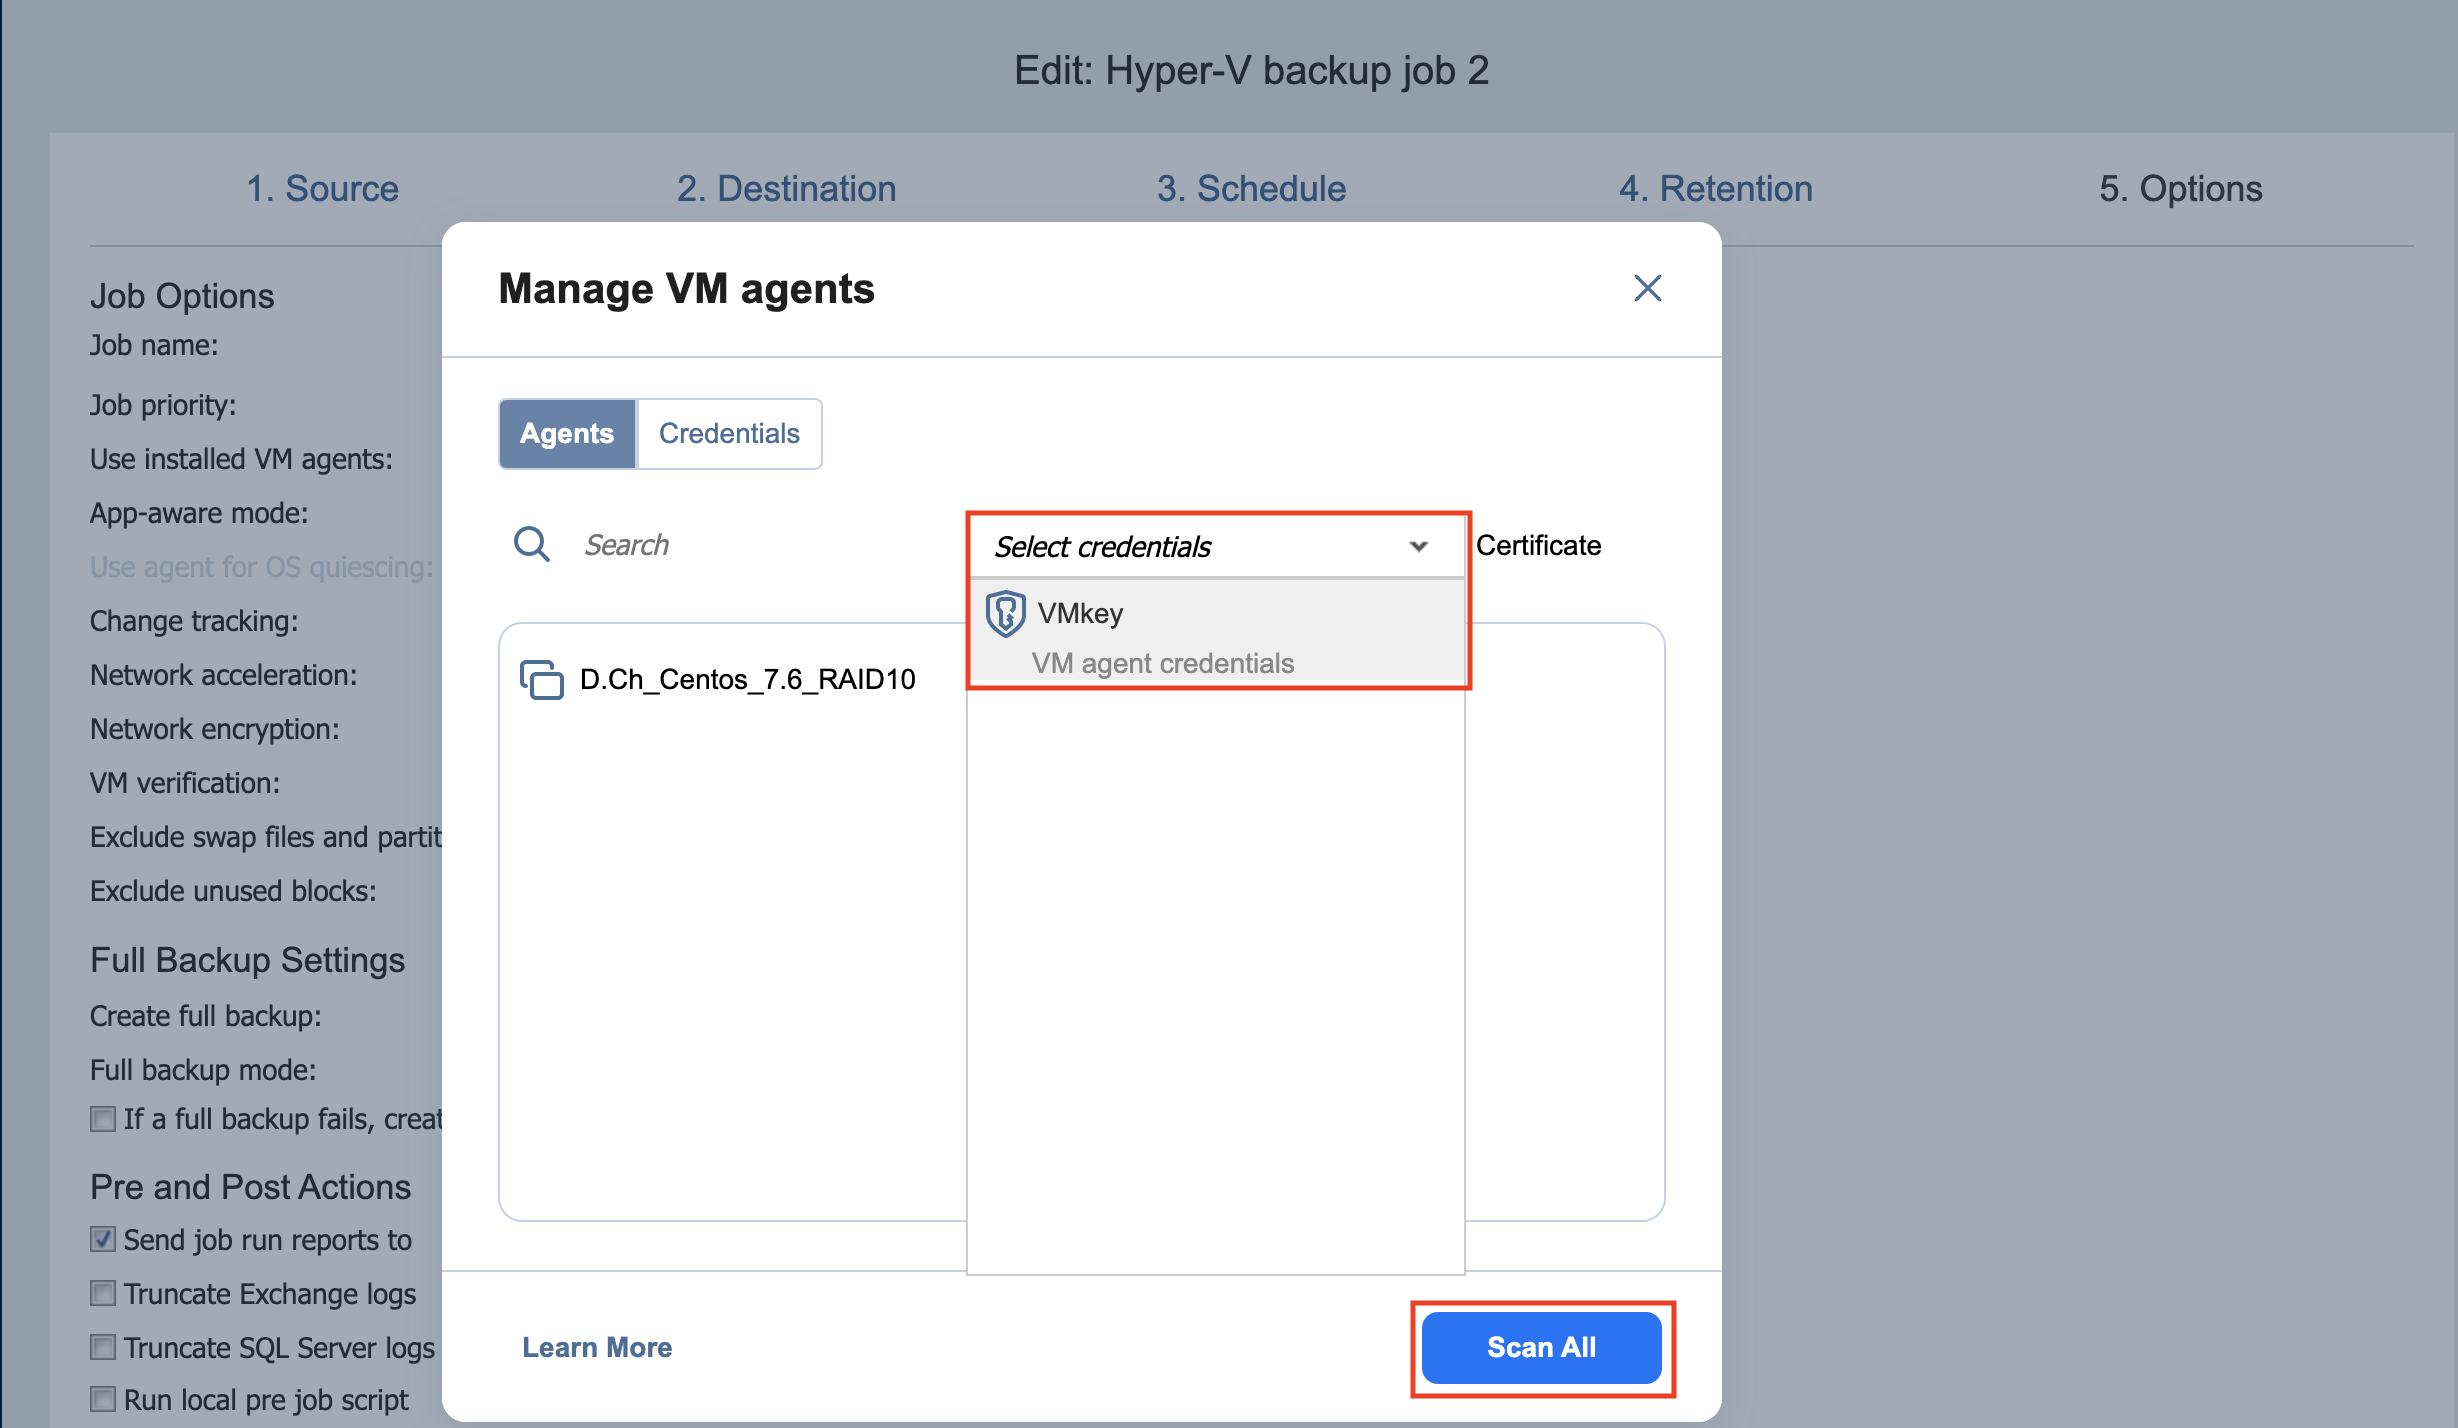
Make sure that Use installed VM agents is enabled. Click settings.
-
Click Scan All to scan every VM in the job for a VM agent.
-
Once the scan is complete, select the master password you wish to use for the discovered VM agents from the Select credentials drop-down list.
-
In the Certificate column, click Verify to verify the validity of a VMA’s certificate.
-
Save the updated job options.
Repeat this process for all jobs for which you want to enable the use of VMAs.
Note
If a VM agent is installed on the recovery server when creating or editing a File Recovery job, the installed agent will automatically be chosen to perform recovery operations.
If NAKIVO Backup & Replication cannot find installed VM agents or is prevented from doing so (such as by a firewall), the application will scan the VMs until a 2-minutes timeout. VMs are scanned in parallel.
If there is no VM agent at the target VM, you may proceed by providing OS credentials to the target machine.
Updating VM Agents Manually
To manually update a VM agent on a specific VM, proceed as follows:
-
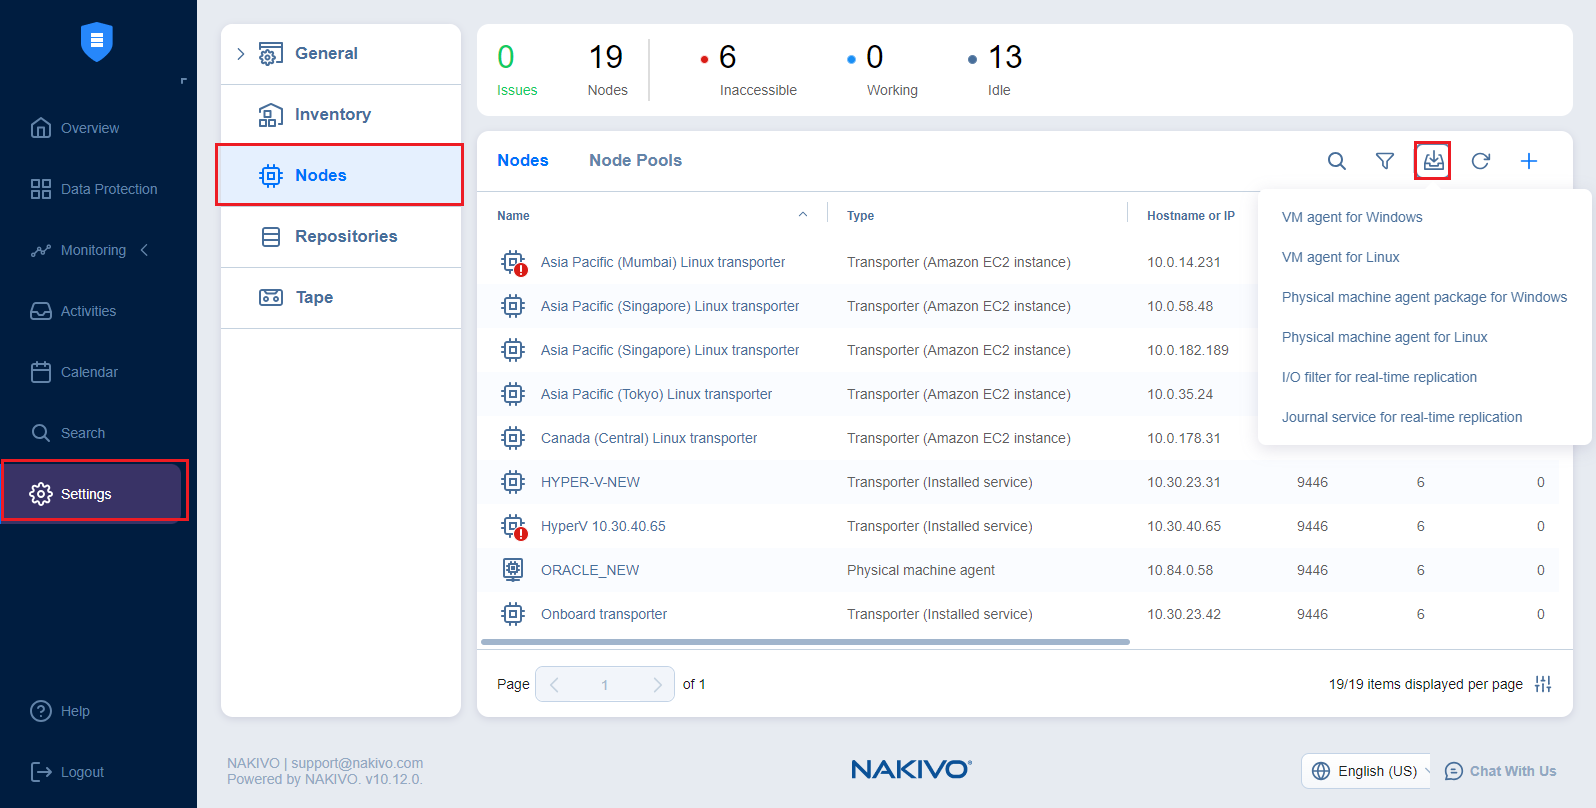
Go to Settings > Nodes, click the Download button, and select to download the new VM agent build for a Window or Linux machine.
-
For silent update, start the agent installer on the machine where the VM agent resides:
-
For Windows OS, use
installer.exe -u --eula-acceptNote
The following arguments can be used instead of
--eula-accept-
--e -
--eu -
--eul -
--eula -
--eula- -
--eula-a -
--eula-ac -
--eula-acc -
--eula-acce -
--eula-accep -
--eula--accept
-
-
For Linux OS, use
installer.sh -u --eula-accept
-
The update success/failure is displayed in the appropriate log file.
How a VM Agent Works
When supported VM actions are prompted, the Director checks for VM agent availability on the respective VM as follows:
-
If an installed VMA is found in the VM, the Director uses this VMA to perform the specified action(s).
-
If an installed VMA is not found in the VM, the Director injects a temporary agent or uses native tools (for example, VMware Tools) to perform the specified action(s). You must then enter VM credentials to proceed.
-
If the usage of an installed VMA is disabled in job options, the Director uses the injection approach or native tools to proceed.


