Failover Amazon EC2 Instances Action
Refer to the following sections on adding a Failover Amazon EC2 Instances action to your Site Recovery job:
Failover Amazon EC2 Instances: Instances
On this page of the wizard, do the following:
-
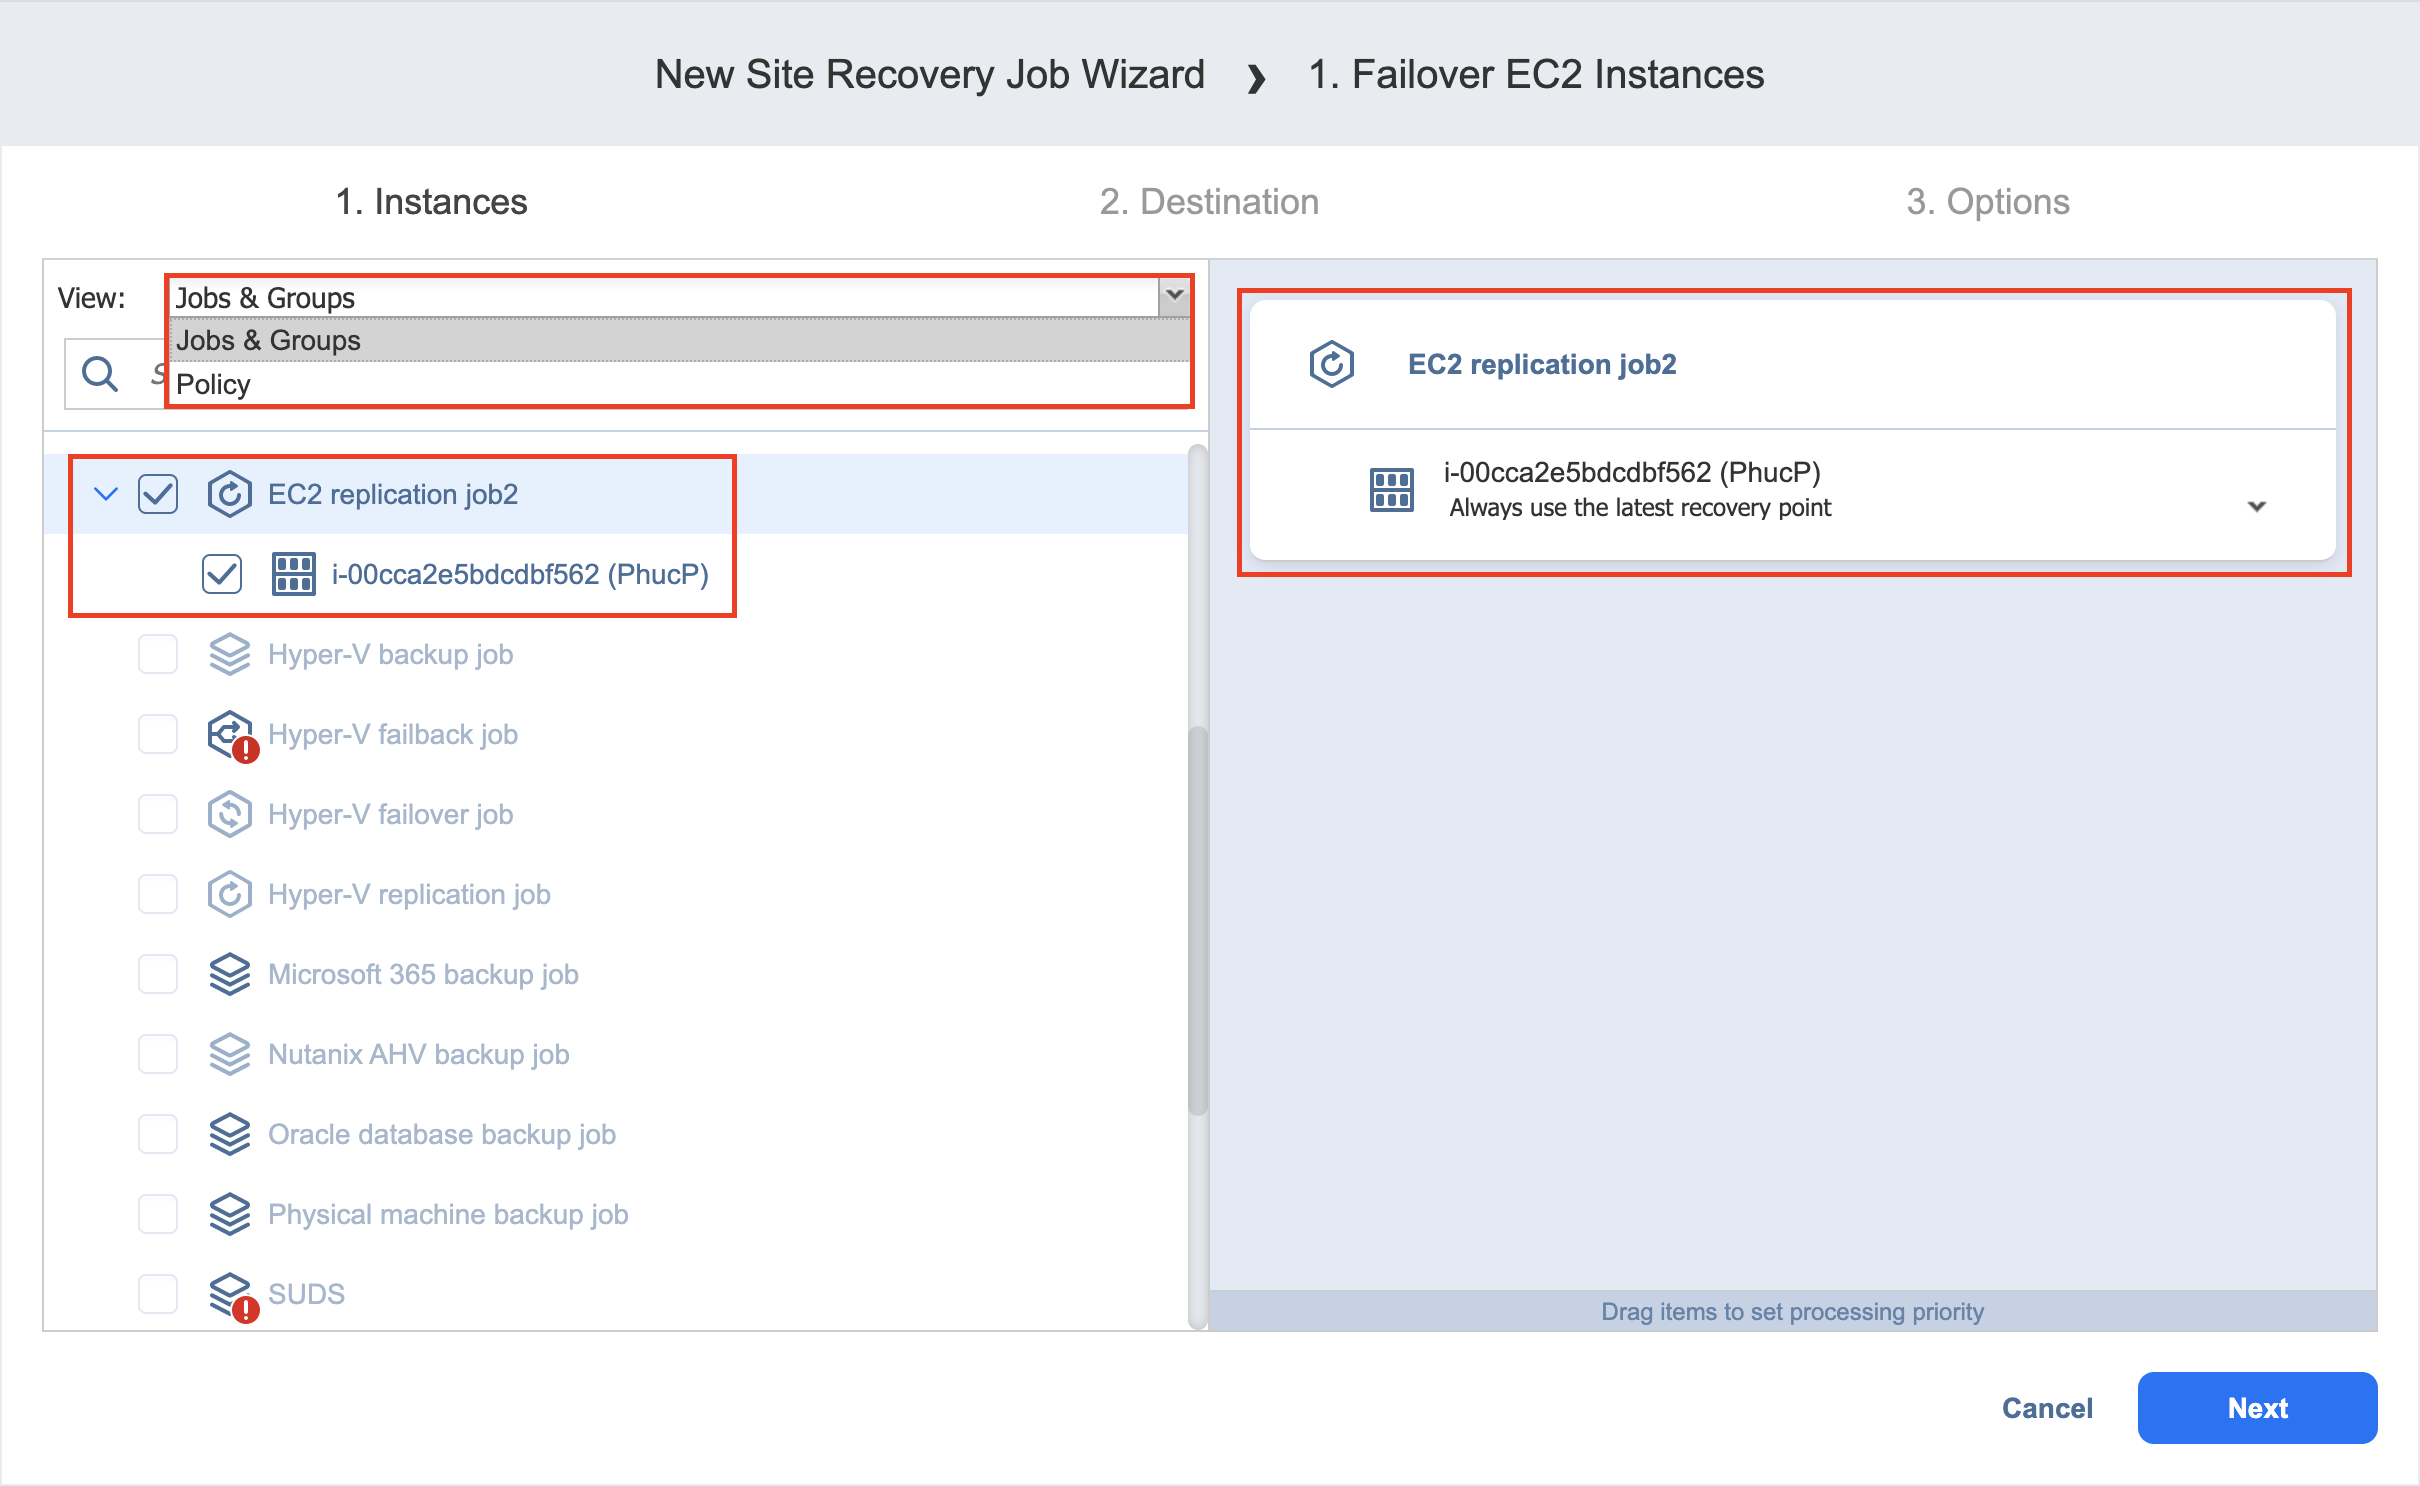
In the left pane of the page, choose either of the following inventory views:
-
Jobs & Groups: When selected, the inventory tree displays groups, jobs, and backups of the appropriate AWS account. You can select the required replica from the list of replication jobs.
-
Policy: When selected, job policies can be used. Refer to Managing Job Policies for details. If the items were selected in alternate views, a dialog box opens warning you that switching to the Policy view will reset your current selection. Click Switch View to confirm switching to the Policy view. Make sure that at least one item matches the available set of policy rules. Refer to Managing Policy Rules for details.
-
-
Select one or more source Amazon EC2 instances from the inventory tree and then select a recovery point for each source Amazon EC2 instance in the right pane.
-
Click Next to go to the Destination page.

Failover Amazon EC2 Instances: Destination
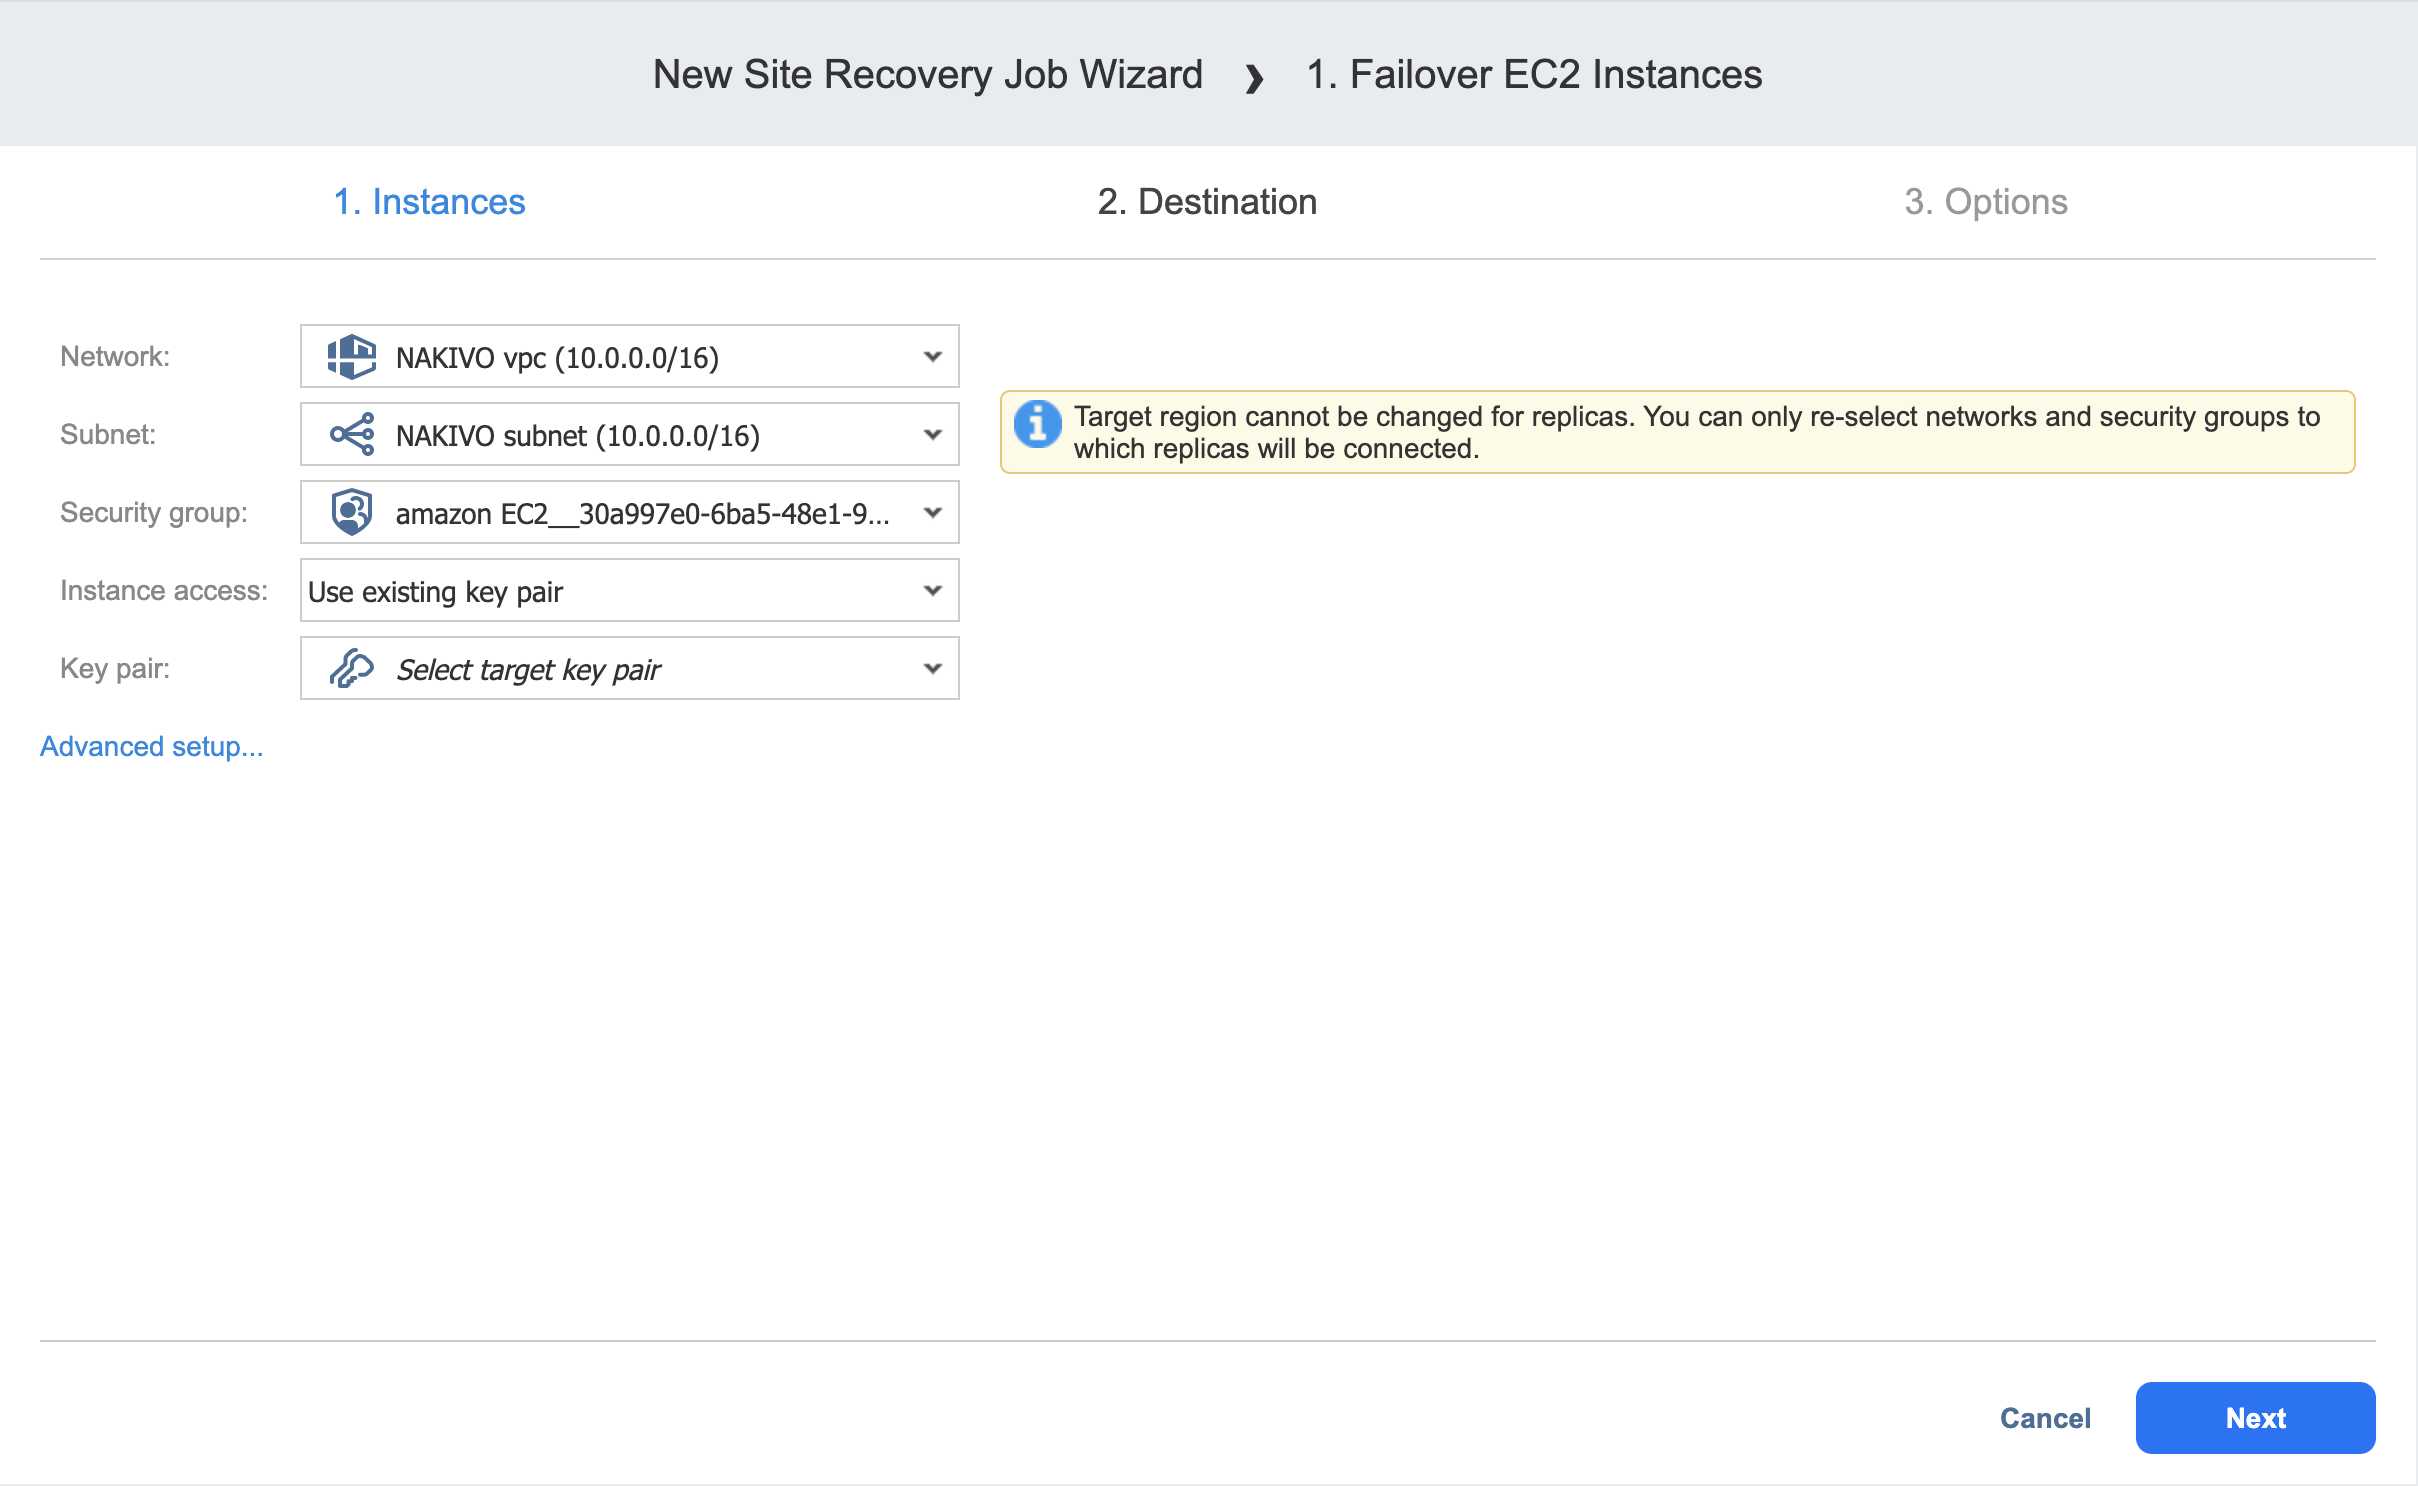
On this page of the wizard, you can specify a failover destination for your Amazon EC2 instances.
Single Destination for Amazon EC2 Instances
To fail over all Amazon EC2 instances defined in the previous page of the wizard to the same AWS region and with the same options, do the following:
-
Network: Select an Amazon EC2 VPC to which all Amazon EC2 instances will be connected.
-
Subnet: Select an Amazon EC2 Subnet to which all Amazon EC2 instances will be connected.
-
Security group: Select an Amazon EC2 Security Group for all Amazon EC2 instances.
-
Instance access: Specify Amazon EC2 Key Pair options by choosing one of the following:
-
Use existing key pair: An existing Amazon EC2 Key Pair will be used to connect to the recovered instances.
-
Create a new key pair: A new Amazon EC2 Key Pair will be created and assigned to all recovered EC2 instances. Type in a name for the new Amazon EC2 Key Pair in the Key pair name field and click Download.
Important
This is your only chance to save the private key file, so make sure you save the private key file in a safe place. You will need to provide the name of your key pair when you start recovered EC2 instances and the corresponding private key each time you connect to the instances. -
Proceed without key pair: No AWS Key Pair will be assigned to the recovered Amazon EC2 instances.
Important
A key pair enables you to connect to Linux Instances via SSH. If you recover Linux Instances without a key pair, you will not be able to connect to them.
-
-
Click Next to go to the next page of the wizard.

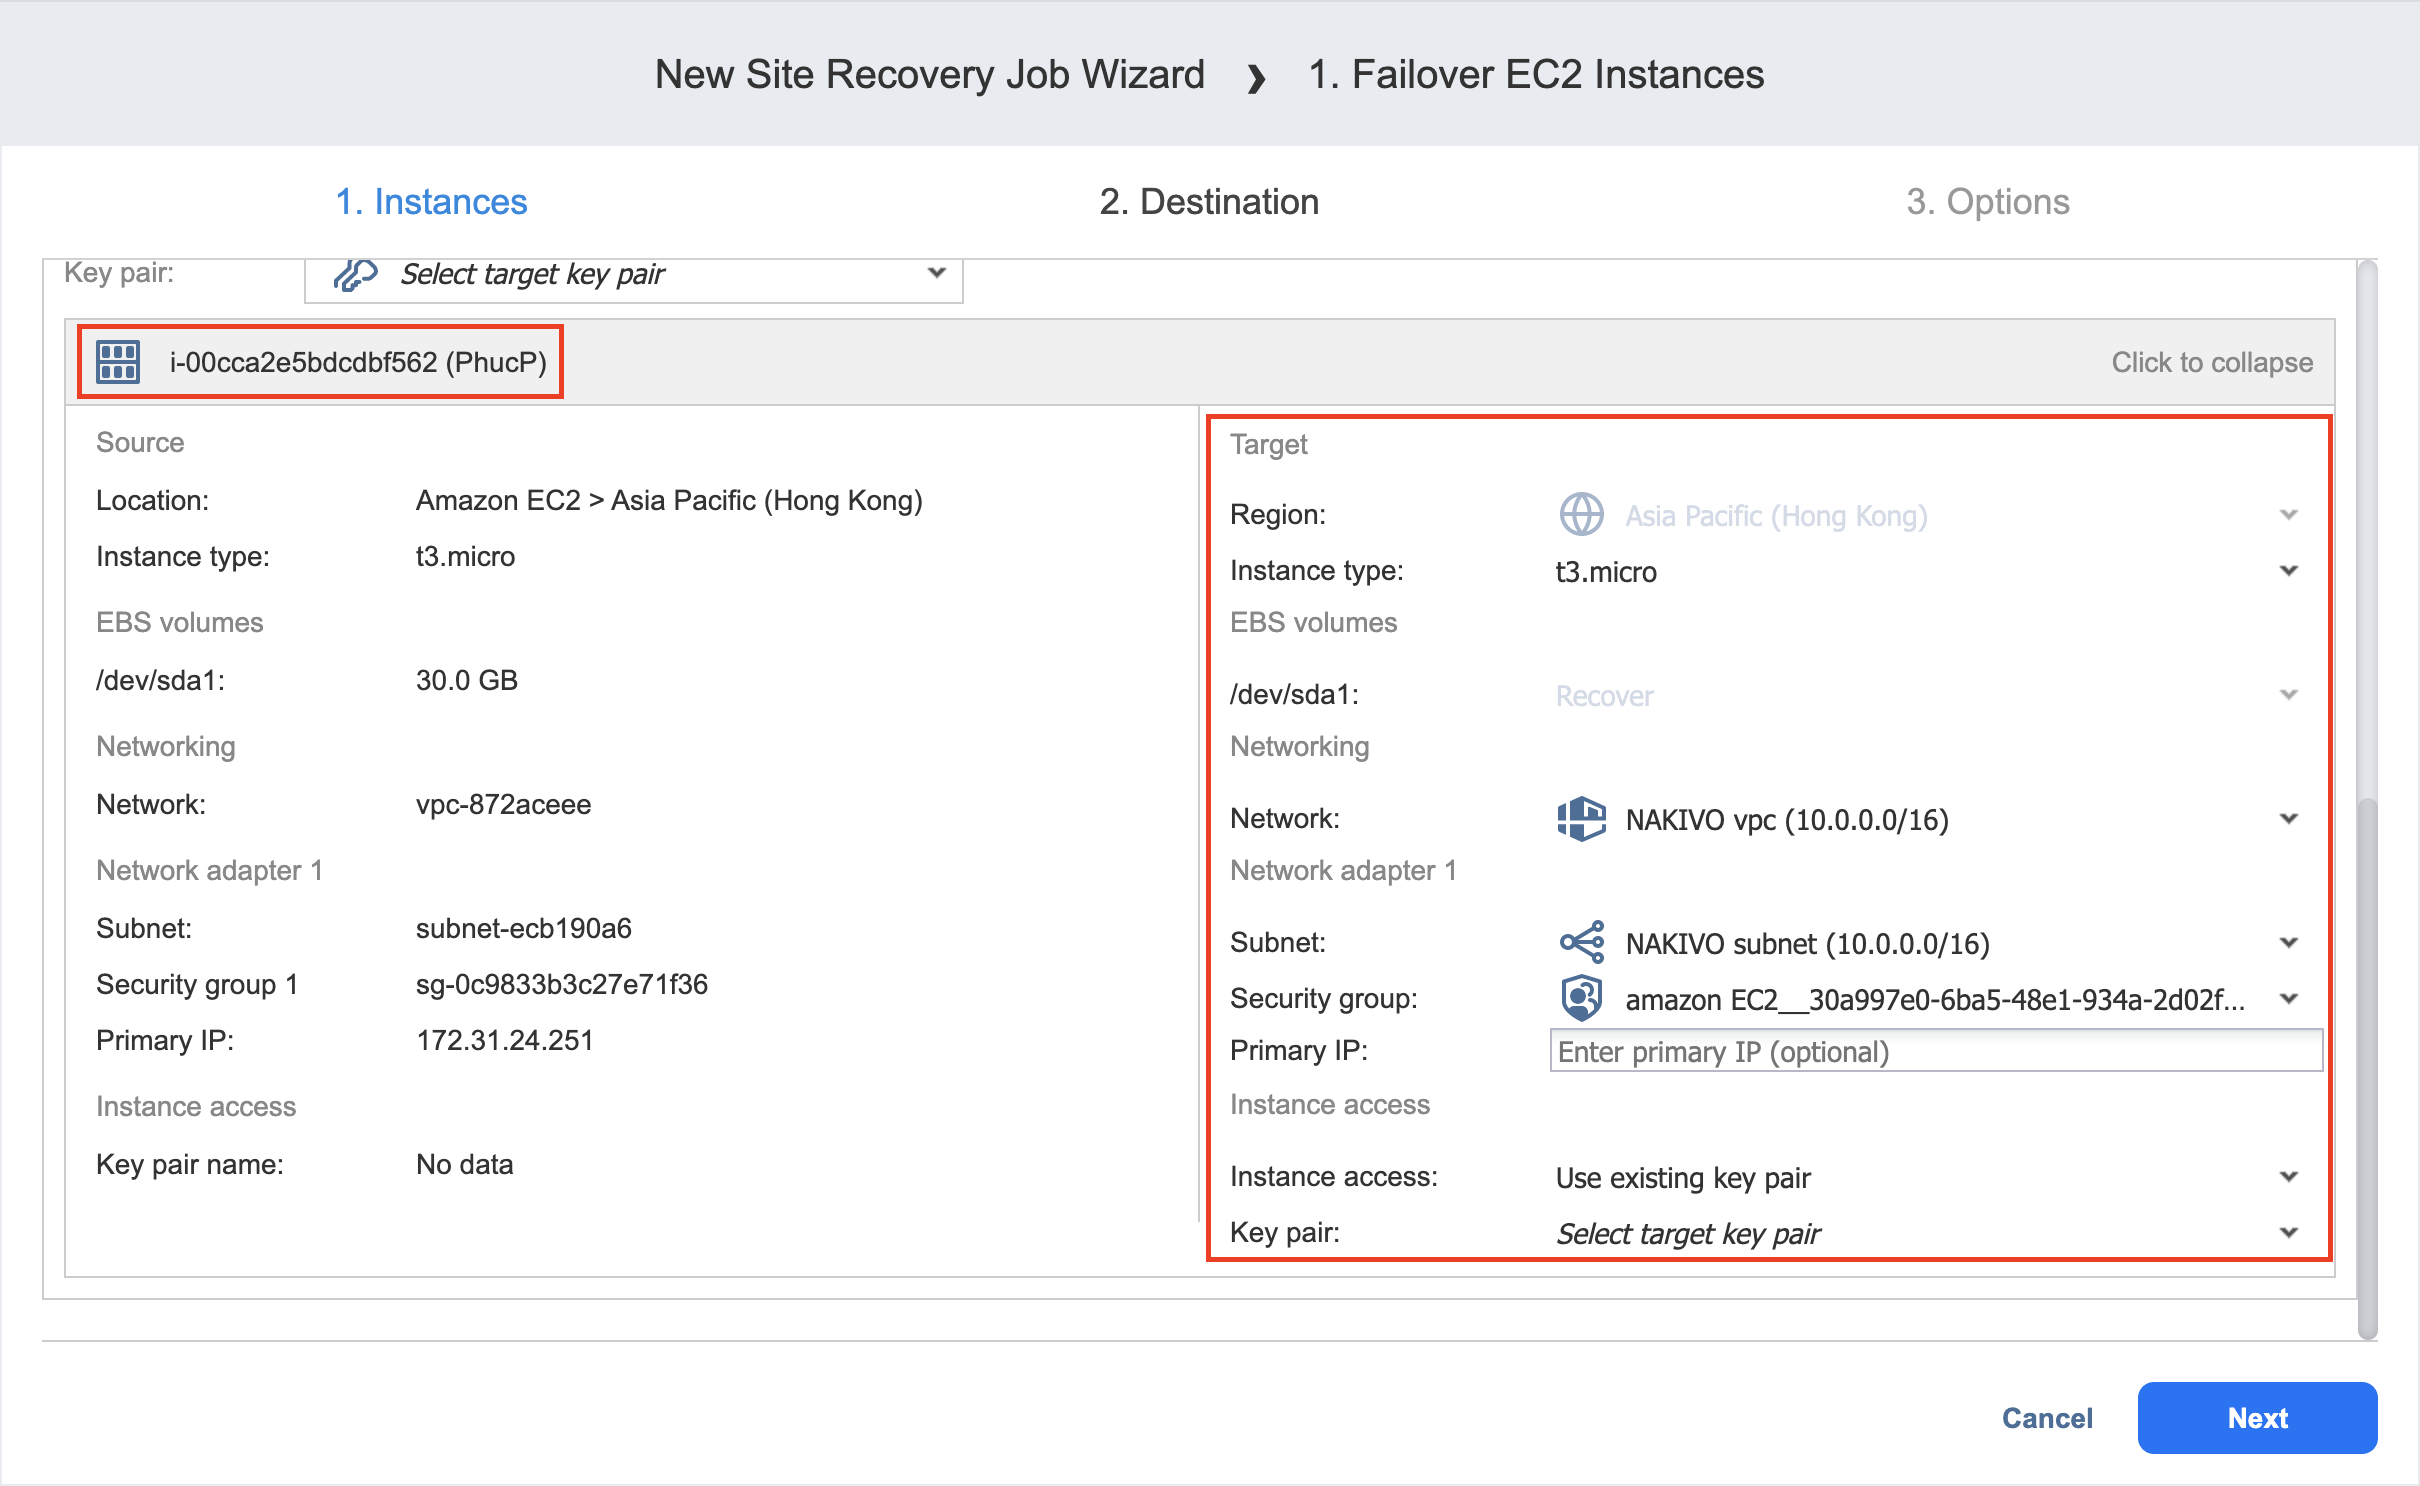
Different Destinations for Amazon EC2 Instances
To set different destination options for individual Amazon EC2 instances, follow the steps below:
-
Click Advanced options.
-
Click an Amazon EC2 Instance to expand it and set the options as follows:
-
Region: Select a target Amazon EC2 Region for the Amazon EC2 instance.
-
Instance type: Select a type for the recovered Amazon EC2 instance.
-
EBS Volumes: Choose whether to recover or skip recovering individual AWS EBS Volumes.
-
Network: Select an Amazon EC2 VPC to which the Amazon EC2 instance will be connected.
-
Subnet: Select an Amazon EC2 Subnet to which the Amazon EC2 instance will be connected.
-
Security group: Select an Amazon EC2 Security Group for the Amazon EC2 instance.
-
Instance access: Specify Amazon EC2 Key Pair options as follows:
-
Use existing key pair: Choose an existing Amazon EC2 Key Pair that you want to use to connect to the recovered instance.
-
Create a new key pair: Select this option to create a new Amazon EC2 Key Pair and assign it to the recovered Amazon EC2 instance. Enter a name for the new Amazon EC2 Key Pair in the Key pair name box and click Download.
Important
This is your only chance to save the private key file, so make sure you save the private key file in a safe place. You will need to provide the name of your key pair when you start recovered EC2 instances and the corresponding private key each time you connect to the instances. -
Proceed without key pair: Select this option if you do not want to assign an Amazon Key Pair to the recovered Amazon EC2 instance.
Important
A key pair enables you to connect to Linux Instances via SSH. If you recover Linux Instances without a key pair, you will not be able to connect to them.
-
-
-
Click Next to go to the next page of the wizard.

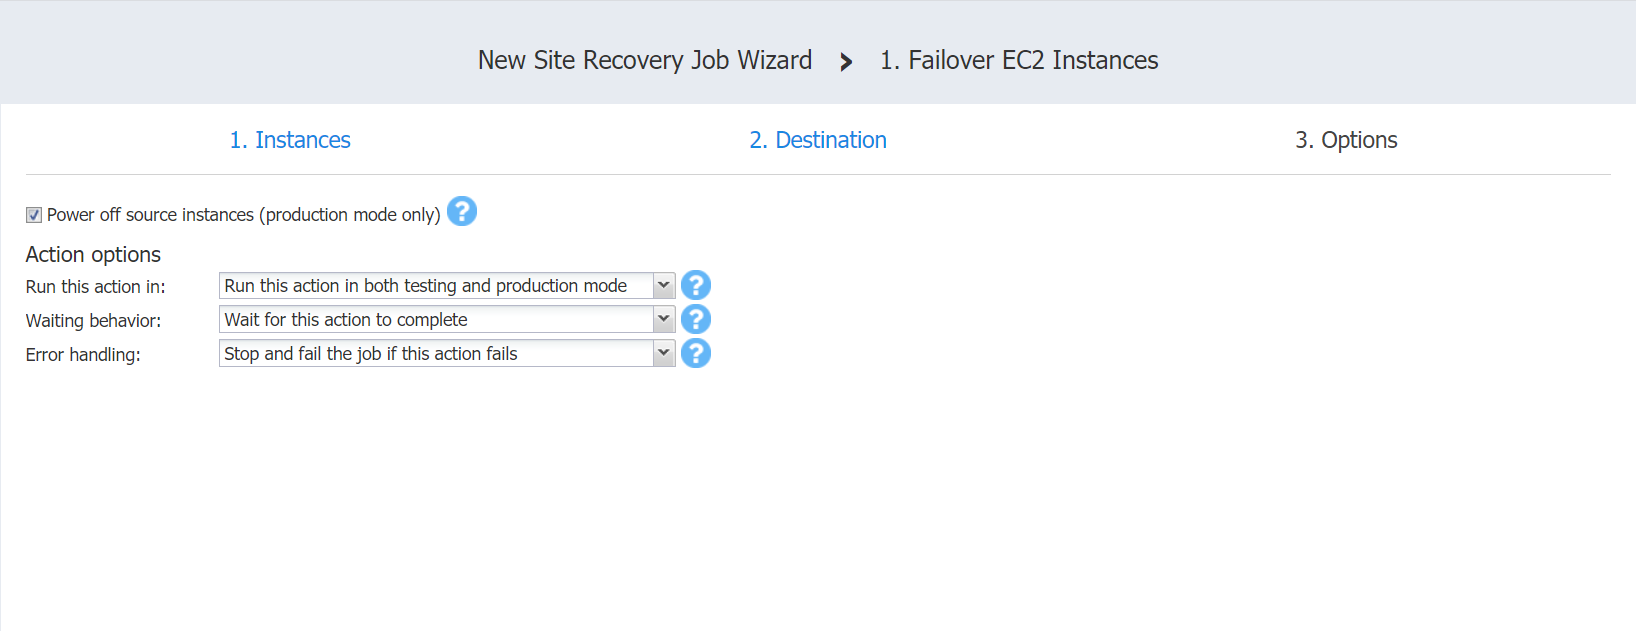
Failover Amazon EC2 Instances: Options
On this page of the wizard, do the following:
-
Select Power off source Instances to power off the production workloads during the failover. Please note that this will take place only in production mode; no workloads will be powered on in test mode.
-
In the Action options section, set the options for your action. Refer to Site Recovery Job Wizard: Actions for details.
-
Click Save.

The Options page closes and your Failover Amazon EC2 Instances action is added to the Site Recovery job.