Failback VMware VMs Action
Please refer to the following sections on adding a Failback VMware VMs action to your Site Recovery job:
Failback VMware VMs: VMs
On this page of the wizard, do the following:
-
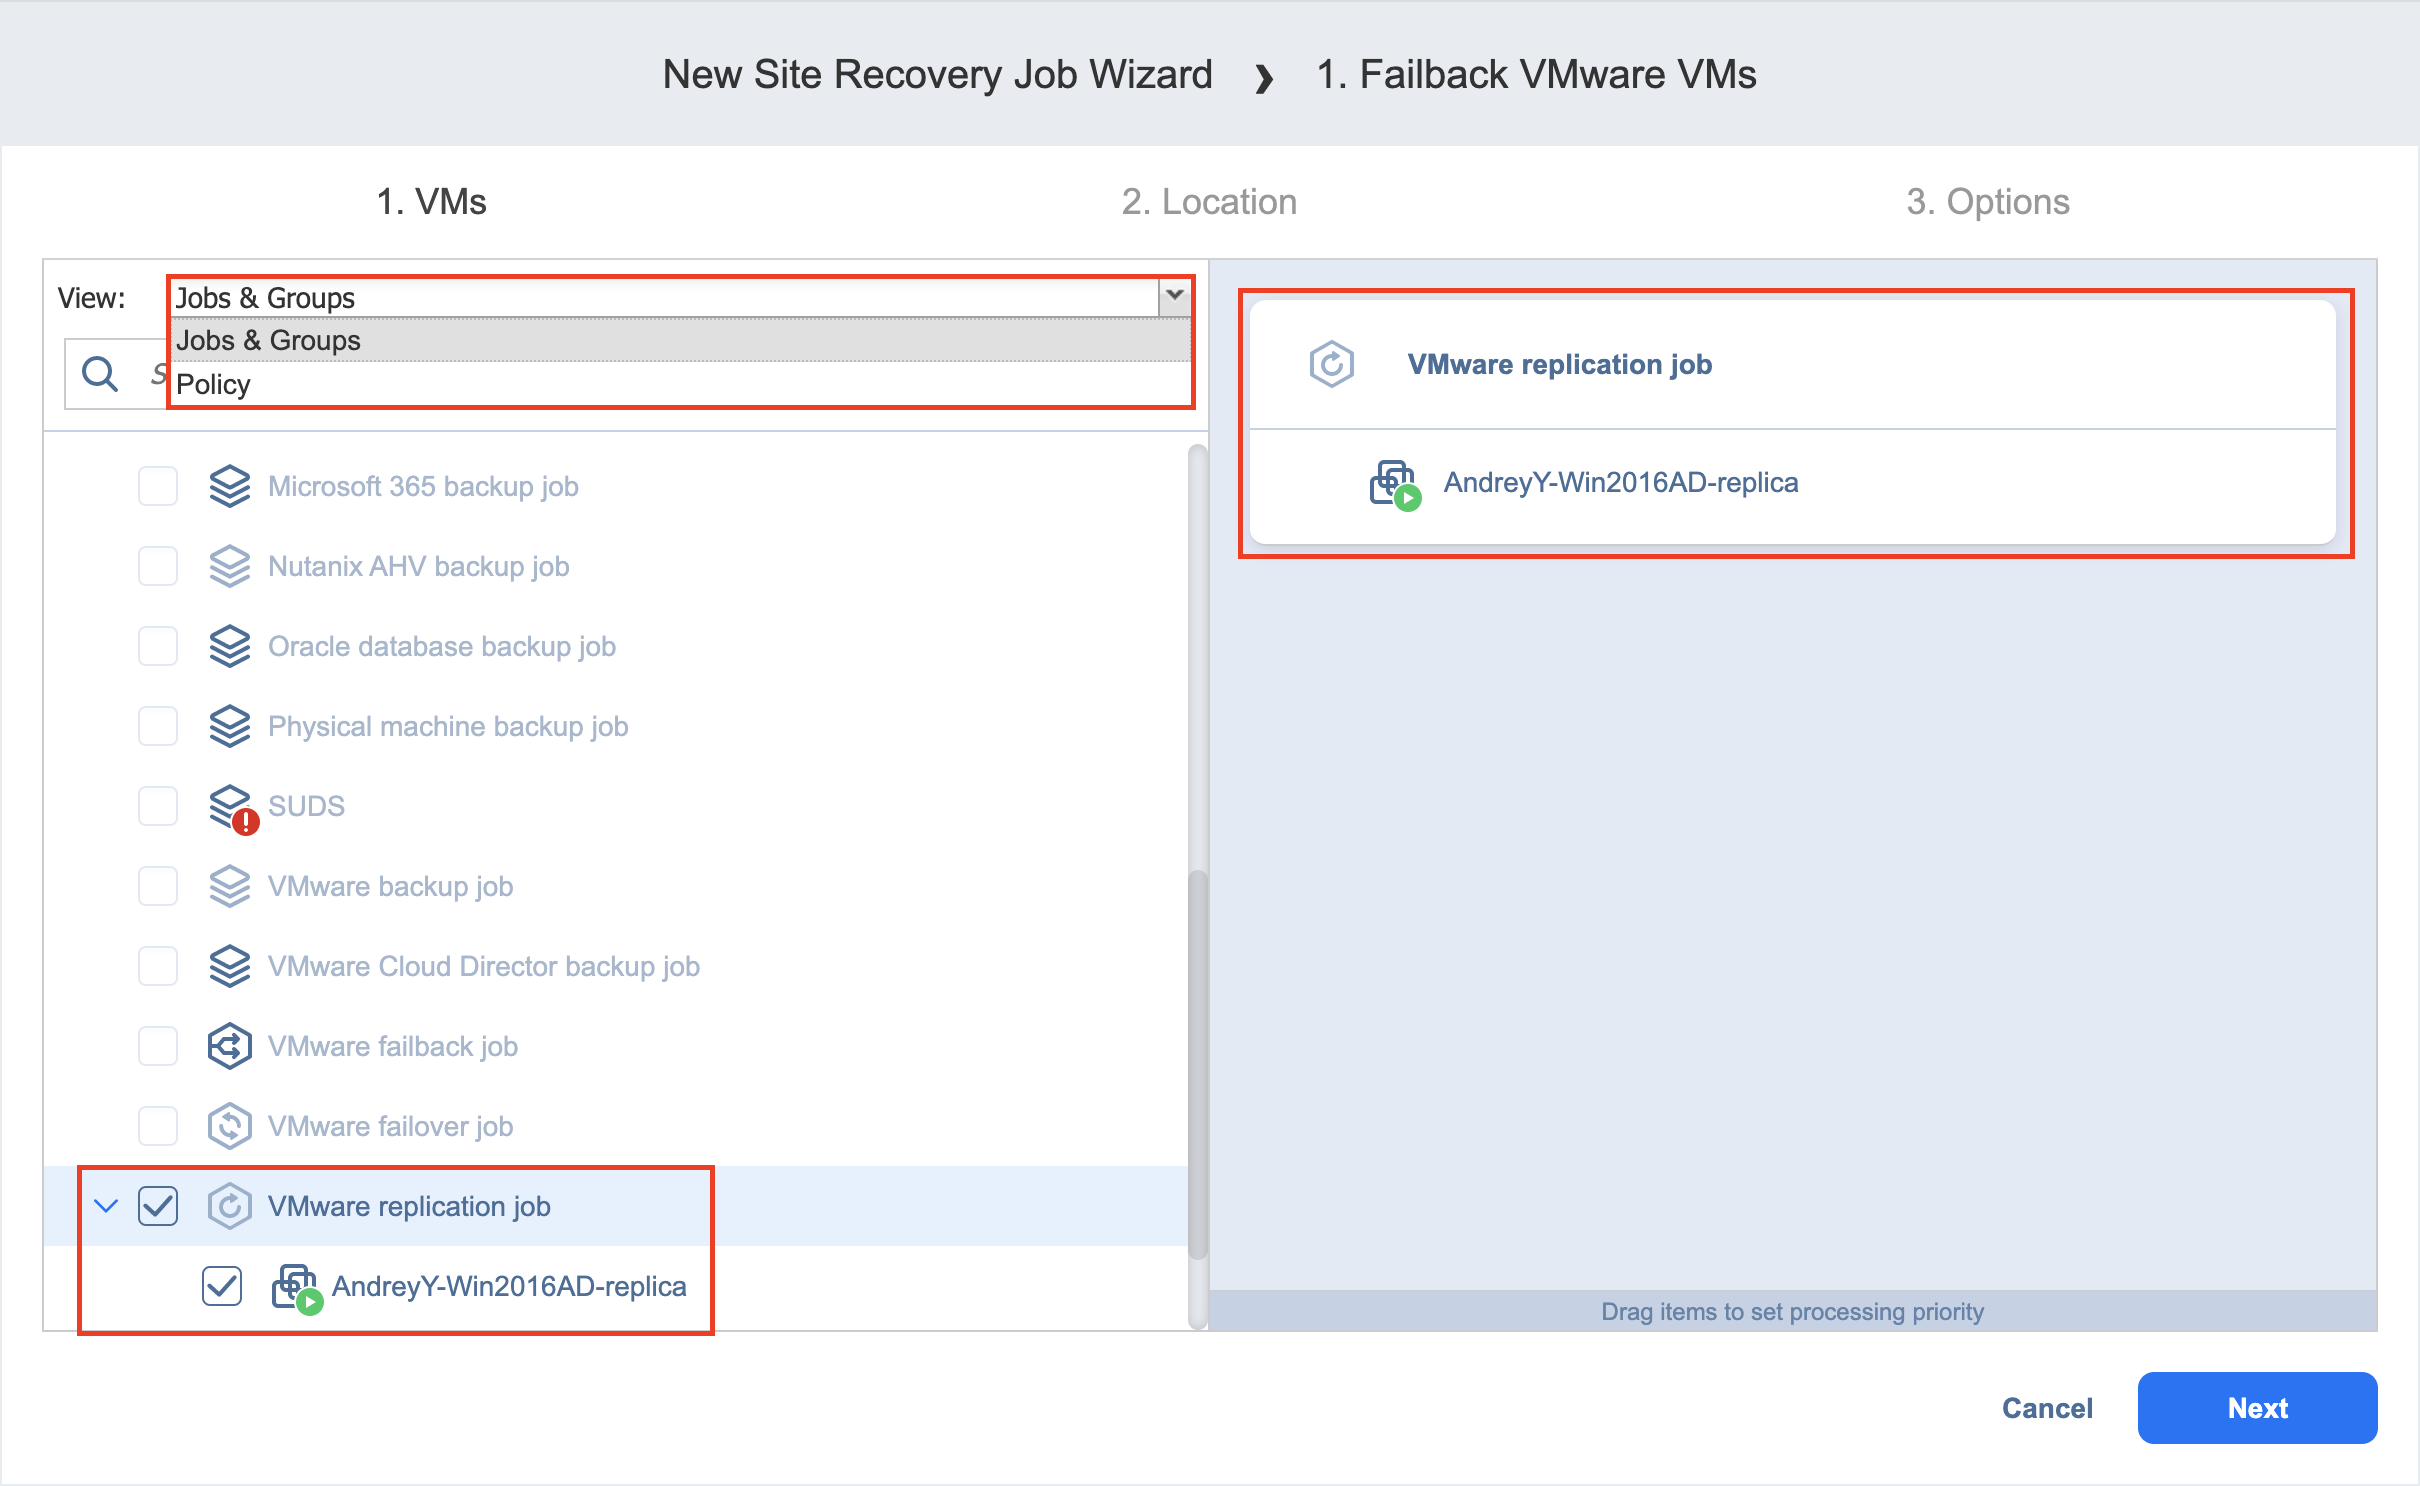
In the left pane of the page, choose either of the following inventory views:
-
Jobs & Groups: When selected, the inventory tree displays groups, jobs, and backups of the appropriate hypervisor. You can select the required replica from the list of replication jobs.
-
Policy: When selected, job policies can be used. Refer to Managing Job Policies for details. If the items were selected in alternate views, a dialog box opens warning you that switching to the Policy view will reset your current selection. Click Switch View to confirm switching to the Policy view. Make sure that at least one item matches the available set of policy rules. Refer to Managing Policy Rules for details.
-
-
Select one or more replica VMware VMs in the left pane of the page.
-
Click Next to go to the Location page of the wizard.

Failback VMware VMs: Location
Please refer to the following subsections on providing a location for your Failback VMware VMs action:
Using Original VMware Failback Location
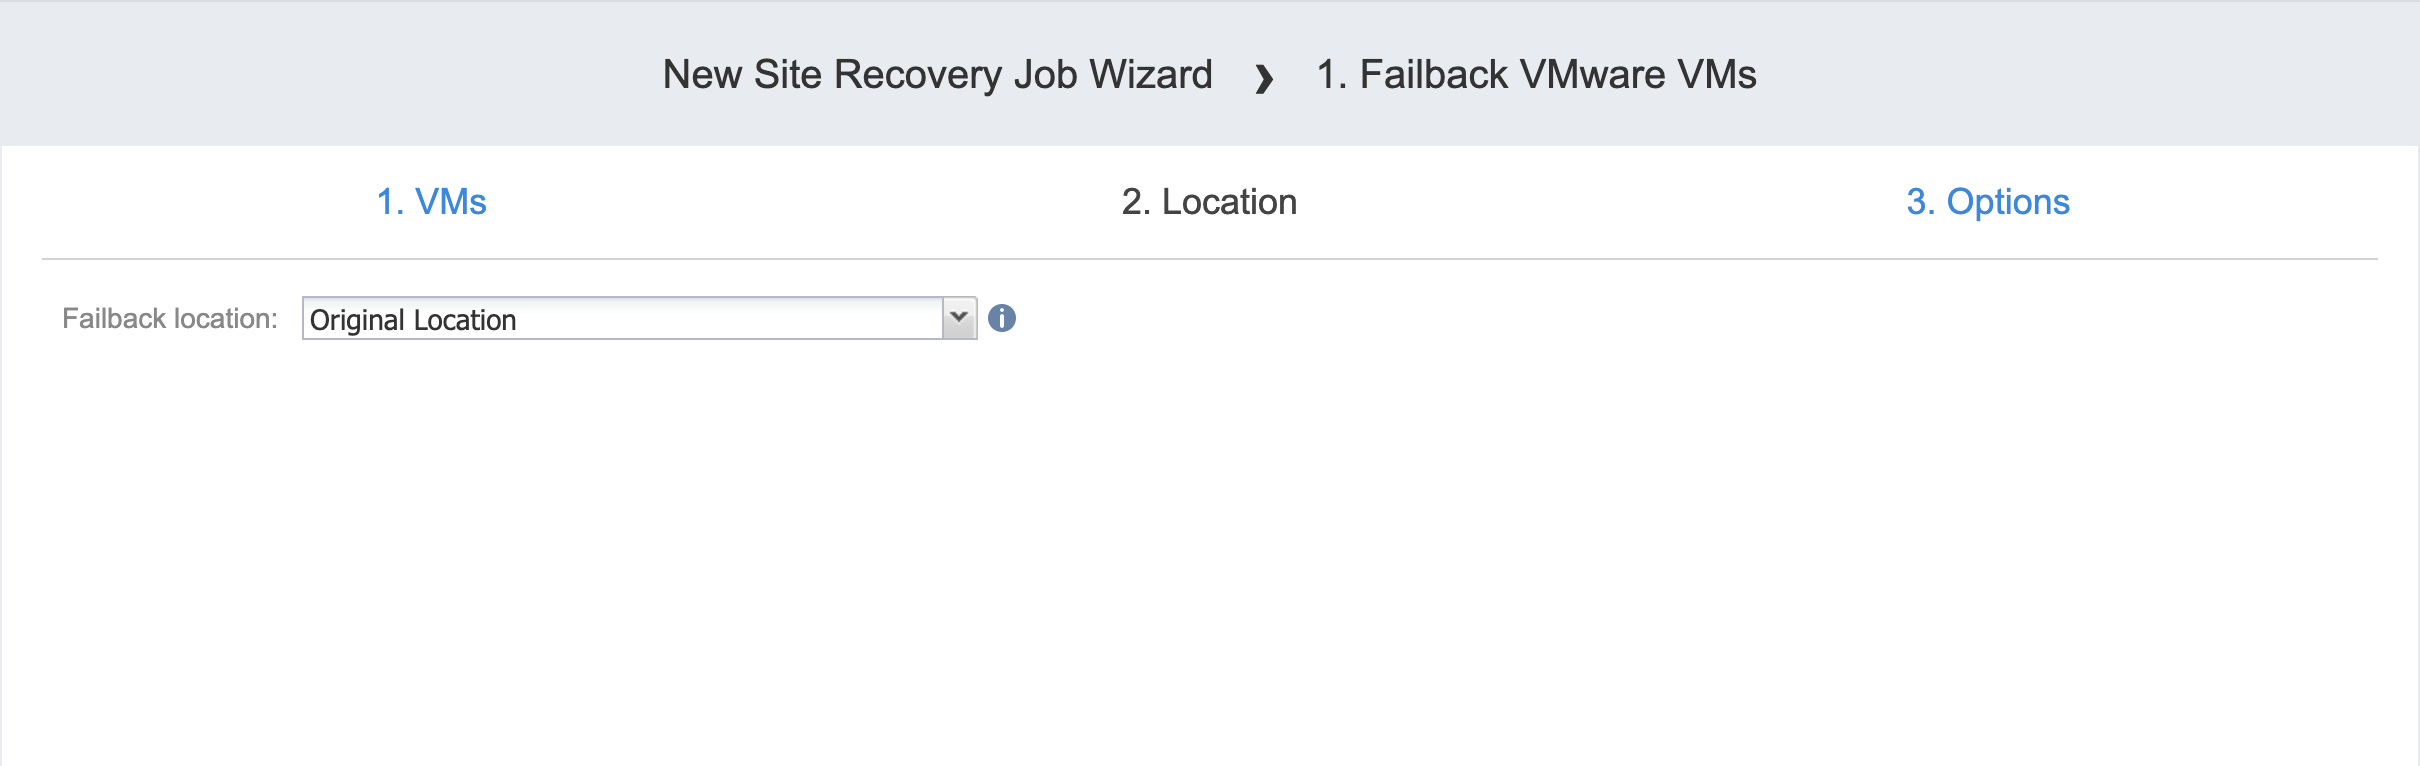
To use the original location for your Failback VMware VMs action, follow the steps below:
-
In the Failback location list, choose Original Location.
-
Click Next to go to the Options page.

Creating New VMware Failback Location
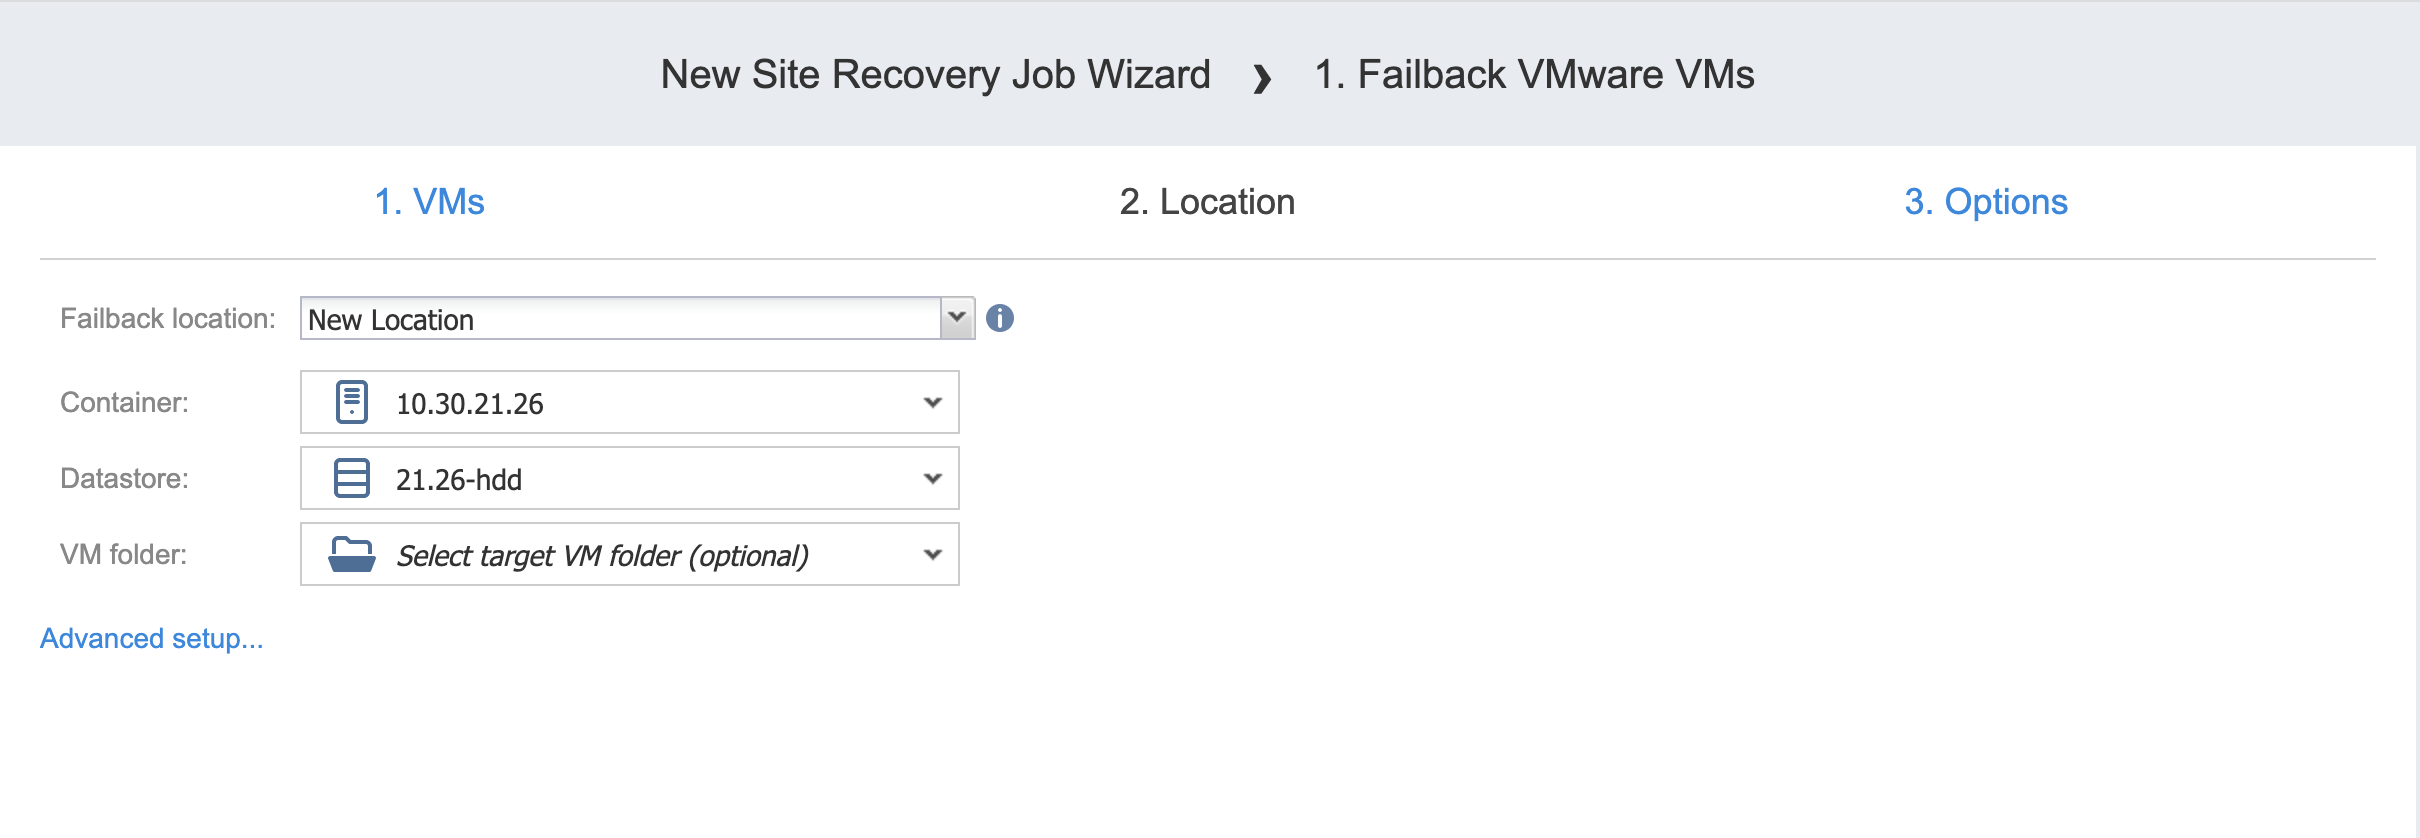
To create a new location for your Failback VMware VMs action, follow the steps below:
-
In the Failback location list, choose New Location.
-
In the Container list, choose a container for your failback location.
-
In the Datastore list, choose a datastore for your failback location.
-
Click Next to go to the Options page.

Reusing Existing VMware Failback Location
To reuse existing locations for your Failback VMware VMs action, follow the steps below:
-
In the Failback location list, choose New Location.
-
Click Advanced Options.
-
Click on the necessary source VMs to expand them.
-
For the required VM, click Use existing target VM to select it.
-
The Virtual Machine list updates to include VMs. Select the VM that should be used as a target.
-
After setting the location advanced options, click Next to go to the Options page.
Failback VMware VMs: Options
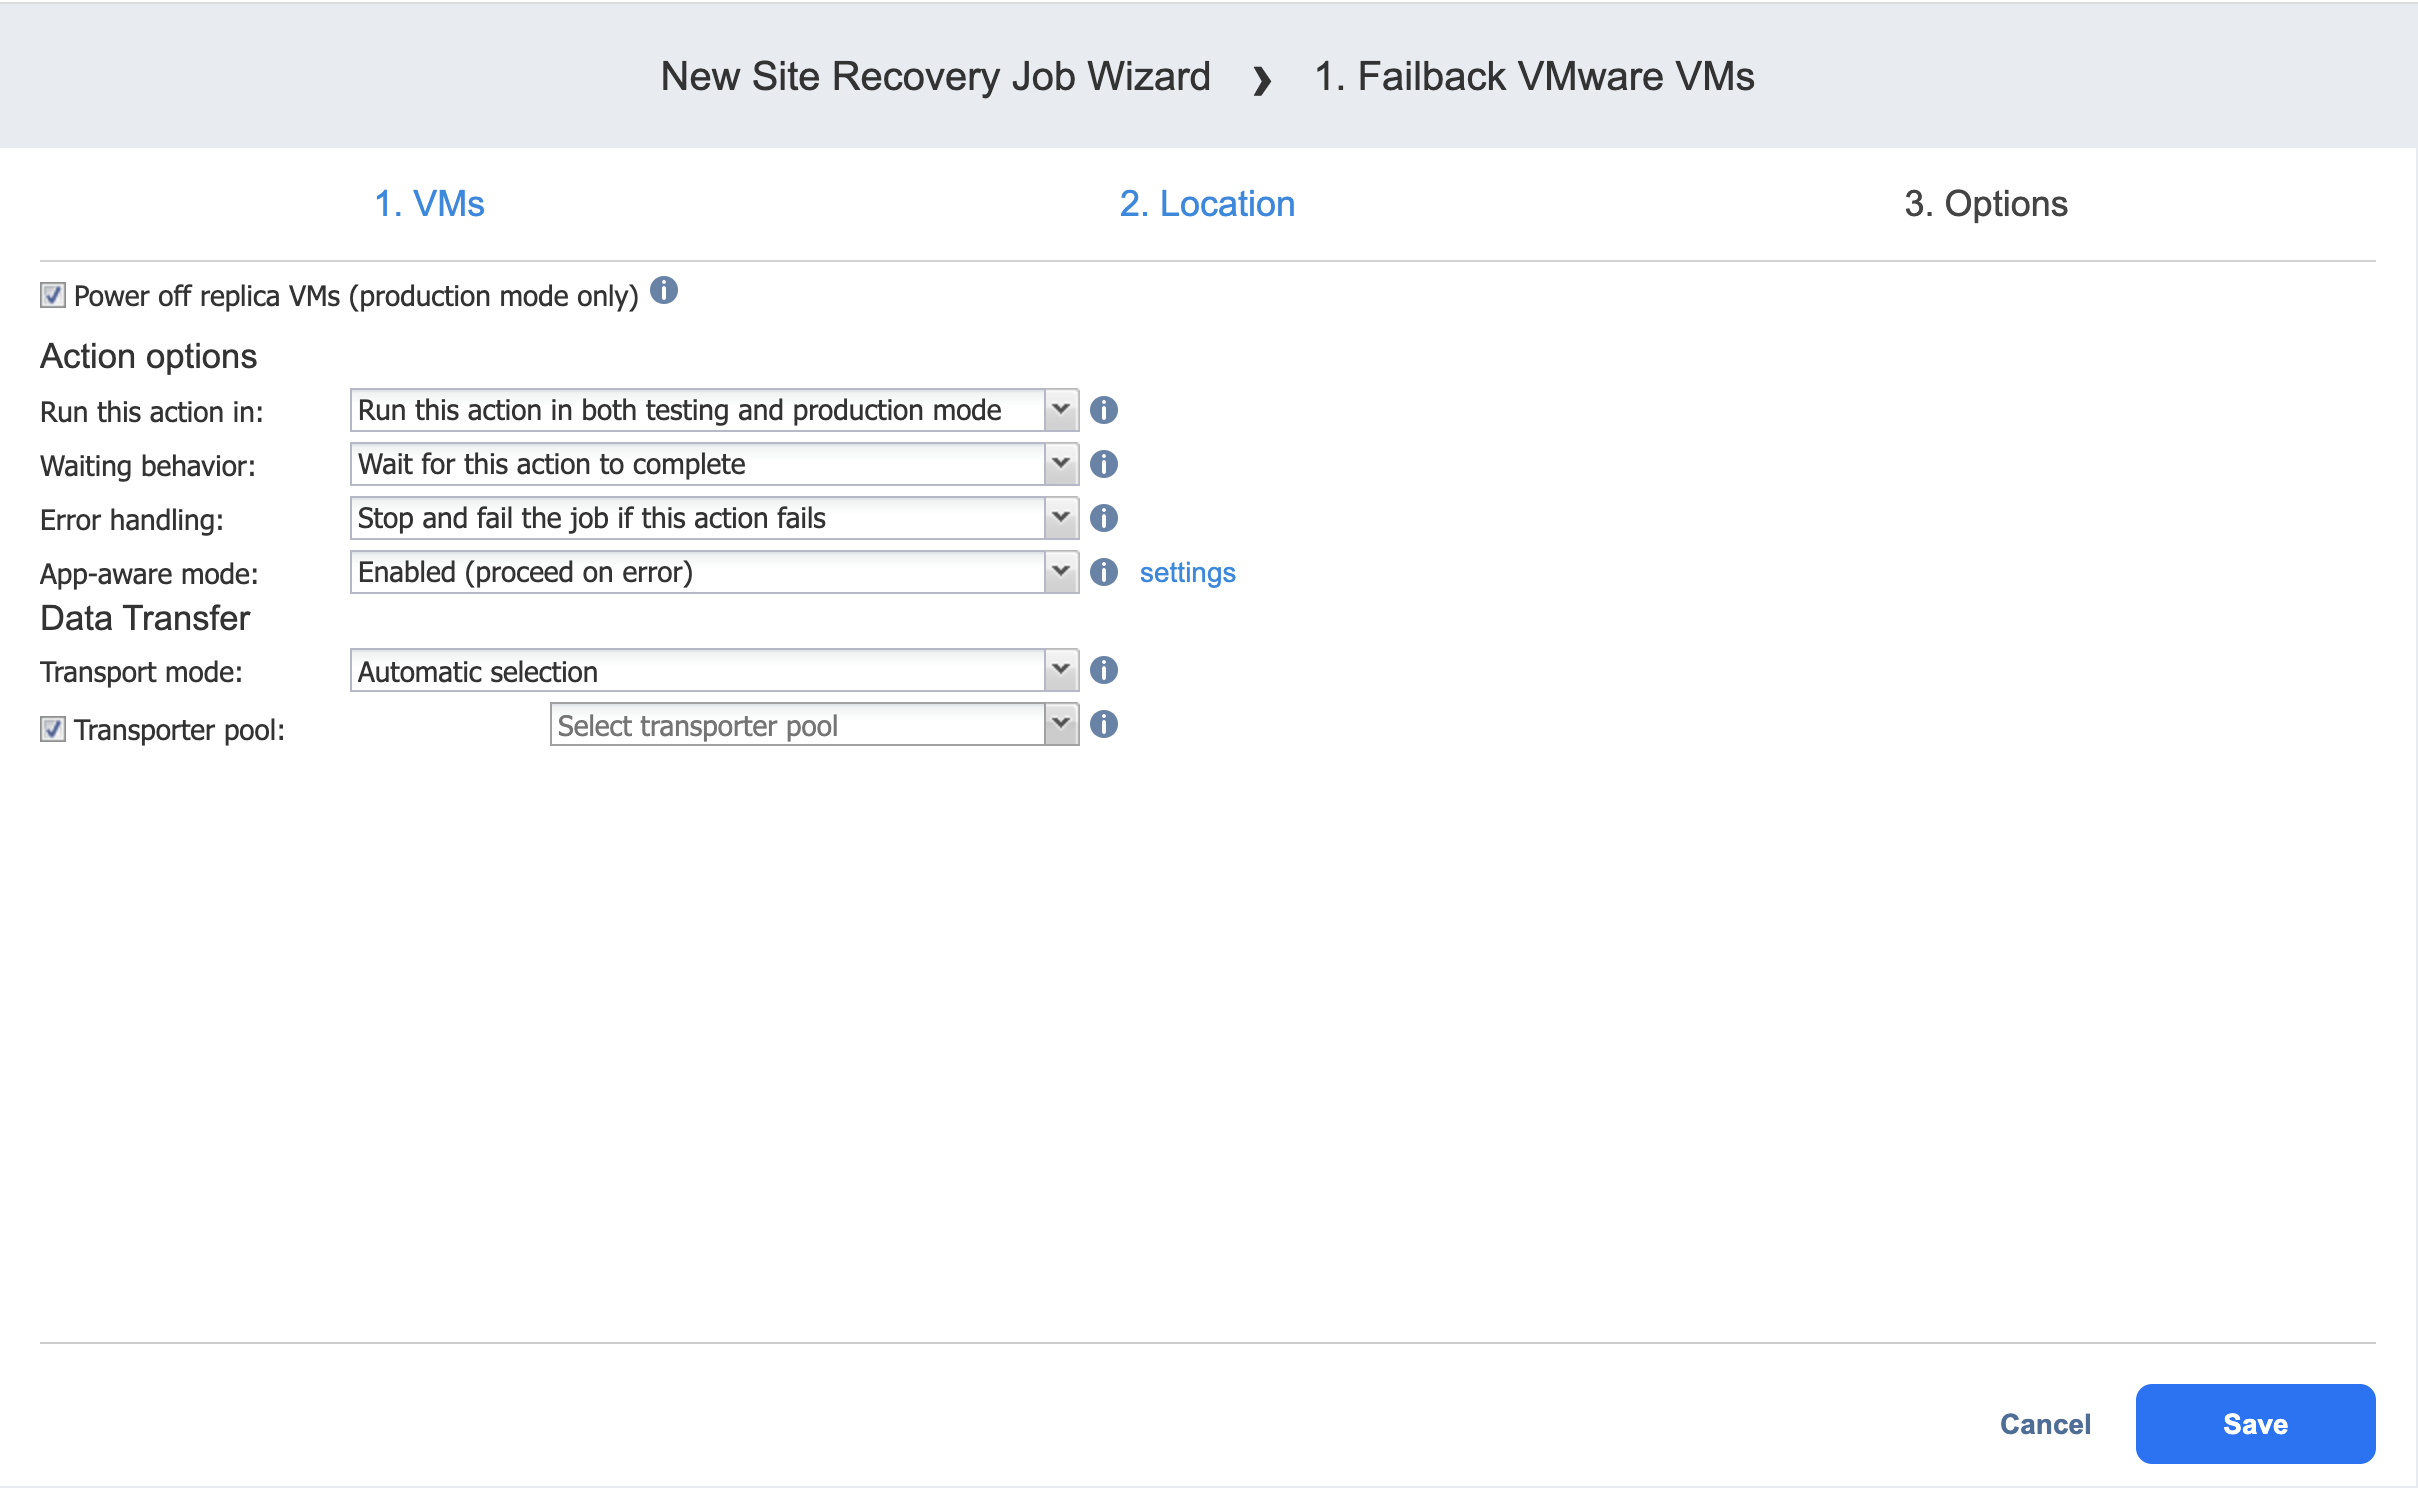
On this page of the wizard, do the following:
-
Select Power off replica VMs to power off the production workloads during the failover. Please note that this will take place only in production mode; no workloads will be powered on in test mode.
-
In the Action options and Data Transfer sections, set the options for your action. Refer to Site Recovery Job Wizard: Actions for details.
-
Click Save.

The Options page closes and your Failback VMware VMs action is added to the Site Recovery job.