VMware Flash Boot Job Wizard: Options
On the Options page, set up job options as described in these sections:
Job Options
In this section, specify a job name and a priority level, select a VM verification type, and enable malware detection.

Job Name
Enter a name for your job in the Job name box.
Job Priority
Select a job priority level between 1 and 5, with 1 being the highest priority. Jobs with higher priority levels are prioritized by Transporters during job processing.
Note
This option is only available in the Enterprise, Enterprise Essentials, Enterprise Plus, MSP Enterprise, and MSP Enterprise Plus editions.
VM Verification
VM Verification allows you to check the integrity of the backup by starting it and interacting with it. For more details, refer to the VM Verification article.
You can choose one of the following VM verification options:
-
Screenshot verification: When enabled, all VM backups created by the job will be verified as follows: After a backup of a VM is completed, the VM is recovered from the backup using Flash boot (and is disconnected from networks), a screenshot of the recovered VM is taken once the VM OS has booted, after which the VM is discarded. VM screenshots will be included in email notifications (if they are configured) and displayed on the main Dashboard.
-
Boot verification: When enabled, all VM backups created by the job will be verified as follows: After a VM backup is completed, NAKIVO Backup & Replication recovers the VM using Flash boot, disables networking to prevent network connections, and verifies successful system start.
If you select the Screenshot verification option, provide verification options in the VM Boot Location dialog box that opens:
-
Verify not more than x VMs simultaneously: Specify the maximum number of VMs that can be started on the target container simultaneously.
-
Recovery time objective: Specify an amount of time allocated for verification of each VM backup. If the VM OS does not start within the specified amount of time, verification will be considered failed.
-
Screenshot delay: Specify an amount of time that the product should wait after a Guest OS start before taking a screenshot.
Note
The specified time must be sufficient to fully start the VM OS. Try increasing this amount if the default amount is not sufficient.
When Boot verification is selected, specify verification options in the dialog box that opens:
-
Verify not more than x VMs simultaneously: Specify the maximum number of VMs that can be started on the target container simultaneously.
-
Recovery time objective: Specify the amount of time allocated for verification of each VM backup. If a VM OS does not start within the specified amount of time, verification will be considered failed.
Malware Detection
With this option enabled, the backups are scanned for malware using the configured antivirus software on the scan server. Optionally, if you have selected Enabled for the Malware detection option, click the settings link to configure the following options:
-
Scan server: Select a specific scan server for the job or leave the Default setting. If Default is selected, the Transporter is used as the scan server and can support a maximum of 2 concurrent scan tasks.
Notes
-
For the Default option, if the Repository Transporter is the installed Transporter, it require the master password to function as the scan server.
-
For more details on the requirements for Scan Server, refer to the Feature Requirements.
-
-
Scan type: Choose between the Deep scan and the Quick scan:
-
Deep scan: When this option is selected, the antivirus software scans the entire backup and may take longer to complete.
-
Quick scan: When this option is selected, the antivirus software scans only OS disks in the backup.
-
-
If malware is detected: Choose the behavior if malware is detected:
-
Fail the recovery job: With this option, the recovery process fails in case the job has only one VM. If the job has several VMs, the infected VMs are skipped and the job continues to run.
-
Continue and recover to isolated network: When this option is selected, the recovery job completes the scanning process and recovers the infected VMs to a temporary isolated network.
-
-
Scan timeout: Specify the timeout for the malware detection process. If the specified amount of time is exceeded, the recovery job fails.
-
Click Apply when you’re done.
Recovered VM Options
In this section, specify VM names, generate VM MAC addresses, and choose whether you want to power on recovered VMs or not.

Specifying VM Names
NAKIVO Backup & Replication allows you to change the names of recovered VMs so you can distinguish between recovered VMs and source VMs. By default, the text “- recovered” is appended to the end of the recovered VM name.
To change VM replica names, choose one of the following Recovered VM names options in the Recovered VM Options section:
-
Append “-recovered” in the end: Source VM names are used for recovered VM names and “-recovered” is added after the recovered VM name.
-
Leave recovered VM names as is: Recovered VM names are identical to the source VM names.
-
Enter custom recovered VM names: You can enter custom names for recovered VMs.
Generating VM MAC Addresses
In the Recovered VM Options section, you can choose one of the following options in relation to recovered VM MAC addresses:
-
Do not generate new MAC addresses: The recovered VMs will have the same MAC address as the source VMs
-
Generate new MAC addresses: A new MAC address will be generated for each recovered VM.
Powering Recovered VMs
To power on the recovered VMs, choose the VM power on option.
Pre and Post Actions
NAKIVO Backup & Replication allows you to run a script before Flash boot begins (a pre-job script) and after the boot of all VMs in the job has completed (a post-job script). The scripts can only be executed on the machine where the Director is installed. You can also set up email notifications for the job.

Setting up Email Notifications for the Job
NAKIVO Backup & Replication can send email notifications about job completion status to specified recipients. This feature complements global notifications and allows you to configure notifications on a per-job level.
To enable this option, make sure Email settings are configured.
To send email notifications, do the following:
-
In the Pre and Post Actions section, select the Send job run reports to option.
-
In the text box that becomes enabled, specify one or more email addresses. Use semicolons to separate multiple email addresses.
Setting Up a Pre-Job Script
To run a script before the product begins recovering VMs, do the following:
-
Place a script file on the machine where the Director is installed.
-
In the Pre and Post Actions section, select the Run local pre job script option and click settings.
-
Script path: Specify a local path to the script on the machine where the Director is installed. A script interpreter should be specified.
Example (Windows): cmd.exe /c D:\script.batExample (Linux): bash /root/script.sh
-
Job behavior: Choose one of the following job behaviors in relation to script completion:
-
Wait for the script to finish:With this option selected, the job will be in the “running” state until the script is completed.
-
Do not wait for the script to finish: With this option selected, the job will be completed even if the script execution is still in progress.
-
-
Error handling: Choose one of the following job behaviors in relation to script failure:
-
Continue the job on script failure: With this option selected, script failure will not influence the status of the job.
-
Fail the job on script failure: With this option selected, if the script fails, the job status will be set to “failed” even if VM backup has been successful.
-
Specify the following parameters in the dialog that opens:
Setting Up a Post-Job Script
To run a script after the product has finished recovering all VMs, do the following:
-
Place a script file on the machine where the Director is installed.
-
In the Pre and Post Actions section, select the Run local post job script option and click settings.
-
Script path: Specify a local path to the script on the machine where the Director is installed. A script interpreter should be specified.
Example (Windows): cmd.exe /c D:\script.batExample (Linux): bash /root/script.sh
-
Job behavior: Choose one of the following job behaviors in relation to script completion:
-
Wait for the script to finish: With this option selected, the job will be in the “running” state until the script is completed.
-
Do not wait for the script to finish: With this option selected, the job will be completed even if the script execution is still in progress.
-
-
Error handling: Choose one of the following job behaviors in relation to script failure:
-
Continue the job on script failure: With this option selected, script failure will not influence the status of the job.
-
Fail the job on script failure: With this option selected, if the script fails, the job status will be set to “failed” even if VM backup has been successful.
-
Specify the following parameters in the dialog that opens.
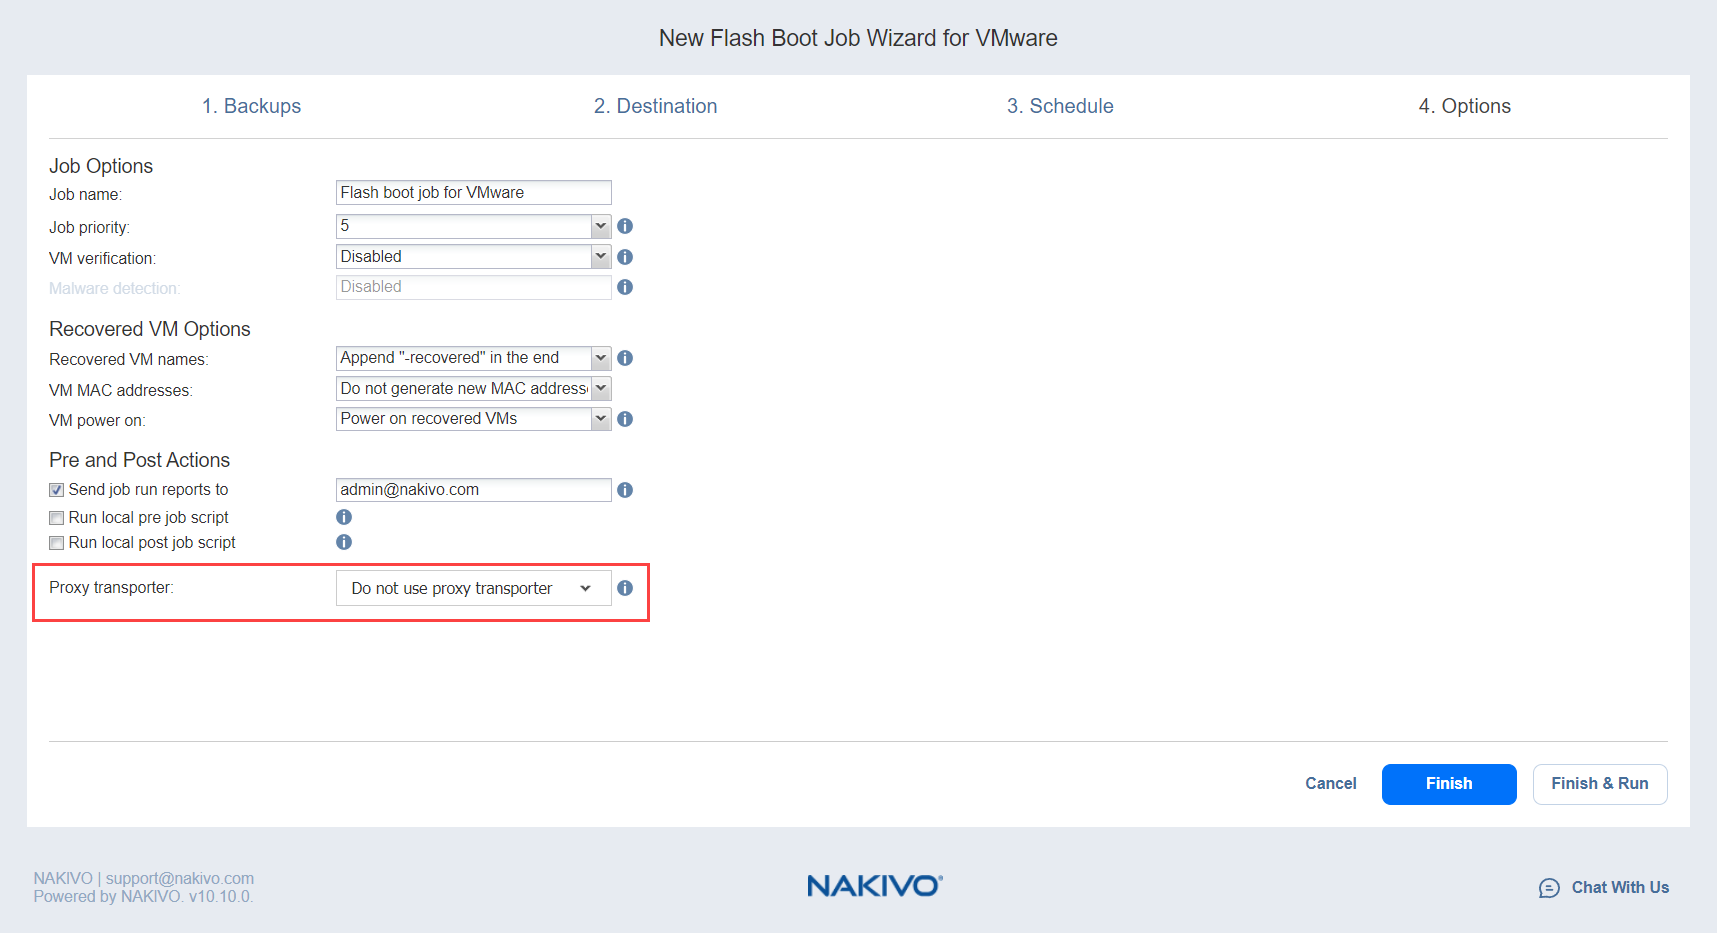
Data Routing
If the Transporter assigned to the Backup Repository cannot use iSCSI port 3260 because it is occupied by other services, you can set data routing: a proxy transporter can be used to forward iSCSI target exposed from the Backup Repository to the target host. To set data routing, go to the Data routing section and choose a proxy transporter from the list of available Transporters.
Completing the New Flash Boot Job Wizard
Click Finish or Finish & Run to complete the job creation.
Note
If you click Finish & Run, you will have to define the scope of your job. Please refer to Running Jobs on Demand for details.