Adding Scan Servers
To add Scan Servers to the Inventory, do the following:
-
Go to Settings > Inventory.
-
Click the “...” button and select Scan servers.
-
The Scan Servers popup displays a list of added scan servers. Optionally, you can click the “...” button to the right of an added scan server and select Edit or Delete to either edit a scan server’s settings or delete it from the list.
-
Click the “+” button.
-
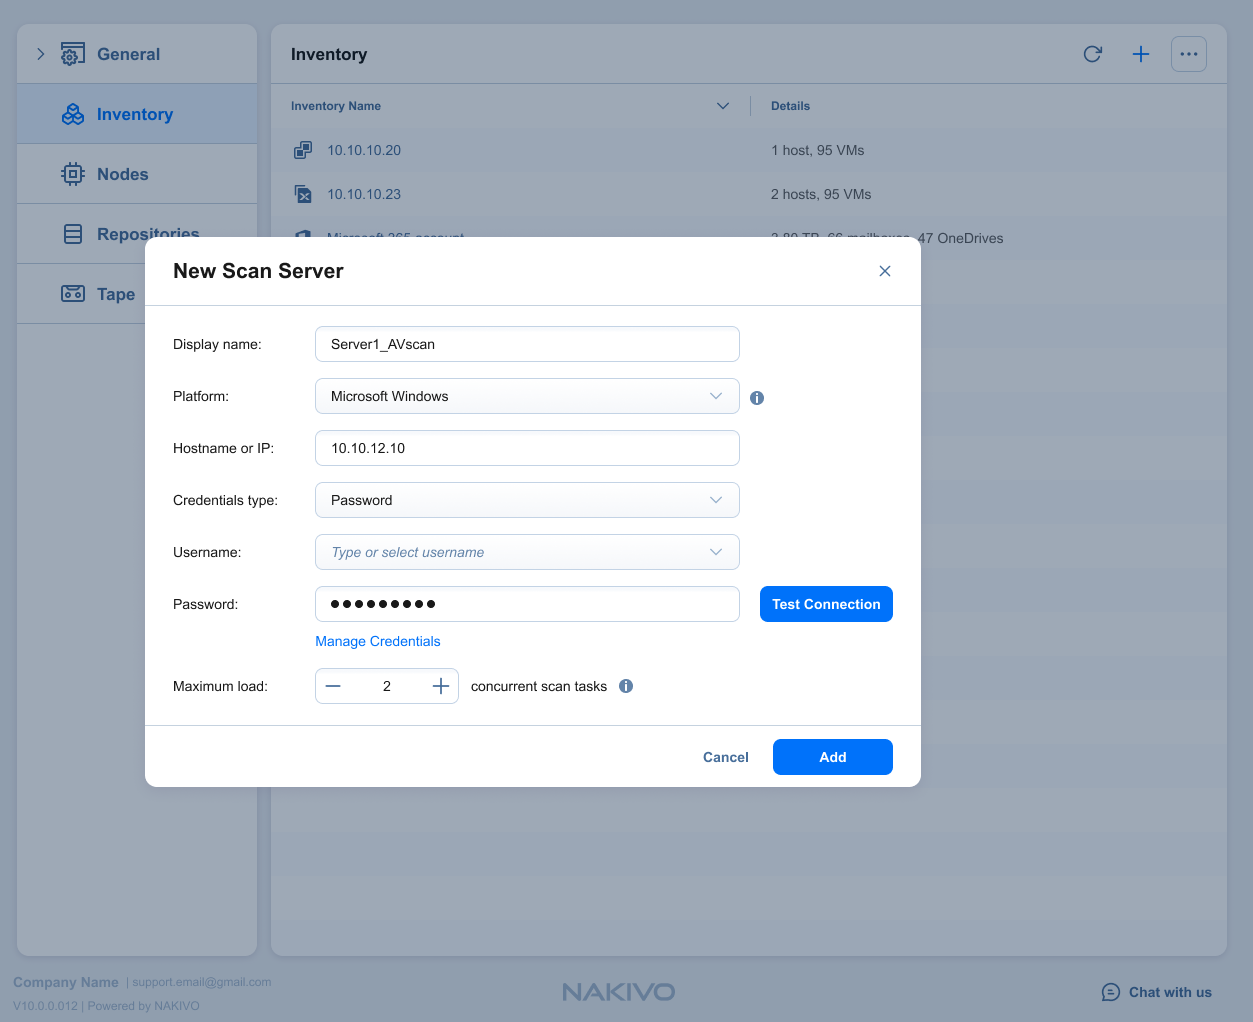
In the New Scan Server popup, provide the following information:
-
Display name: Specify a name for the scan server.
-
Platform: Select either Microsoft Windows or Linux.
-
Hostname or IP: Specify the hostname or IP address of the scan server that you want to add to the Inventory.
-
Credentials type: Choose your preferred option and enter your respective credentials:
-
Password: Enter a Username with administrative privileges for the scan server entered above and your Password.
-
Private key: Select your private key from the drop-down list.
-
-
-
Optionally, you can add, manage, or delete your credentials using the Manage credentials functionality. Refer to Managing Credentials for more information.
-
Click Test Connection to make sure that NAKIVO Backup & Replication can successfully connect to your scan server.
-
Configure the Maximum load for the scan server, which is the maximum number of concurrent scan tasks the scan server can process.
-
After you’re done, click Add.