How to Migrate System Configuration to New VMware Virtual Appliance
Product version: 9.1
Last modified: 13 September 2019
To migrate NAKIVO Backup & Replication to a new VMware virtual appliance (VA), follow the procedures below.
Full Solution VA
-
Download a new VA with NAKIVO Backup & Replication.
-
Deploy the VA and shut it down.
-
Make sure that no backup or recovery jobs are running on the old VA.
-
Detach all repositories.
-
Export the system configuration from the old VA.
-
Shut down the old VA.
-
Disconnect an onboard repository disk from the new VA.
-
Disconnect Onboard repository disks from the old VA:
-
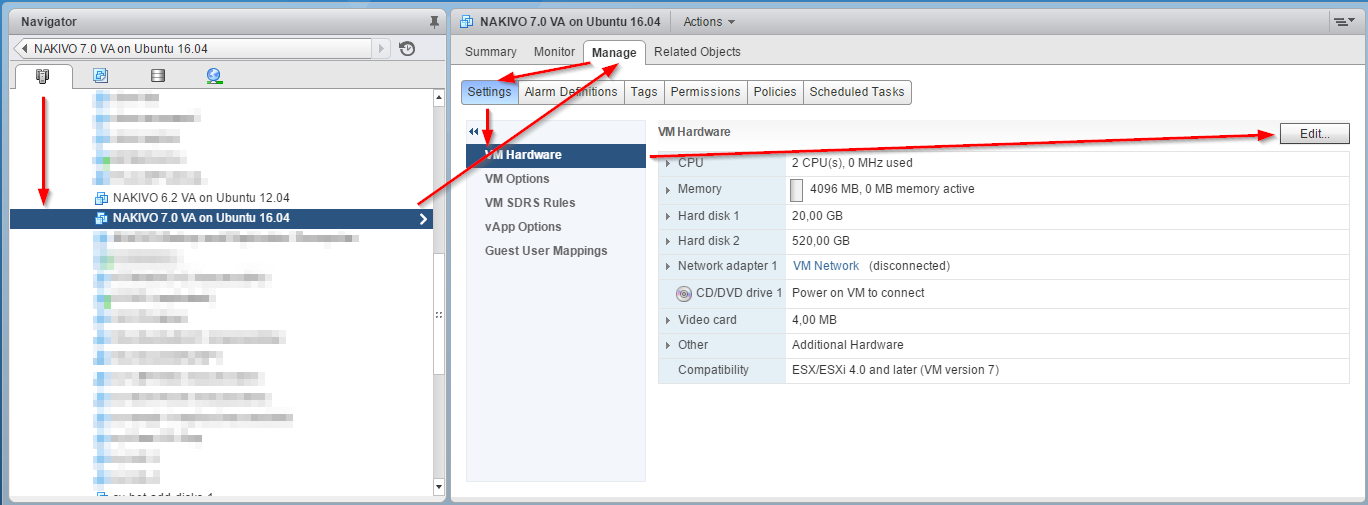
Locate the old VA in the vSphere Client.
-
Go to Manage > Settings > VM Hardware and click Edit.
-
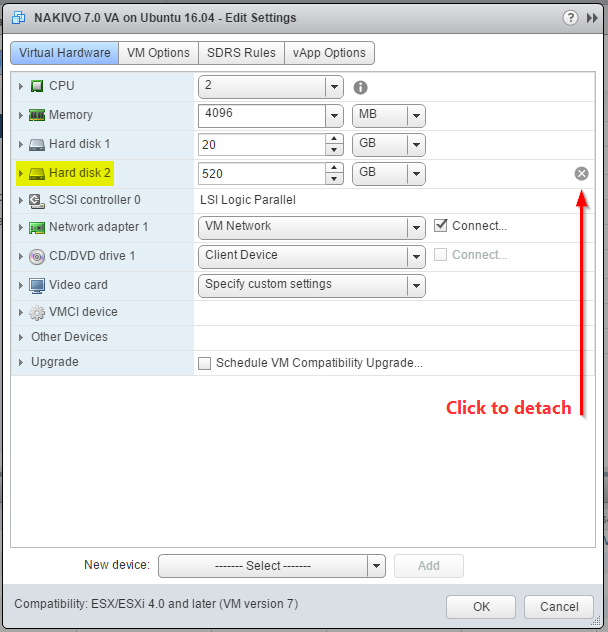
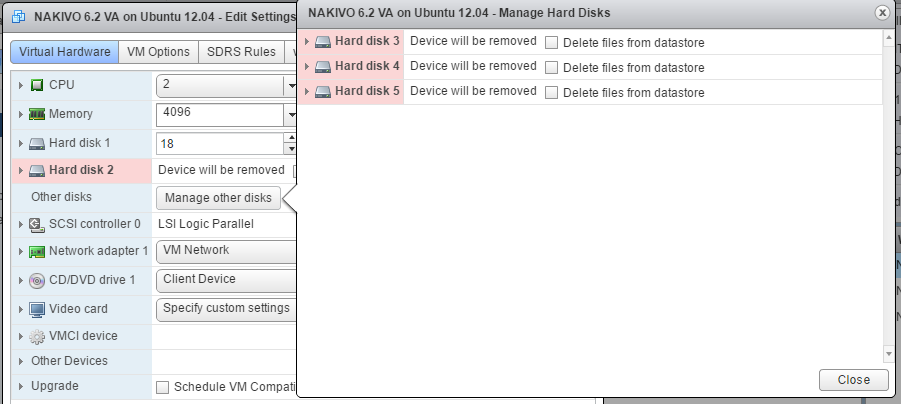
Select disks to remove from the VA.
Warning
Do not select Delete files from datastore. If you do, the data will be lost.-
Click OK.
-
-
Connect the onboard repository disks to the new VA:
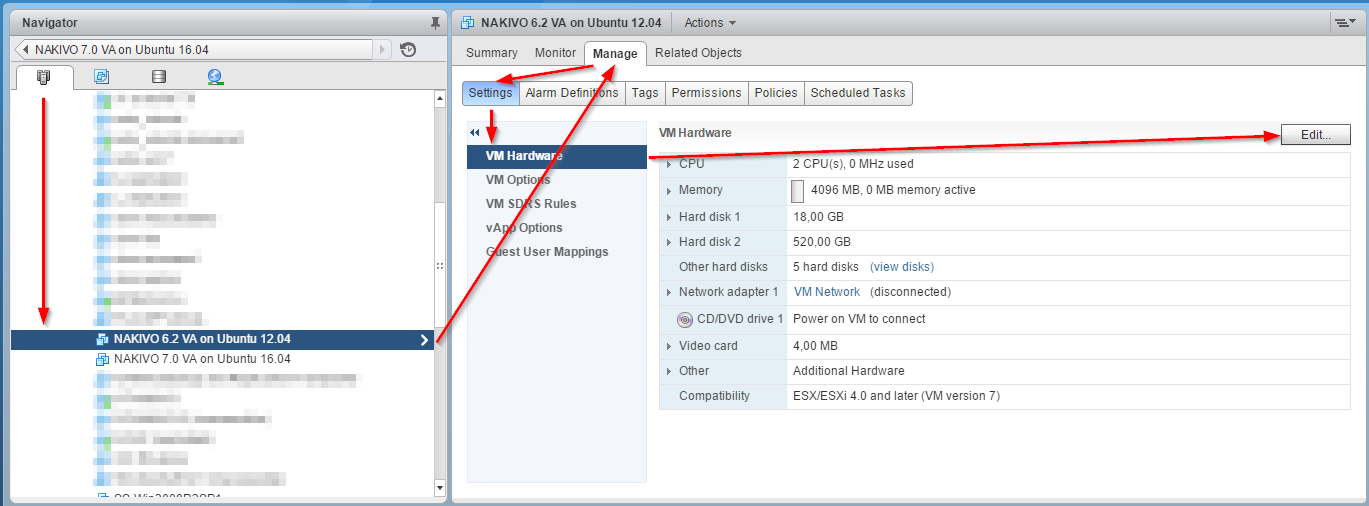
Locate the new VA on the vSphere Client.
Go to Manage > Settings > VM Hardware and click Edit.
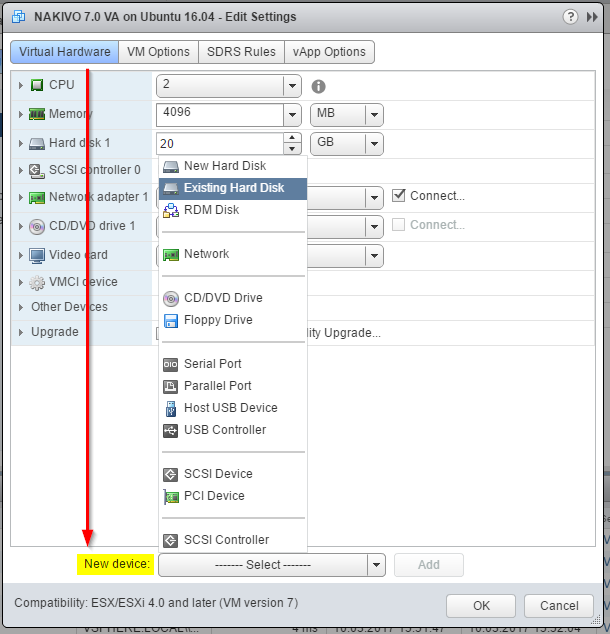
Select an Existing Hard Disk from the New device drop-down list.
Select the datastore and folder with the same name as the old VA.
Select a .vmdk file to add. The disk files with repositories have an underscore and number suffix such as '_1'. For example, NAKIVO 6.2 VA on Ubuntu 18.04_1.vmdk
Click OK.
-
Power on the new VA.
-
Import the system configuration to the new VA.
Full Solution without Repository VA
-
Deploy Full Solution without Repository VA and power it on.
-
Export the system configuration from the old VA and power it off.
-
Import the system configuration into the new VA.
-
Remove the old VA.
Transporter VA
-
Deploy the new Transporter VA and power it on.
-
Check an IP address of the new VA.
-
Add the new Transporter to NAKIVO Backup & Replication.
-
Edit the Backup Repositories configuration and change Assigned Transporter to a new one (if needed).
-
Remove the old Transporter from the product.
-
Shut down and remove the old Transporter VA.
Transporter with Repository VA
-
Deploy the VA and shut it down.
-
Shutdown the old VA.
-
Disconnect the onboard repository disk from the new VA:
-
Disconnect onboard repository disks from the old VA:
Locate the old VA in the vSphere Client.
Go to Manage > Settings > VM Hardware and click Edit.
Select disks to remove from the VA.
Warning
Do not select Delete files from datastore. If you do, the data will be lost.Click OK.
-
Connect the onboard repository disks to the new VA:
Locate the new VA in the vSphere Client.
Go to Manage > Settings > VM Hardware and click Edit.
Select an Existing Hard Disk from the New device drop-down list.
Select the datastore and folder with the same name as the old VA.
Select a .vmdk file to add. The disk files with repositories have an underscore and number suffix such as '_1'. For example, NAKIVO 6.2 VA on Ubuntu 18.04_1.vmdk
Click OK.
-
Power on the new VA.
-
Edit the Backup Repositories configuration and change Assigned Transporter to a new one (if needed).
-
Remove the old Transporter from the product.
-
Shut down and remove the old Transporter VA.
Multi-Tenant Director VA
-
Deploy a new multi-tenant Director VA and power it on.
-
Export the system configurationfrom the old multi-tenant instance and power it off.
-
Import the system configuration into the new multi-tenant instance.
-
Remove the old multi-tenant Director VA.


