Deploying VMware Virtual Appliance
- Deploying Virtual Appliance with vSphere Web Client
- Virtual Appliance OS, Credentials, and Security
- Web Interface Login
NAKIVO Backup & Replication offers the following VA deployment options:
- Full Solution
- Full Solution without Backup Repository
- Transporter-only
- Transporter with Backup Repository
- Multi-tenant Director
The Virtual Appliance (VA) has two disks: the first (30 GB) contains a Linux OS with NAKIVO Backup & Replication, and the second (500 GB) is used as a Backup Repository. If you deploy the Virtual Appliance disks using the Thin Provision option, then the disks will not reserve space on your datastore and will only consume space when actual data (such as your backups) is written to disks.
Deploying Virtual Appliance with vSphere Web Client
-
Download NAKIVO Backup & Replication VA.
-
Log in to your vSphere vCenter with the vSphere Web Client.
-
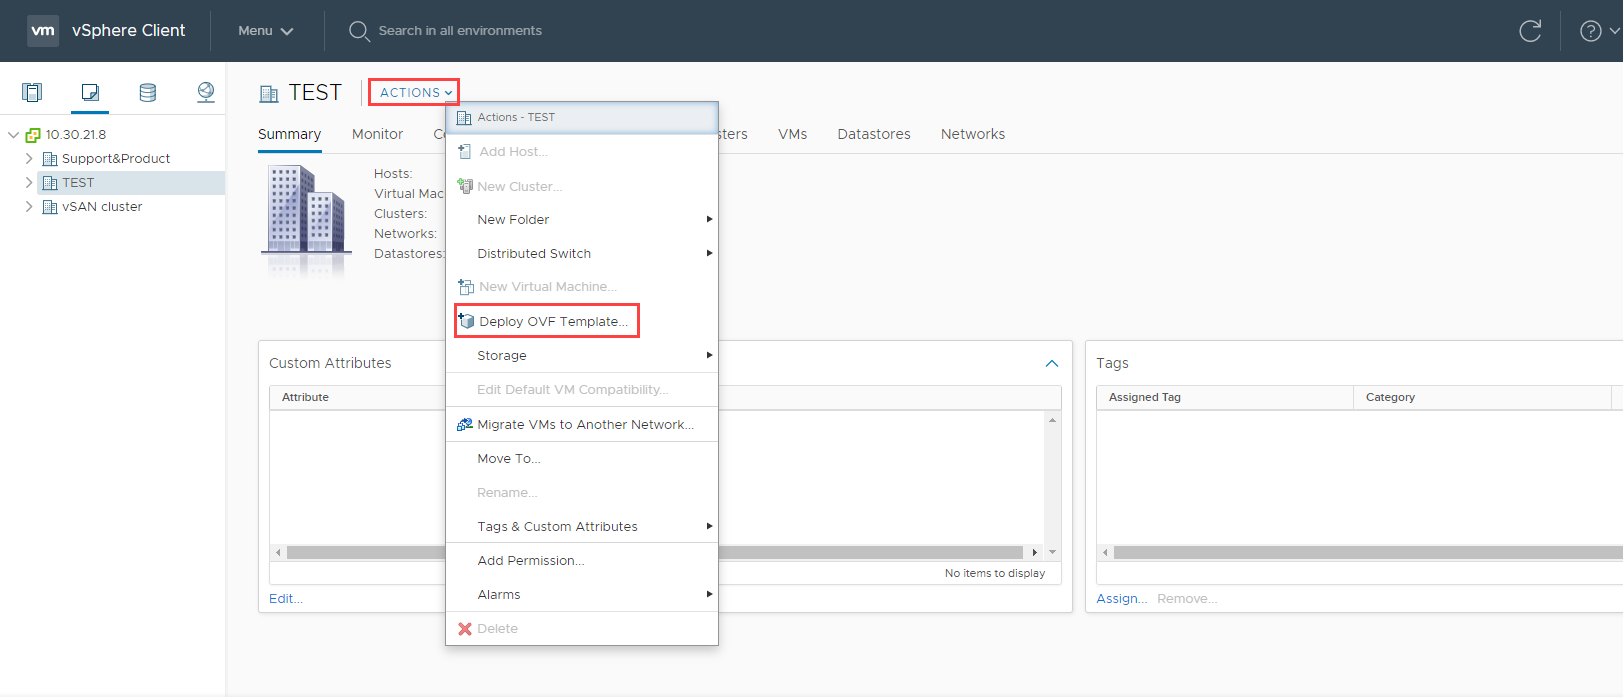
Select Deploy OVF Template from the Actions menu. Note that the Client Integration Plug-in must be installed to enable OVF functionality.

-
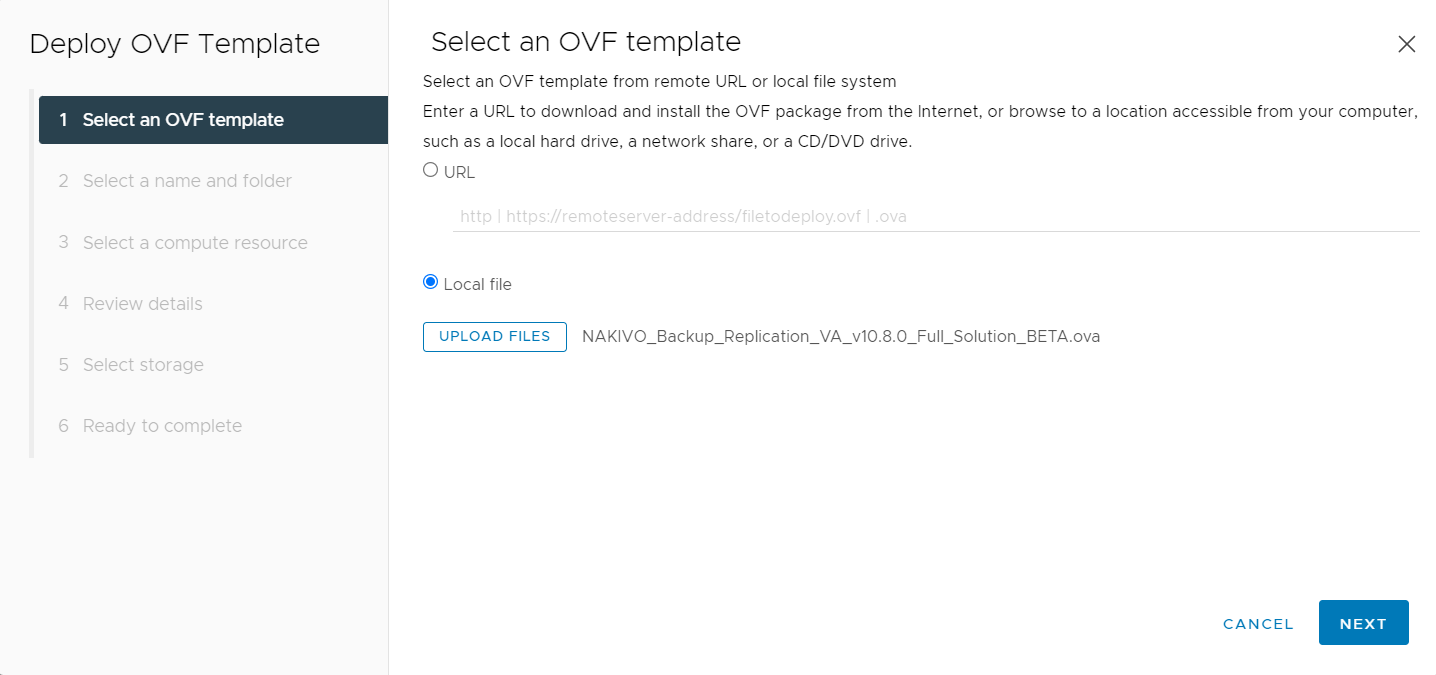
On the Select an OVF template page of the Deploy OVF Template wizard, select Local file and upload the VA file (.ova) you've downloaded. Click Next.

-
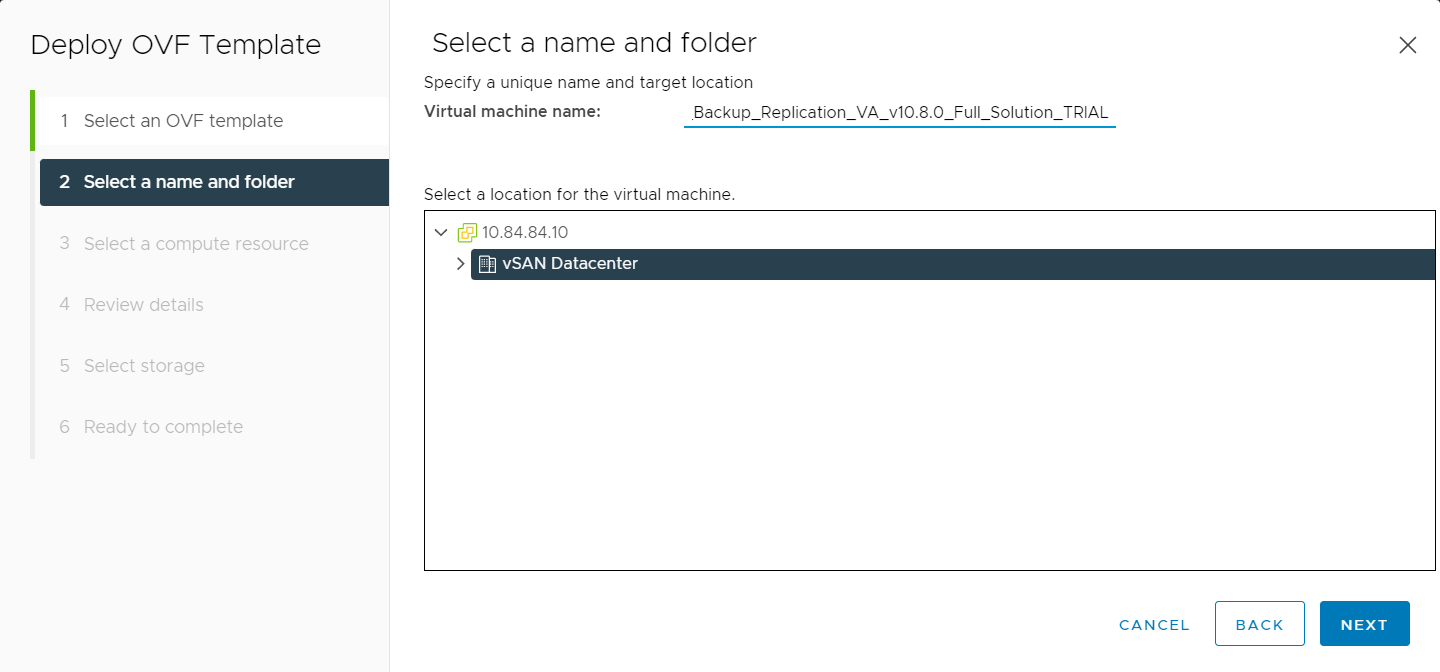
On the Select a name and folder page, specify a unique name and target location for the Virtual Appliance. Click Next.
-
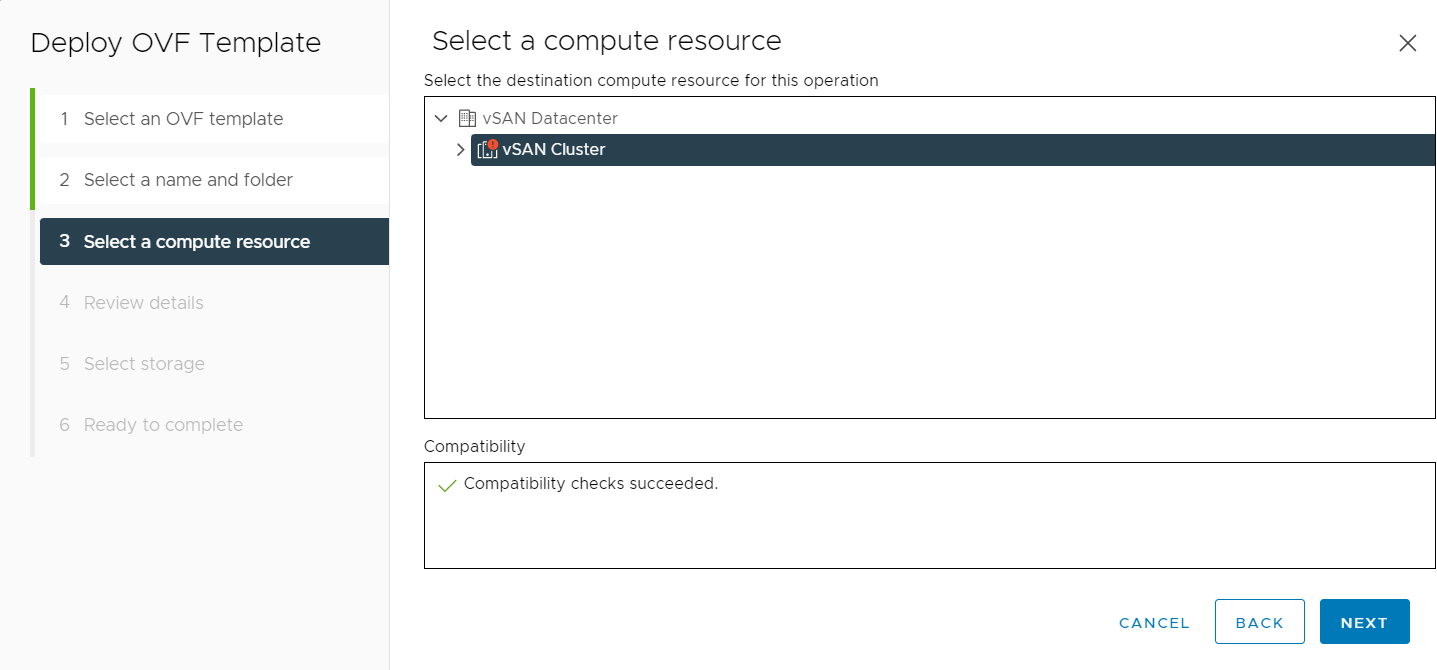
On the Select a computer resource page, select the resource pool within which you would like to deploy the Virtual Appliance and click Next.
-
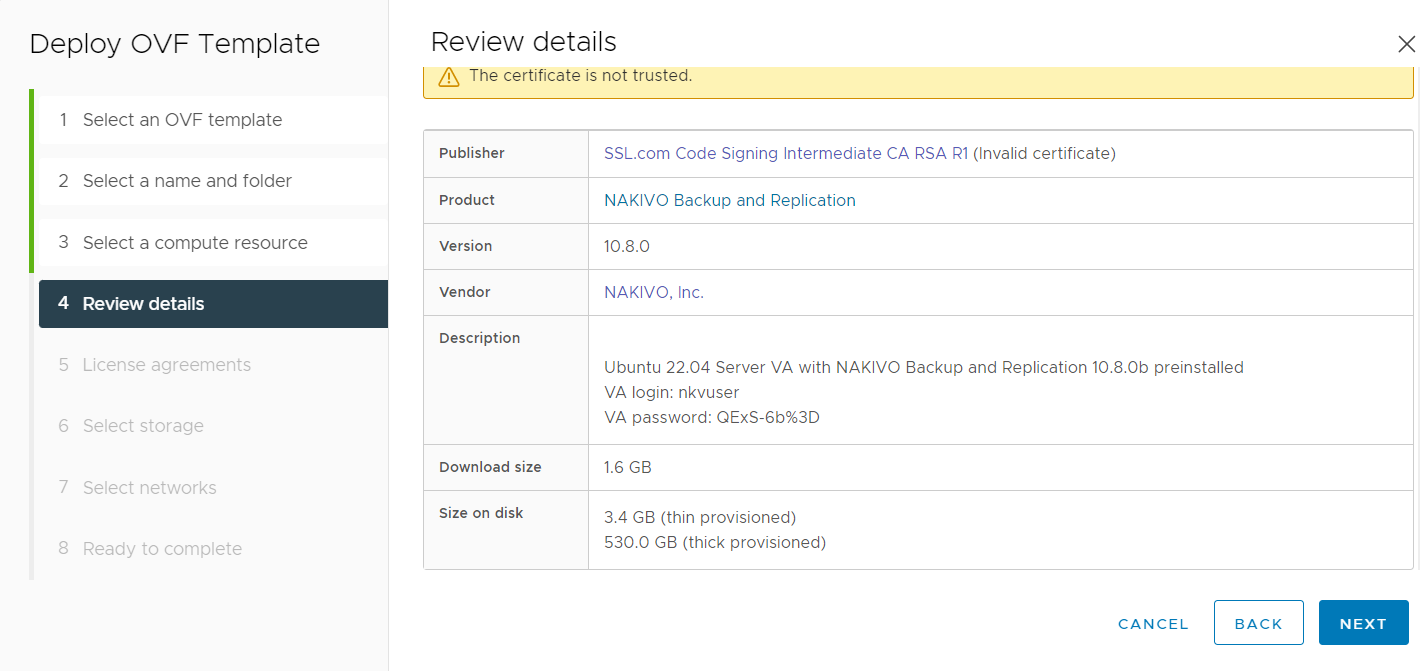
On the Review details page, review the template details and click Next.

-
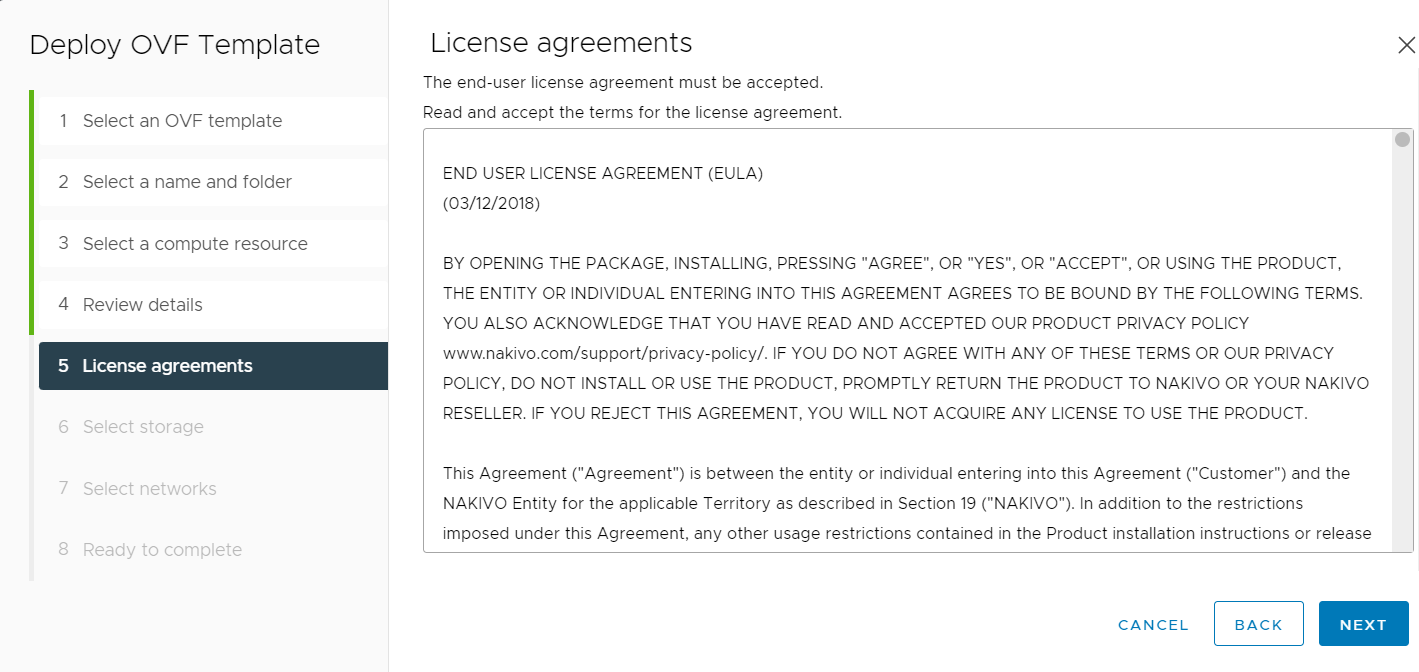
On the License agreements page, read the end-user license agreement (EULA). If you agree to its terms, select I accept all license agreements and then click Next.

-
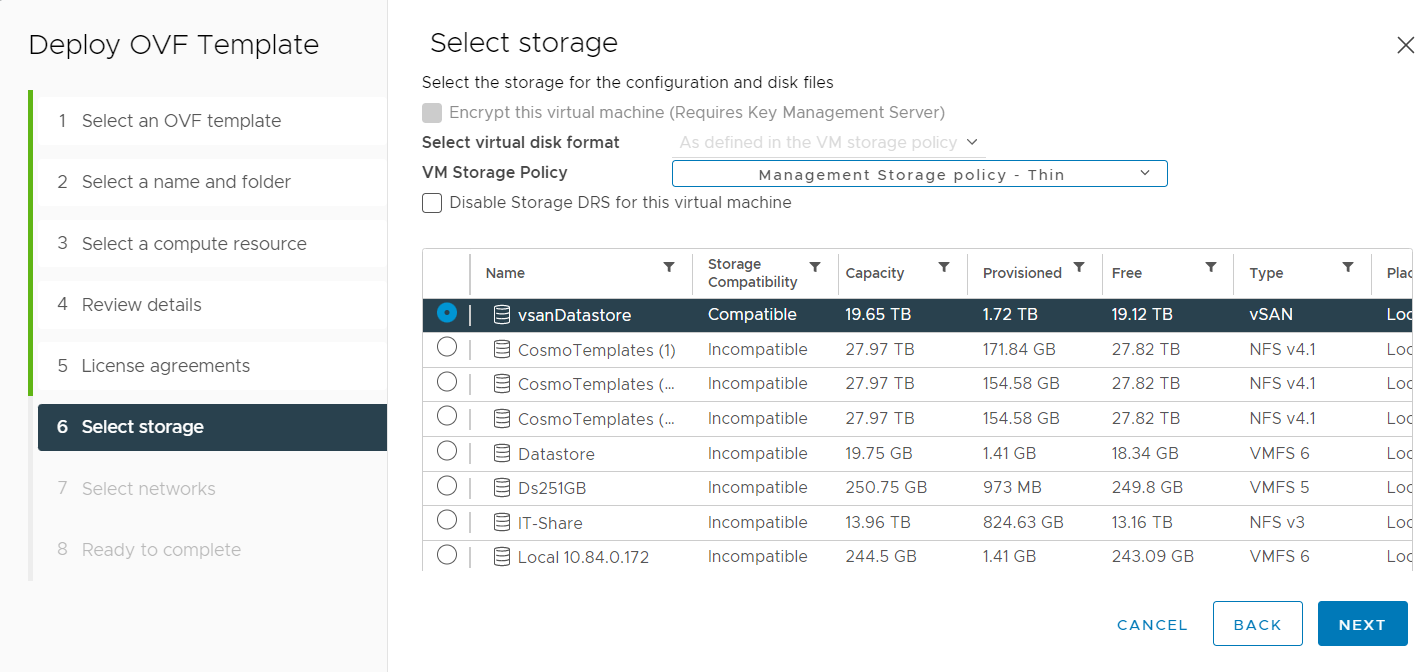
On the Select storage page, select a datastore in which you would like to keep the Virtual Appliance disk, virtual disk format (Thin Provisioning is recommended), VM storage policy and click Next.

Important
If you use thick provisioning instead of thin provisioning, keep in mind that NAKIVO Backup & Replication can take up to 0,5 TB of data. Check to see if it is 0,5 TB by default for all cases. -
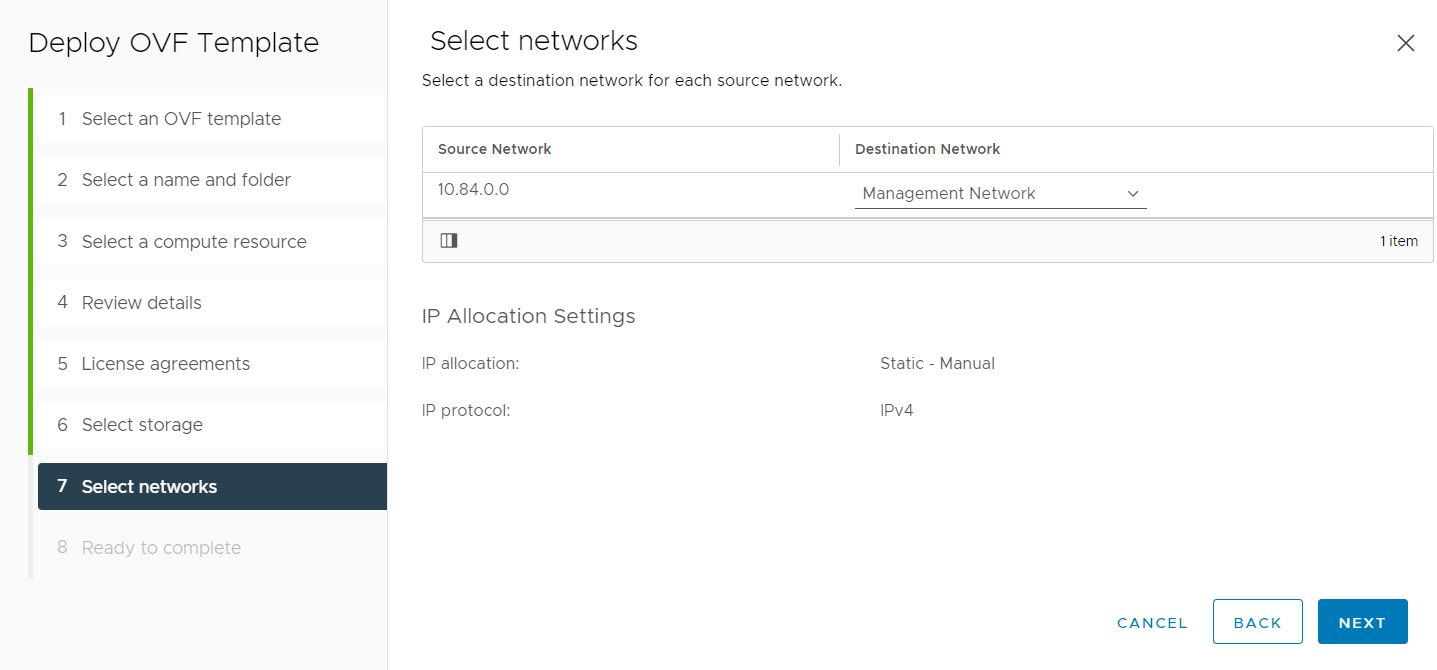
On the Select networks page, select a network to which the Virtual Appliance will be connected. Opting for a network with DHCP and Internet access is recommended. Click Next.

-
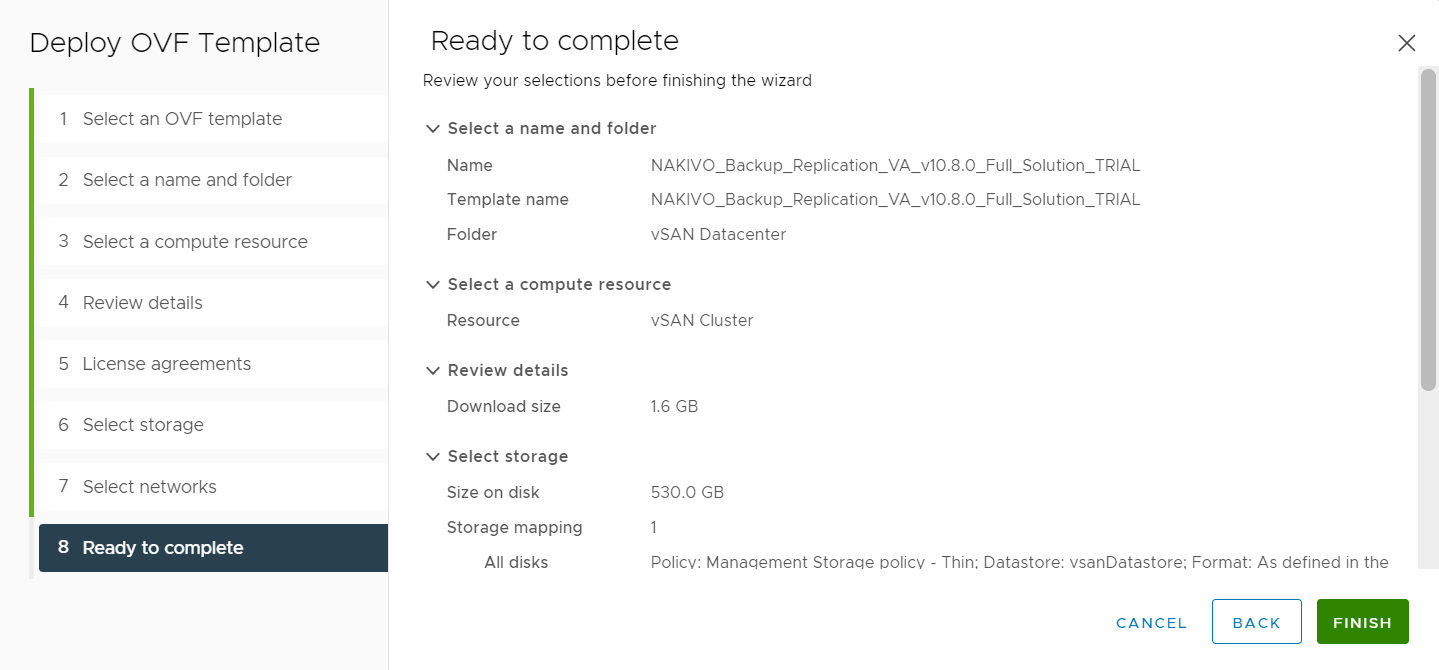
On the Ready to complete page, review the summary of the setups you have configured and click Finish to complete deployment.

After the Virtual Appliance is deployed, you may need to configure it.
Important
If you plan to expose the Virtual Appliance to the Internet, change the default credentials and set up a login and password for the Web interface.


Virtual Appliance OS, Credentials, and Security
The appliance runs Ubuntu 24.04, 64-bit. Use the following credentials to log in to the appliance:
-
Username: nkvuser
-
Password: QExS-6b%3D
The following vSphere versions are supported for the VA deployment:
-
6.5
-
6.7
-
7.0
-
8.0
-
9.0
Note
This limitation on supported versions only applies to when deploying the VA using VMware desktop client. When a VA is deployed via NAKIVO Backup & Replication UI (usually a Transporter), no problems should occur.
For the versions of NAKIVO Backup & Replication older than 7.2, the password is root.
Important
If you plan to expose the Virtual Appliance to the Internet, change the default VA credentials and set up a login and password for the Web interface.
It is recommended to run an update on all packages in your Virtual Appliance at least once a month.
To enable Backup Immutability for Amazon S3, Wasabi, Azure Blob Storage, Backblaze B2 Cloud Storage, or Local Folder types of Backup Repository deployed as part of virtual appliance, NAKIVO Backup & Replication does the following:
-
Creates a new user for all administrative needs and adds it to the sudo group
-
Disables root user
-
Changes default SSH port to 2221
-
Configure the following kernel parameters via sysctl.conf:
-
Limits network-transmitted configuration for IPv4/IPv6
-
Prevents the common 'syn flood attack'
-
Turns on source IP address verification
-
Prevents a cracker from using a spoofing attack against the IP address of the server
-
Logs several types of suspicious packets, such as spoofed packets, source-routed packets, and redirects
-
Configures swap. Sets vm.swappiness to 15
-
Sets kernel.unprivileged_bpf_disabled to 1
-
Sets kernel.core_pattern to /tmp/%e.%p.core
-
Sets kernel.core_uses_pid to 1
-
Sets kernel.dmesg_restrict to 1
-
Sets kernel.kptr_restrict to 2
-
Sets kernel.sysrq to 0
-
-
Secures /tmp and /var/tmp
-
Secures Shared Memory
-
Installs and configures fail2ban
Notes
After fail2ban is installed on the hardened VA, the user IP may be banned for 10 minutes if mistakes have been made during the login procedure.
Any additional packages installed manually on the system may cause a security breach.
Web Interface Login
Open your browser and go to the VA’s web interface. Refer to the Getting Started section to better understand how to continue working with NAKIVO Backup & Replication.