Adding Microsoft 365 Accounts
Before you start backing up items from your organization’s Microsoft 365 account, you need to add the Microsoft 365 account to Inventory in NAKIVO Backup & Replication.
Adding Microsoft 365 Account to Inventory
To add a Microsoft 365 account to the Inventory, do the following:
-
Check if you meet the requirements for Backup for Microsoft 365.
-
Click Settings in the left pane.
-
Go to the Inventory tab and click +.
-
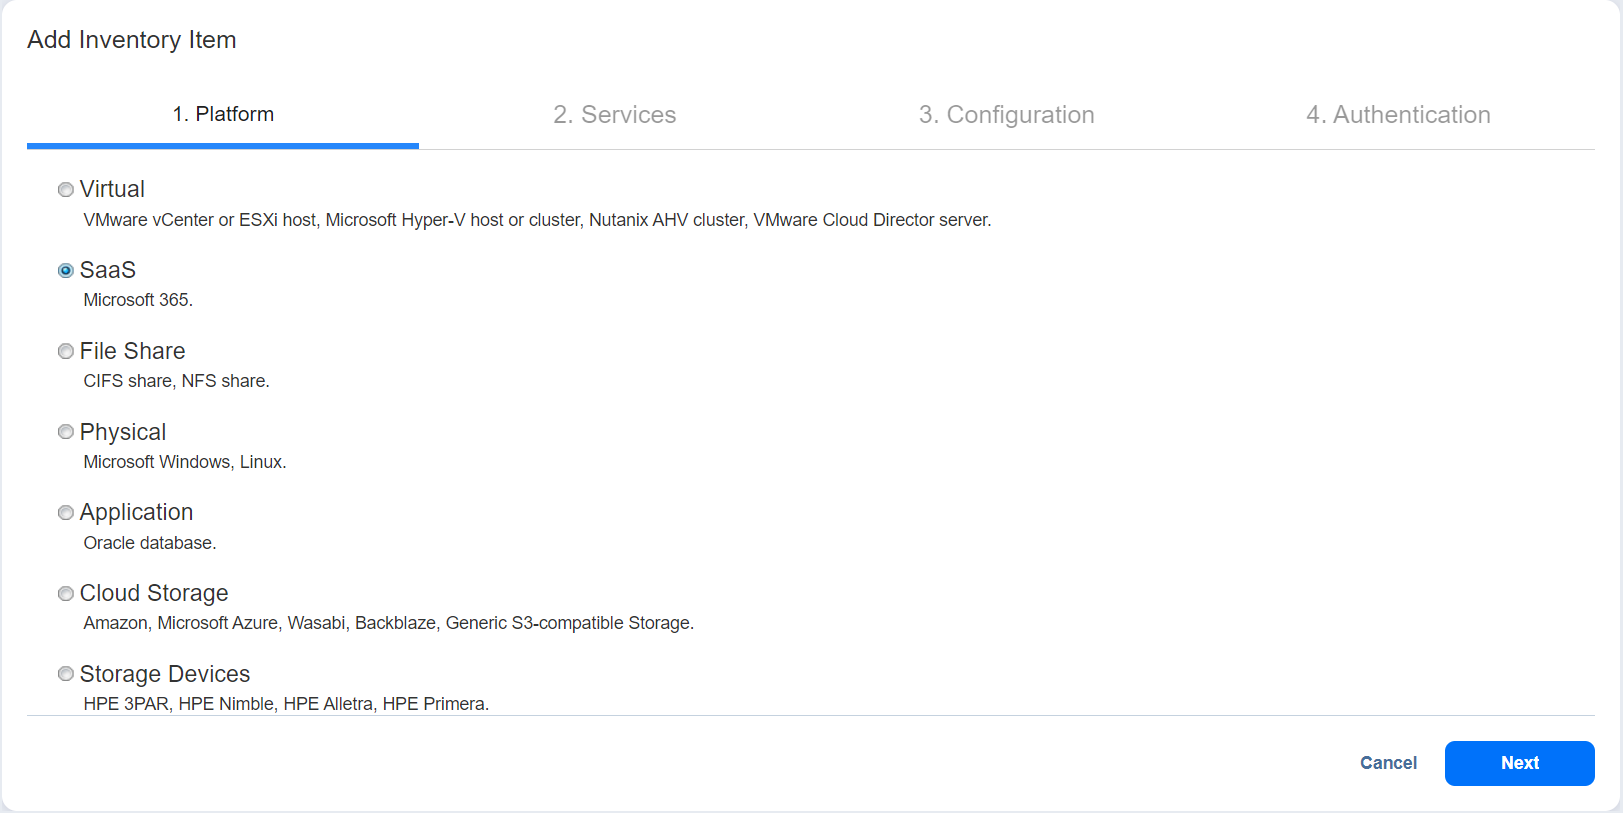
On the Platform page of the wizard, select SaaS. Click Next to proceed.

-
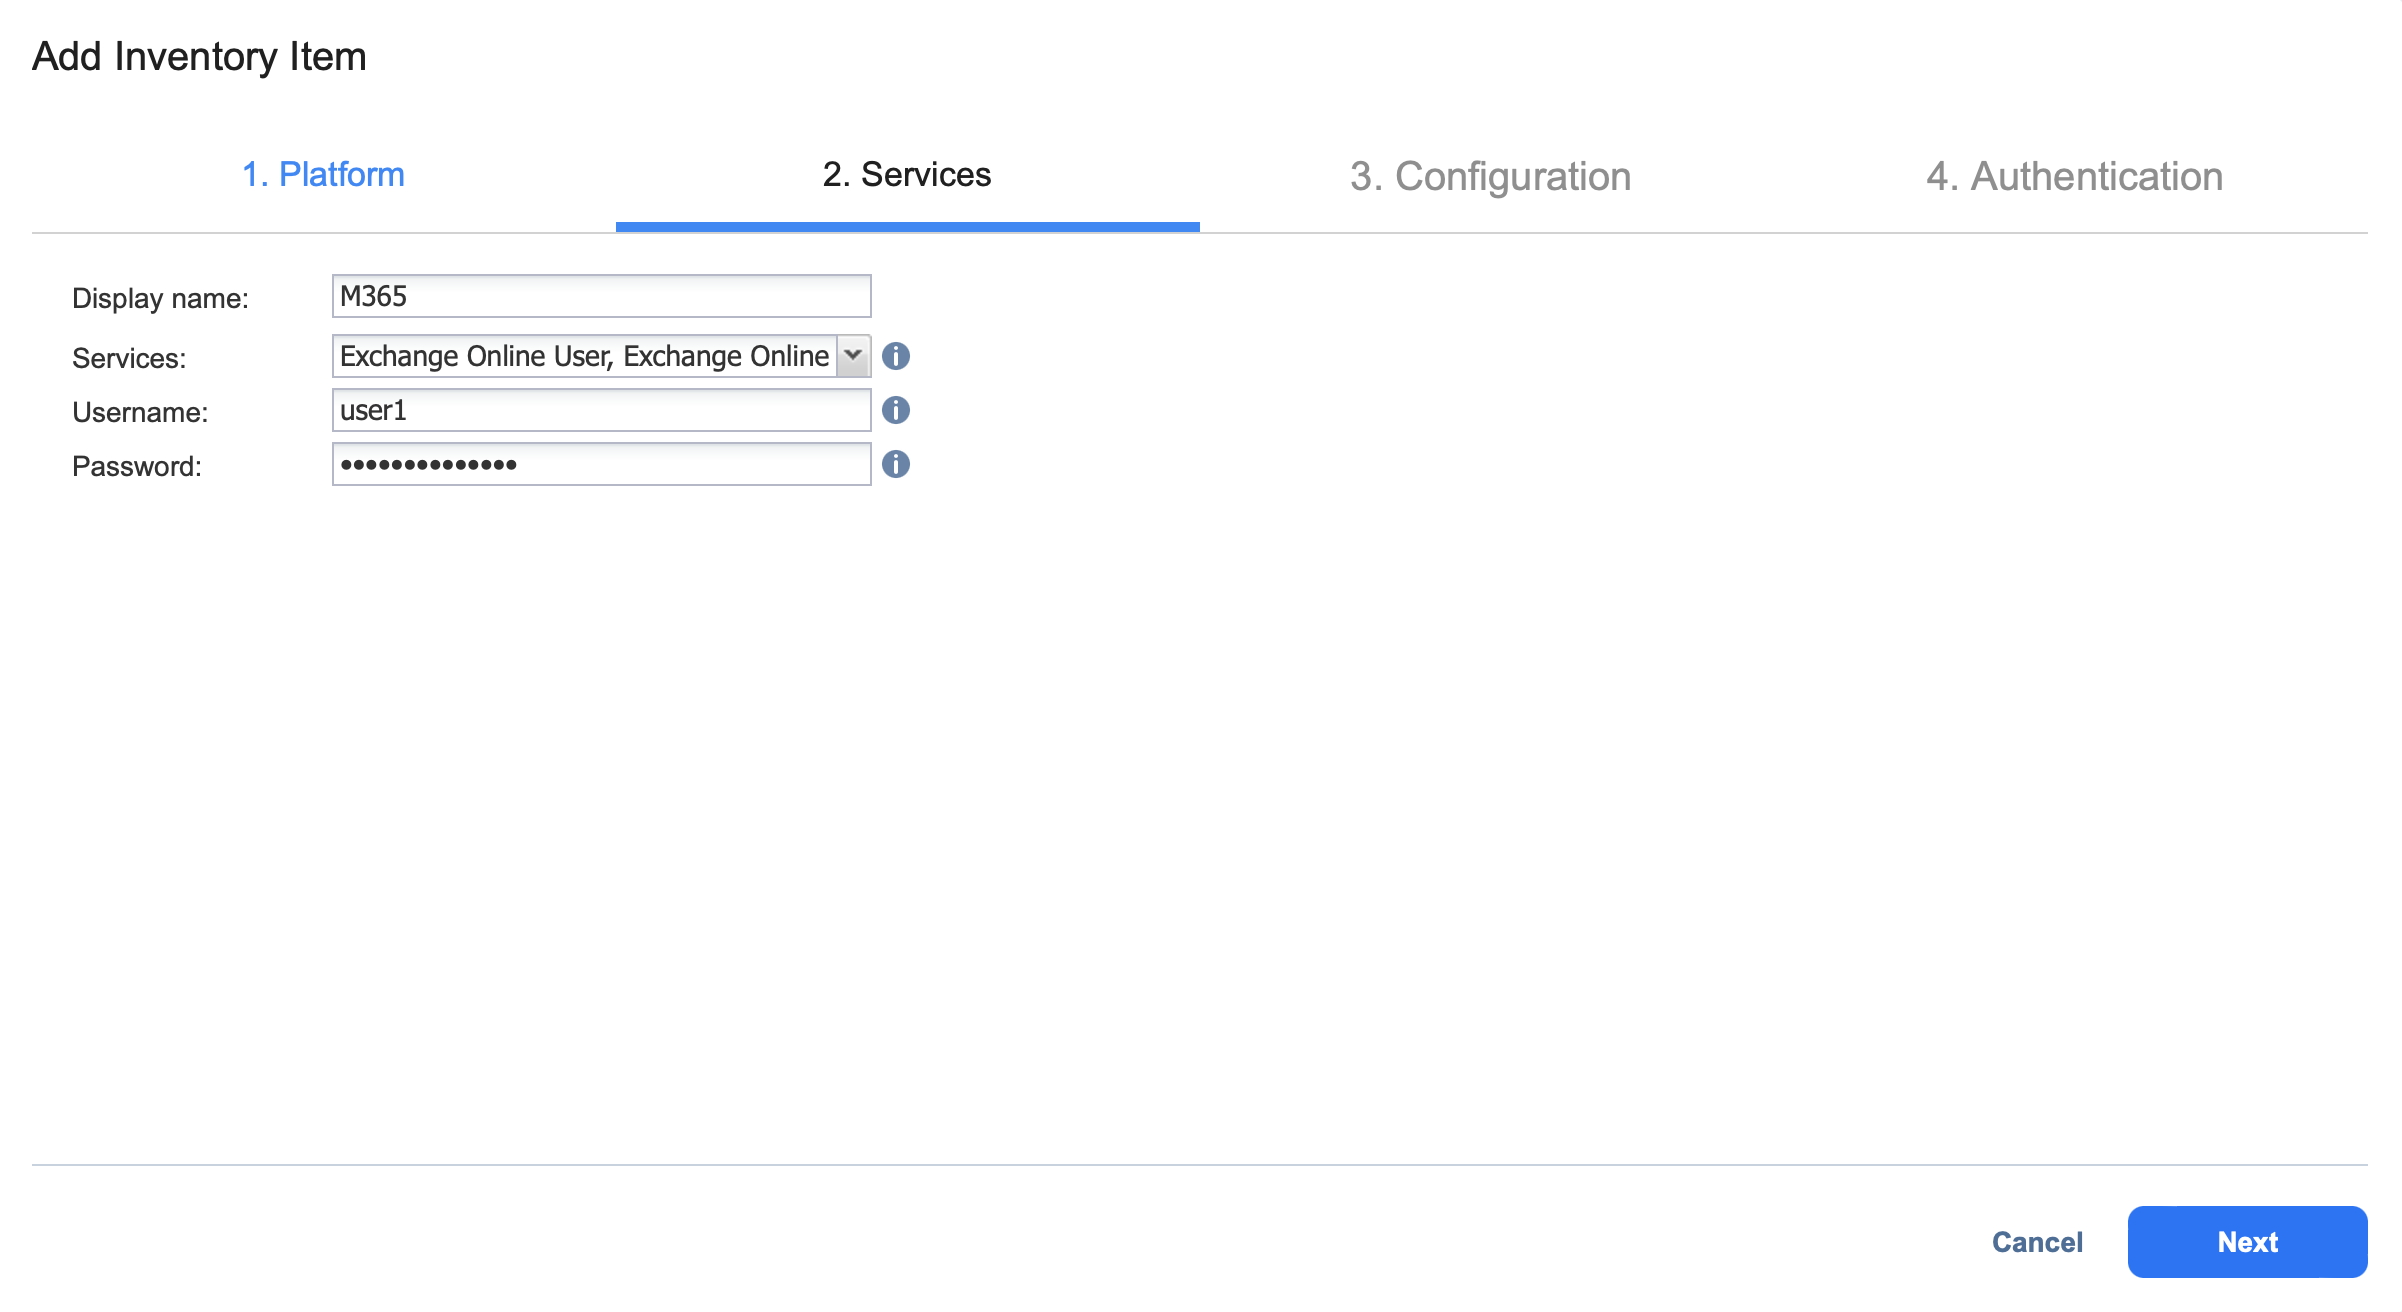
On the Services page, provide the following information:
-
Display name: Enter a name for the account.
-
Services: Select the Microsoft 365 services that you want to back up:
-
Exchange Online Users
-
OneDrive for Business
Note
OneDrives without added email addresses or assigned licenses are ignored.
-
Exchange Online Groups
-
SharePoint Online
Note
Optionally, select the Use Modern Authentication with enabled MFA account сheckbox if MFA is enabled for your Microsoft 365 accounts.
-
Teams
Notes
-
Optionally, you can enable the Use Teams Export APIs to back up Teams chat messages to use Teams Export APIs instead of MS Graph APIs to back up Teams chat messages. Backup performance may be improved with this option. As of August 25, 2025, Microsoft has confirmed that Teams Export APIs are free to use and no longer incur additional charges.
-
For NAKIVO Backup & Replication to successfully discover Teams, the following conditions must be met:
-
Microsoft Teams Exploratory experience license or higher (access to Microsoft Teams API is required).
-
The administrator account must have the Global Administrator role or Team Administrator role assigned.
-
If you prefer not to use a Global Administrator role:
-
Register the application and manually assign all necessary permissions. For more information, refer to Required API Permissions for Microsoft 365.
-
In the Add Inventory Item wizard select Use an existing AD Application and deselect Automatically grant required permissions, and proceed with the setup.
-
-
-
-
-
-
Click Next to proceed.
-
On the Configuration page, choose one of the following:
-
Automatically register a new Azure AD application: When this option is selected, NAKIVO Backup & Replication automatically registers the Microsoft 365 account as a new application along with a new self-signed certificate in Azure Active Directory and grants the required permissions after authentication.
-
Use an existing Azure AD application: When this option is selected, you can manually add an existing Microsoft 365 application already registered in Azure Active Directory.
Note
In order to add a Microsoft 365 account to NAKIVO Backup & Replication, the account has to be registered in Azure Active Directory.
-
-
Click Next to proceed. If you selected Automatically register a new Azure AD application, skip to step 12.
-
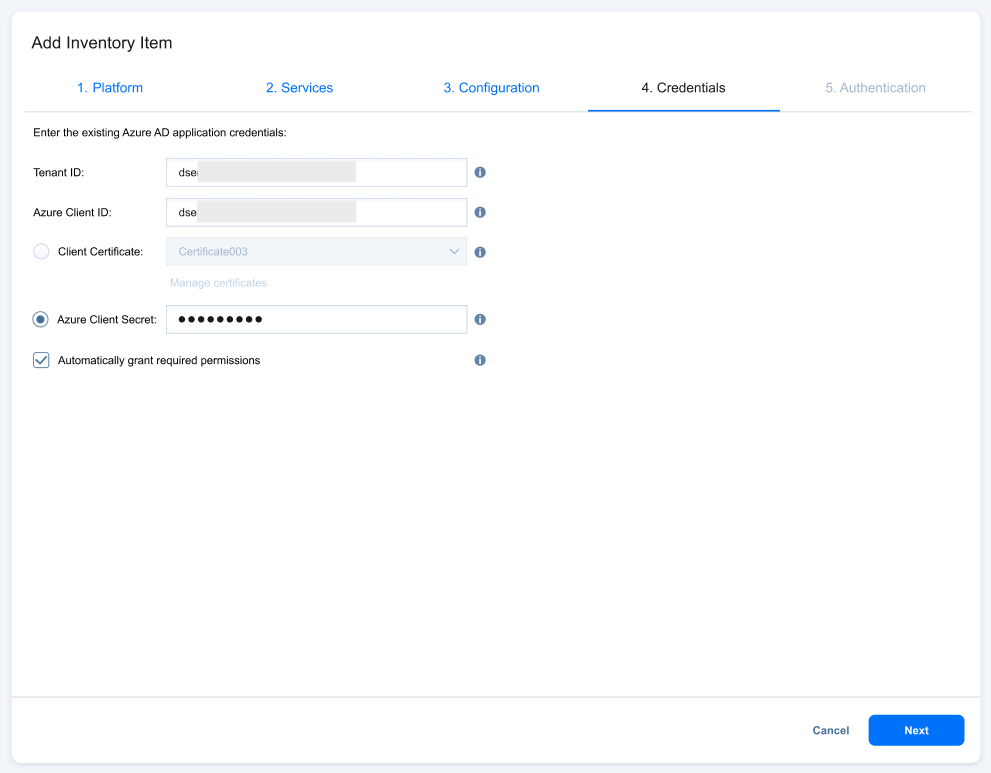
The Credentials page opens if you have chosen Use an existing Azure AD application option on the Configuration page. Provide the following information:
-
Tenant ID: Enter your Azure Tenant ID created when registering your Microsoft 365 account in the Azure Portal.
-
Azure Client ID: Enter your Azure Client ID created when registering your Microsoft 365 account in the Azure Portal.
-
-
Choose one of the following authentication methods:
-
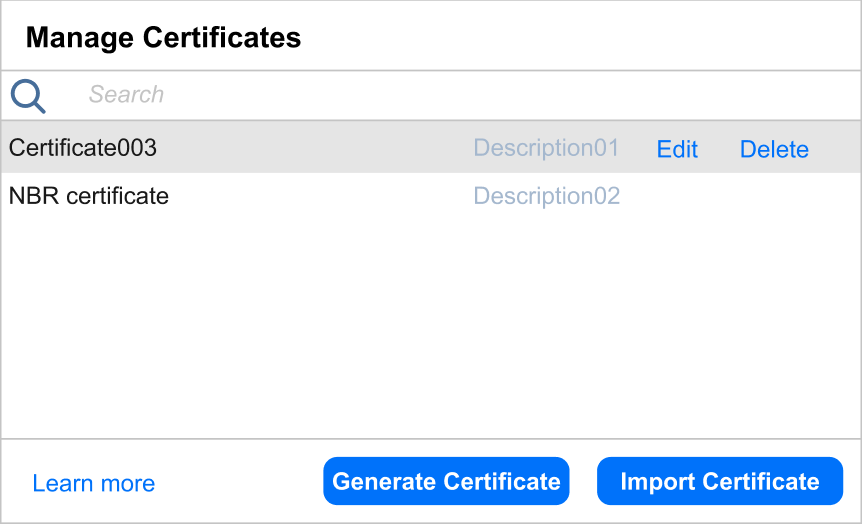
Client Certificate: Choose a saved certificate from the drop-down list to use an existing certificate. If you don’t have any saved certificates or want to generate a new one, click the Manage certificates button. In the resulting pop-up, you can edit and delete existing certificates, generate new certificates, or import existing certificates.
-
To generate a certificate, click the Generate Certificate button. In the Generate New Self-Signed Certificate pop-up, enter a display name and (optionally) a description for the certificate. Clicking Save will generate a new self-signed certificate and add it to the list of saved certificates.
-
To import an existing certificate, click the Import Certificate button. In the Import Certificate pop-up, enter a display name for the certificate and click the Browse… button to upload a certificate in the required .pfx format. Then, enter the certificate password if required, and (optionally) add a description for the certificate. Clicking Save will add the certificate to the list of saved certificates.
-
-
Azure Client Secret: Enter your Azure Client Secret obtained from the Azure Portal. For more information on obtaining the Azure credentials, refer to the Obtaining Microsoft 365 Credentials below. Note that this option is disabled if Use Modern Authentication with enabled MFA account is enabled on the Services page; you must use Client Certificate in this case.
-
-
Enter the administrator Username and Password required for SharePoint Online. This is only required if you have provided the Azure Client Secret.
-
Depending on the authentication method you selected, you can optionally select Automatically grant required permissions (for Azure Client Secret authentication) or Automatically grant required permissions and register certificate (for Client Certificate authentication). This allows NAKIVO Backup & Replication to automatically check the required API permissions for the selected services of your organization’s Microsoft 365 account and to add them if they are missing. If you do not select this option, you have to manually grant the required permissions. If this option is selected for Client Certificate authentication, NAKIVO Backup & Replication will also automatically register the selected certificate with the specified application, if it is not already registered. If you do not select this option, you have to manually register the certificate with the application. If you have selected either option, click Next. Alternatively, click Finish to complete adding the item to the Inventory.
-
If you have selected Automatically grant required permissions or Automatically grant required permissions and register certificate on the Credentials page or Automatically register a new Azure AD application on the Configuration page, the Authentication page opens. Do the following:
-
If you selected Automatically register a new Azure AD application on the Configuration page, enter a name for the application in the Application name field.
-
If you selected Automatically register a new Azure AD application on the Configuration page, add a client certificate as described in step 10.
-
The Code field shows the code that needs to be entered at https://microsoft.com/devicelogin.
-
Clicking the link will open the page in a new tab and you will be required to log in to the Microsoft Azure Cross-Platform Command-Line Interface (xplat-cli) using the provided code.
-
If the provided credentials are correct, the account will be authenticated and you will be able to continue with the discovery process.
Notes
-
While using a Global Administrator account is recommended for automatic permissions setup, you can use a non-Global Admin account if you manually assign the required Microsoft 365 permissions listed in Required API Permissions for Microsoft 365.
-
If SharePoint Online was selected on the Services page, the SharePoint Administrator role must be assigned to the account in Microsoft 365 admin center for the authentication process to be successful.
-
It is possible to bypass the Authentication step if the IP address or hostname of your NAKIVO Backup & Replication installation location is added as a trusted location in Azure Active Directory. For more information, refer to this page.
-
If Automatically register a new Azure AD application is selected in the Configuration step, then the credentials to the newly registered application will be downloaded to the browser after successful authentication.
-
When generating a new certificate, the new self-signed certificate will be downloaded to the browser in .pfx format after clicking Save in the Generate New Self-Signed Certificate pop-up.
-
If NAKIVO Backup & Replication is updated from a version that did not include support for Microsoft 365 Groups to a version that does, it is possible for the group mailboxes and group sites to be discovered automatically for existing Microsoft 365 accounts:
-
If you have selected Automatically grant required permissions on the Credentials page, the group mailboxes and group sites will be added automatically with all of the required permissions granted.
-
If you have not selected Automatically grant required permissions on the Credentials page, the group mailboxes and group sites will remain undiscovered by the solution.
-
-
If NAKIVO Backup & Replication is updated from a version that did not include support for Microsoft Teams to a version that does, Teams will not be discovered automatically. In order to discover Teams, you will need to edit the appropriate Microsoft 365 account in Inventory and add Teams as a service.
-
-
Click Finish to complete adding the item to Inventory.


Activating Access to Microsoft Graph Teams Export APIs
To back up Teams chat messages using Teams Export APIs, the following requirements must be met:
-
You have an active Azure subscription.
-
You have an active app registration in Azure.
-
You have created a resource group as described here.
-
Make sure Azure CLI is installed on the running machine.
-
Run the command line and enter the required information to enable an application to use metered APIs and services in Microsoft Graph and become associated with an Azure subscription.
Notes
As of August 25, 2025, Microsoft has confirmed that Teams Export APIs are free to use and no longer incur additional costs.
The feature is not supported for Microsoft 365 US Government, Germany, and China.
Obtaining Microsoft 365 Credentials
To obtain the credentials required to add a Microsoft 365 account to the Inventory in NAKIVO Backup & Replication, follow the steps below:
-
Open the Azure Portal by going to portal.azure.com
-
Sign in to Microsoft Azure with your Microsoft 365 account credentials.
-
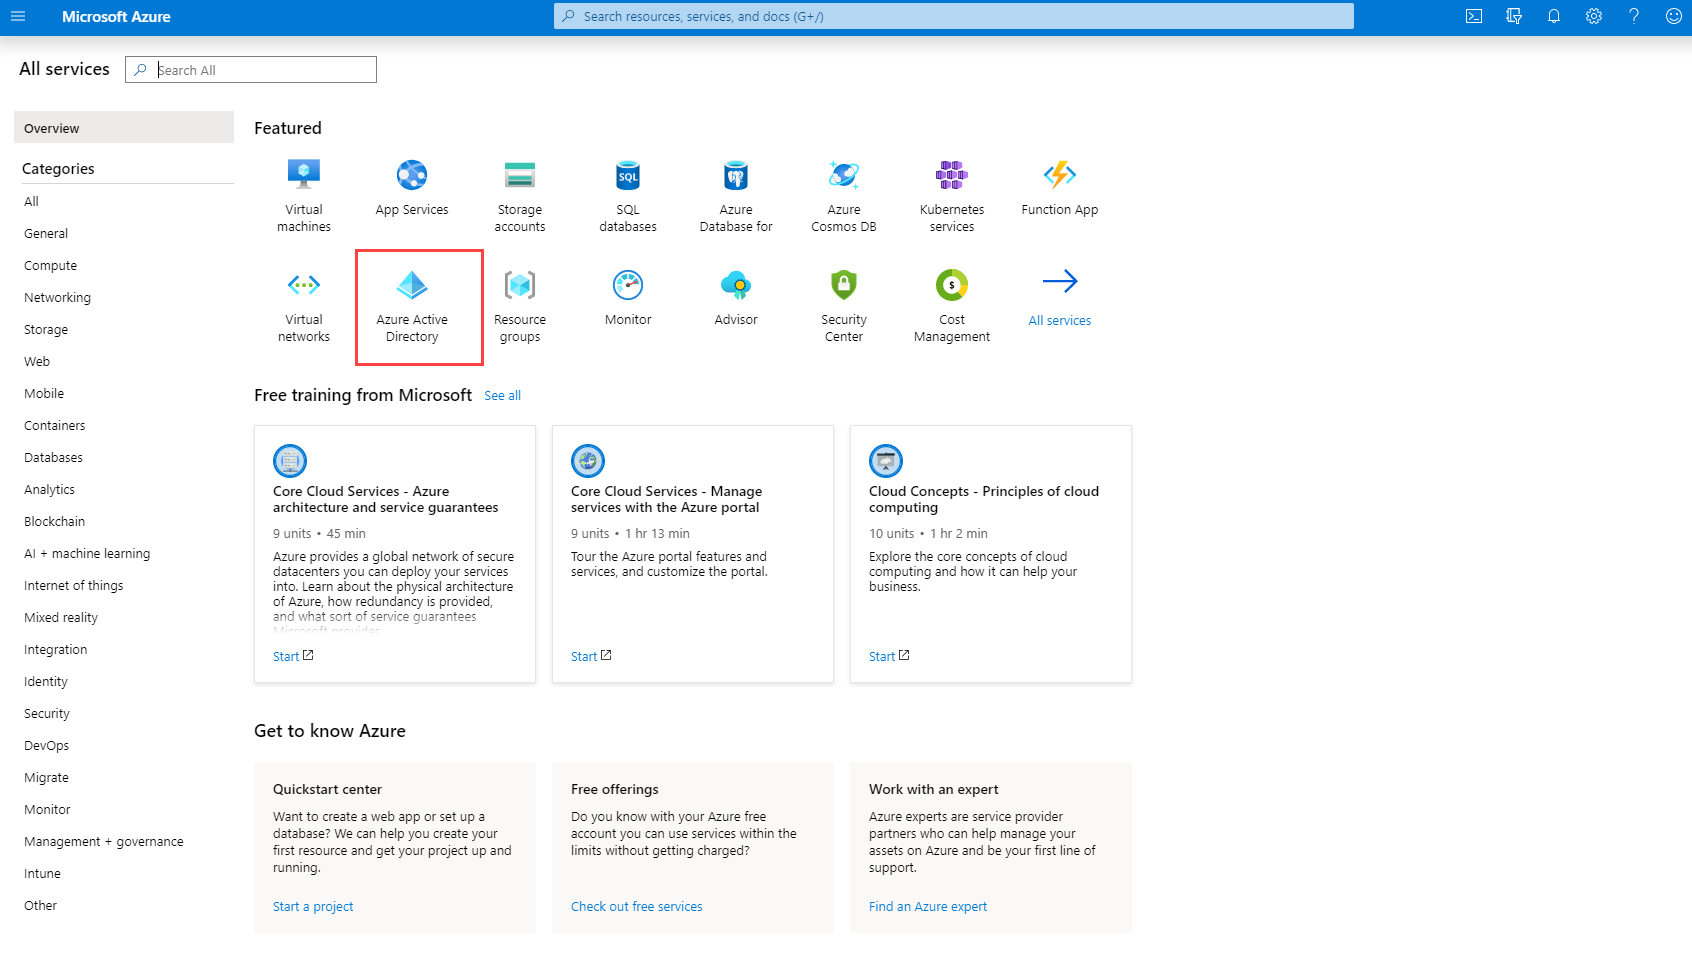
Select Azure Active Directory from the Dashboard or from the Portal Menu.

-
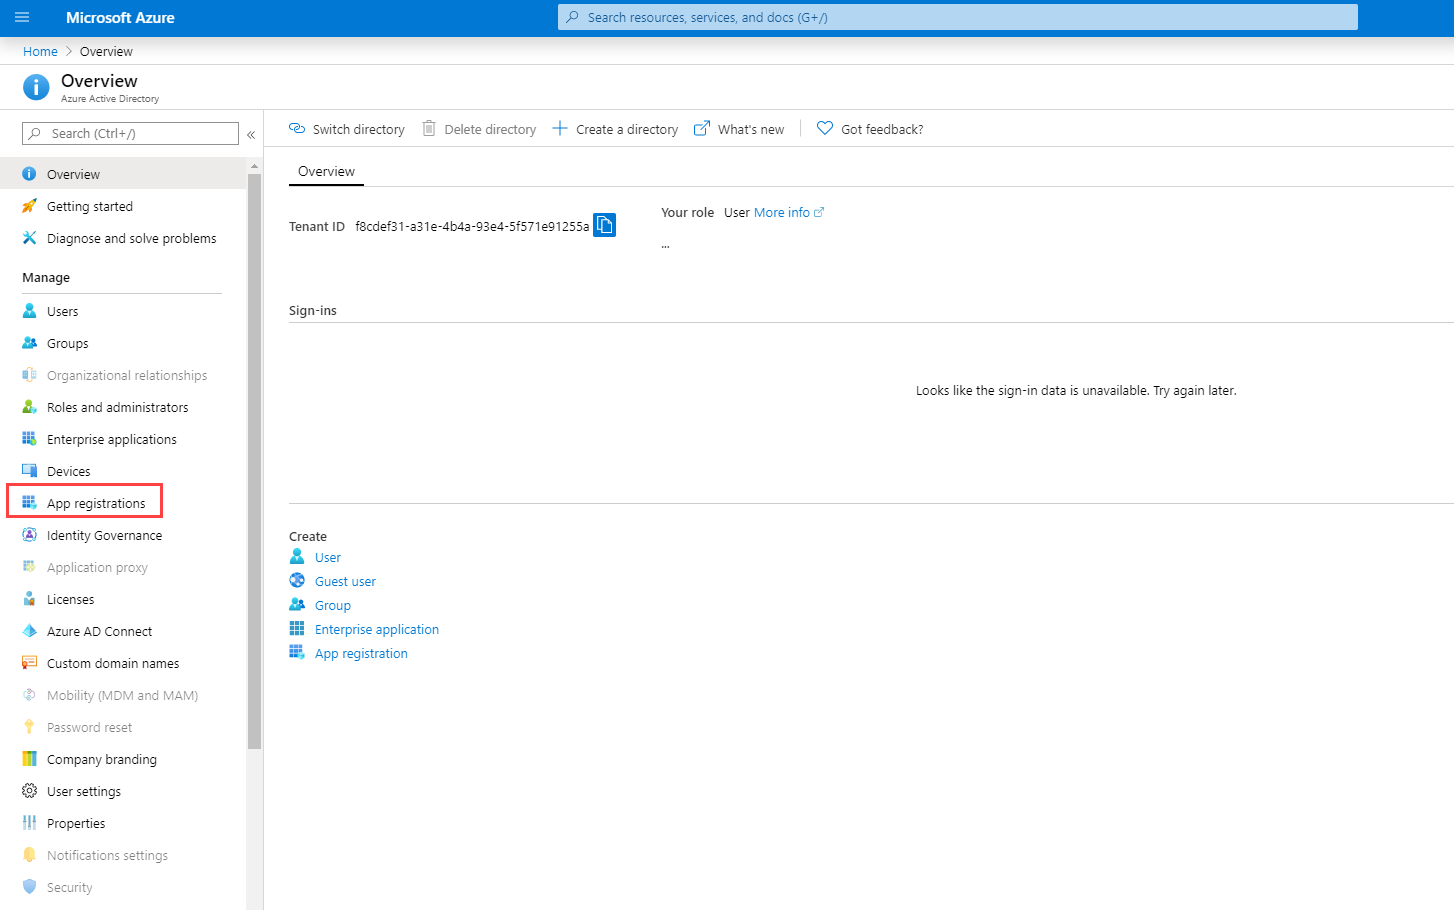
In the left menu, click App registrations.

-
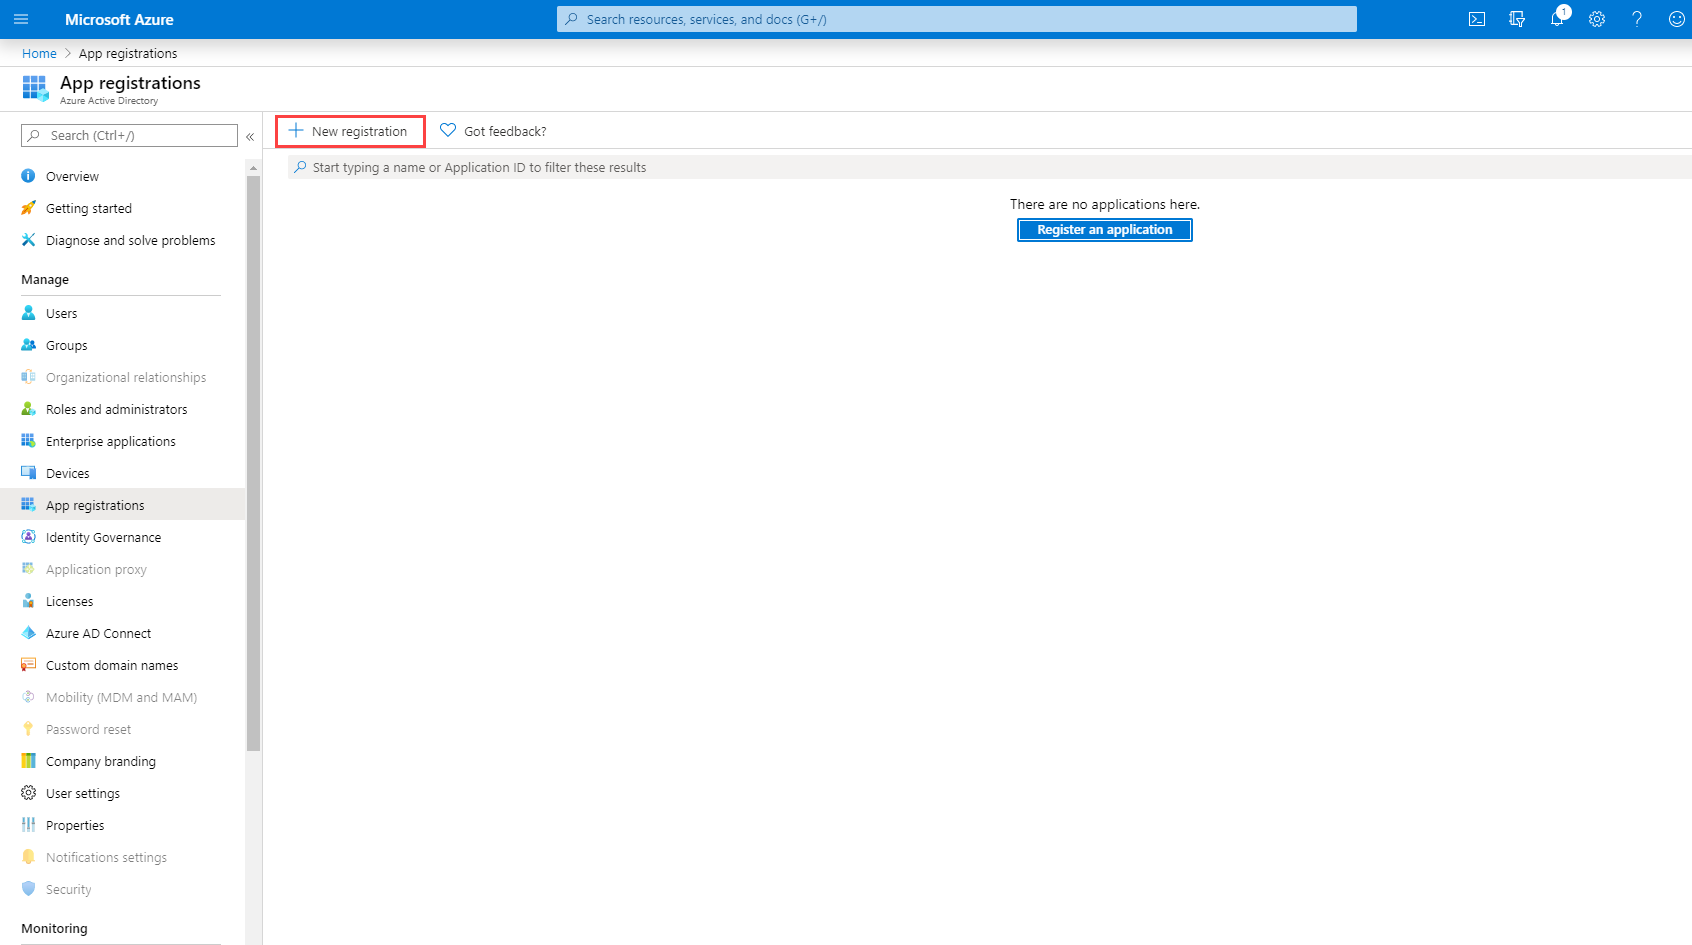
Click New registration on the App registrations page.

-
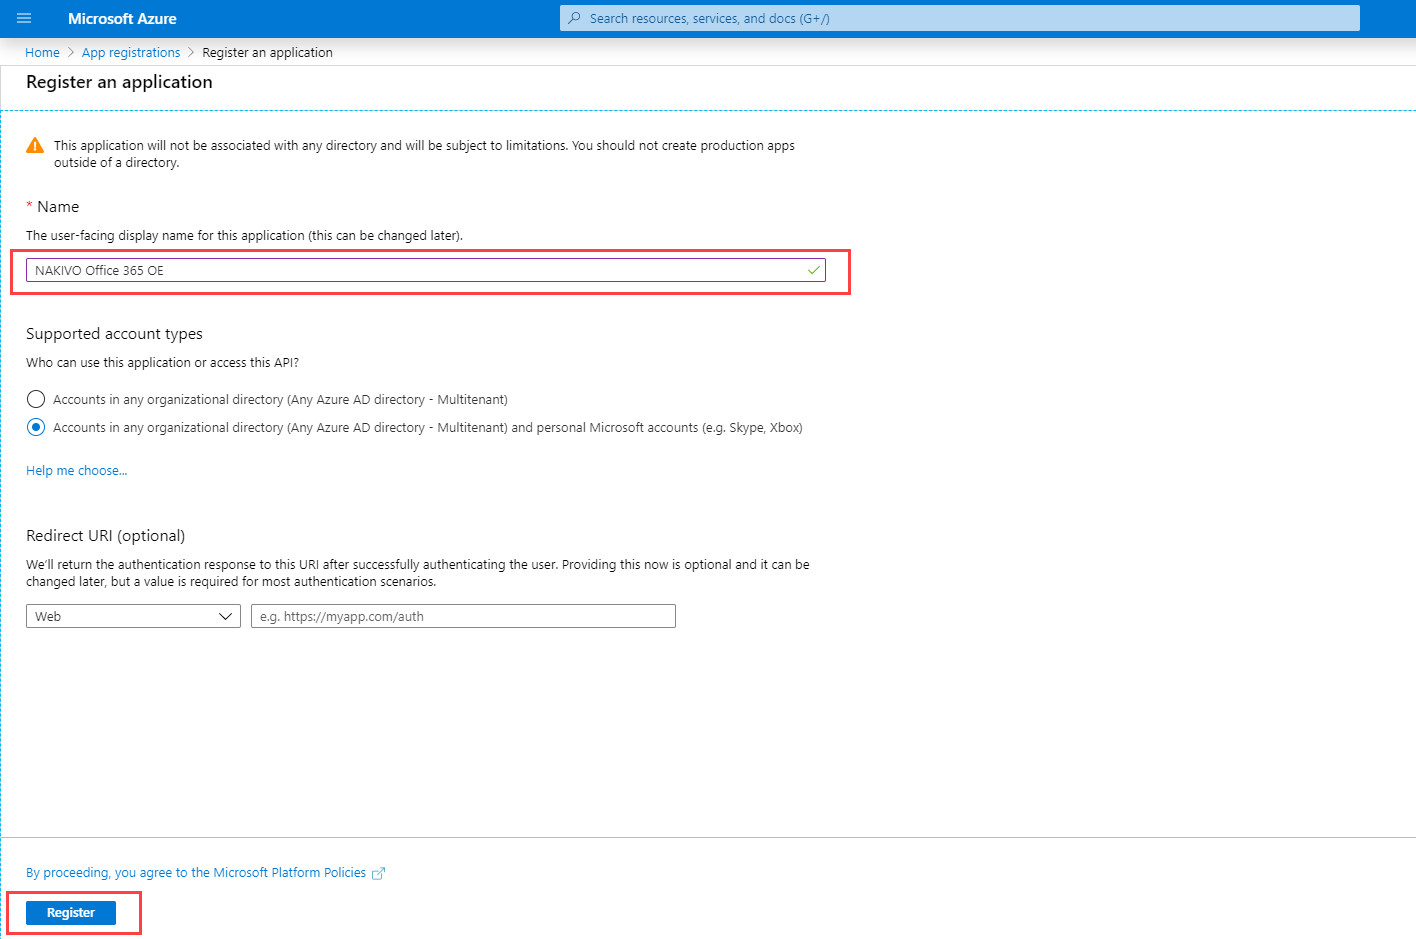
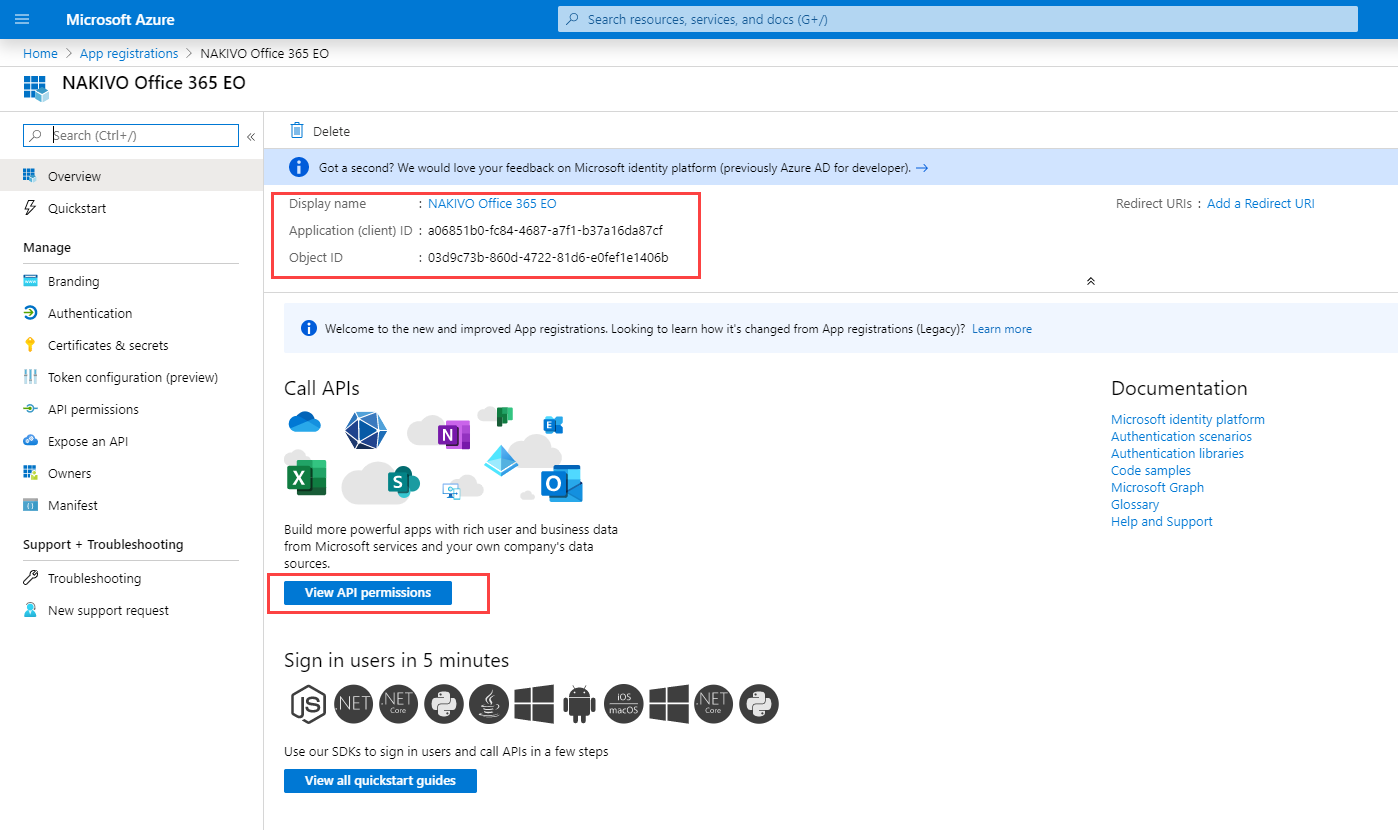
On the Register an application page, enter a name for the application and click Register.

-
Click View API Permissions to add the necessary permissions.
-
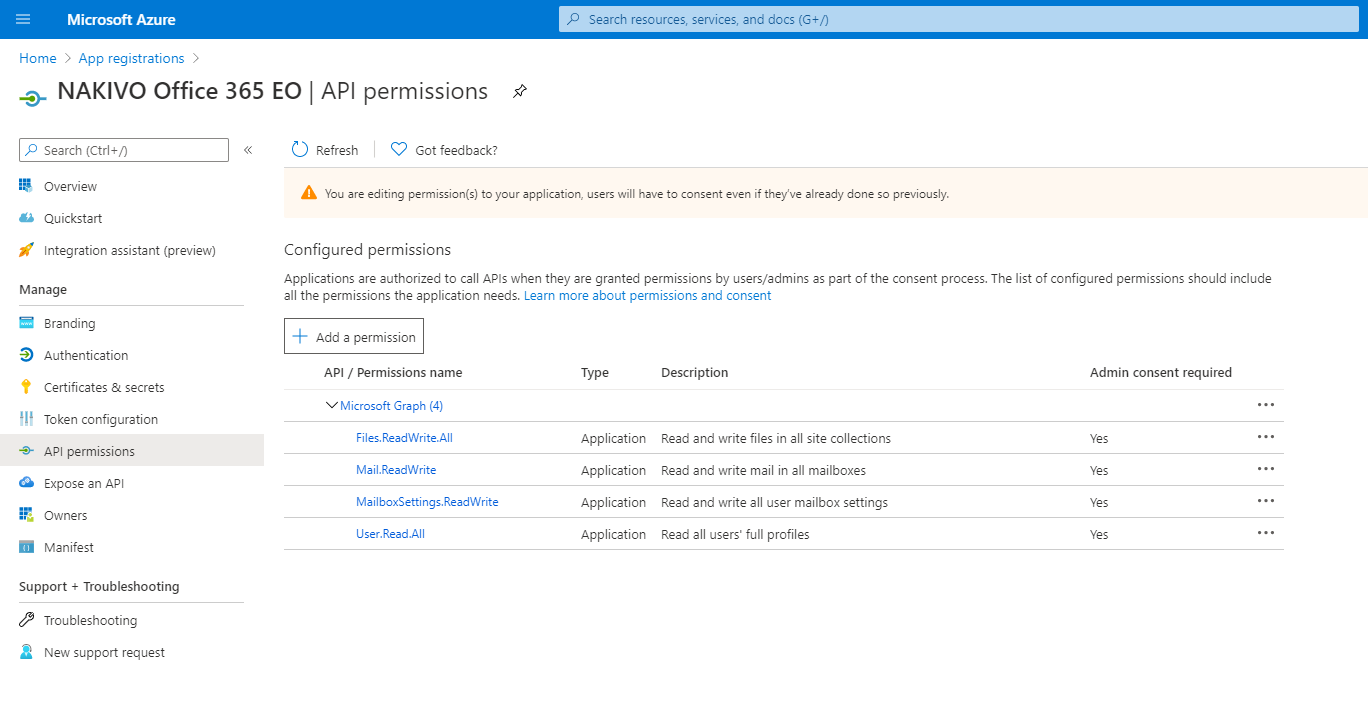
Click Microsoft Graph.
-
Click the Application permissions tab.
-
Provide the necessary API Permissions. Refer to Required API Permissions from Microsoft 365 for details.
Notes
-
To skip discovering Exchange Online mailboxes, OneDrives or SharePoint sites in inventory, disable the API permissions for the corresponding service.
-
If the necessary Microsoft Exchange Online/OneDrive/Shaepoint API permissions are not provided, the corresponding service will not be discovered by NAKIVO Backup & Replication.
-
If the necessary API permissions for Microsoft Exchange Online contact and calendar items are not provided, the items will not be supported for backup and recovery operations.
-
To recover messages and contacts containing a lot of content, you also need to enable full_access_as_app for Office 365 Exchange Online in APIs my organization uses.
-
-
Click Update Permissions.
-
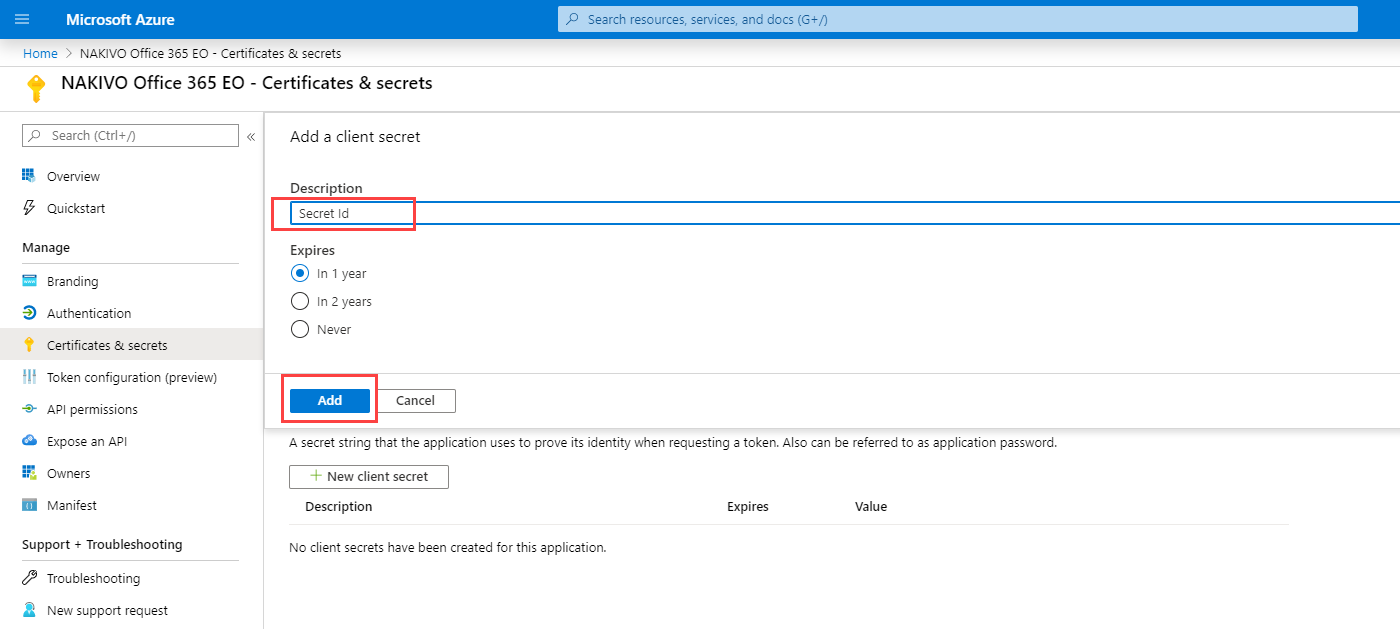
Click Certificates & secrets > New client secret to create a new client secret for your app.
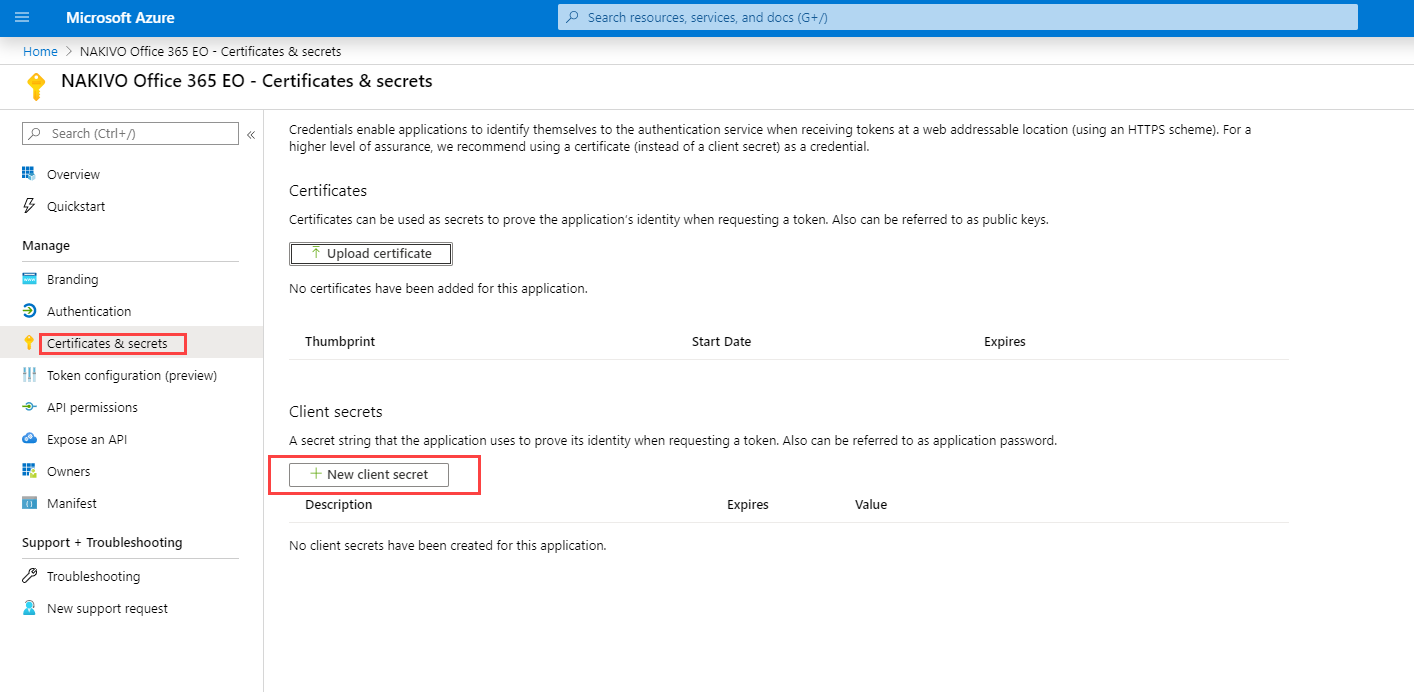
-
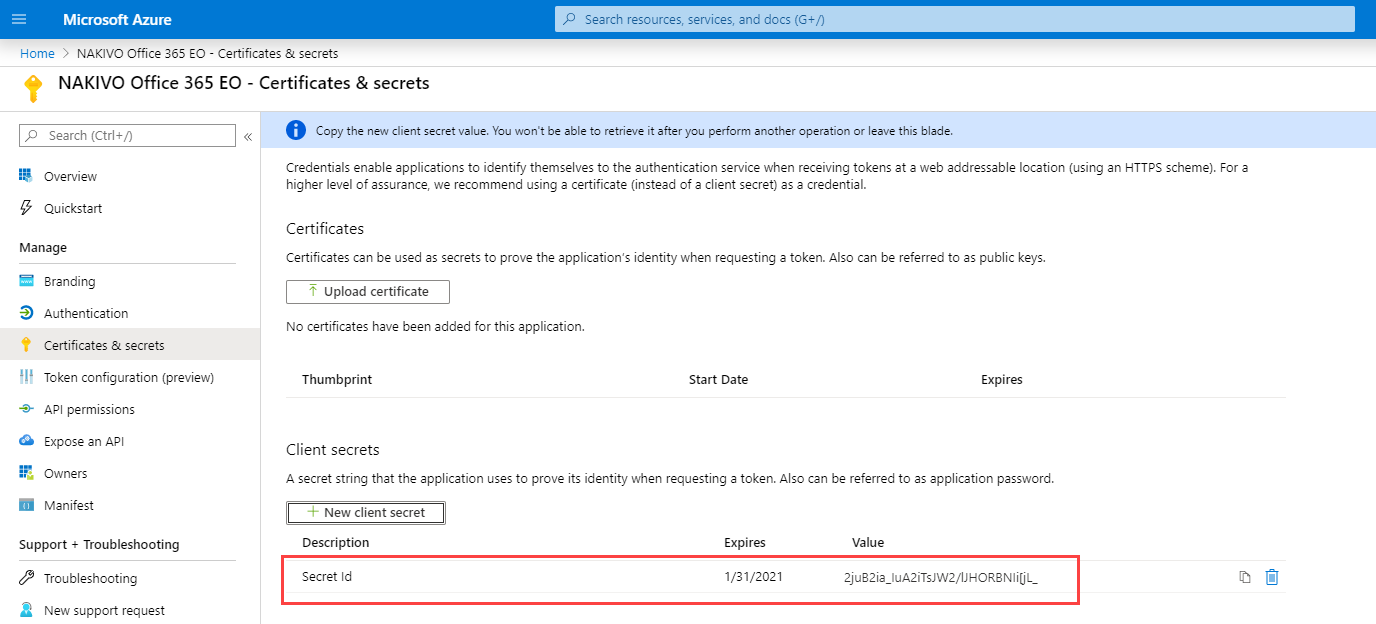
Enter a description for the client secret, select the expiration period, and click Add.

The new Client secret is generated.