Replication Job Wizard for Hyper-V: Destination
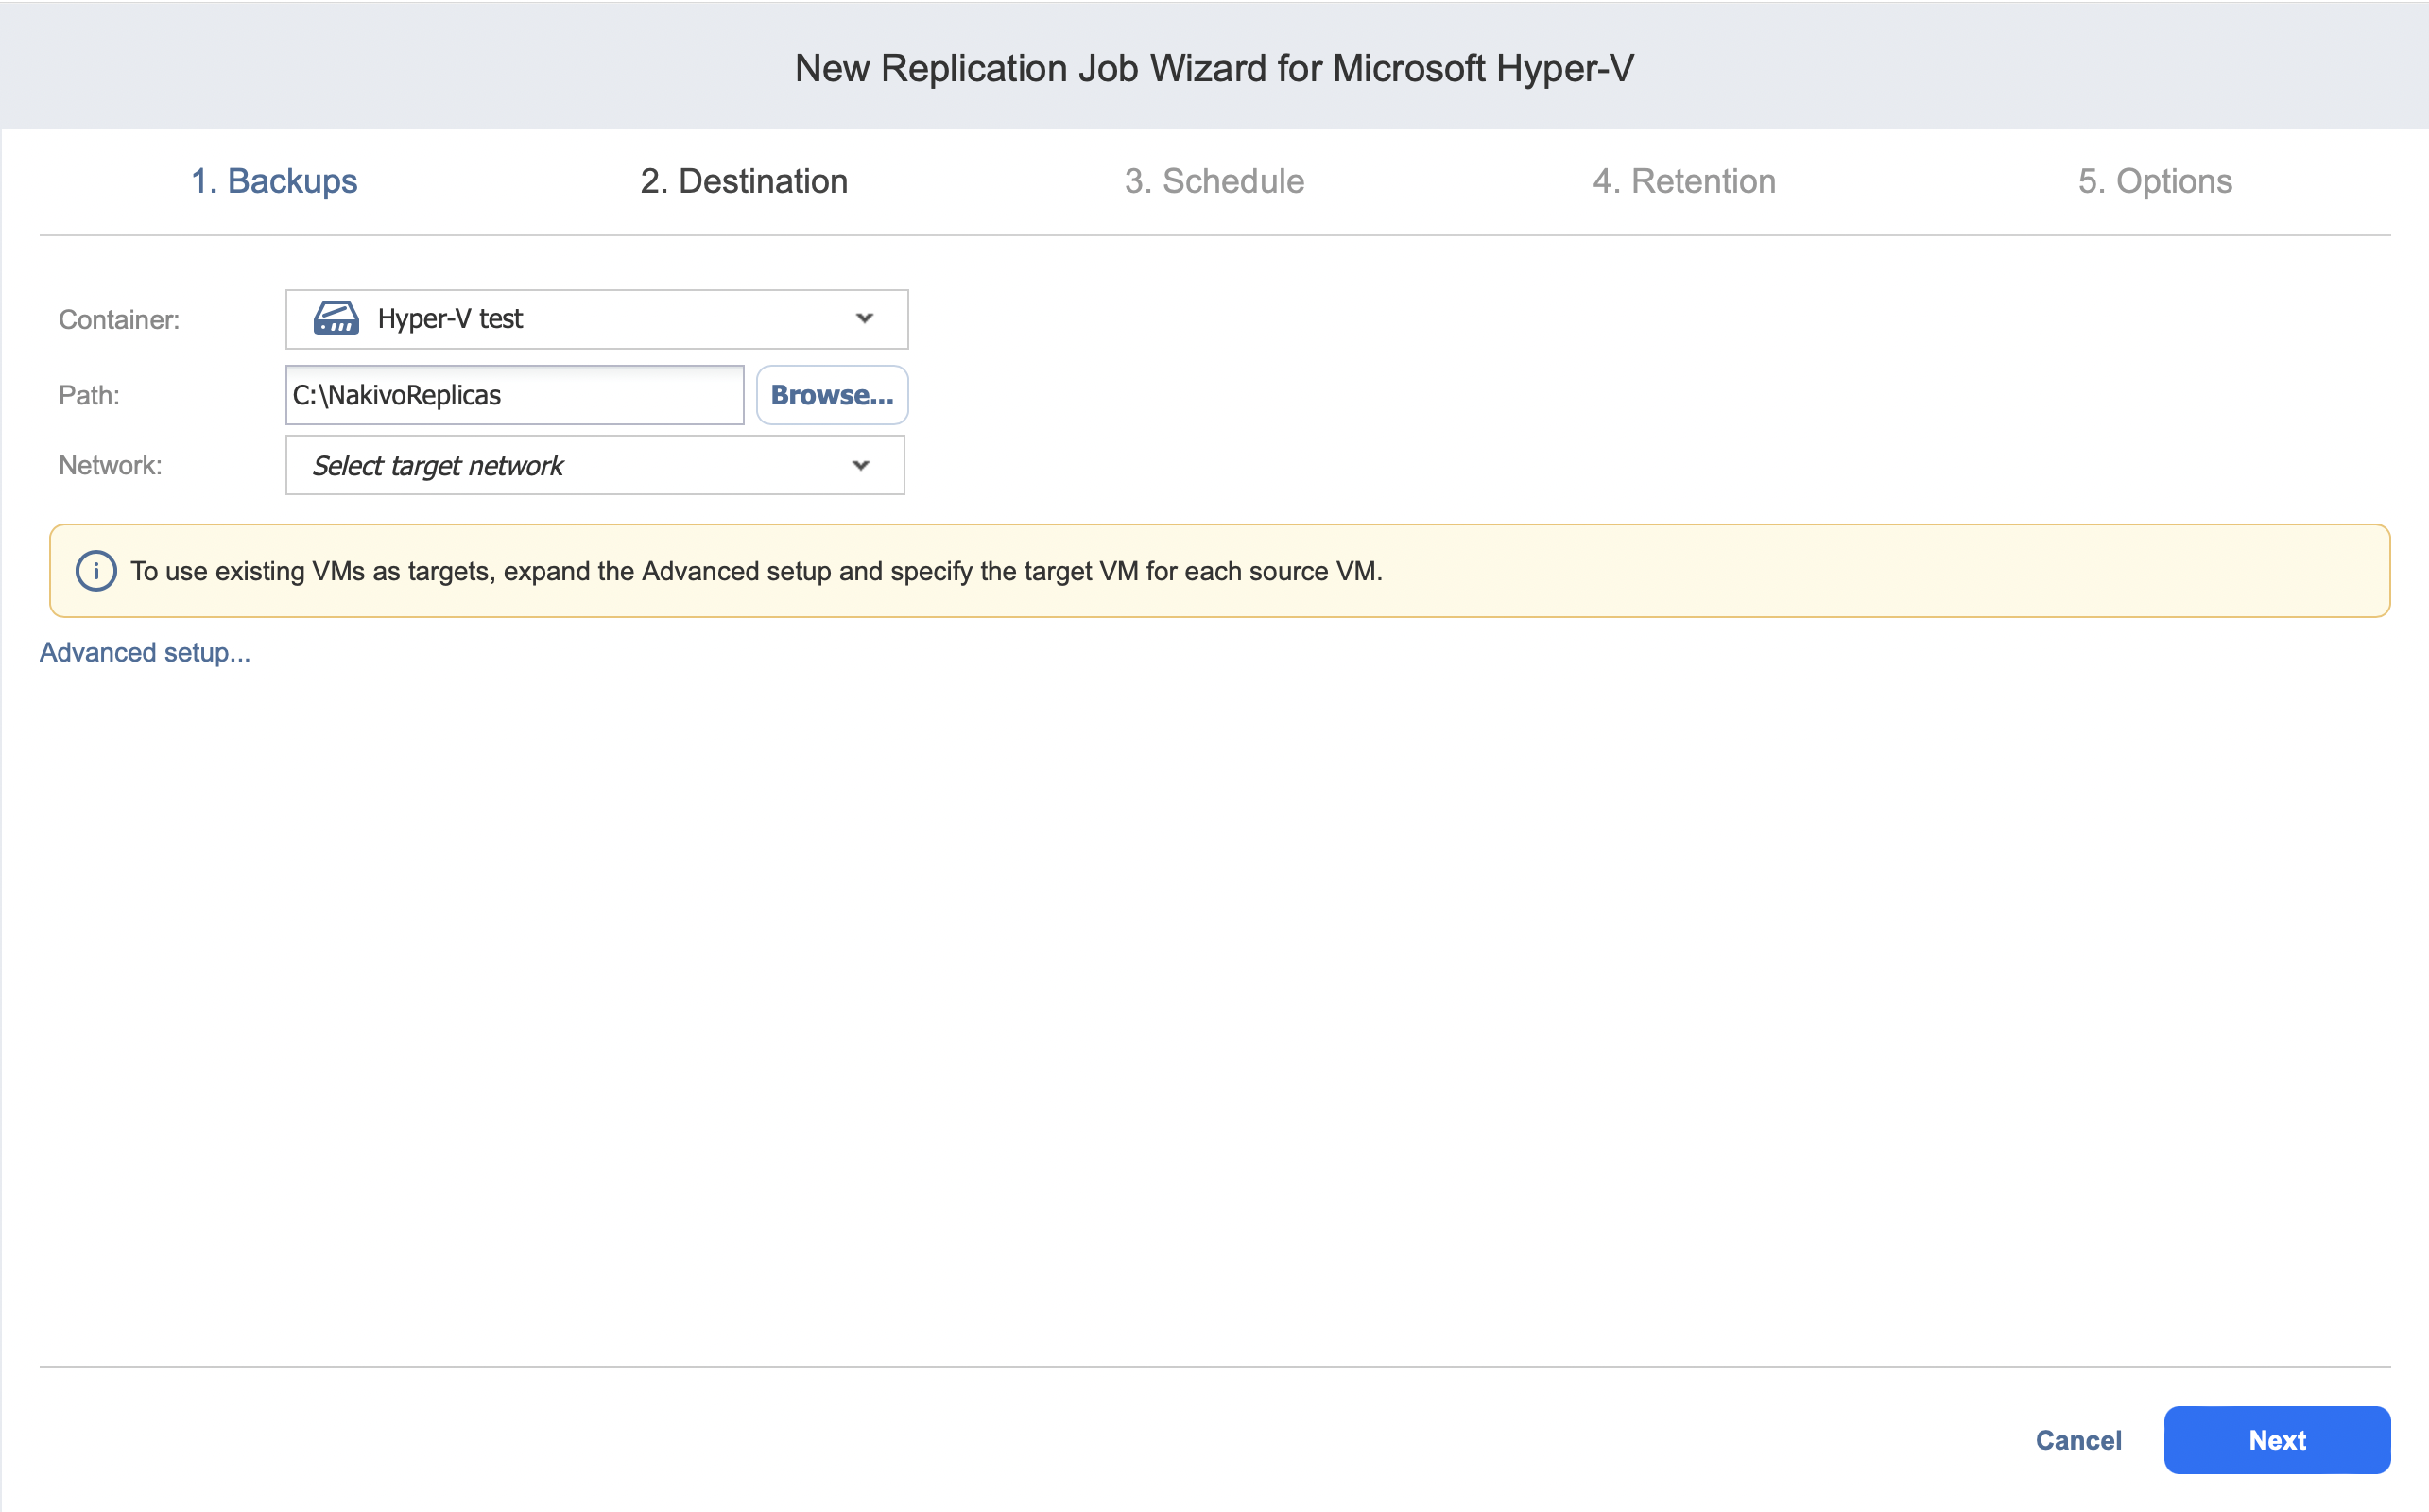
On the Destination page, select a location for your Hyper-V replicas.
Setting the Same Host and Path for All Replicas
To replicate all VMs to the same server and location, and to connect all replicas to the same network:
-
Choose a server from the Container drop-down list.
-
Enter a path to the location where you want to store VM replicas in the Path field. Optionally, use the Browse button to navigate to the path. It can be either a local or shared path.
Notes
To connect to a shared path successfully, make sure that the following requirements are met:-
The shared path is created with the same credentials as the corresponding Hyper-V container. See Adding Microsoft Hyper-V Servers for details on adding Hyper-V containers to the inventory of NAKIVO Backup & Replication.
-
The logon session in which you created the shared path has not ended. As a workaround, create a symbolic link to the shared path from the Hyper-V container. Refer to Step 7 in High Availability of NAKIVO Backup & Replication for details.
-
-
If you are creating a Replication job from an existing Backup job, select the target network from the Network drop-down list. For more details, see Replication Job Wizard for Hyper-V: Source.

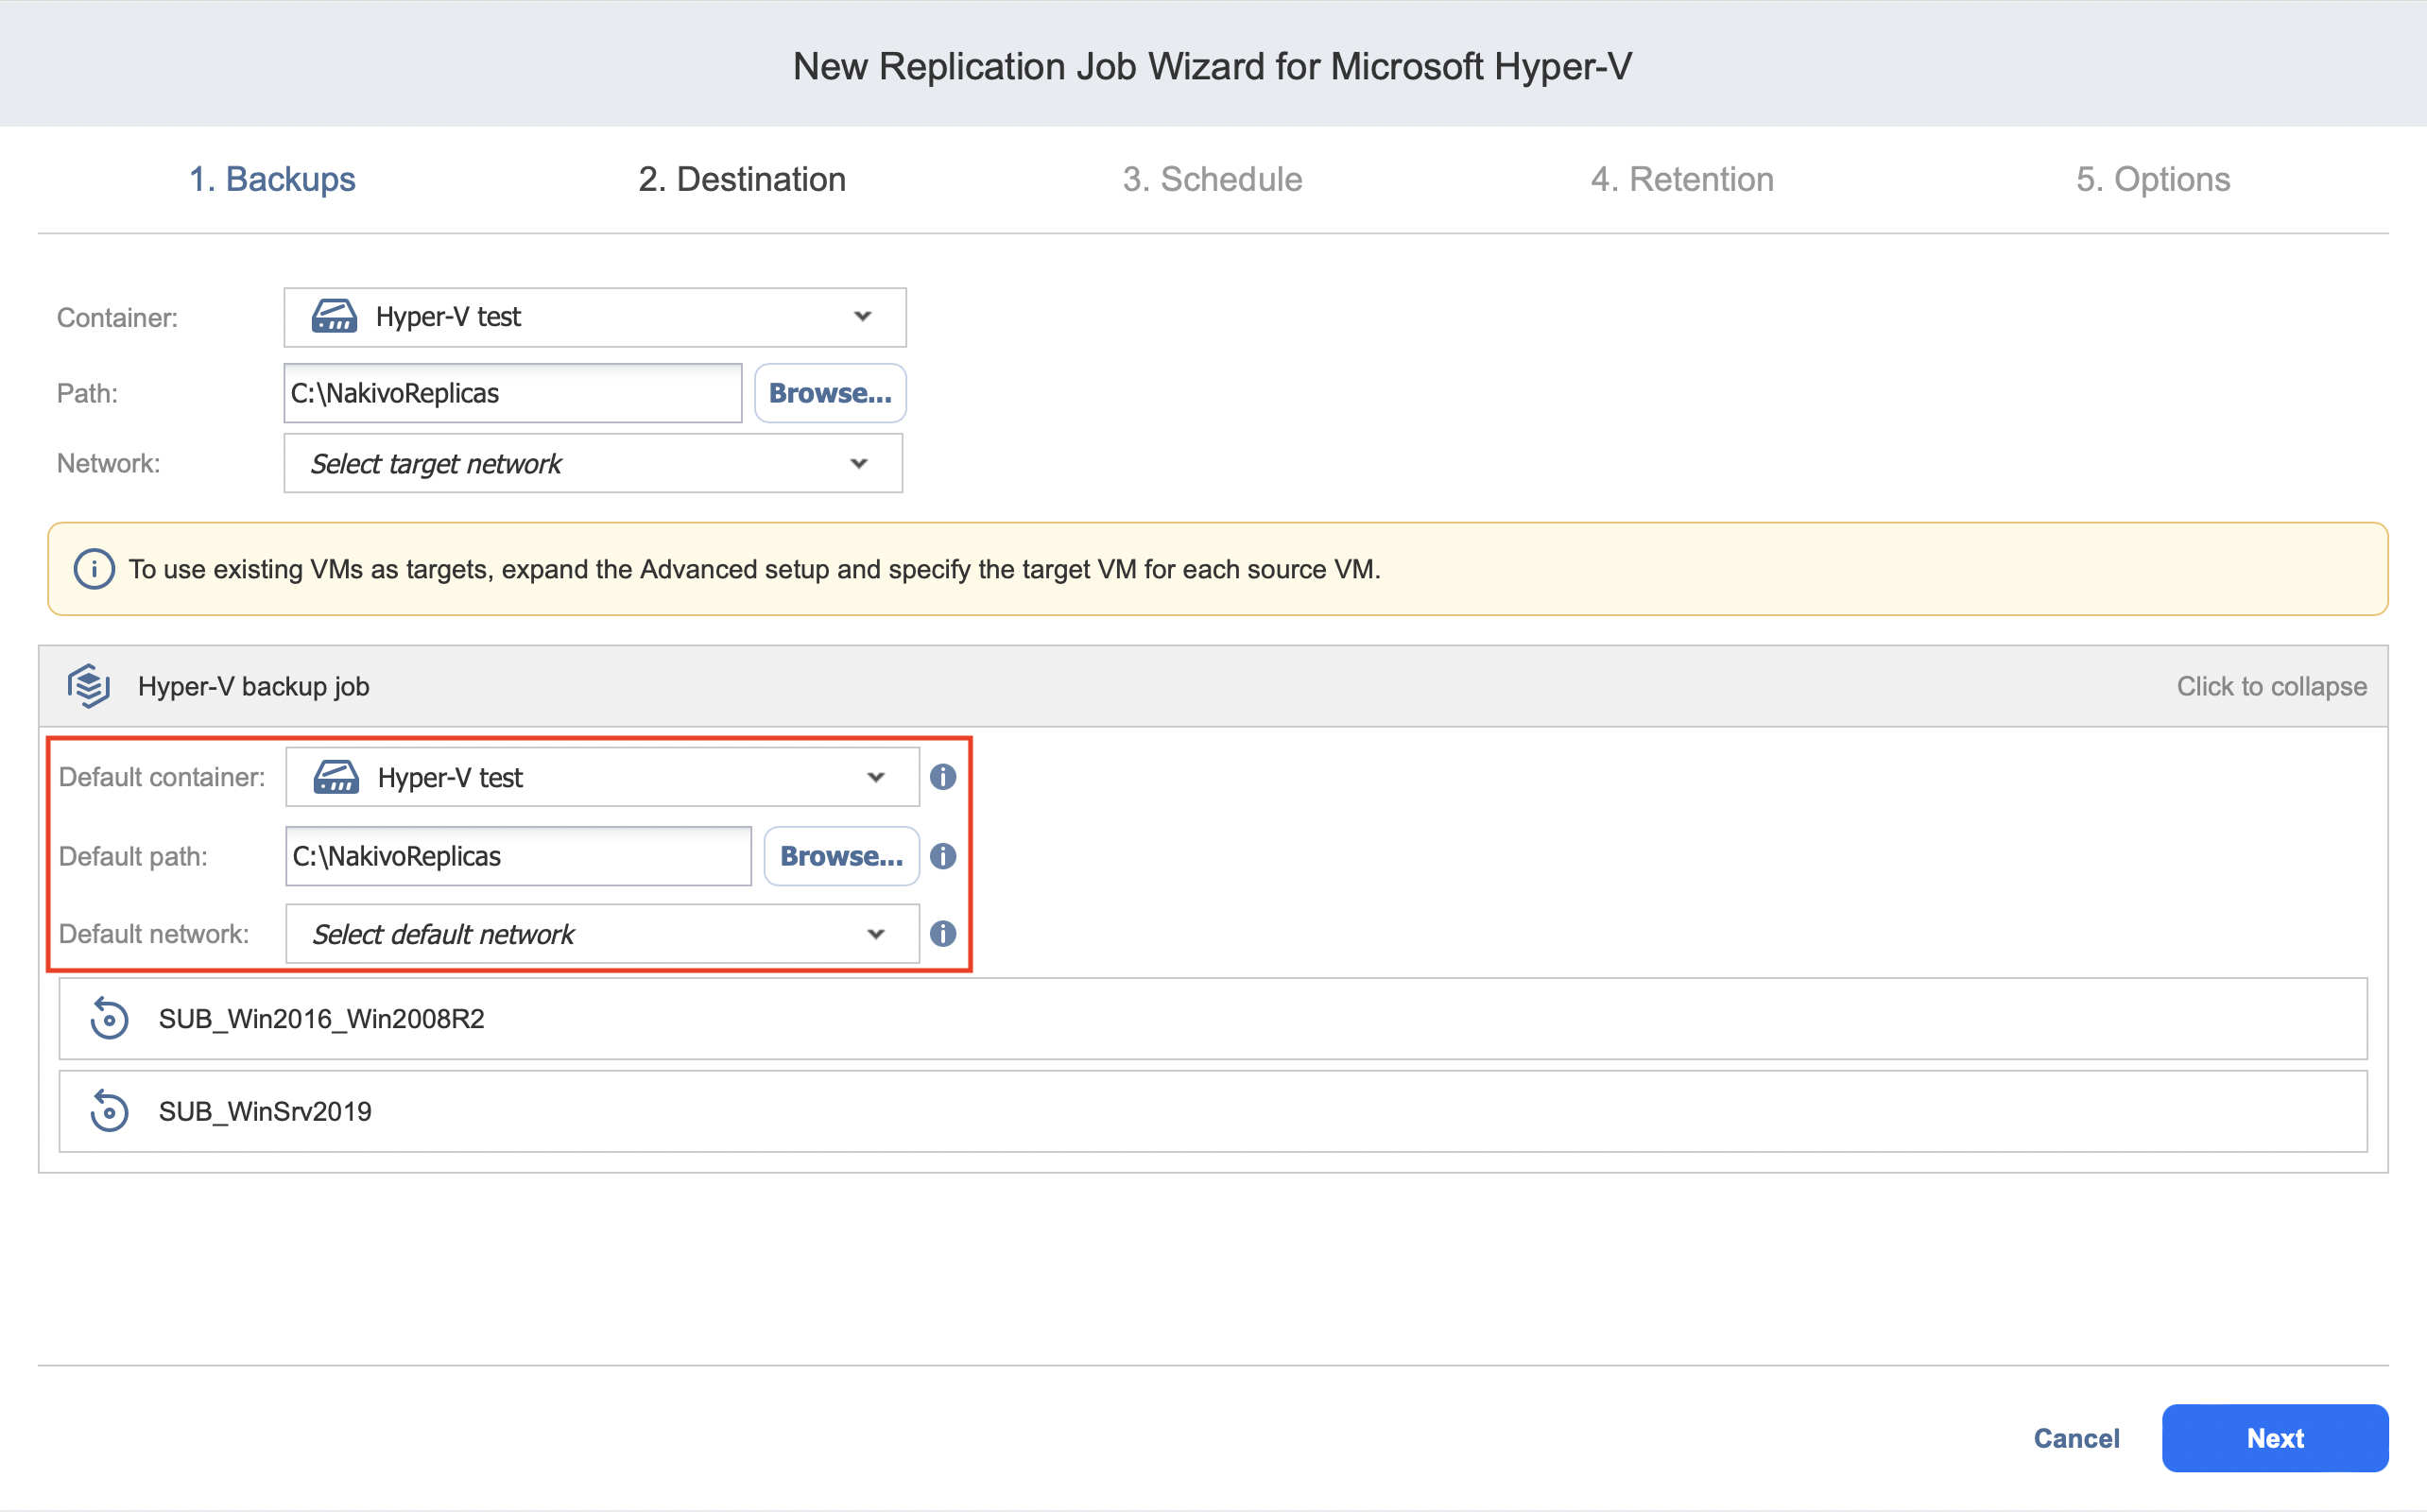
Setting the Default Destination for Replicas
If you have chosen a host, cluster, folder, or a resource pool as a source for your replication job on the Source wizard page, you can set a default container, datastore, and VM folder for replicas. To do this:
-
Click Advanced setup and then click on the name of the chosen host, cluster, folder, or resource pool.
-
Choose a Default container.
-
If you have chosen a Backup job on the Source page, you can choose a Default Network.

Setting Different Options for Replicas
To specify different replication options for VMs, follow the steps below:
-
Click Advanced setup.
-
Set a target server, path, and network for each VM.

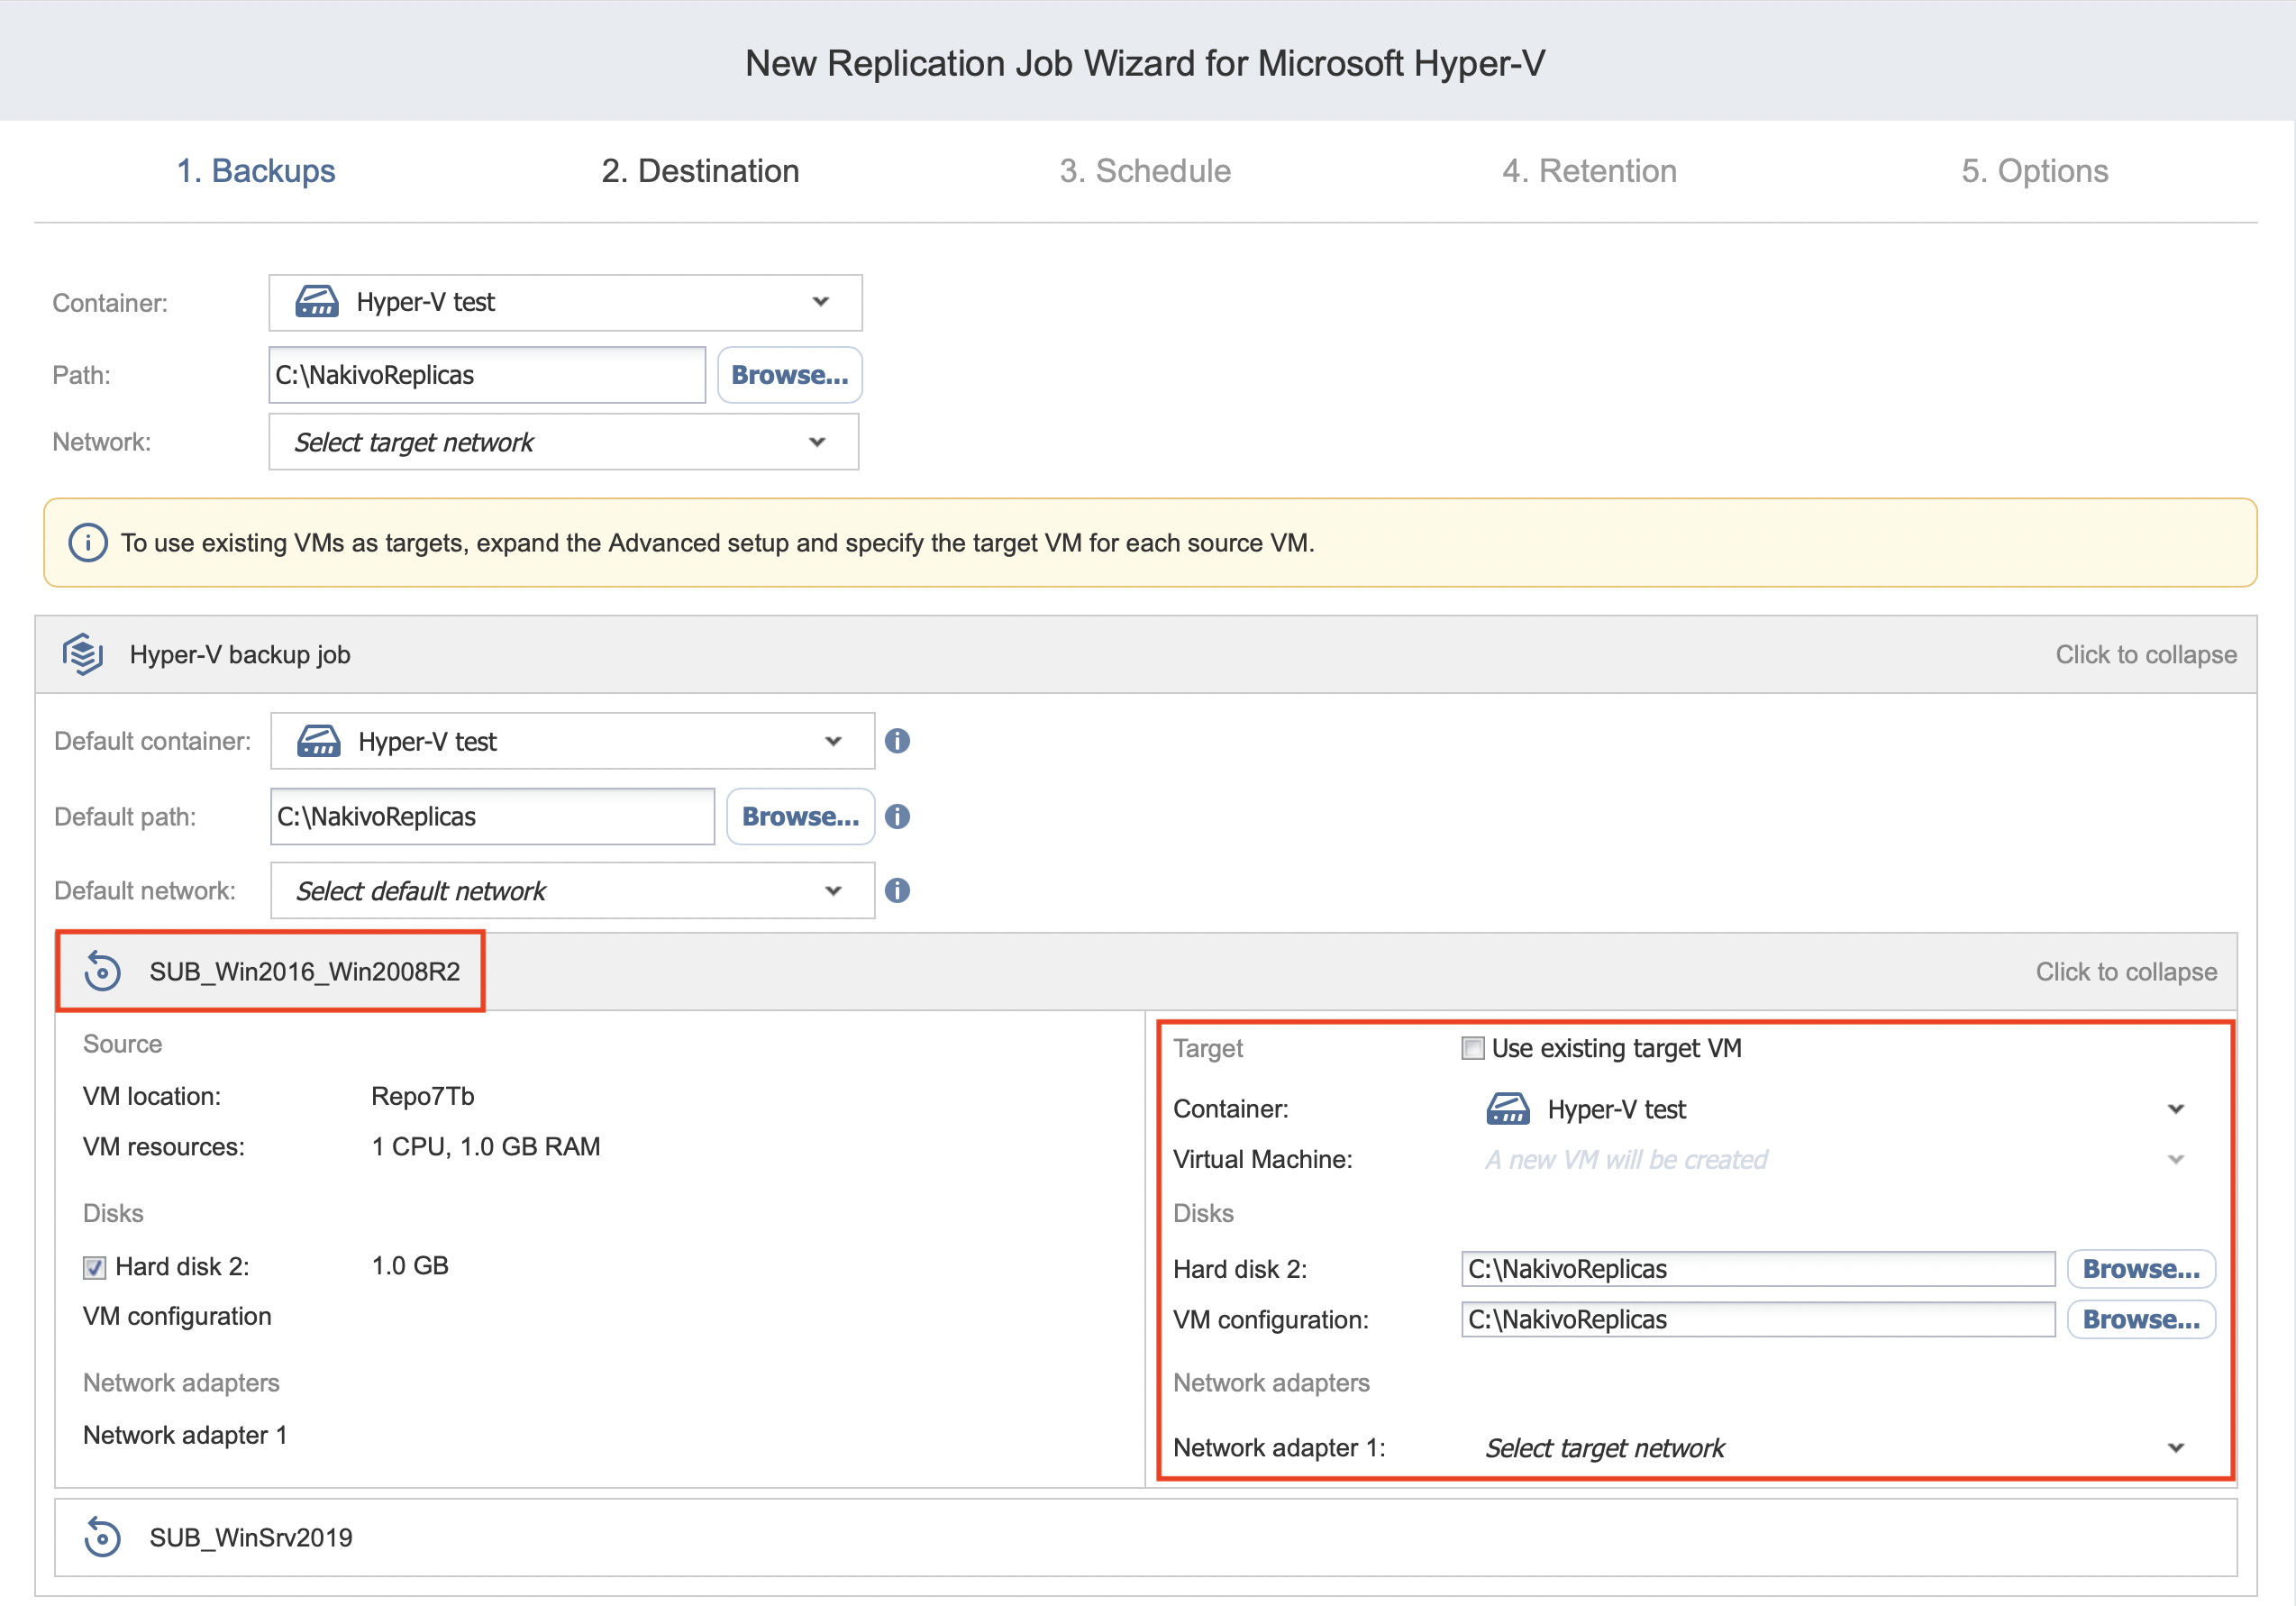
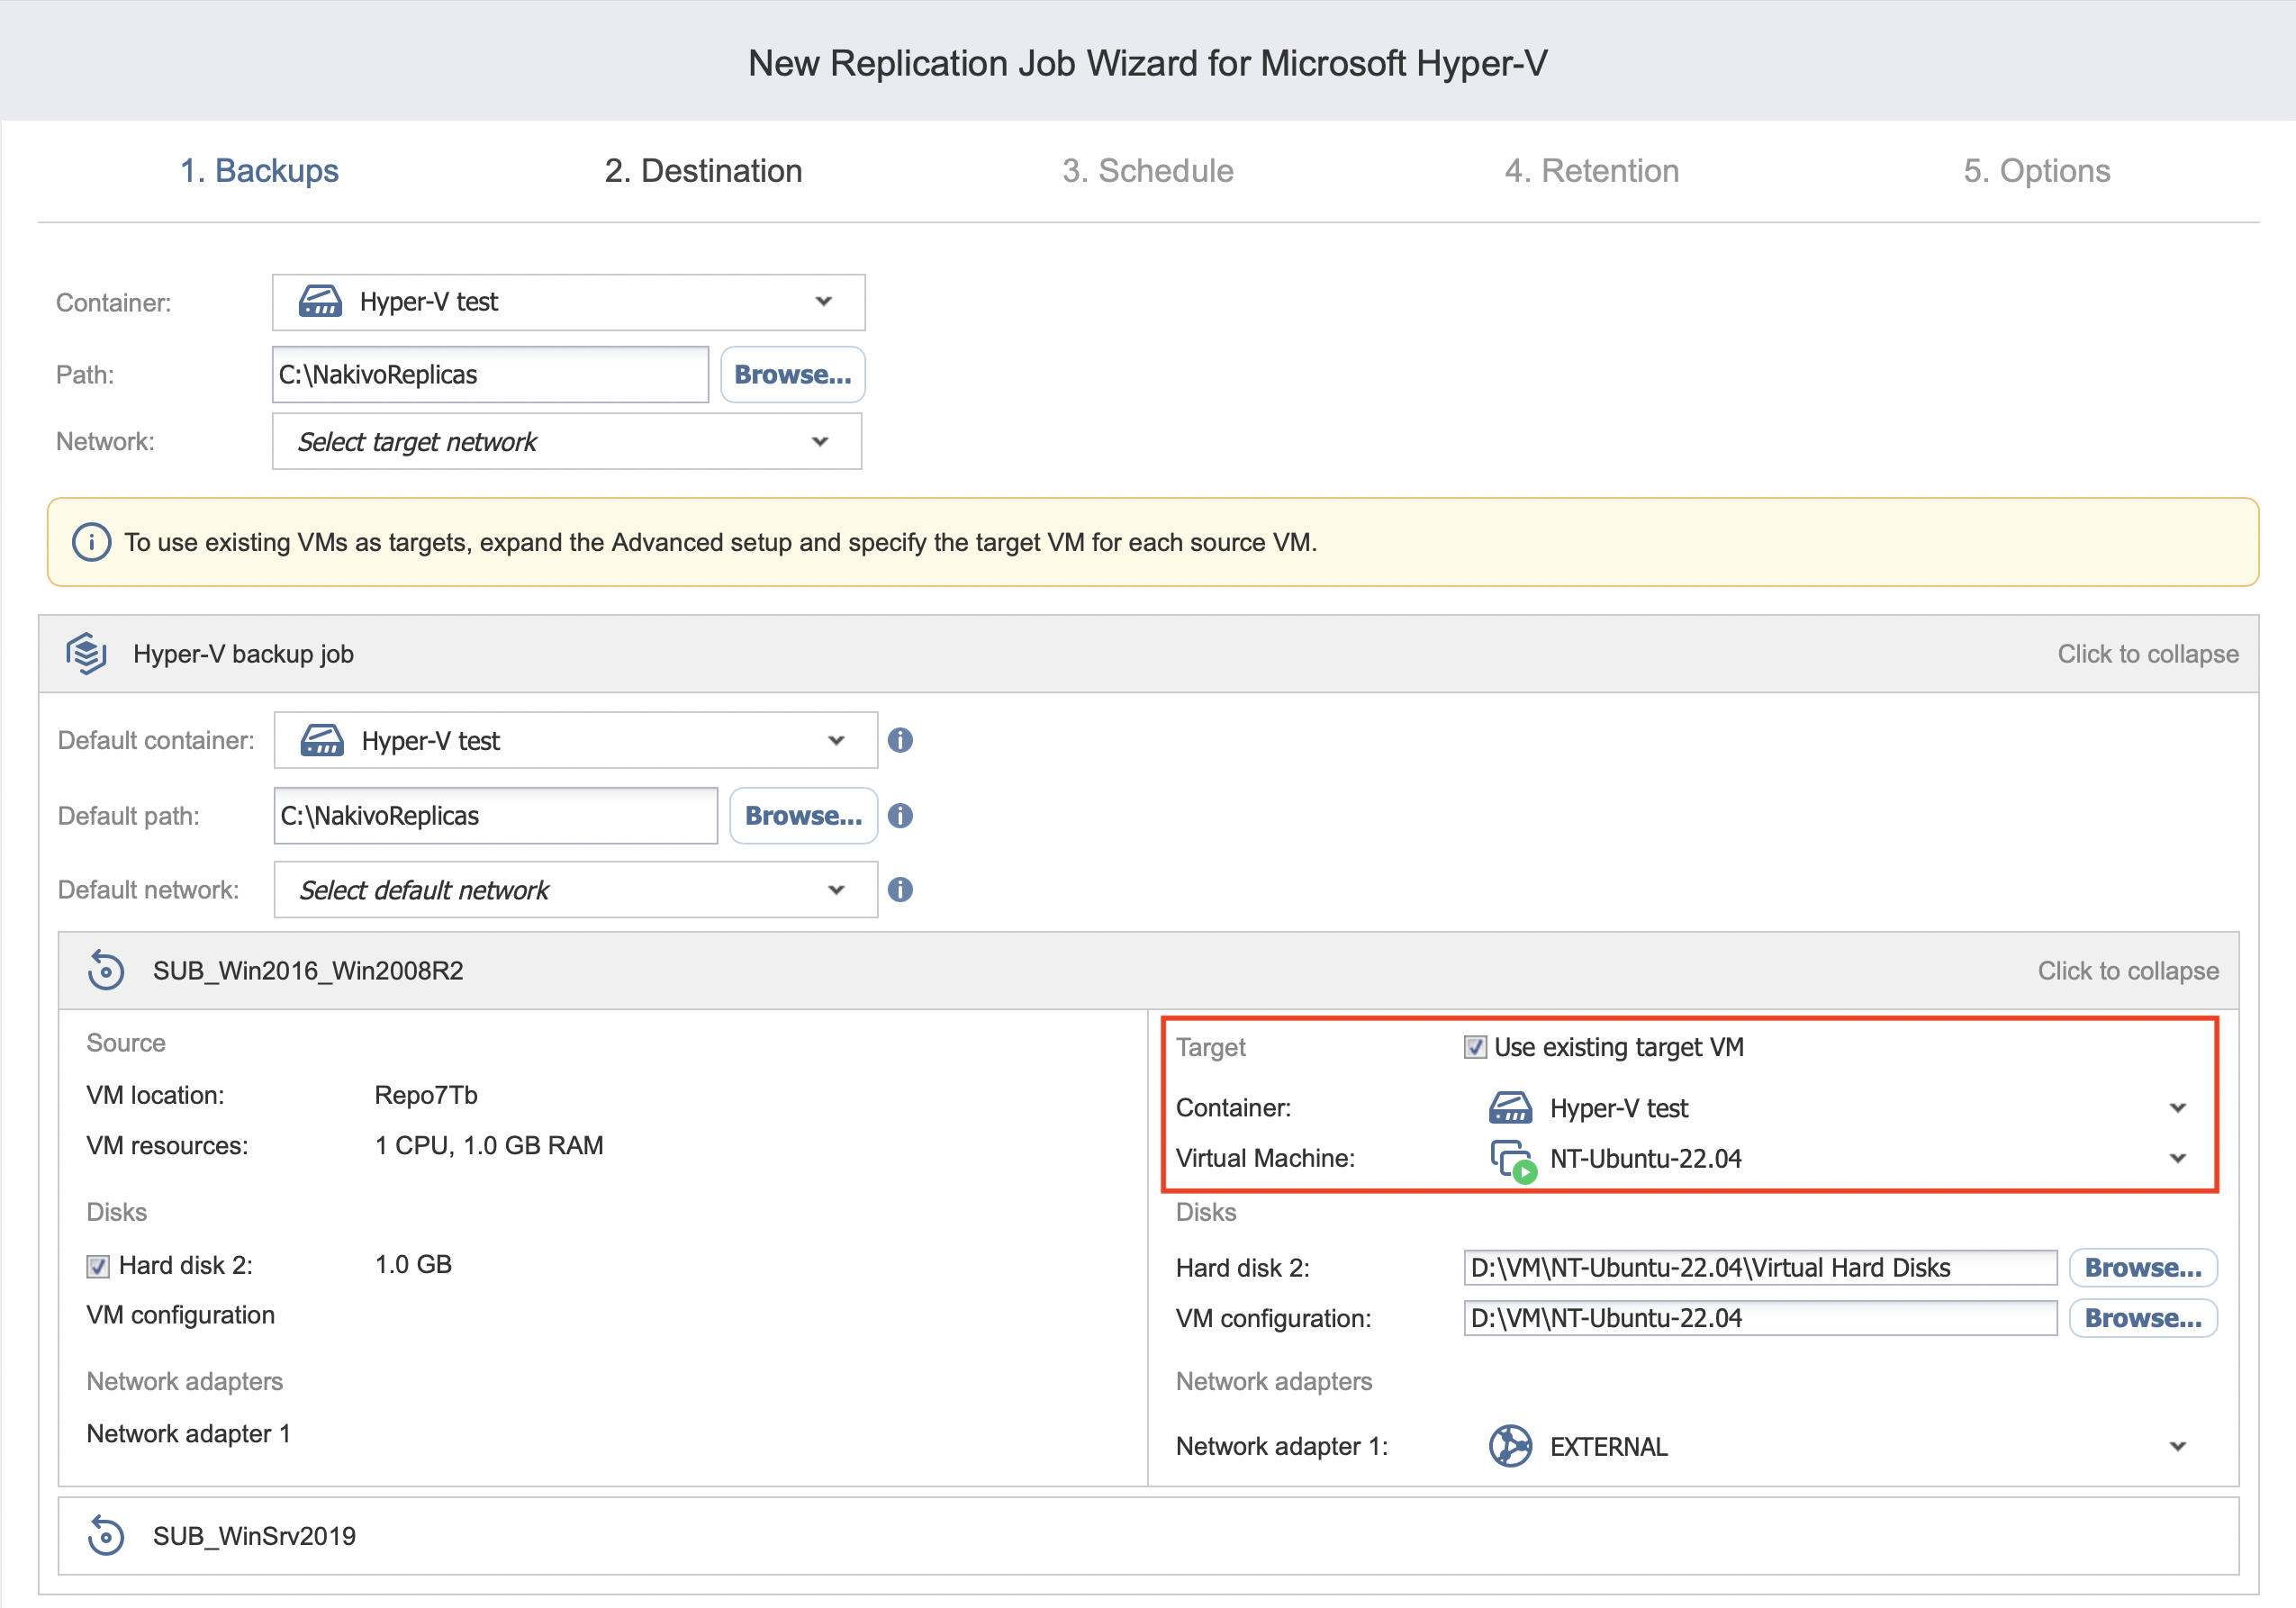
Mapping Source VMs to Existing Replicas
If you want to perform staged replication or if you lose the replication job (due to accidental job deletion or because you need to recreate jobs in a new copy of the product), you can map source VMs to existing replicas to avoid running full VM replication again.
To map source VMs to existing VMs, follow the steps below:
-
Click Advanced setup.
-
Select the Use existing target VM option.
-
From the Virtual Machine drop-down list, select the VM that should be used as a target for replication.

When you run the job, the product analyzes the target VM you have selected, determines how it is different from the source VM, and transfers only the differential data. VM replication mapping can be a time-consuming process that can be equal to the time required to create a full VM replication. After job completion, a new recovery point is created and existing recovery points are not changed or overwritten.
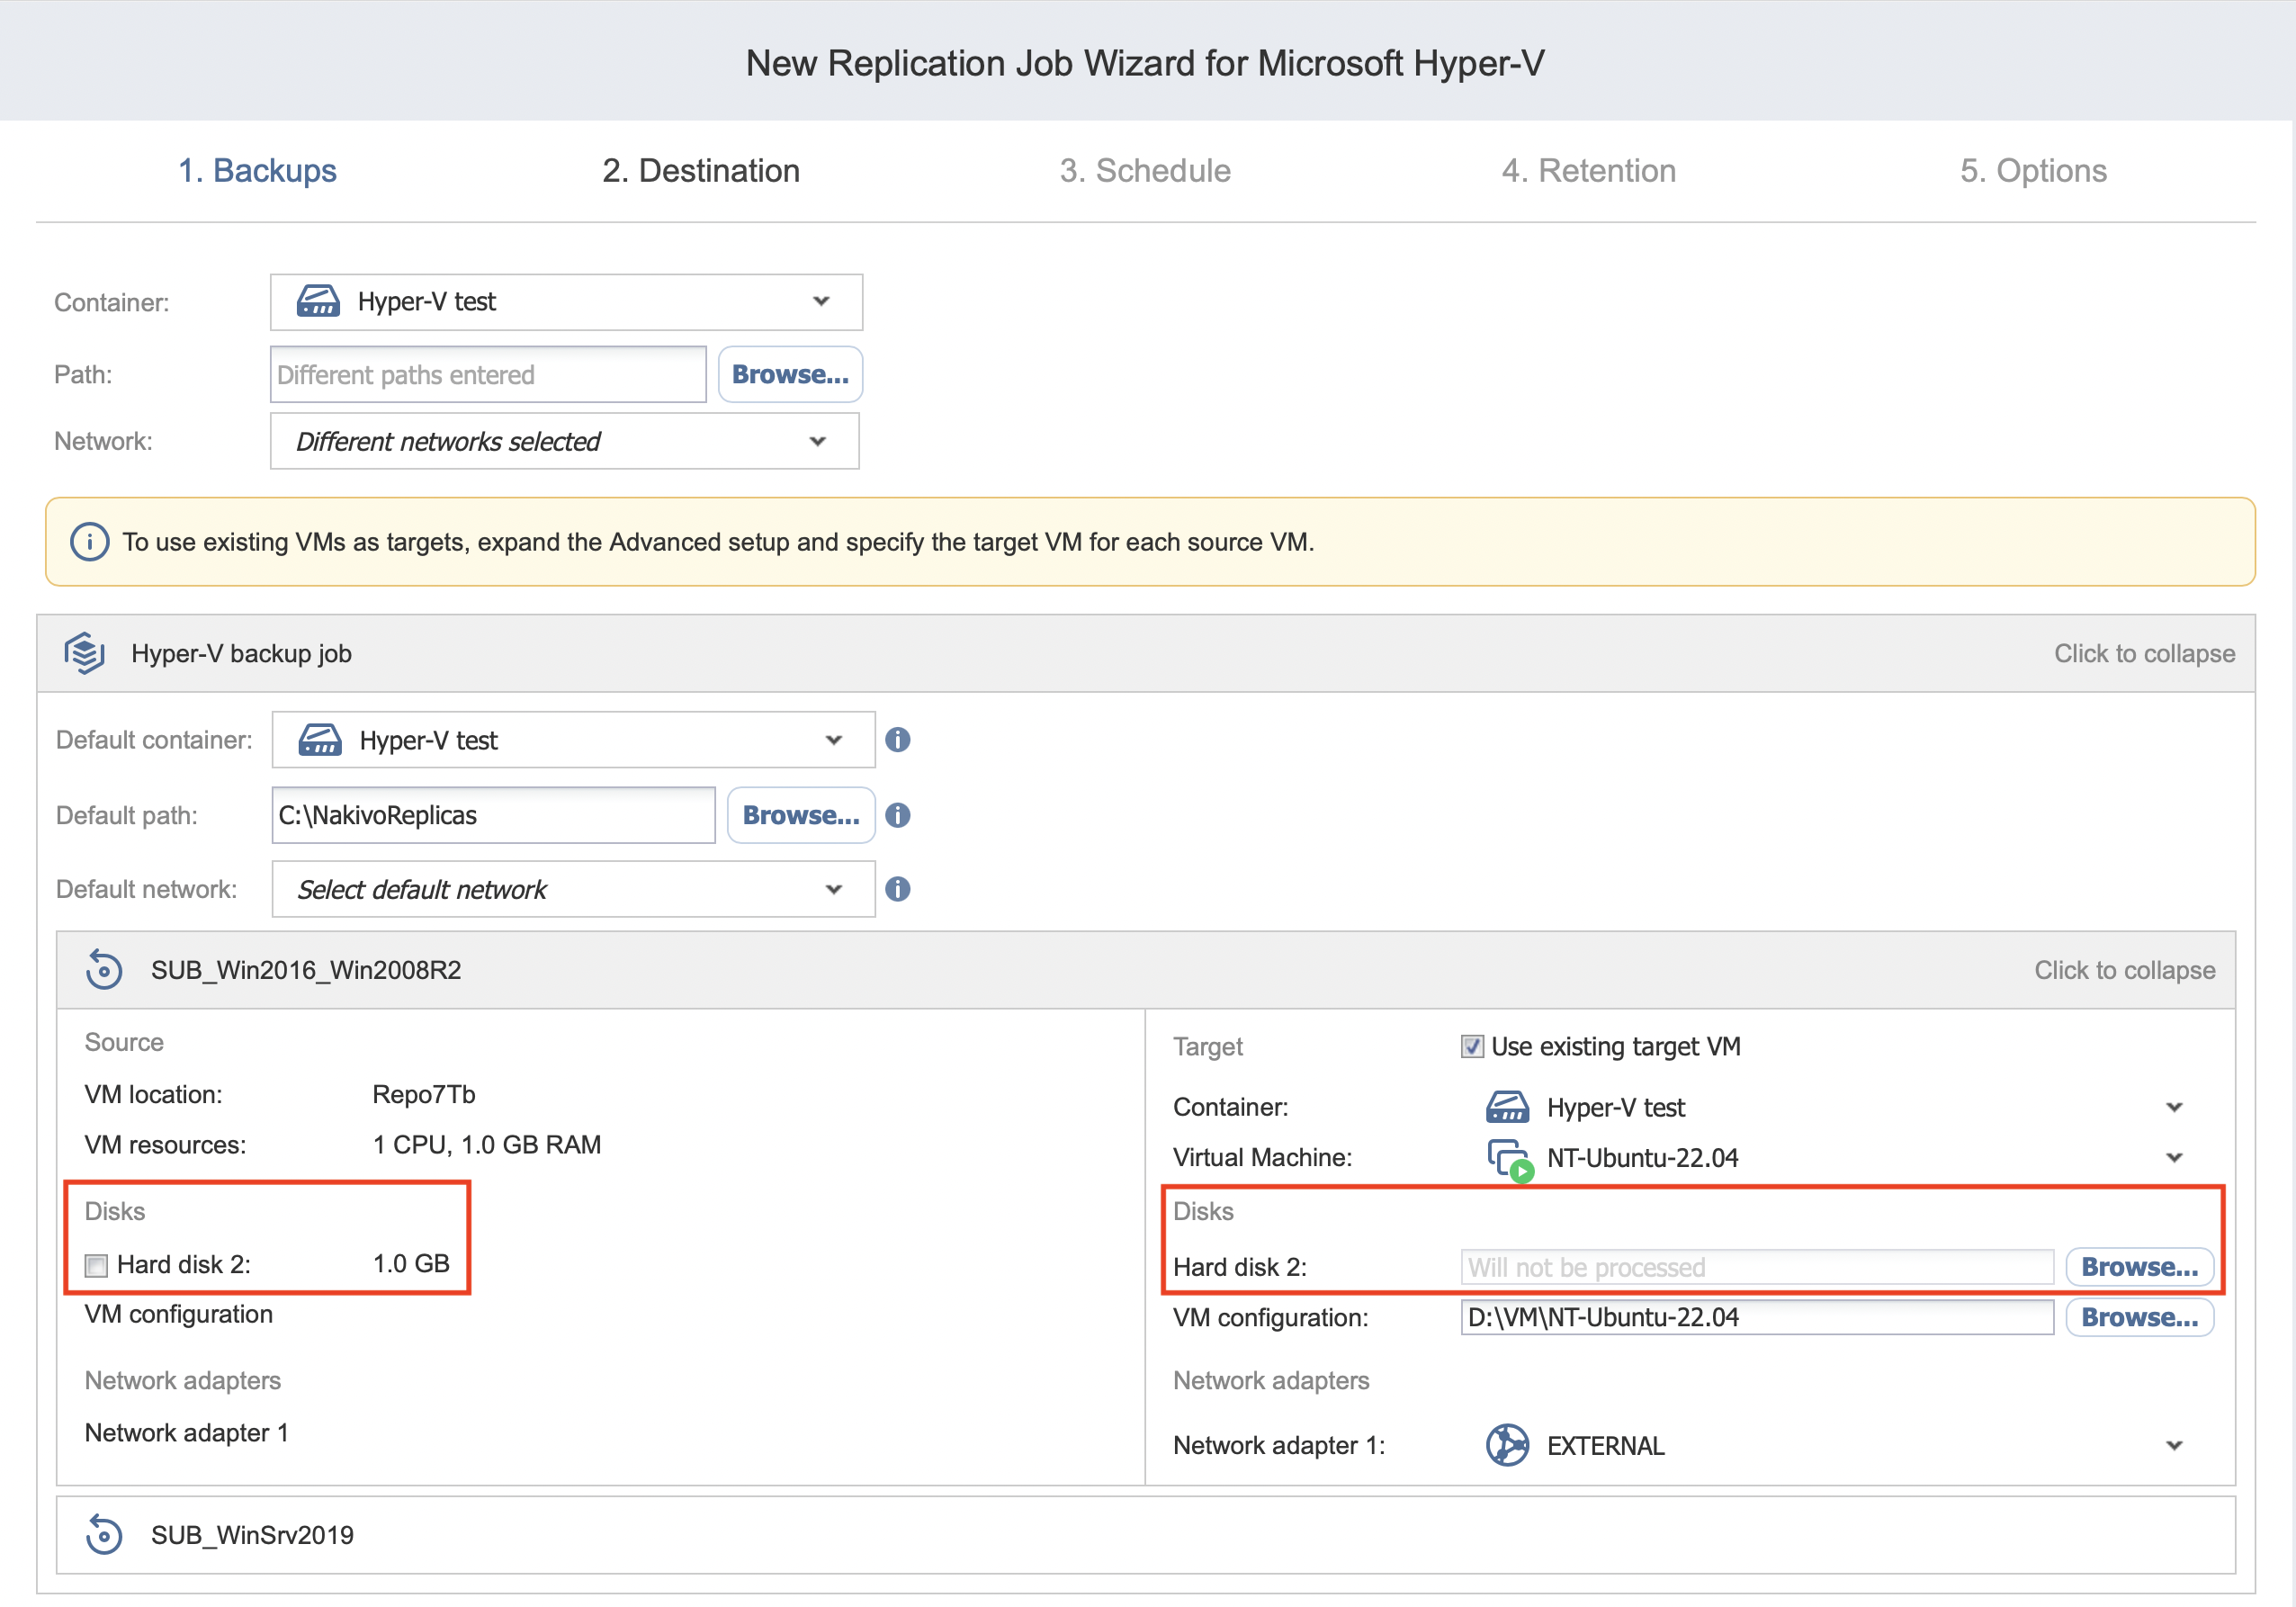
Excluding a VM Disk from the Replication Job
If you do not want to replicate some disks of a VM, you can exclude those disks from the replication job. Follow the steps below:
-
Click Advanced setup.
-
In the VM box, uncheck the disks you want to exclude from the replication job.