Running Site Recovery Job
The section includes the following topics:
Running Site Recovery Job in Test Mode
Running your site recovery job in the test mode allows you to verify the site recovery workflow and results.
Please follow the steps below to run your site recovery Job in the test mode:
-
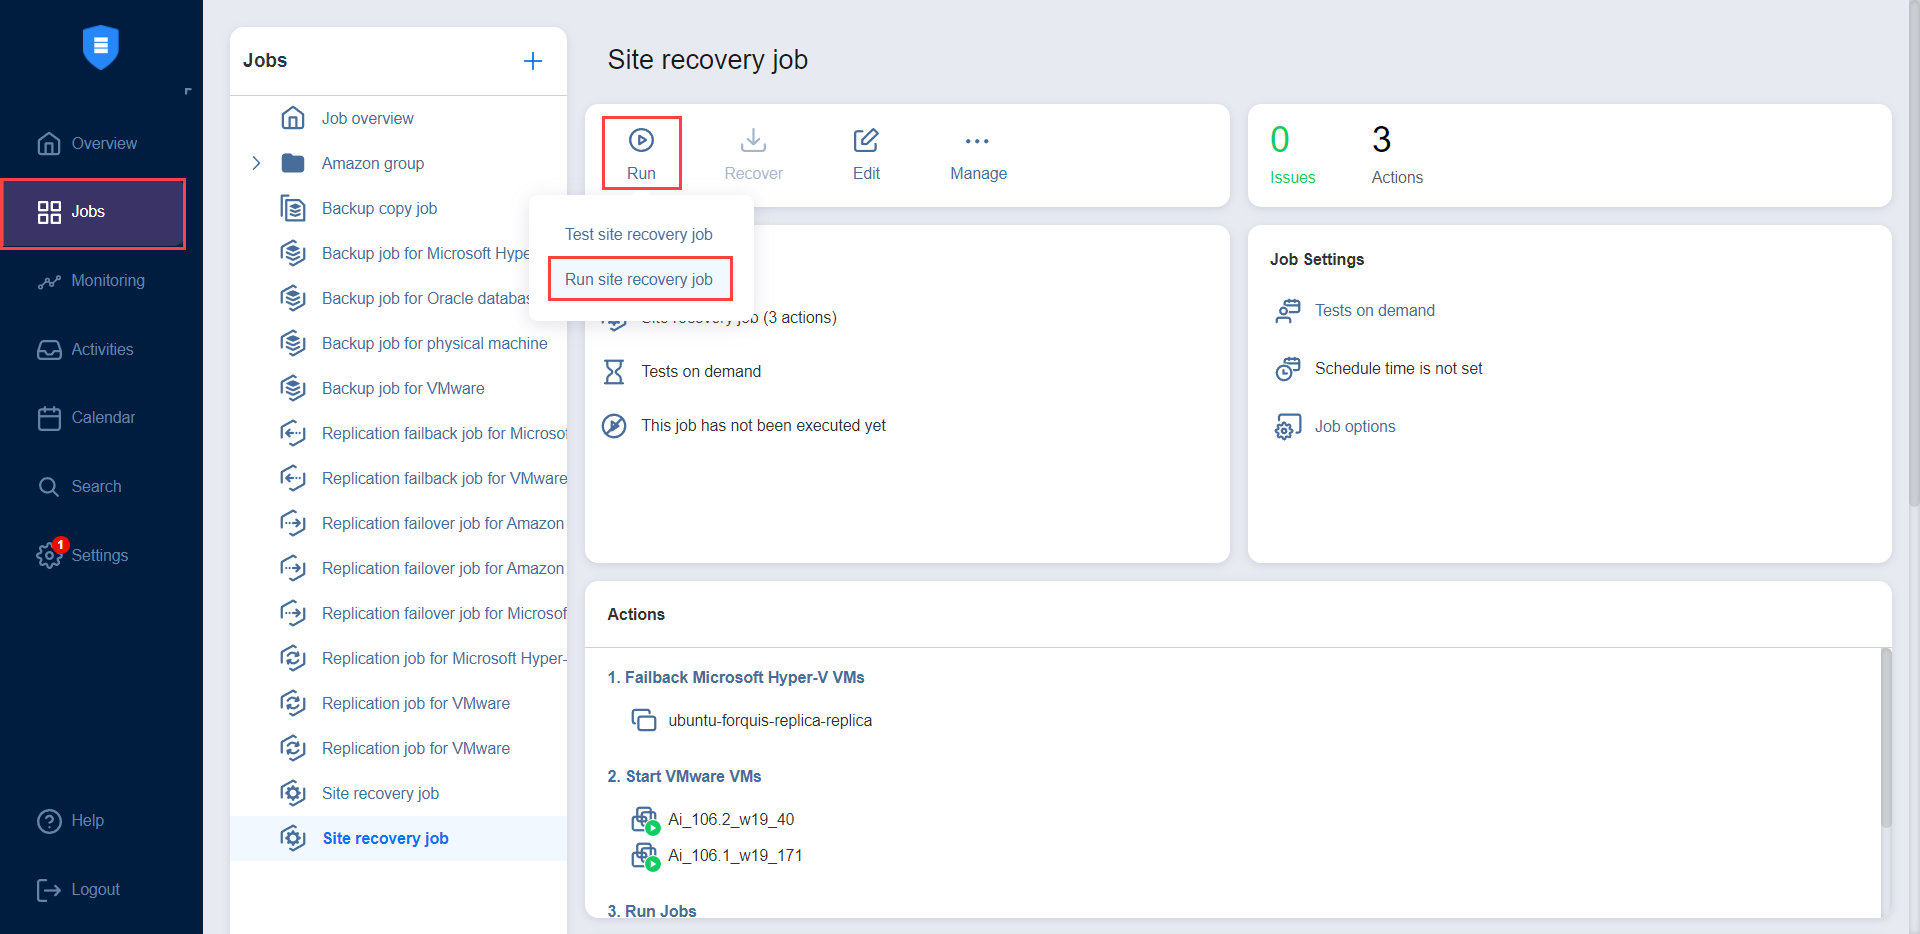
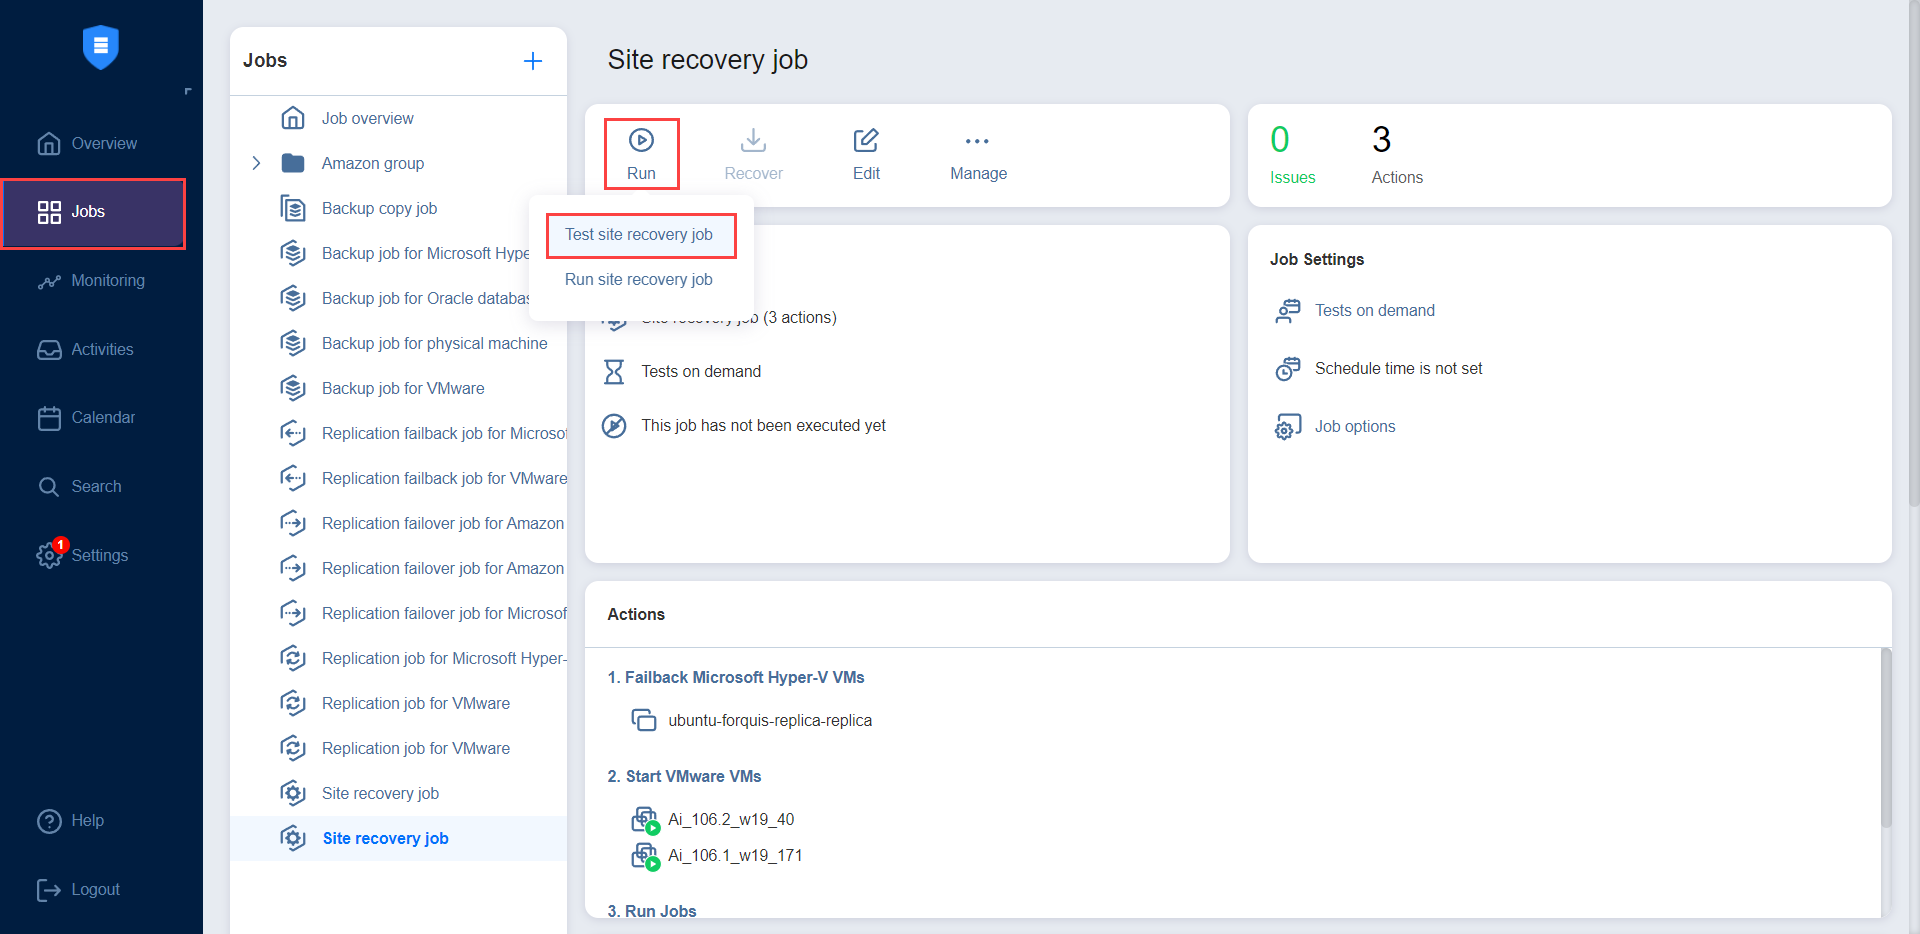
In the Jobs menu, select your site recovery job and then click the Run button.
-
In the dialog that opens, click Test site recovery job.
-
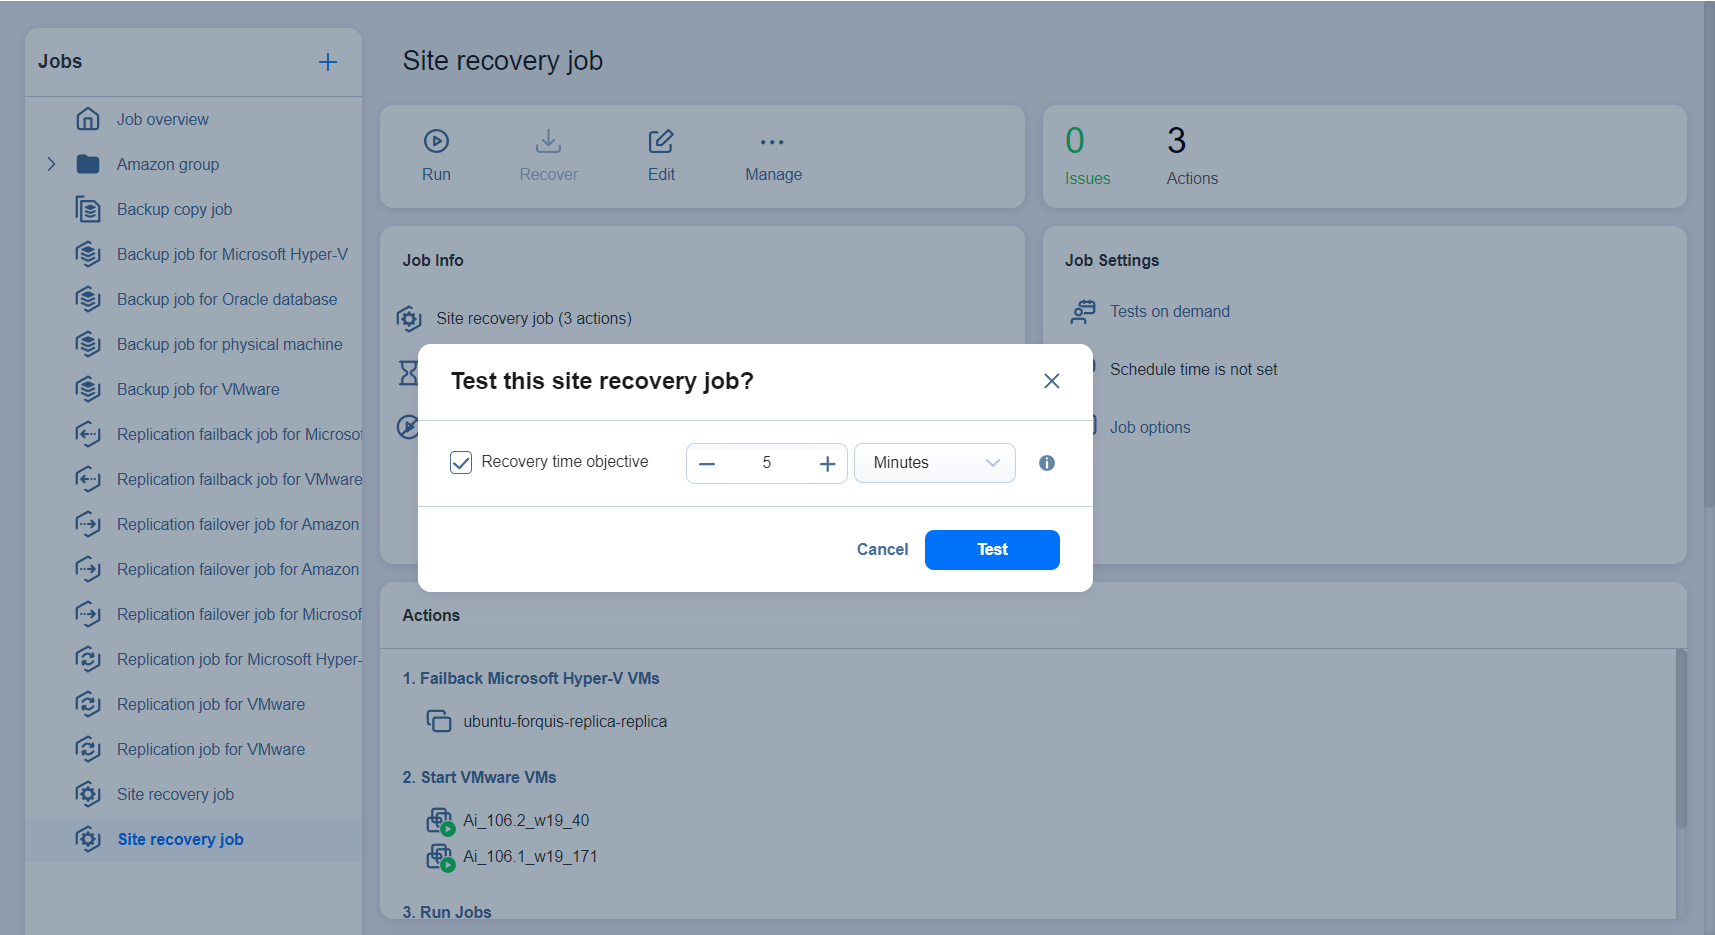
The Recovery time objective dialog opens. Here you can:
-
Disable/enable the Recovery time objective option.
-
If the Recovery time objective is enabled, modify the amount of time allowed for the job to be completed.
-
-
Click Test when ready. The site recovery job starts running in the test mode.


Note
In addition to testing the site recovery job on demand, testing can also be scheduled. Refer to Site Recovery Job Wizard: Test Schedule for details.
Running Site Recovery Job in Production Mode
Running your site recovery job in the production mode allows you to recover your environment from disaster.
Please follow the steps below to run your site recovery job in the production mode:
-
In the Jobs menu, select your site recovery job and then click the Run Job button.
-
In the dialog that opens, click Run site recovery job.

-
The Failover type dialog opens. Choose either of the following failover types:
-
Planned failover: The application will sync replica data with the source VM before switching workloads to the replica.
-
Emergency failover: The application will switch workloads from the source VM to the replica immediately.
Note
The Failover type option is only available for site recovery jobs containing a Failover action.
-
-
Click Run. The site recovery job starts running in the production mode.