Site Recovery Job Wizard: Test Schedule
On the Test Schedule page of the Site Recovery Job Wizard you can schedule testing your site recovery job.
Please refer to the following sections for details:
Disabling Site Recovery Job Test Schedule
If you only want to start the site recovery job manually (without any test schedule), select the Do not schedule, test on demand check box.
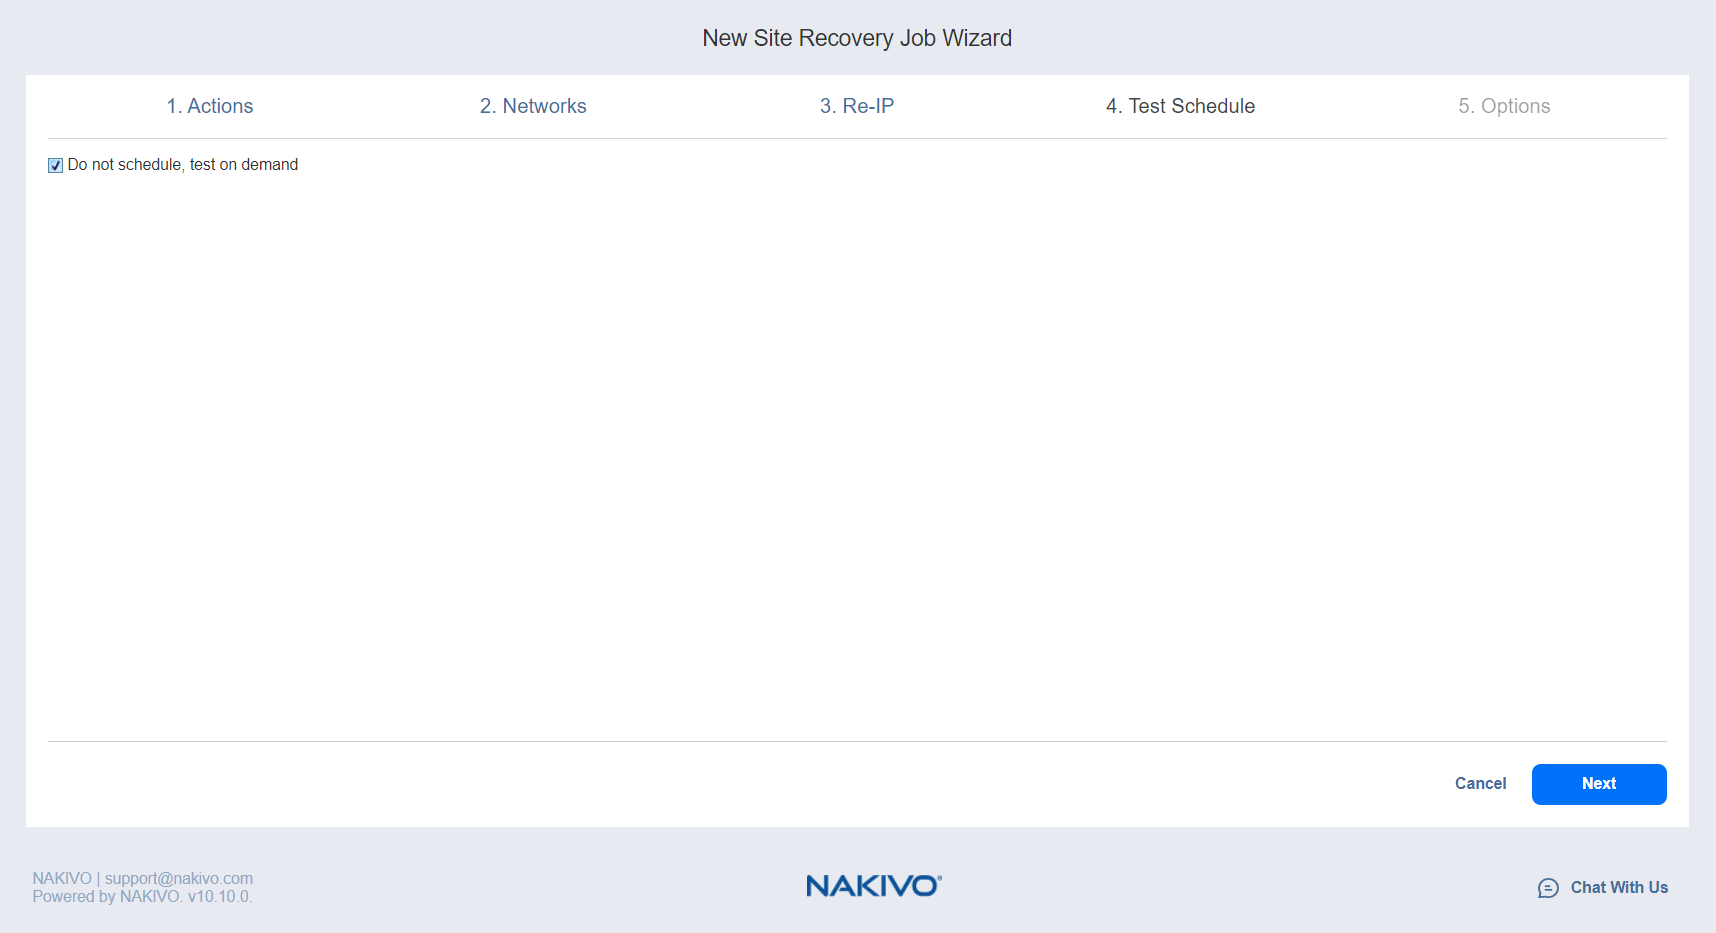
Then click Next to go to the Options page of the Site Recovery Job Wizard.
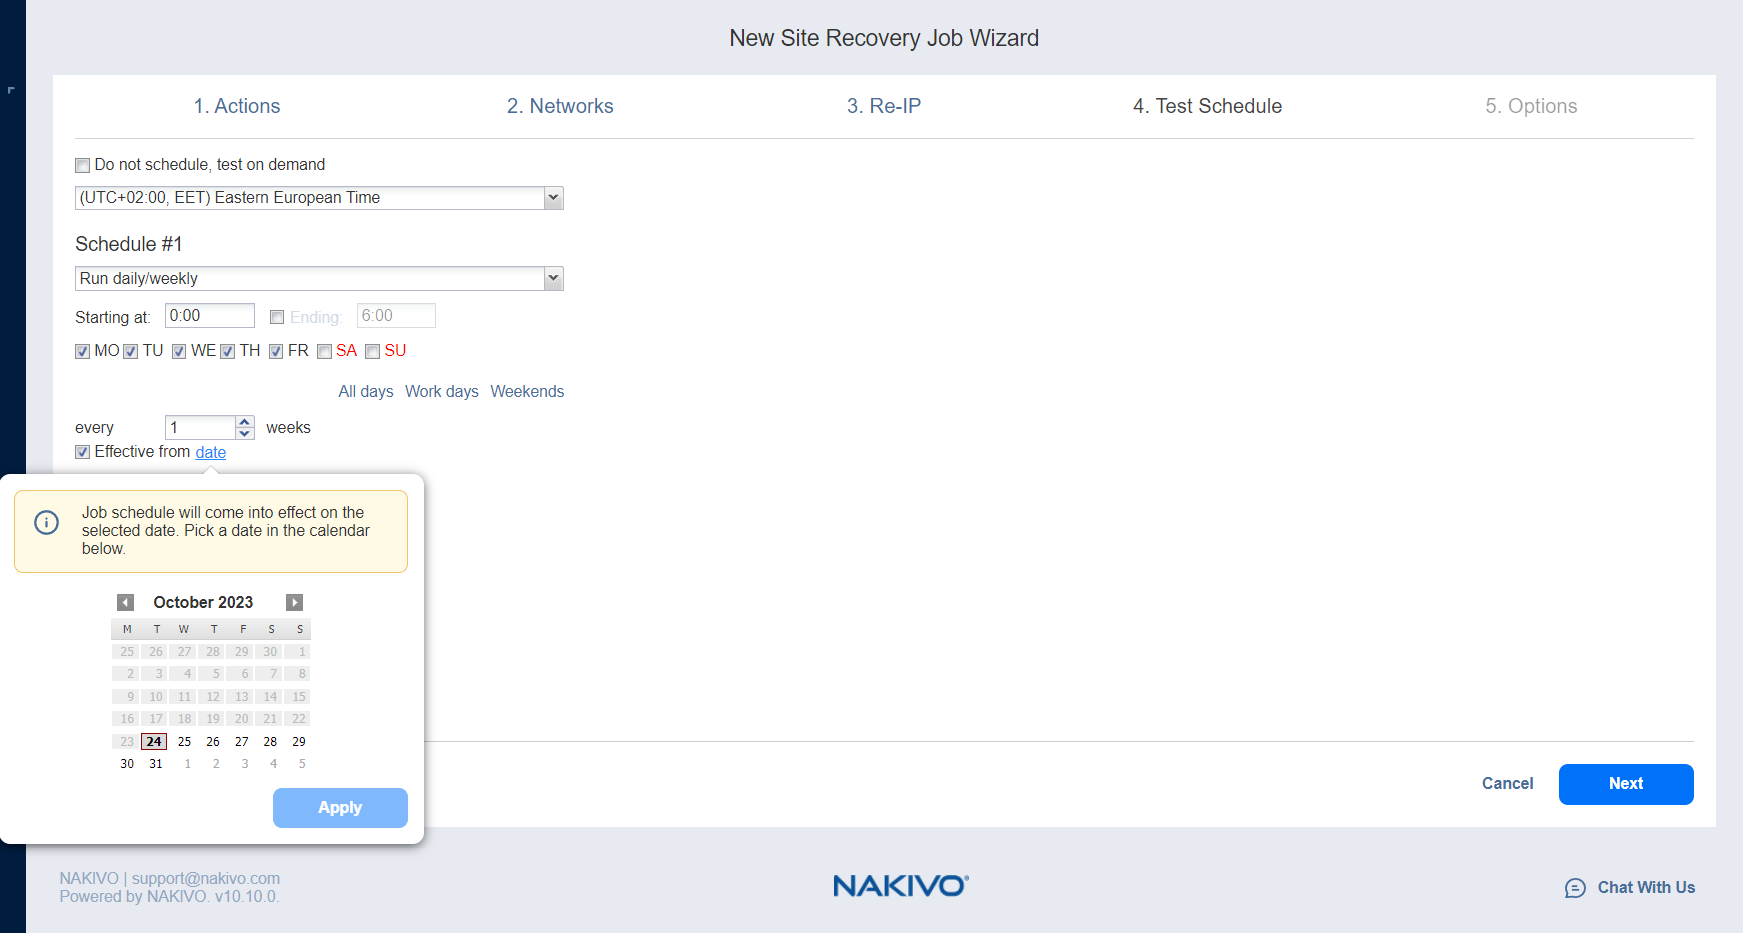
Daily Site Recovery Job Testing
To test your site recovery job once a day, do the following:
-
Choose a time zone that should be used for the site recovery job start and end times from the time zone list.
-
Choose Run daily/weekly from the Schedule #1 list.
-
Specify the time when the site recovery job should be started in the Starting at box.
-
Specify the end time for the site recovery job in the Ending box. If the site recovery job has not completed by the time specified, the site recovery job will be stopped.
-
Select the days of the week during which the site recovery job will be started.
-
To specify a date when the job test schedule comes into effect, click Effective from, click date and then pick a date in the calendar that opens.
-
Click Next to go to the Options page of the Site Recovery Job Wizard.

Monthly or Yearly Site Recovery Job Testing
To test your site recovery job monthly or yearly, do the following:
-
Choose Monthly/yearly from the schedule list.
-
Choose a time zone that should be used for the job start and end times, in the list of available time zones.
-
Specify a site recovery job start schedule in the appropriate boxes.
-
Specify the time when the site recovery job should be started, in the Starting at box.
-
Specify the end time for the site recovery job, in the Ending box. If the site recovery job has not completed by the time specified, the site recovery job will be stopped.
-
Select the days of the week during which the job will be started.
-
To specify a date when the job test schedule comes into effect, click Effective from, click Date and then pick a date in the calendar that opens.
-
Click Next to go to the Options page of the Site Recovery Job Wizard.


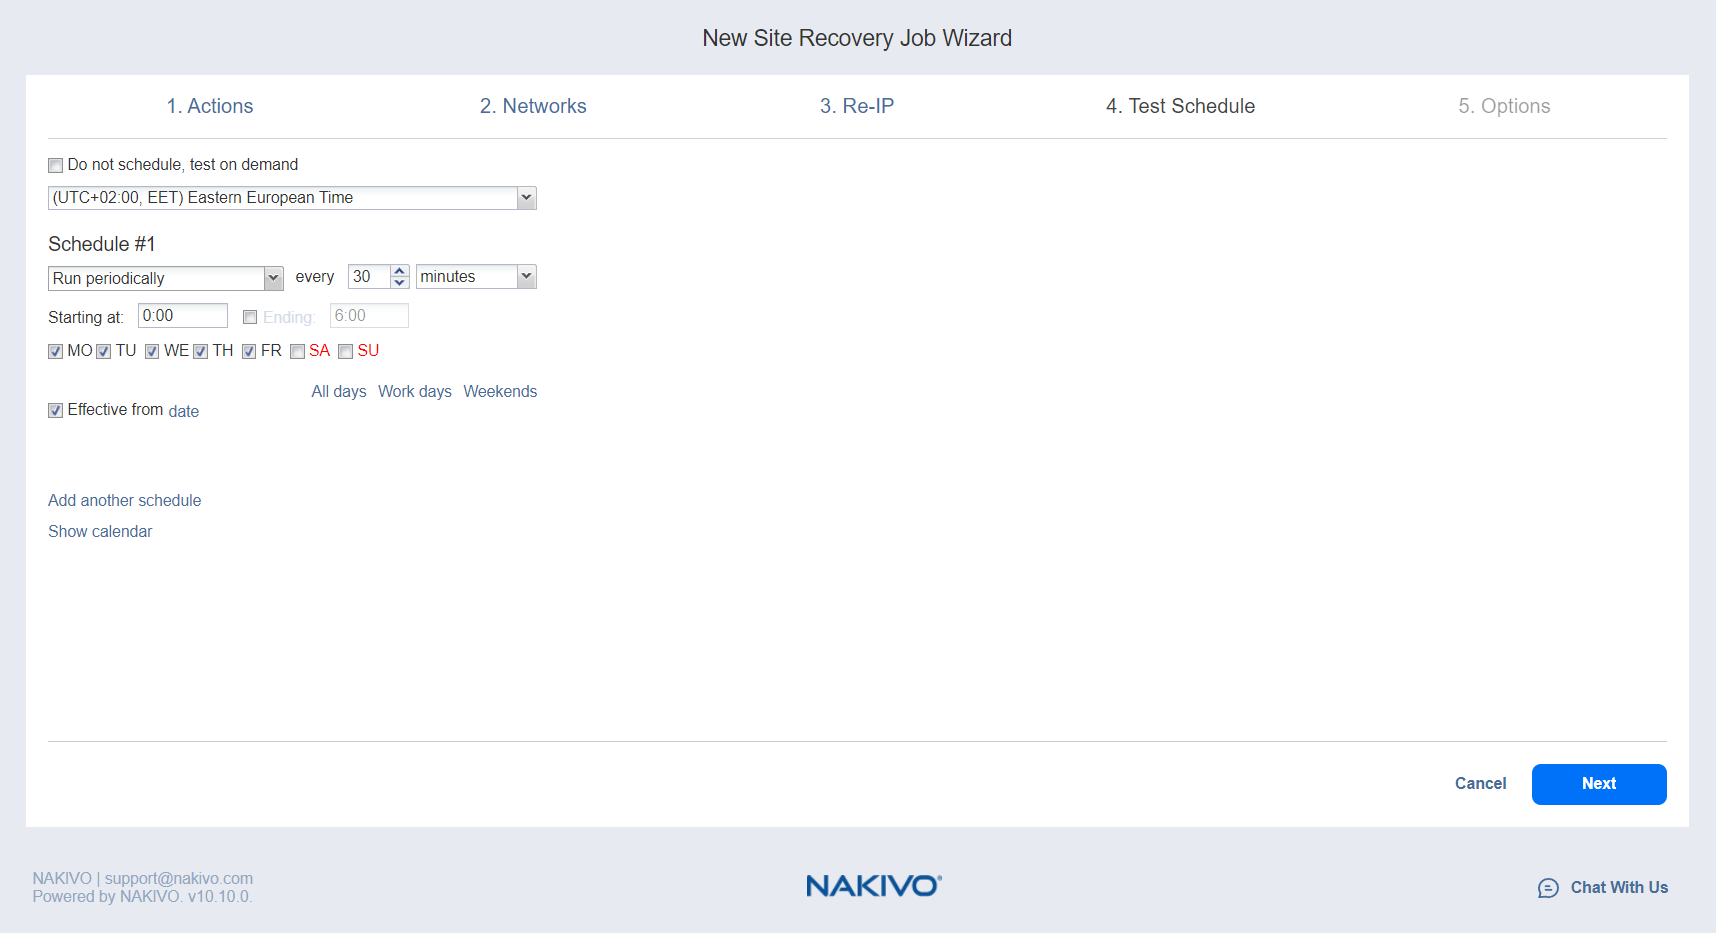
Periodic Site Recovery Job Testing
To test your site recovery job multiple times per day, do the following:
-
Choose a time zone that should be used for the site recovery job start and end times from the list of time zones.
-
Choose Run periodically from the Schedule #1 list and then choose a time period from the appropriate boxes.
-
Specify the time when the site recovery job should be started in the Starting at box.
-
Specify the end time for the job in the Ending box. If the site recovery job has not completed by the time specified, the site recovery job will be stopped.
-
To specify a date when the job test schedule comes into effect, click Effective from, click Date and then pick a date in the calendar that opens.
-
Click Next to go to the Options page of the Site Recovery Job Wizard.

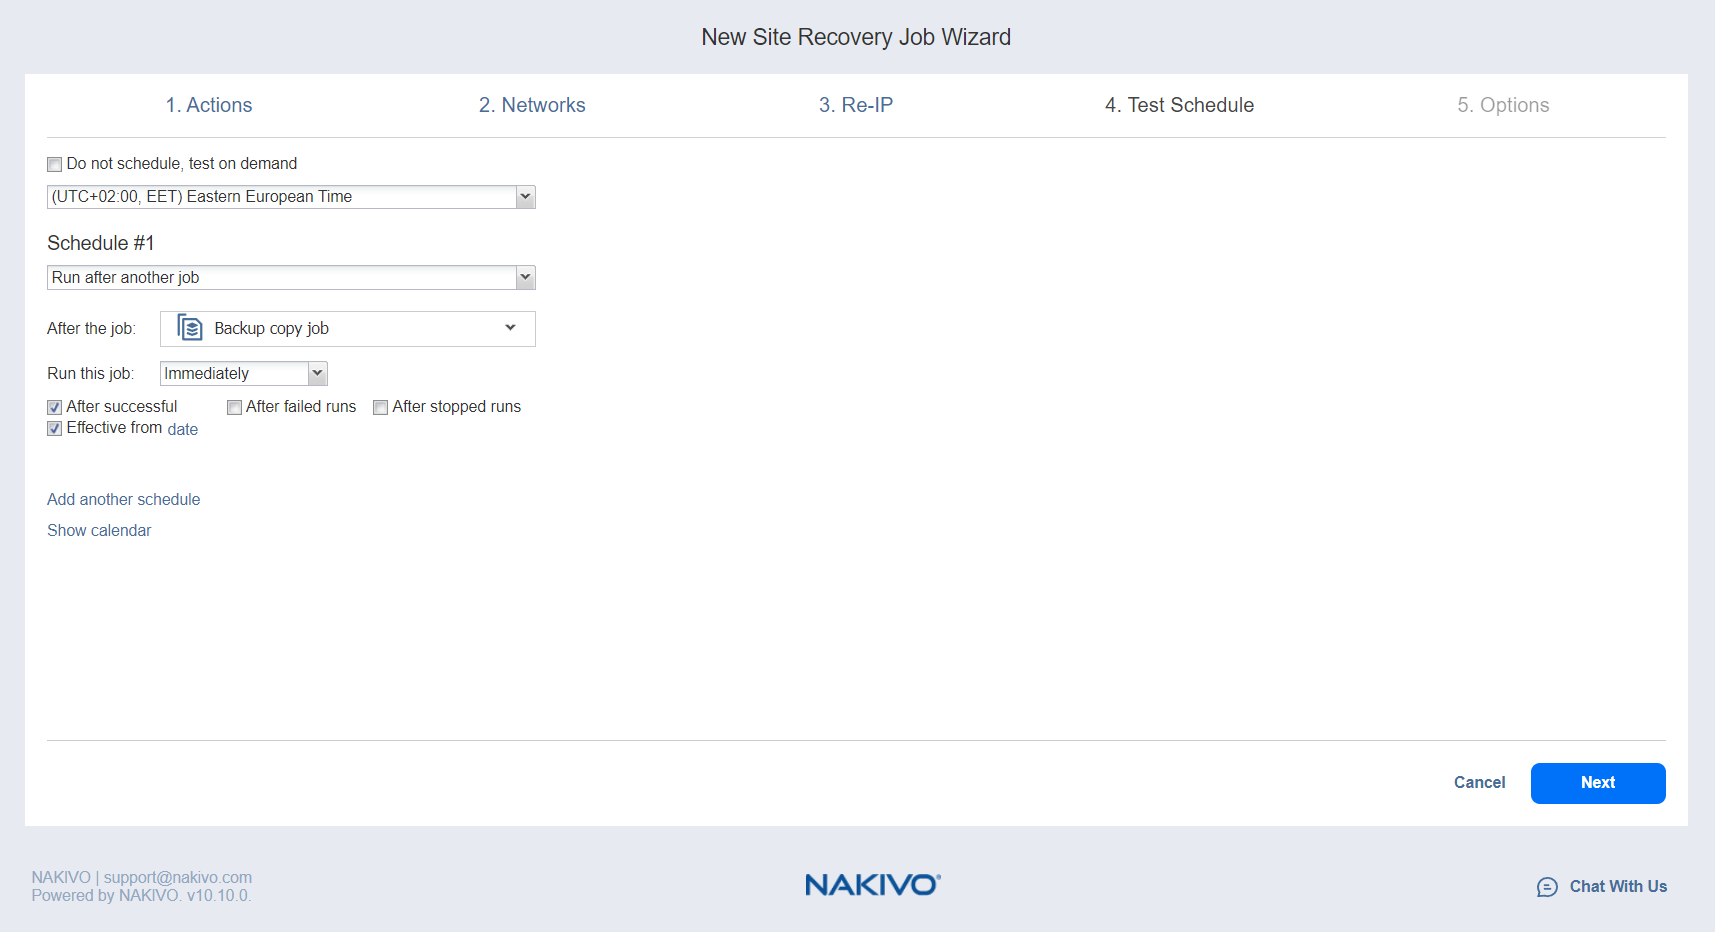
Chained Site Recovery Job
To run the site recovery job after a previous job has completed, do the following:
-
Choose Run after another job from the Schedule #1 list.
-
Set the options as follows:
-
After the job: select a job after which the current site recovery job will be started.
-
Run this job: Choose whether to run the current site recovery job immediately after the previous job has completed, or specify a delay.
-
After successful runs: If selected, the site recovery job will run if the previous job has completed successfully.
-
After failed runs: If selected, the site recovery job will run if the previous job has failed.
-
After stopped runs: If selected, the site recovery job will run if the previous job has been stopped.
-
-
To specify a date when the job test schedule comes into effect, click Effective from, click date and then pick a date in the calendar that opens.
-
Click Next to go to the Options page of the Site Recovery Job Wizard.

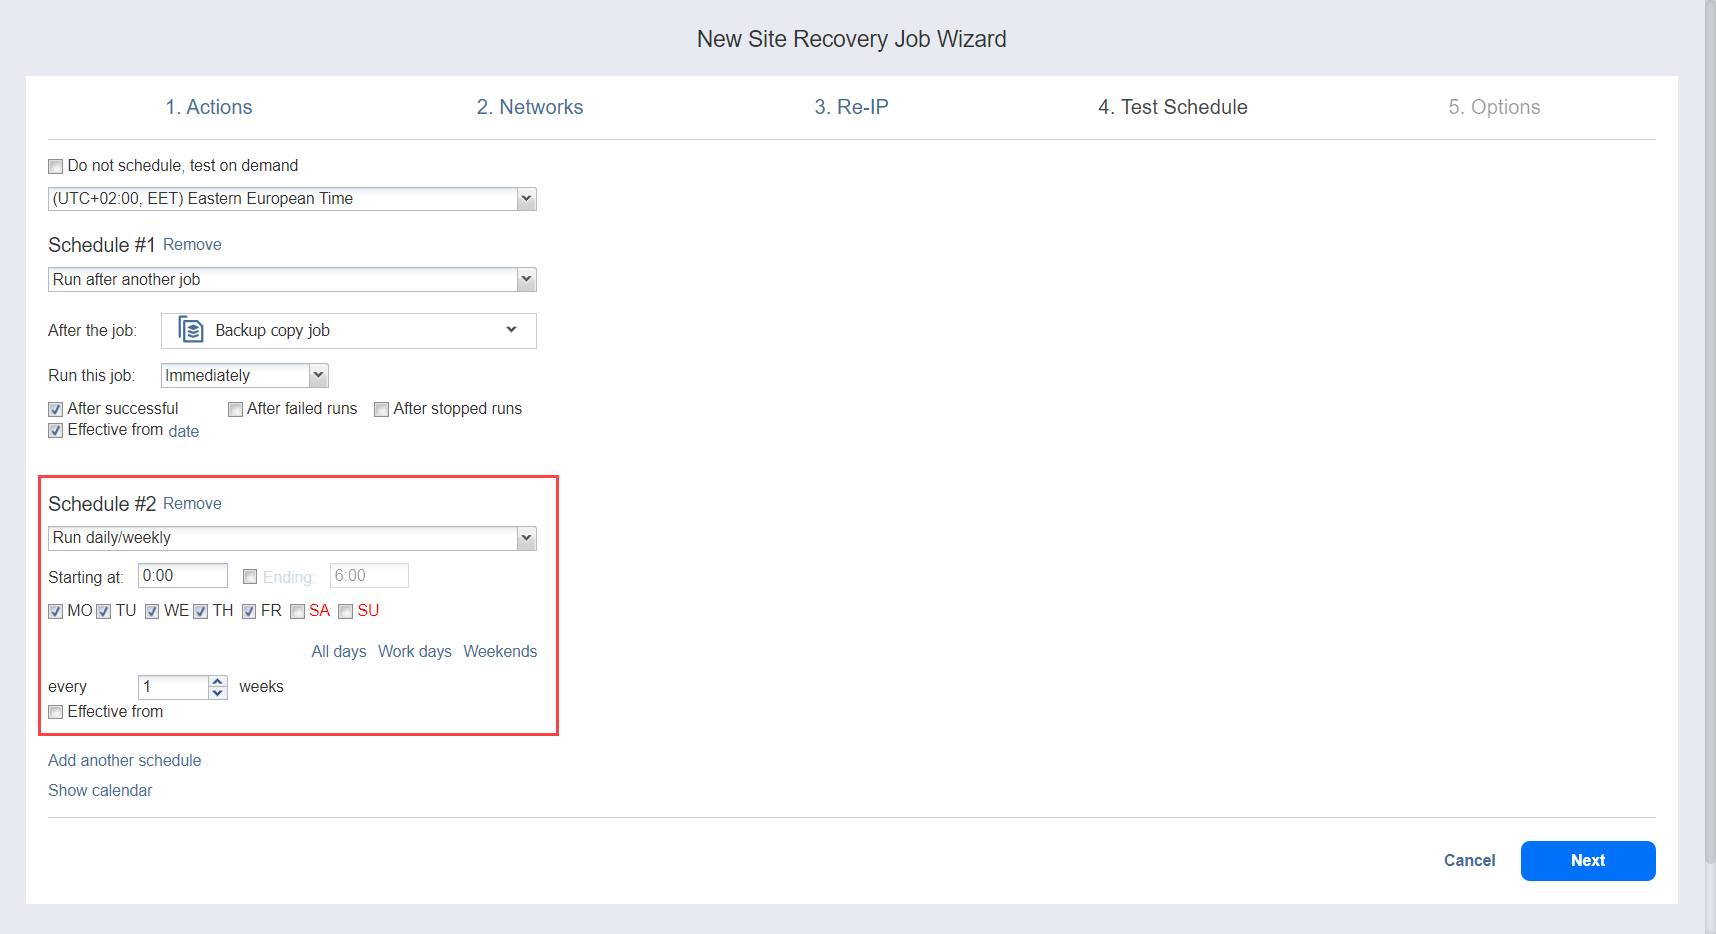
Additional Schedule
To add more than one schedule to your site recovery job, do the following:
-
Click Add another schedule.
-
The Schedule #2 section opens. Proceed with instructions provided in the sections above.
-
When ready with adding an additional schedule to your site recovery job, click Next.