Universal Object Recovery Wizard: Options
In the Options page of the wizard:
-
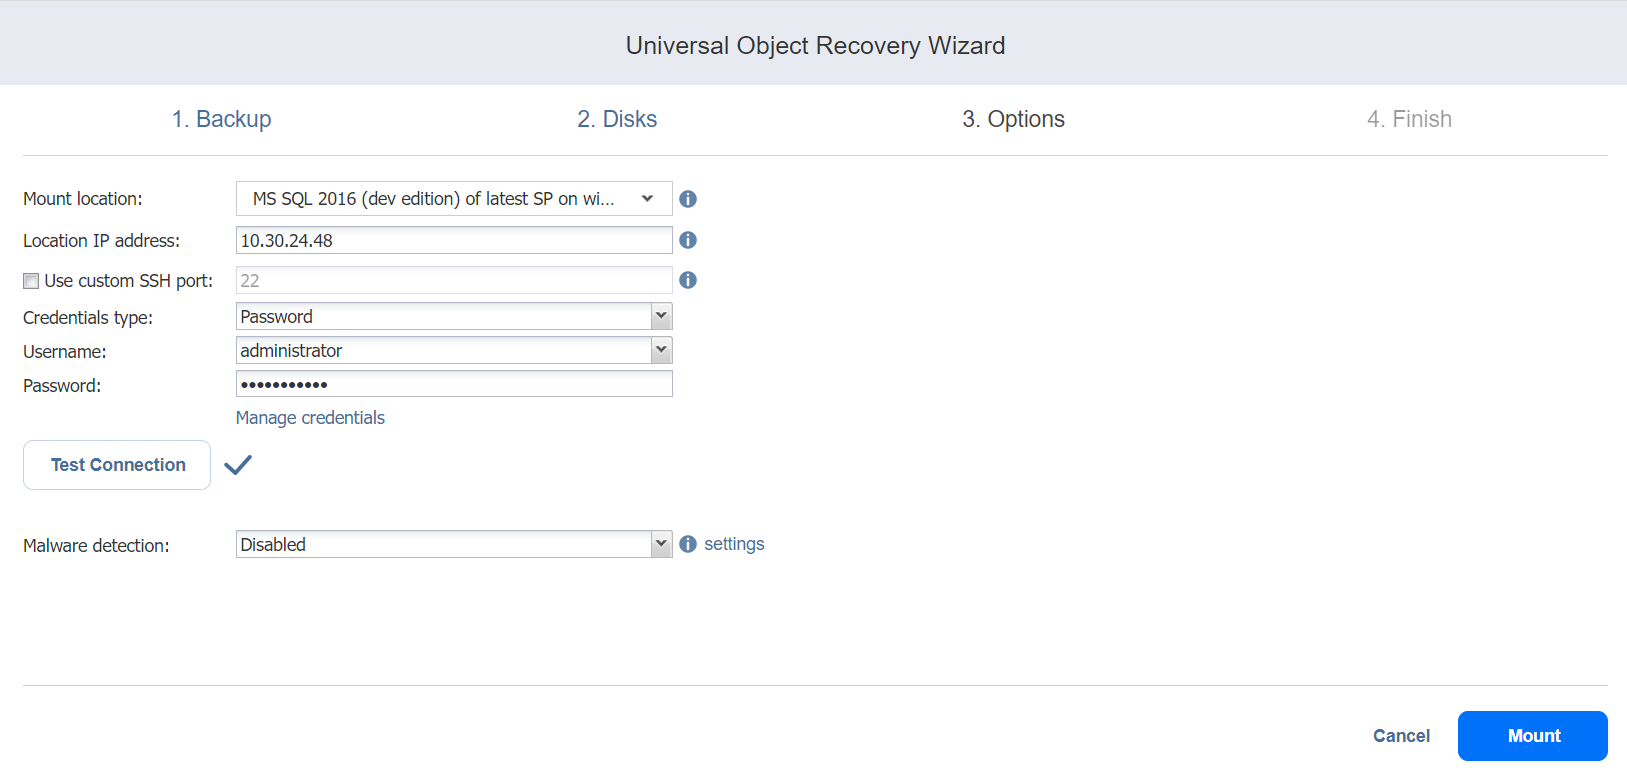
Specify mount location options:
-
Mount location: Choose the mount location from the drop-down list.
Note
Servers added using Direct Connect are not supported.
-
Location IP address: Enter the IP address of the server to which the disks will be mounted if it is not detected by the application based on the Mount location value. Here you can enter an IP address of any virtual or physical machine.
-
Use custom SSH port: To recover to a Linux server, select this option to enter a custom SSH port to be used for connecting to the recovery server. The default value is 22.
- Credentials type: Choose your preferred option and enter your respective credentials:
Password: Enter a username with administrative privileges for the file share entered above and your password.
Private key: Select your private key from the drop-down list.
-
-
Click the Test Connection button to test your credentials for the specified recovery server. If your credentials are correct, a checkmark appears to the right of the button.
- Malware detection: With this option enabled, the backups are scanned for malware using the configured antivirus software on the scan server.
-
Optionally, if you have selected Enabled for the Malware detection option, click the settings link to configure the following options:
-
Scan server: Select a specific scan server for the job or leave the Default setting. If Default is selected, the Transporter is used as the scan server and can support a maximum of 2 concurrent scan tasks.
Notes
-
For the Default option, if the Repository Transporter is the installed Transporter, it require the master password to function as the scan server.
-
For more details on the requirements for Scan Server, refer to the Feature Requirements.
-
-
Scan type: Choose between the Deep scan and the Quick scan:
-
Deep scan: When this option is selected, the antivirus software scans the entire backup and may take longer to complete.
-
Quick scan: When this option is selected, the antivirus software scans only OS disks in the backup.
-
-
If malware is detected: Choose the behavior if malware is detected:
-
Fail recovery: With this option, the recovery process fails in case the job has only one disks. If the job has several disks, the infected disks are skipped and the job continues to run.
-
Continue recovery: When this option is selected, the recovery job completes the scanning process and recovers the infected disks.
-
-
Scan timeout: Specify the timeout for the malware detection process. If the specified amount of time is exceeded, the recovery job fails.
-
Click Apply when you’re done.
-
-
Click Mount to confirm mounting your disks to the selected recovery server.
The Universal Object Recovery is started and the Finish page of the wizard opens.
-
Click the Activities link to go to the Activities page if you want to view the progress of the Universal Object Recovery.
-
Click Close to close the Universal Object Recovery Wizard. Upon successful Universal Object Recovery, the disks are mounted to the recovery server.
