Full Recovery Job Wizard for Proxmox VE: Backups
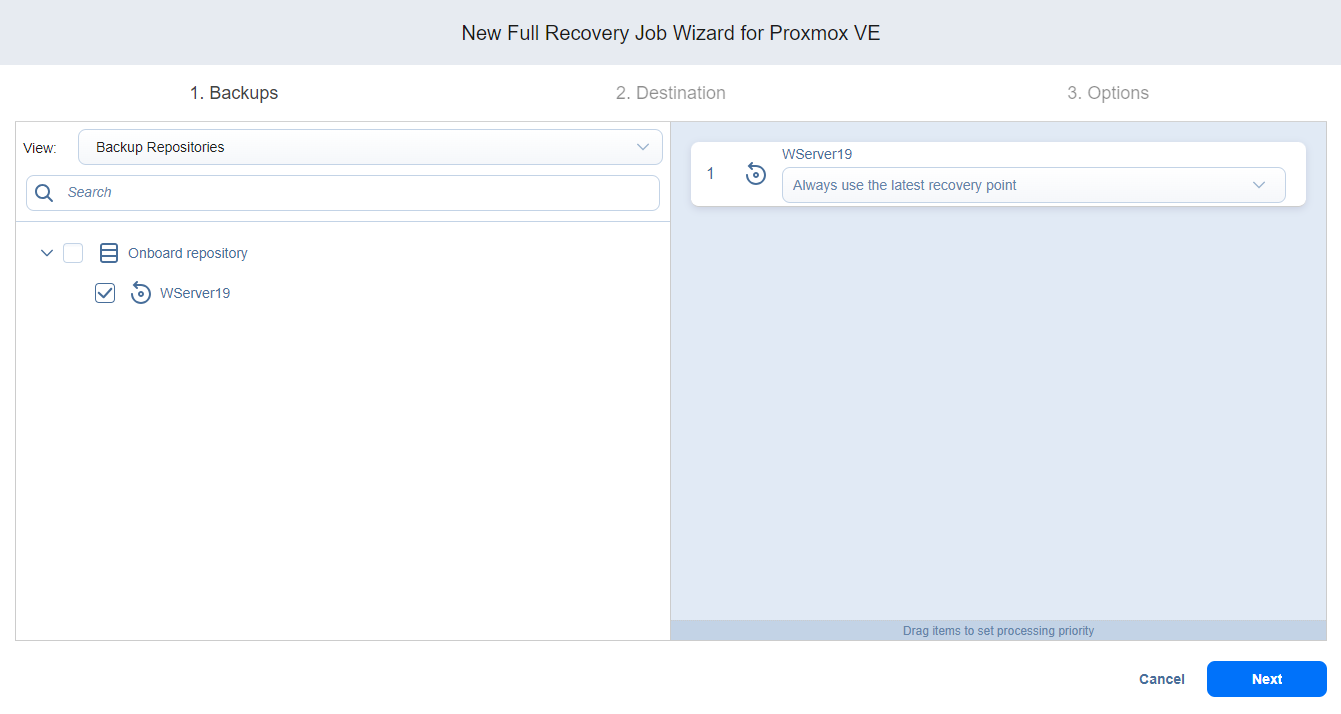
1. On the Backups page of the wizard, in the left pane, select a backup using either a Backup Repositories, Jobs & Groups or Tape view in the left pane. Note that selecting Tape opens the Recovery from Tape Job Wizard.
Both federated and standalone (not used as members of federated repositories) backup repositories can be selected.
Notes
You cannot select a federated repository member as a source for recovery jobs.
You cannot perform recovery from recovery points located in an inaccessible federated repository member or those that depend on inaccessible recovery points.
File share backup and Microsoft 365 backup options are disabled when recovering backups from tape.
Selecting an item in the tree adds the parent item and all children items to the right pane.
Notes
You can search for a specific backup, job, group, or repository (depending on the selected view) by entering its name into the Search field.
Selecting a single backup object opens the Calendar view of the date picker if this view was the last user-selected view. Selecting a single backup object opens the Table view if this was the last view the user selected.
You can select a backup object with the corrupted, inaccessible, or pending removal recovery points, but you cannot select the backup objects of the detached repository.
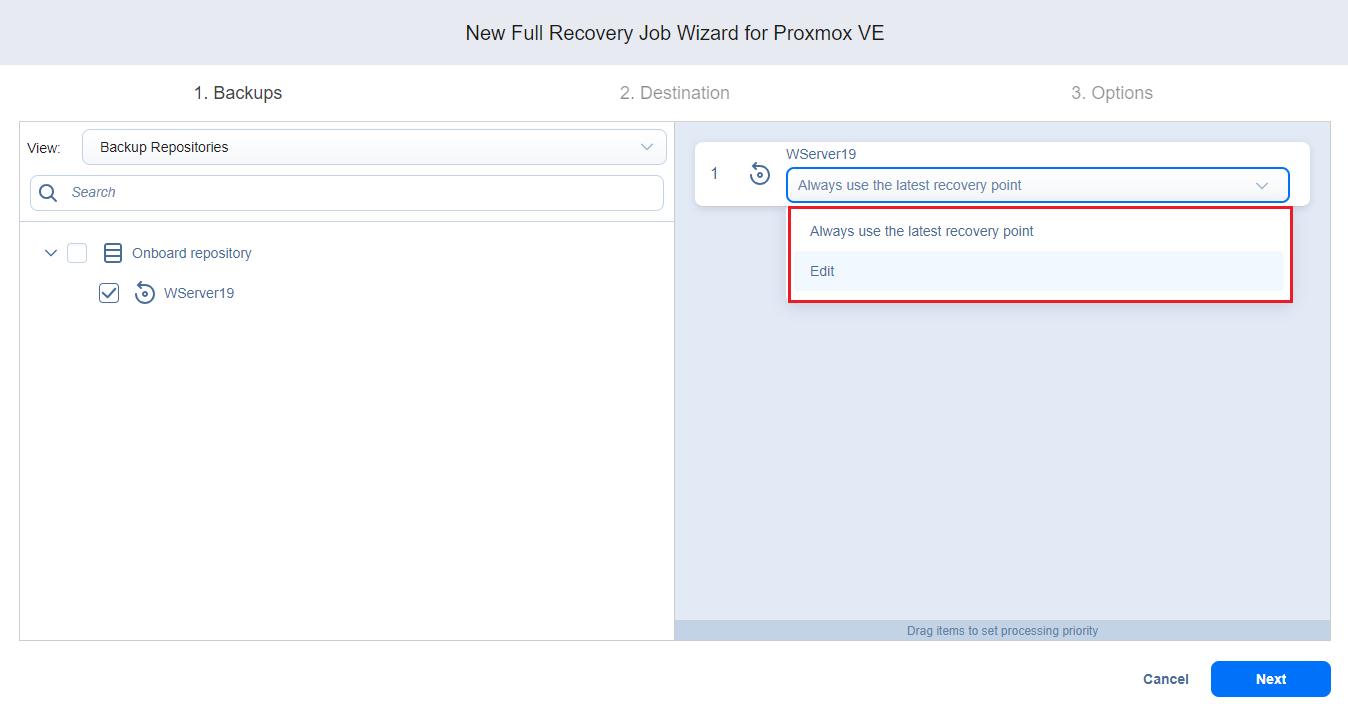
2. In the drop-down list of the selected item in the right pane, select one of the options:
-
Always use the latest recovery point (displayed by default).
-
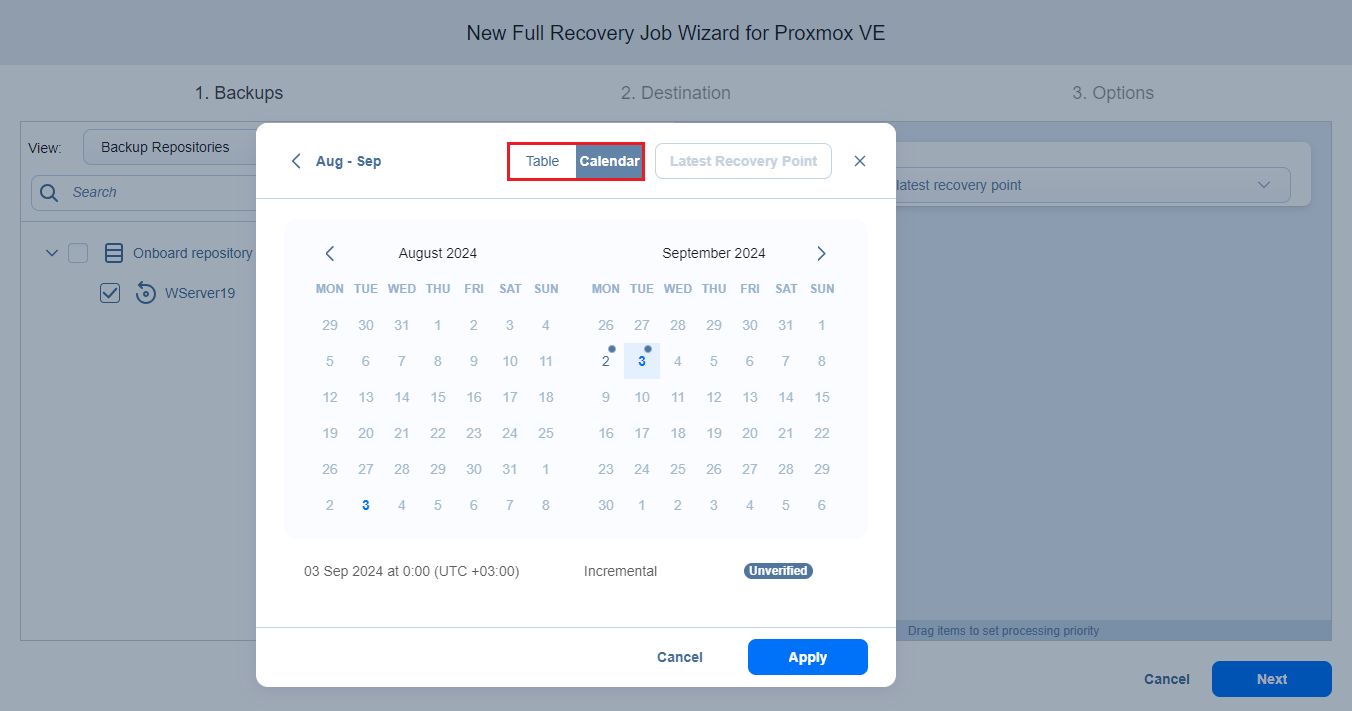
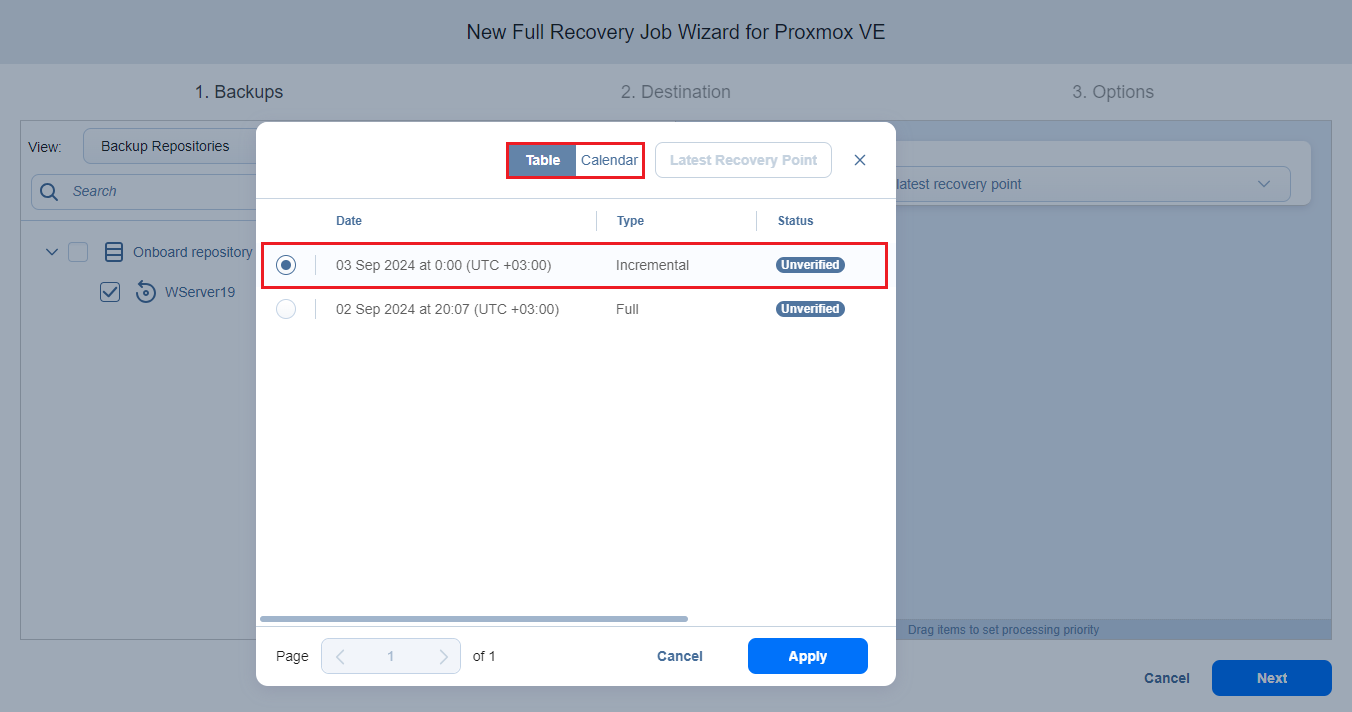
Edit to open the Recovery points picker dialog box in the Calendar or Table view and pick a date.
Notes
-
If a recovery point has been preselected (shown in the dropdown), it is selected by default when the Calendar or Table view is opened.
-
The selected view, either Calendar or Table, is saved on a per-user basis.
-
3. If necessary, toggle between the Calendar and Table views:
-
In the Calendar view, select a date or click Latest Recovery Point to select the date with the latest recovery point.
Notes
A small dot is displayed on the top of the date if there is at least one recovery point on that date.
The selected recovery point has a preview displayed under the calendar showing the recovery point status:
green – verified recovery points
red – inaccessible/corrupted/pending removal recovery points
dark grey – unverified recovery points
The corrupted, inaccessible, or pending removal recovery points cannot be recovered.
The selected date becomes highlighted.
-
In the Table view, select a date or click Latest Recovery Point to select the date with the latest recovery point.
Notes
Clicking the Latest Recovery Point option selects the date with the latest recovery point that is not corrupted, inaccessible, or pending removal.
The Latest Recovery Point option is disabled if:
The latest recovery point is currently selected.
All the recovery points of the backup object are corrupted, inaccessible, or pending removal.
If the selected recovery point is encrypted and the corresponding password hash is not available, the Always use the latest recovery point or the recovery point timestamp is highlighted in red with a red lock icon. To add such a recovery point to the job, you need to provide the password manually. See Providing Passwords for encrypted recovery points.
4. Click Next to go to the next step.
Note
You cannot proceed to the next step if there is at least one selected recovery point to which a password has not been provided.


