Backup Job Wizard for Physical Machine: Schedule
On the Schedule page of the wizard, select to run the backup job manually or schedule the job to run on a regular basis.
Proceed as described in the sections below:
Switching to Improved Retention Approach
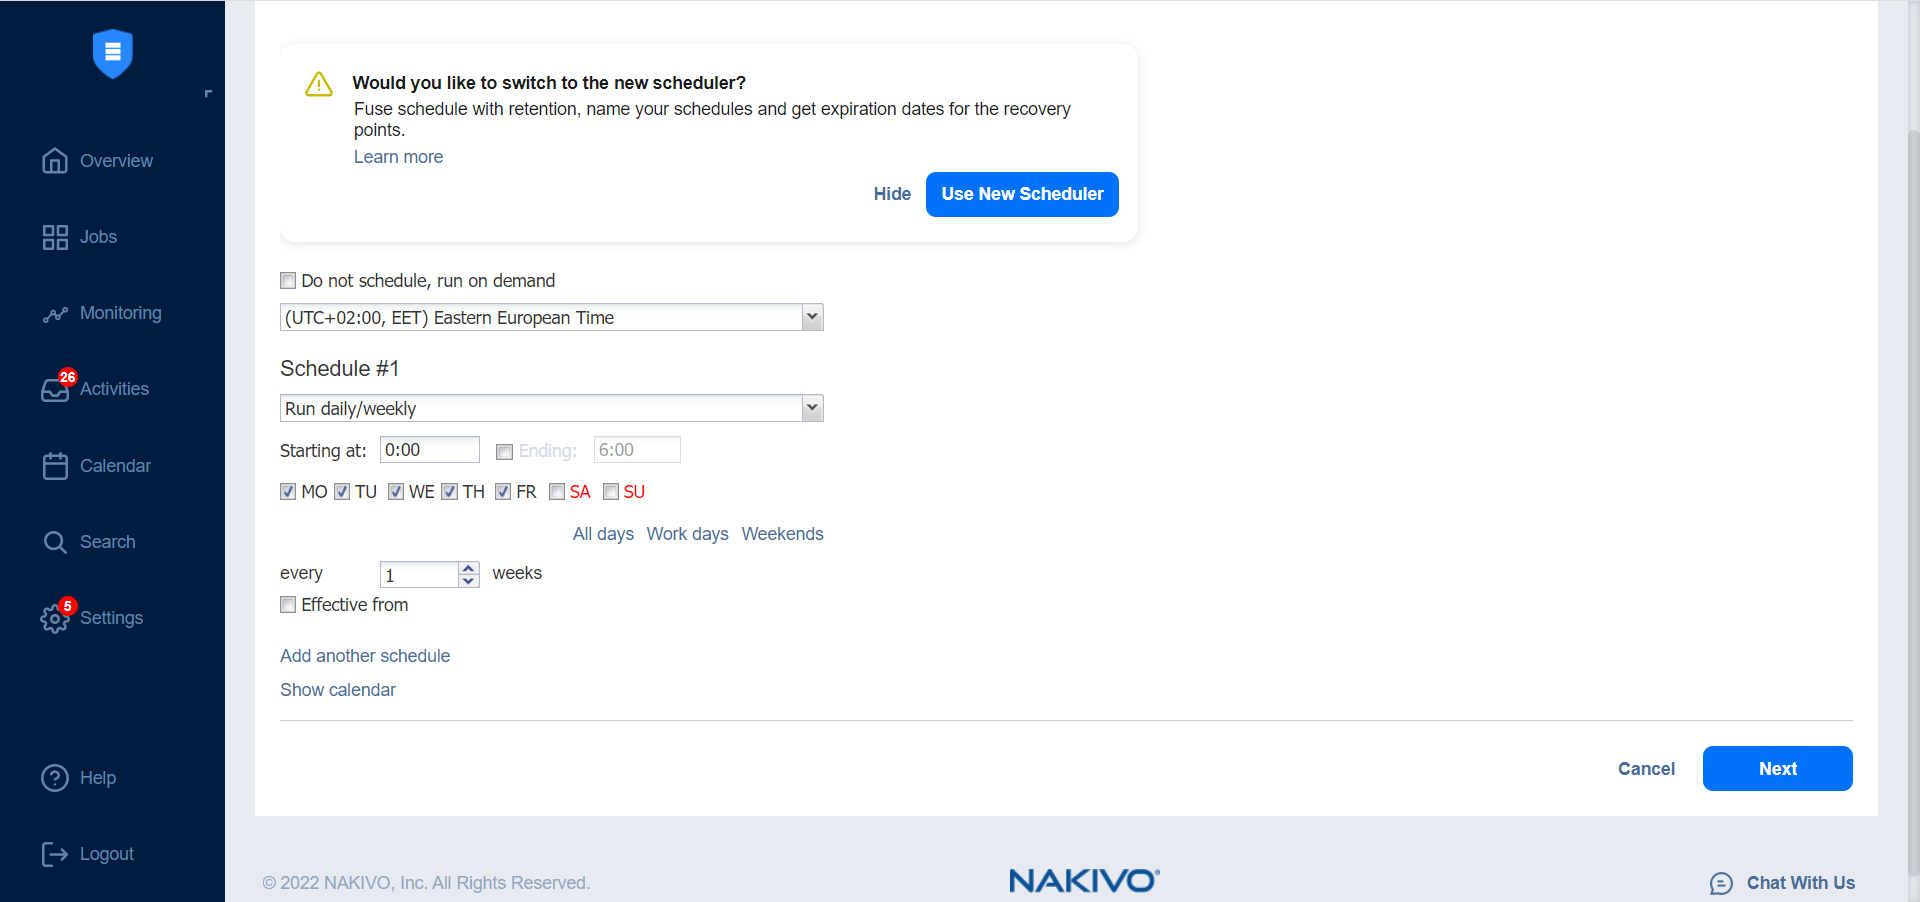
NAKIVO Backup & Replication offers two approaches to retention and scheduling: the legacy or the improved approach. To learn more about how the legacy and improved approaches work, go here. If you create a new job or edit the existing one that uses the legacy approach, a popup appears offering that you to switch to the improved retention approach in the following cases:
-
You have updated your instance of the product to v10.8 or later from an older version.
-
You have imported a configuration to an instance of NAKIVO Backup & Replication v10.8 or later from an older version.
Note
If you install NAKIVO Backup & Replication v10.8 or higher, the new approach is enabled by default.
After the popup appears, do one of the following actions:
-
If you do not want to switch to the new scheduler, click Hide to close the popup. You can later click Use New Scheduler on the Schedule page to proceed with the change if you change your mind.
-
Alternatively, click Use New Scheduler in the popup. Next, choose one of the following options:
-
MIGRATE SETTINGS: When you select this option, the existing schedules are automatically converted to new schedules and the existing retention settings are mapped to the new schedules.
-
CREATE NEW SCHEDULES: When you select this option, you can create new schedules using the existing retention settings. Old schedules will be deleted.
-
CONFIGURE SETTINGS ANEW: Select this option to reset all existing schedules and retention settings and configure them from scratch.
-
Notes
After switching to the new scheduler, the legacy schedule and retention settings are displayed on the right side of the page.
After switching to the new scheduler, reverting to the legacy schedule and retention settings is impossible.
You can learn how expiration dates are assigned to recovery points after migration here.
The improved retention approach supports schedule prioritization and ensures predictable execution when multiple schedules overlap.
In contrast, the legacy retention approach does not guarantee schedule prioritization and may result in unpredictable execution order.
Creating New Schedules
Before creating a new schedule, you can optionally enable the following settings:
-
Do not schedule, run on demand: Enable this option if you want to start the job manually.
-
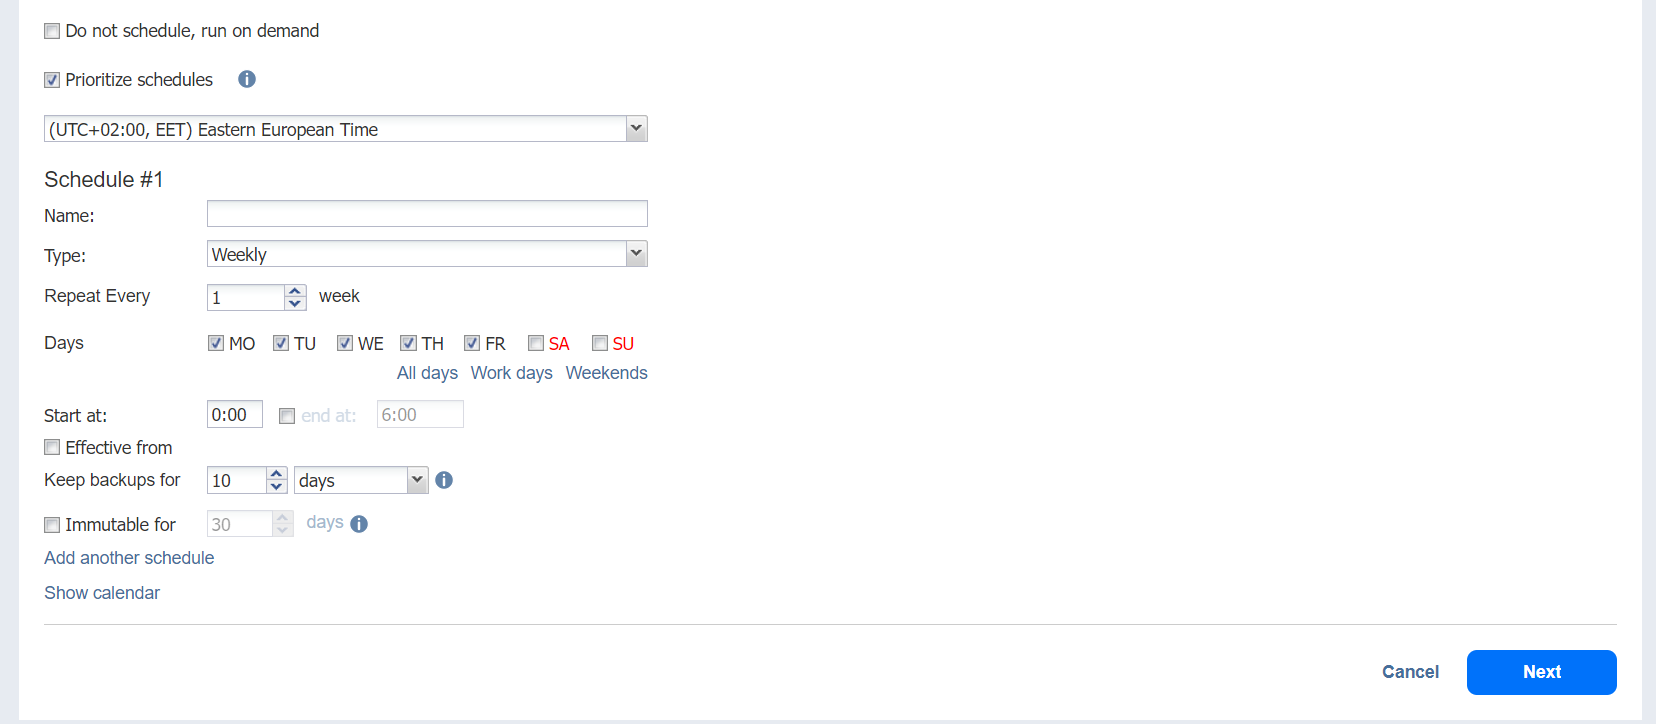
Prioritize schedules: When this option is selected, NAKIVO Backup & Replication starts treating schedules based on their priority.
Notes
-
Schedule prioritization rules apply only to the improved retention approach. If the Prioritize schedules option is enabled
-
If multiple schedules are configured to run the job on the same day, higher priority schedules (for example, yearly over monthly or weekly) take precedence, and lower priority schedules are skipped.
-
If multiple schedules of the same type overlap on the same day, the schedule with longer retention has higher priority.
-
-
Optionally, when creating any type of schedule, click Show Calendar to show the calendar or Hide Calendar to hide it.
When Amazon EC2, Amazon S3, Wasabi, Azure Blob Storage, Backblaze B2 Cloud Storage, or Local Folder is selected as the Backup Repository Type and the only backup destination, you can make recovery points in these repositories immutable during schedule creation. With immutability enabled, the recovery points are immutable and stored using the write-once-read-many (WORM) model. With Amazon EC2, Amazon S3, Wasabi, Azure Blob Storage, or Backblaze B2 Cloud Storage types of Backup Repository, immutable recovery points cannot be overwritten, deleted, or changed by the root user until the specified period has expired. For Local Folder type of Backup Repository, the root user can still clear immutability.
Notes
For the Immutability section to be available, the following conditions must be met:
Amazon EC2, Amazon S3, Wasabi, Azure Blob Storage, Backblaze B2 Cloud Storage, or Local Folder must be selected for Backup Repository Type on the Destination page of the wizard.
When Amazon EC2, Amazon S3, Wasabi, Azure Blob Storage, or Backblaze B2 Cloud Storage is selected as the Backup Repository Type, the bucket or blob container with the repository must have Object Lock or version-level immutability enabled respectively as well as Versioning.
For Local Folder type of Backup Repository, see feature requirements.
When creating the schedules, you can create schedules of the following types:
Weekly
You can configure the following options for this schedule type:
-
Schedule title: Designates the number of a schedule.
-
Name: Enter the name of your schedule.
-
Repeat every X weeks: Indicates how often the schedule is repeated.
-
Days: Select specific days when the schedule executes the job.
-
Start at: Specify the time when the job should start.
-
End at: Specify the time when the job should end.
-
Optionally, select the Effective from checkbox and choose the date when the schedule should come into effect.
-
Keep backups for: Specify how many days, months, or years NAKIVO Backup & Replication should retain the backups.
-
Immutable for X days: Enabling this option makes the recovery points immutable for the specified number of days.
-
Optionally, click Add another schedule if you want to add more than one schedule.

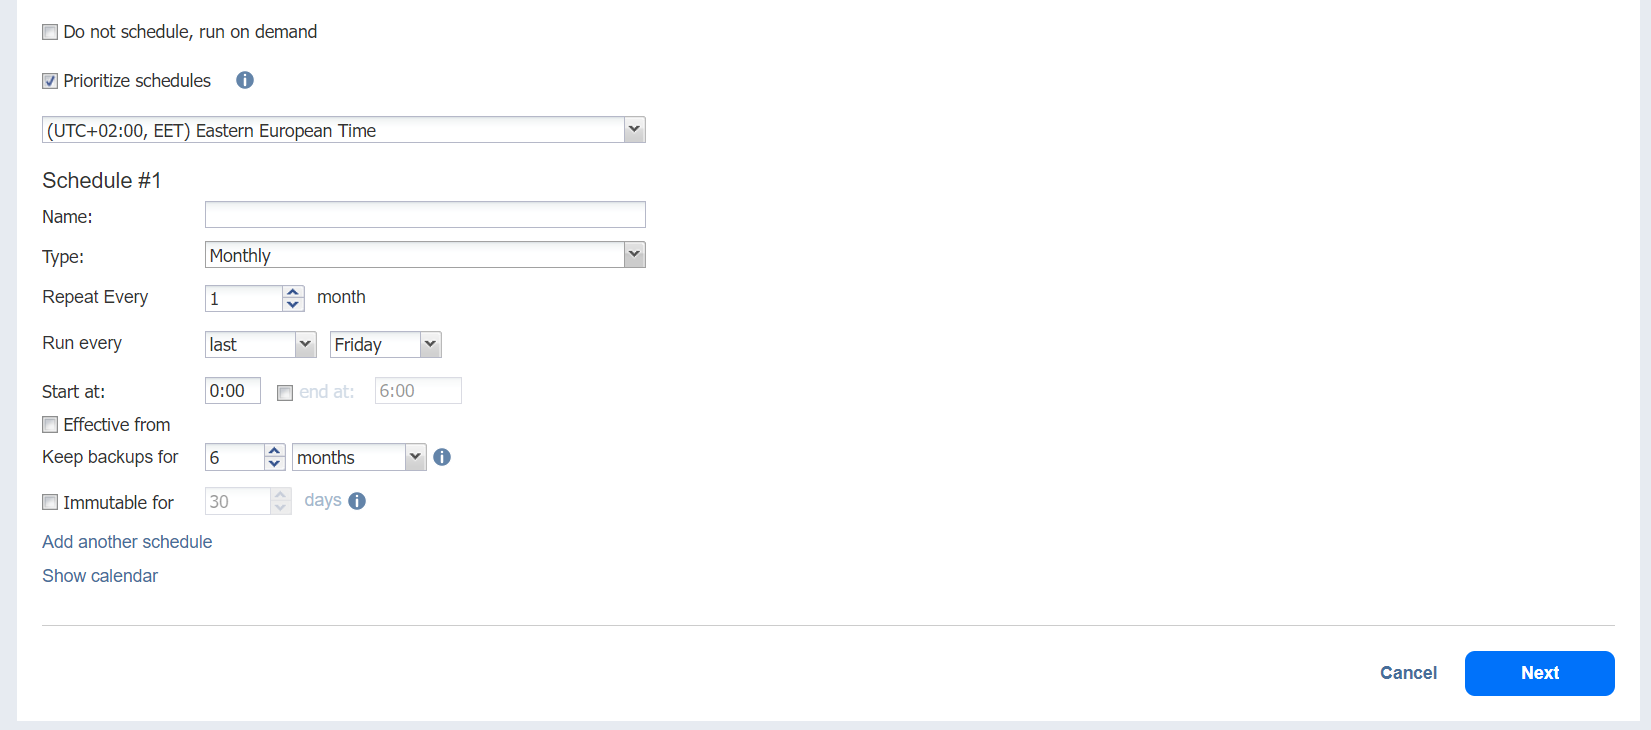
Monthly
You can configure the following options for this schedule type:
-
Schedule title: Designates the number of a schedule.
-
Name: Enter the name of your schedule.
-
Repeat every X months: Indicates how often the schedule is repeated.
-
Run every: Select specific days of the month when NAKIVO Backup & Replication executes the job.
-
Start at: Specify the time when the job should start.
-
End at: Specify the time when the job should end.
-
Optionally, select the Effective from checkbox and choose the date when the schedule should come into effect.
-
Keep backups for: Specify how many days, months, or years NAKIVO Backup & Replication should keep the backups.
-
Immutable for X days: Enabling this option makes the recovery points immutable for the specified number of days.
-
Optionally, click Add another schedule if you want to add more than one schedule.

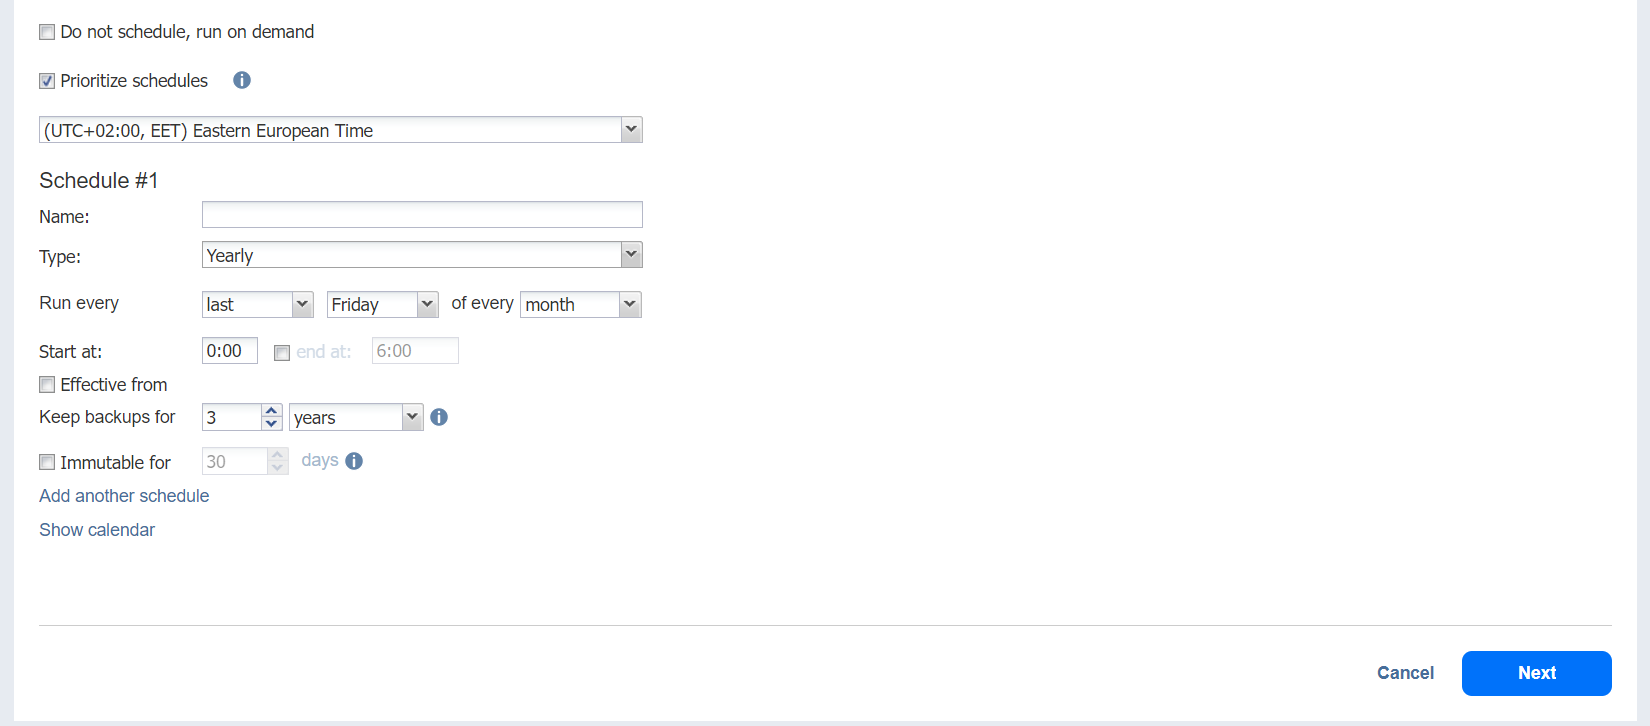
Yearly
You can configure the following options for this schedule type:
-
Schedule title: Designates the number of a schedule.
-
Name: Enter the name of your schedule.
-
Run every: Select specific days of the specific month when NAKIVO Backup & Replication executes the job.
-
Optionally, select the Effective from checkbox and choose the date when the schedule should come into effect.
-
Keep backups for: Specify how many days, months, or years NAKIVO Backup & Replication should keep the backups.
-
Immutable for X days: Enabling this option makes the recovery points immutable for the specified number of days.
-
Optionally, click Add another schedule if you want to add more than one schedule.

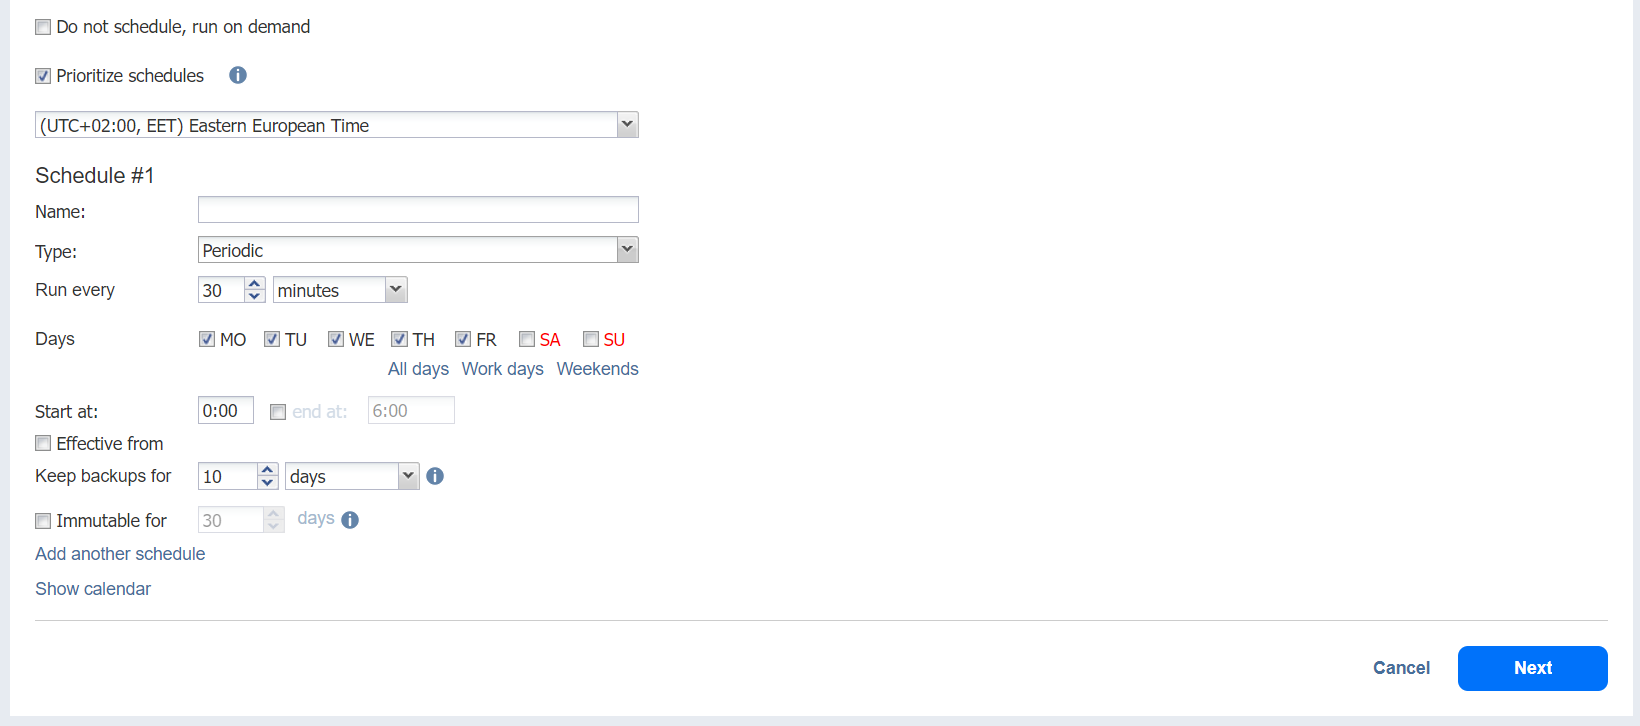
Periodical
You can configure the following options for this schedule type:
-
Schedule title: Designates the number of a schedule.
-
Name: Enter the name of your schedule.
-
Run every: Select the period measured in minutes, hours, or days when NAKIVO Backup & Replication executes the job.
-
Start at: Specify the time when the job should start.
-
End at: Specify the time when the job should end.
-
Days: Select specific days when the schedule executes the job.
-
Optionally, select the Effective from checkbox and choose the date when the schedule should come into effect.
-
Keep backups for: Specify how many days, months, or years NAKIVO Backup & Replication should keep the backups.
-
Immutable for X days: Enabling this option makes the recovery points immutable for the specified number of days.
-
Optionally, click Add another schedule if you want to add more than one schedule.
-
Optionally, when creating any type of schedule, click Show Calendar to show the calendar or Hide Calendar to hide it.

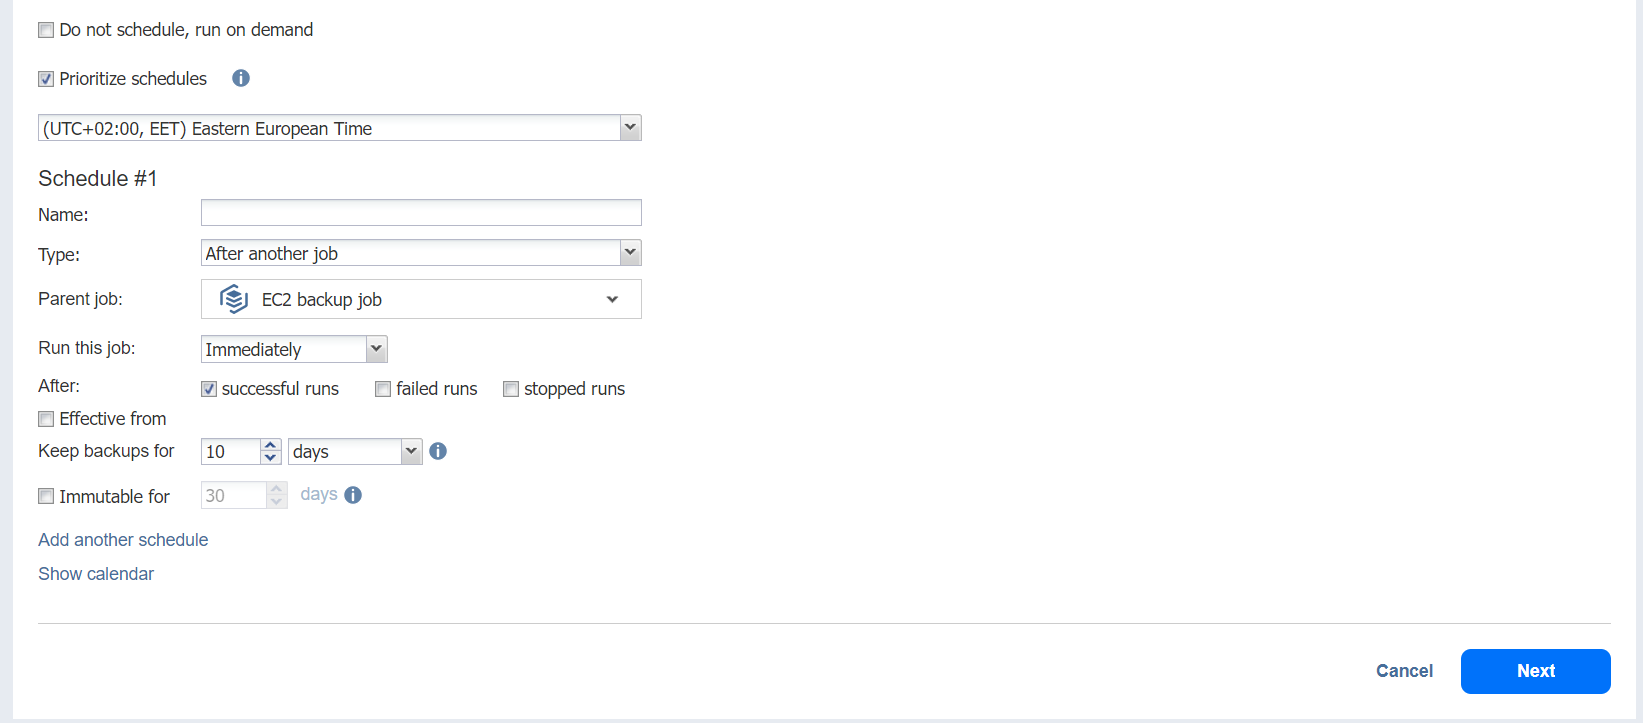
After Another Job
You can configure the following options for this schedule type:
Note
This option is disabled if there are no other jobs.
-
Schedule title: Designates the number of a schedule.
-
Name: Enter the name of your schedule.
-
Parent job: Select the job after which this job starts running.
-
Run this job: Select one of the following options:
-
Immediately: The schedule starts right after the parent job is completed.
-
Delayed: The schedule starts after the specified number of minutes or hours following parent job completion.
-
-
Optionally, select the Effective from checkbox and choose the date when the schedule should come into effect.
-
Keep backups for: Specify how many days, months, or years NAKIVO Backup & Replication should keep the backups.
-
Immutable for X days: Enabling this option makes the recovery points immutable for the specified number of days.
-
Optionally, click Add another schedule if you want to add more than one schedule.
-
Optionally, click Show Calendar to show the calendar or Hide Calendar to hide it.

Creating Legacy Schedules
Before creating a new schedule, you can optionally enable the following settings:
-
Click Use New Scheduler to switch to the Improved retention approach.
-
Do not schedule, run on demand: Enable this option if you want to start the job manually.
-
Optionally, when creating any type of schedule, click Show Calendar to show the calendar or Hide Calendar to hide it.
-
Optionally, click Add another schedule if you want to add more than one schedule.
Notes
-
In the legacy retention approach, schedule prioritization rules are not applied.
-
Schedules are initiated based on their configured start time and system concurrency constraints. If multiple schedules are due to start at the same time, the product attempts to start one of them; however, which schedule runs first is not deterministic and may vary between runs.
-
It is recommended to use the improved retention approach if predictable execution order or schedule prioritization is required.
-
Daily or Weekly Backup
To run the job once a day, choose Run daily/weekly from the schedule drop-down list and do the following:
-
Specify the time when the job should be started in the Starting box.
-
Specify the end time for the job in the Ending box. If the job has not completed by the time specified, the job will be stopped.
-
Choose a time zone that should be used for the job start and end times from the time zone drop-down list.
-
Select the days of the week during which the job will be started.
-
If necessary, select the Effective from checkbox and pick the date when the schedule comes into effect.


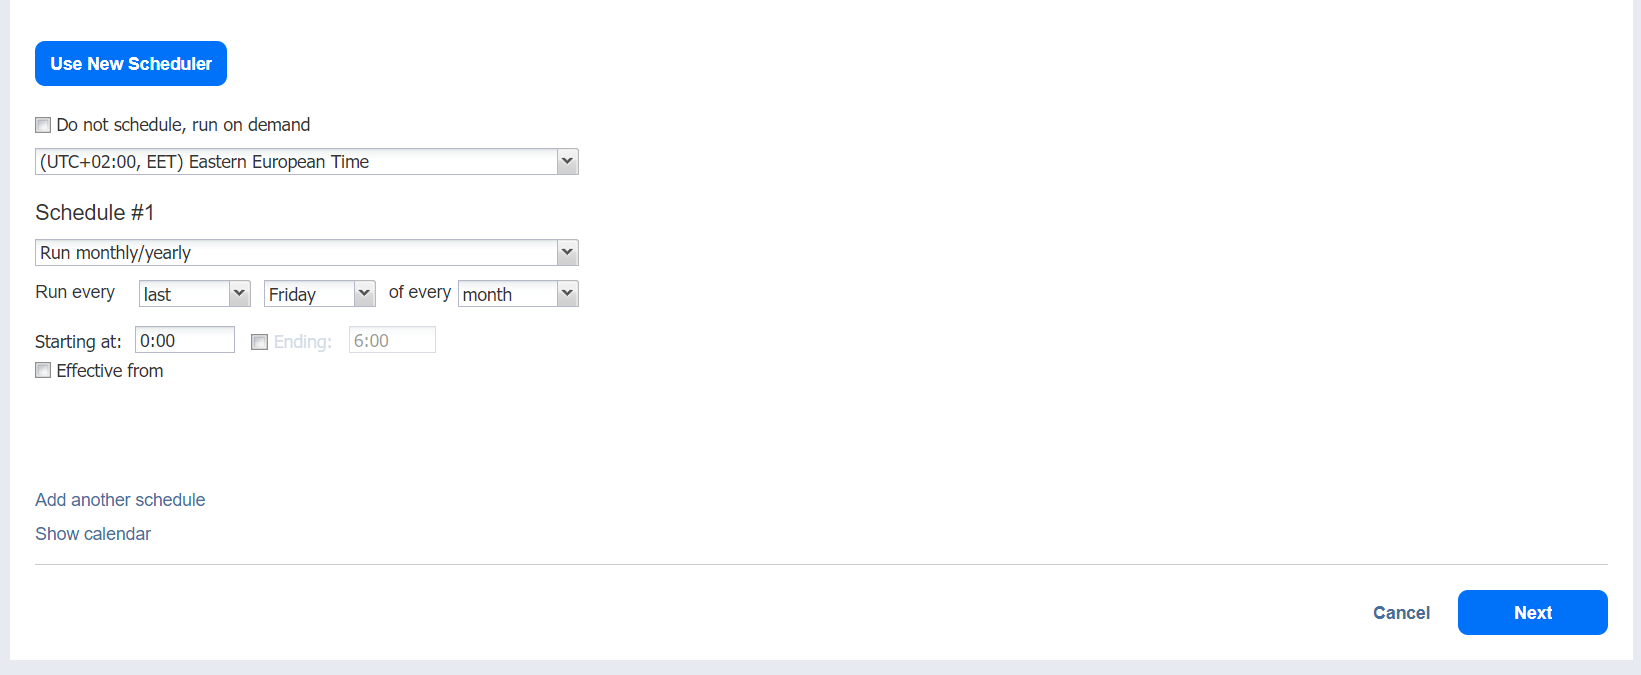
Monthly or Yearly Backup
To run the job monthly or yearly, choose Monthly/yearly from the schedule drop-down list and do the following:
-
Specify the job start schedule in the appropriate boxes.
-
Specify the day and month when the job should be started in the Run every boxes.
-
Specify the time when the job should be started in the Starting box.
-
Specify the end time for the job in the Ending box. If the job has not completed by the time specified, the job will be stopped.
-
If necessary, select the Effective from checkbox and pick the date when the schedule comes into effect.

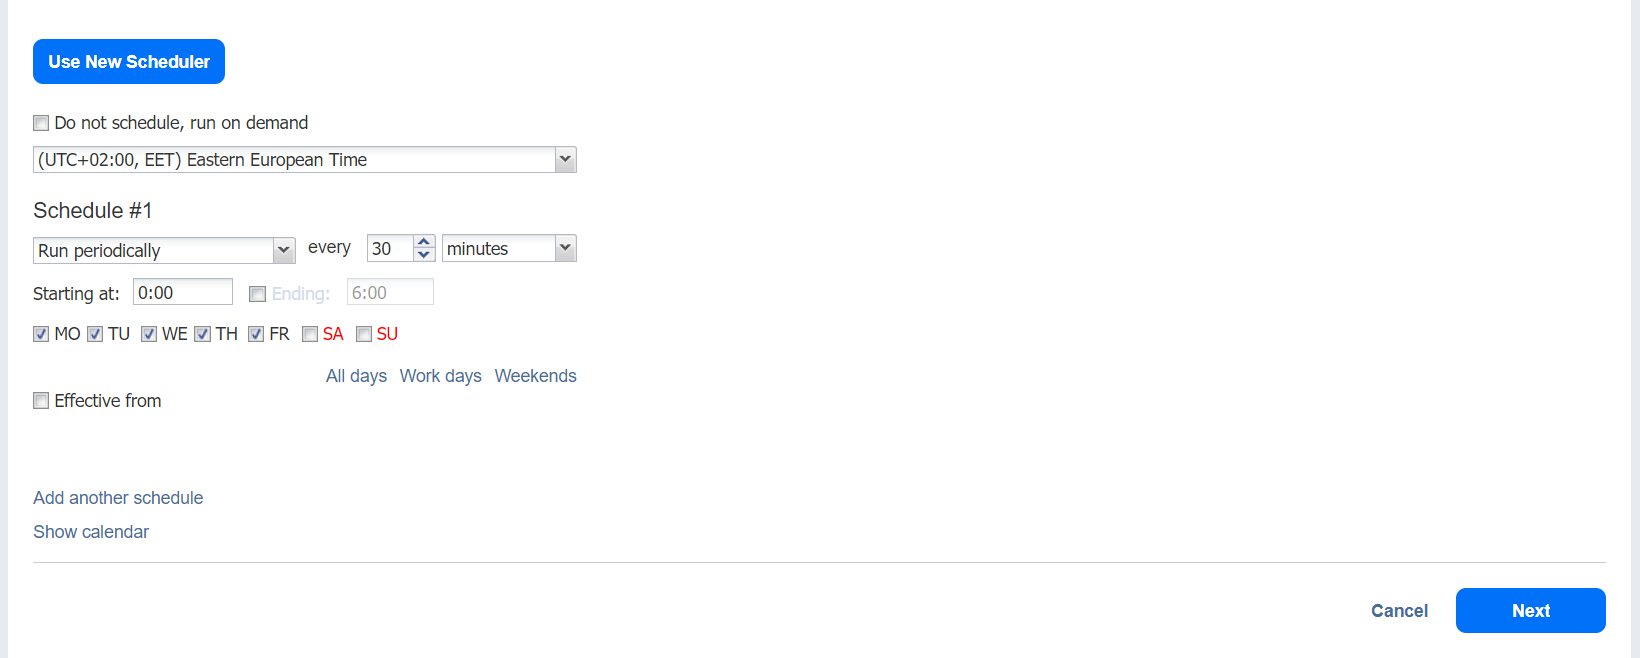
Periodic Backup
To run the job multiple times per day, choose Run periodically from the schedule drop-down list and then choose a time period from the appropriate boxes:
-
Specify the time when the job should be started in the Starting box.
-
Specify the end time for the job in the Ending box. If the job has not completed by the time specified, the job will be stopped.
-
Select the days of the week during which the job will be started.
-
If necessary, select the Effective from checkbox and pick the date when the schedule comes into effect.

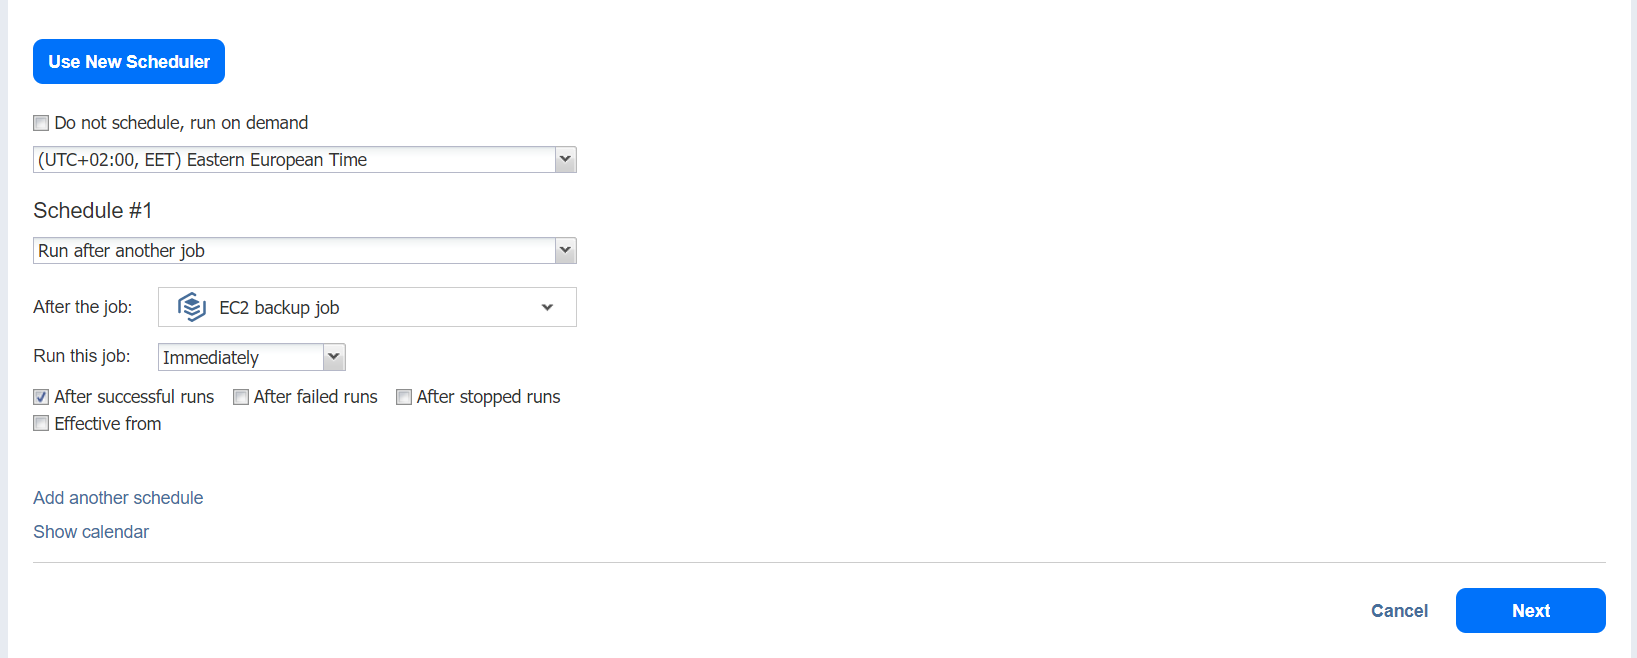
Chained Job
To run the job after a previous one has completed, choose Run after another job from the schedule drop-down list and set the options as follows:
-
After the job: Select a job after which the current job will be started.
-
Run this job: Choose whether to run the current job immediately after the previous one has completed or within a delay.
-
After successful runs: If selected, the job will run if the previous one has completed successfully.
-
After failed runs: If selected, the job will run if the previous one has failed.
-
After stopped runs: If selected, the job will run if the previous one has been stopped.
-
Effective from: If selected, the schedule will come into effect on the date picked.