Failback Job Wizard for Microsoft Hyper-V: Re-IP
When the IP addressing scheme for the replica differs from the IP addressing scheme for the Hyper-V source VMs, your failback job needs relations between source VMs addresses and the replica VMs addresses to be performed successfully. These relations are called Re-IP rules.
Warning
Hyper-V Integration Services must be running on source VMs to enable successful re-IP for your failback job.
To map a source VM IP address to a specific target IP address, do the following on the Re-IP page of the wizard:
-
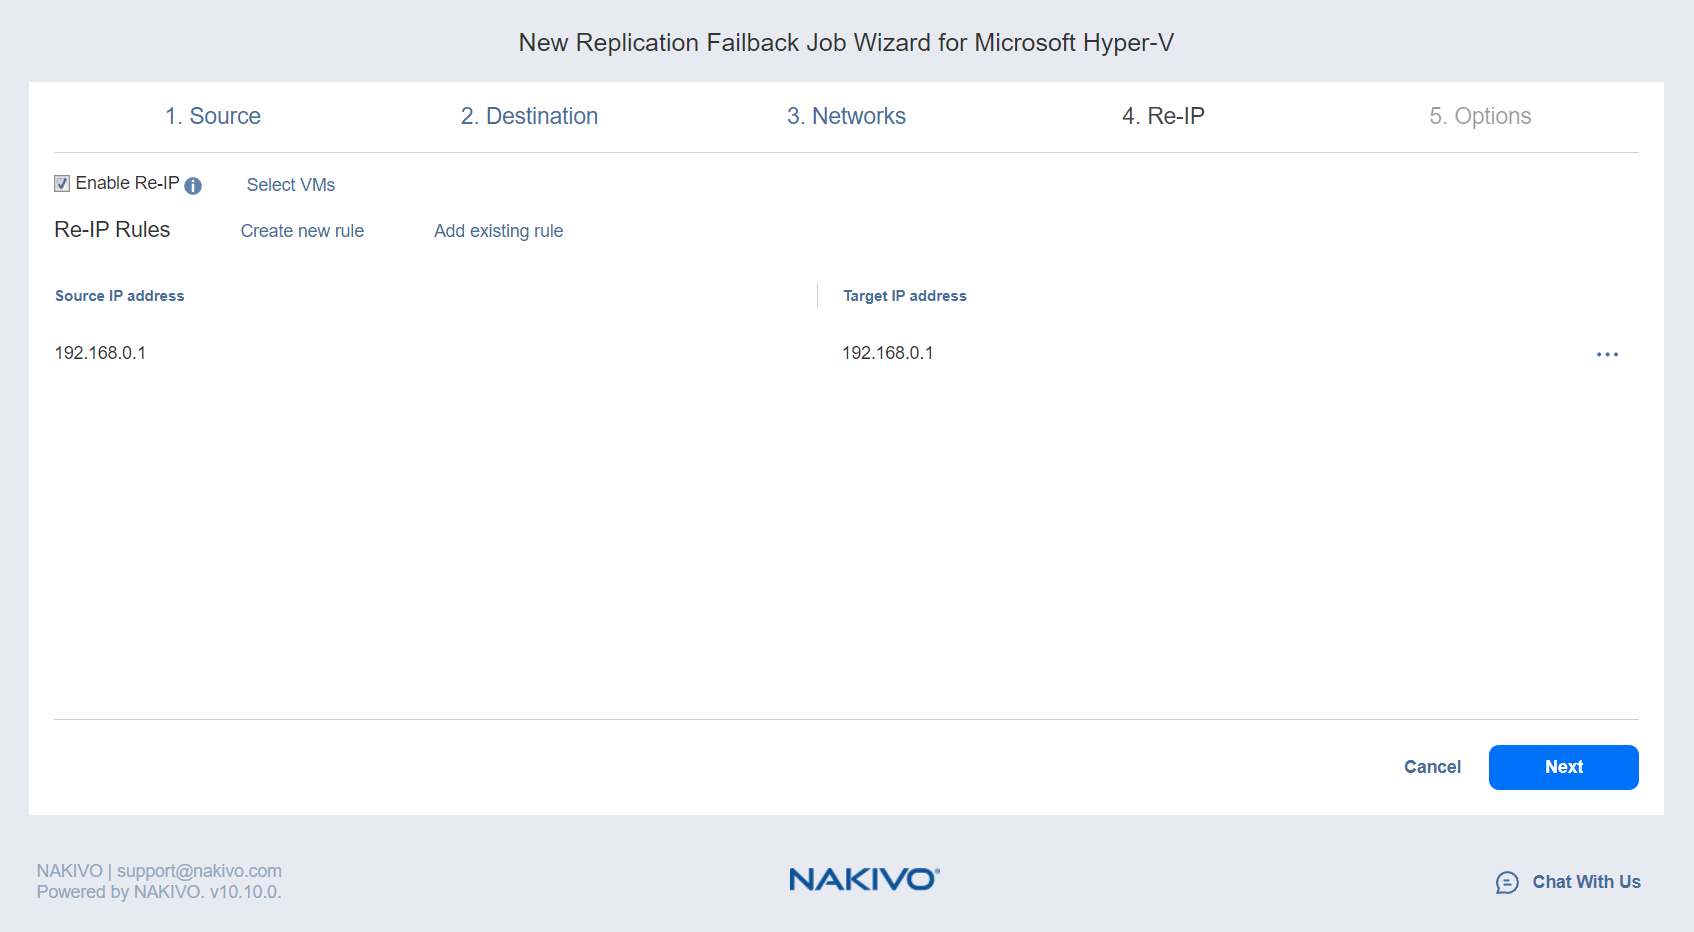
Select Enable Re-IP.
-
The Re-IP Rules section opens. Click the Select VMs link.
-
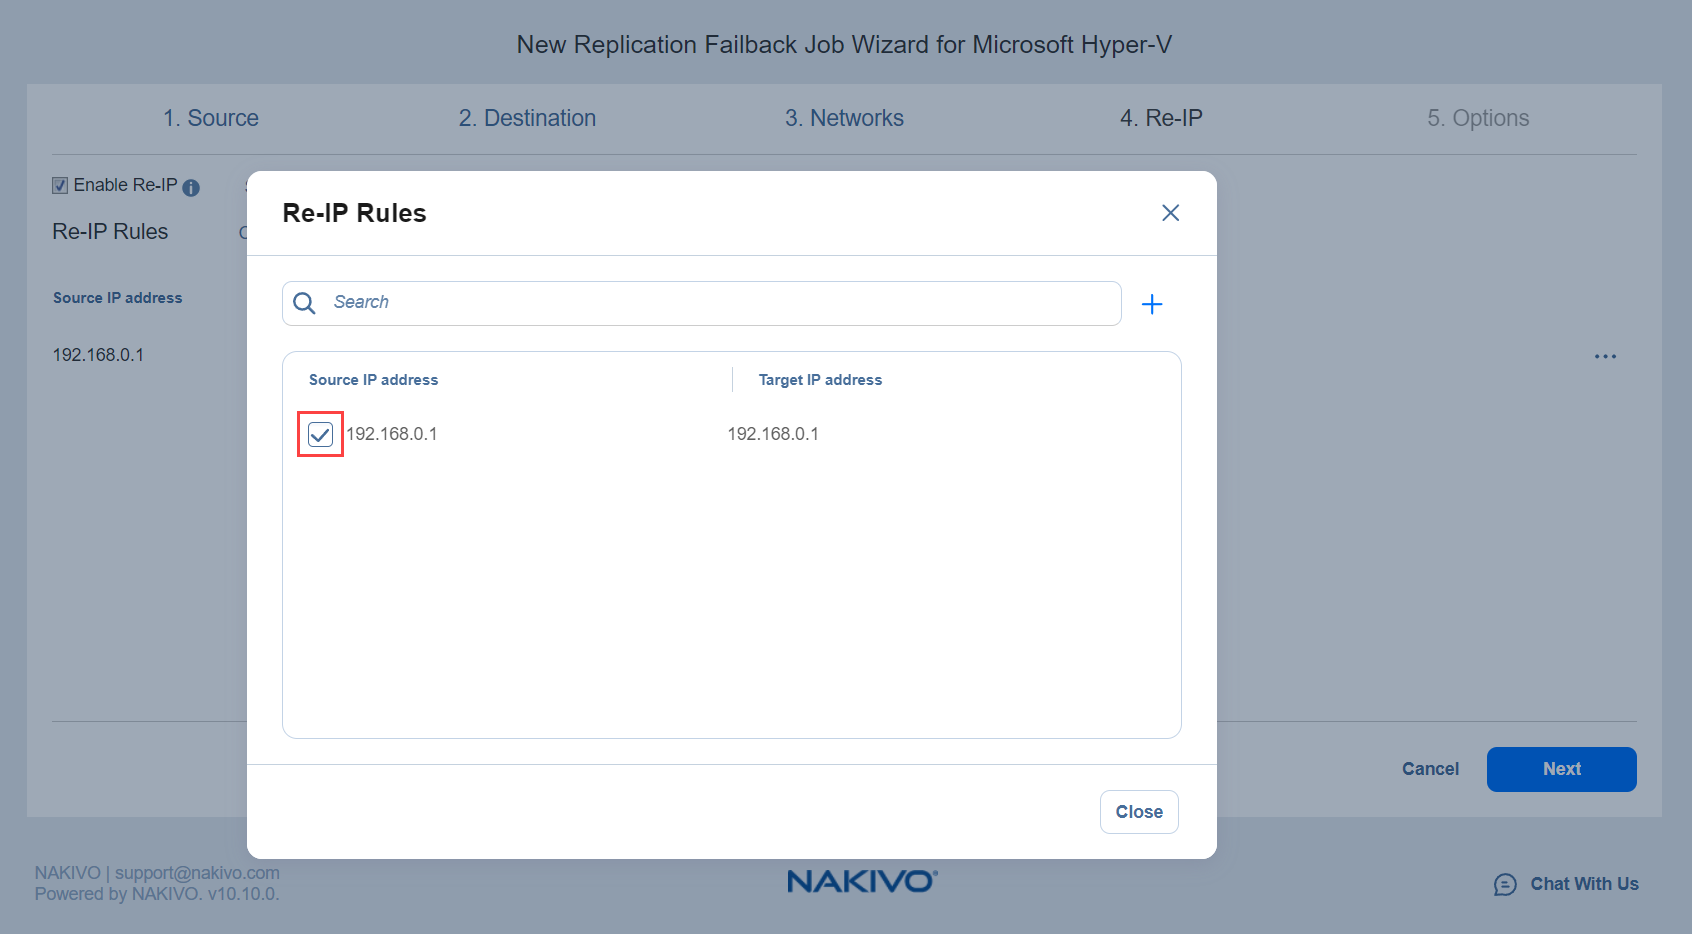
The Re-IP dialog opens. In the list of your source VMs, select at least one and close the dialog.
-
You have the following options:
-
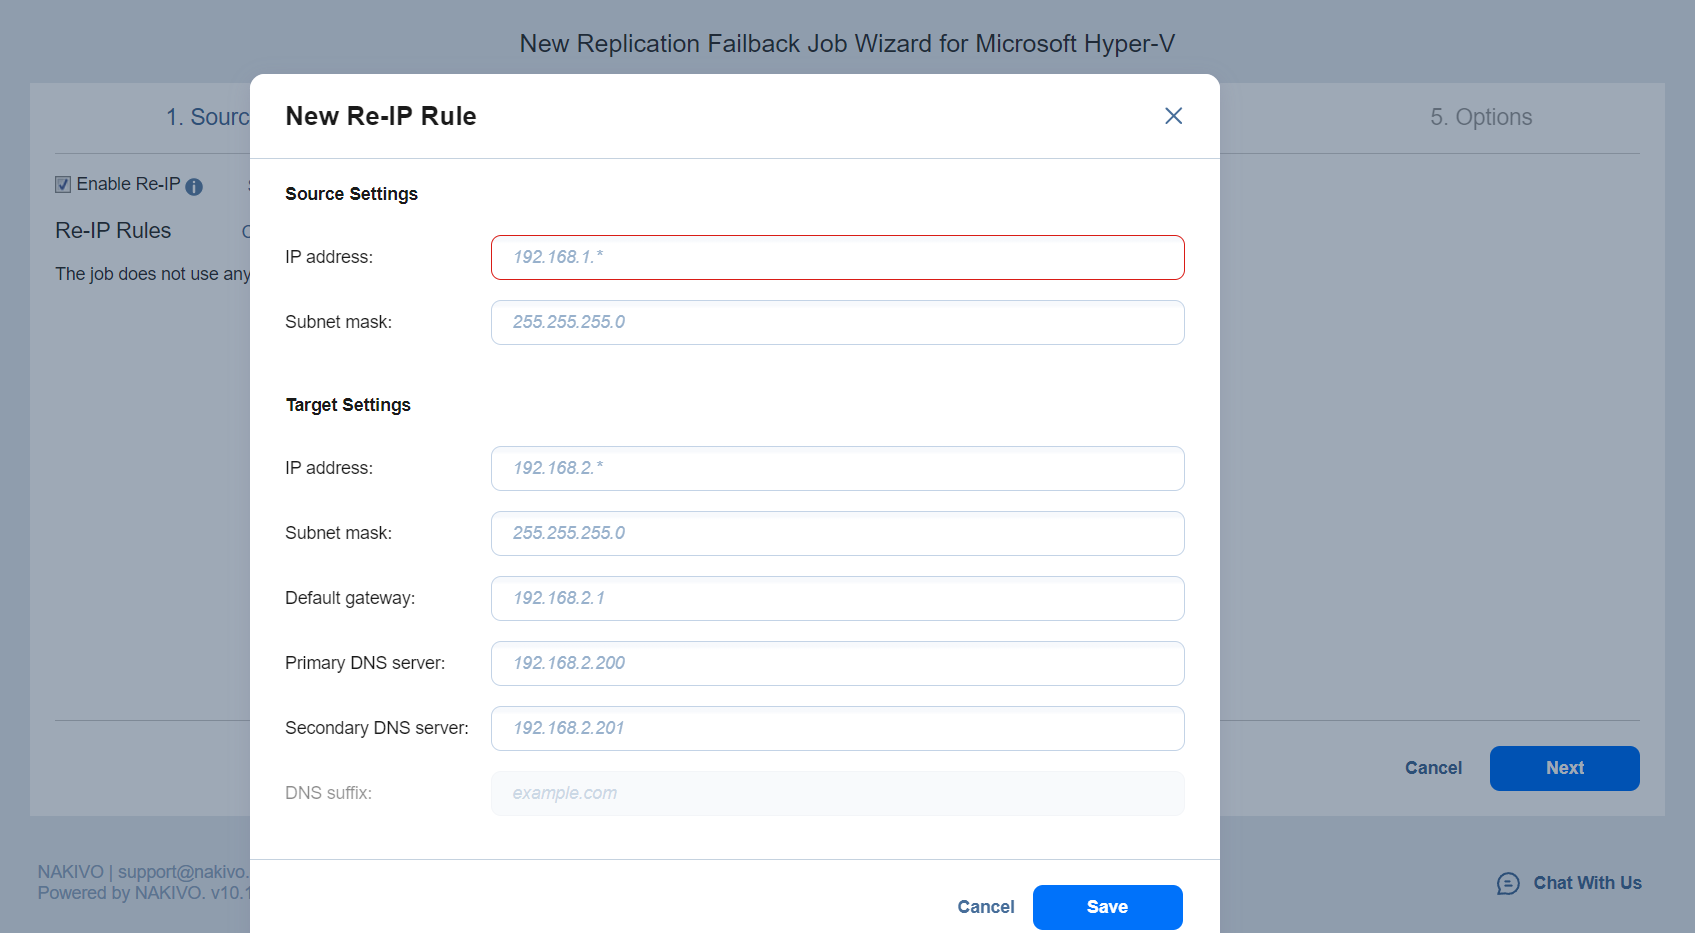
Create a new rule:
-
Click Create new rule.
-
The New Re-IP Rule dialog opens. Enter source and target settings for the Re-IP rule and click Save.

Note
You can use wildcards for IP addresses.Example
When the 192.168.1.* -> 10.30.30.* Re-IP rule, a source VM IP address such as 192.168.1.50 will be changed to the 10.30.30.50 IP address for your replica failback job.
When there are several Re-IP rules applicable to your source VM, the application will define the most suitable one and apply it to the source VM IP address.
-
-
Add an existing rule:
-
Click Add existing rule.
-
The Re-IP Rules dialog opens. Choose an appropriate Re-IP rule and close the dialog box.

-
-
Edit an existing Re-IP rule:
-
Hover over the required item in the Re-IP Rules list.
-
A toolbar with icons opens to the right of the item. Click the Edit icon.
-
The Edit Re-IP Rule dialog box opens. Edit the required properties of the Re-IP rule and click Save.
-
-
Delete an existing mapping:
-
Hover the pointer over the necessary item in the Re-IP Rules
-
A toolbar with icons opens to the right of the item. Click the Delete icon.
-
-
To leave the list of existing Re-IP rules intact, go to the next page of the wizard.
-
-
Click Next to go to the next page of the wizard.