Configuring Active Directory Integration
To configure Active Directory integration, follow these steps:
-
Go to Settings > General > Users and Roles.
-
The Users & Roles page opens. Click the Configure AD Integration button.
-
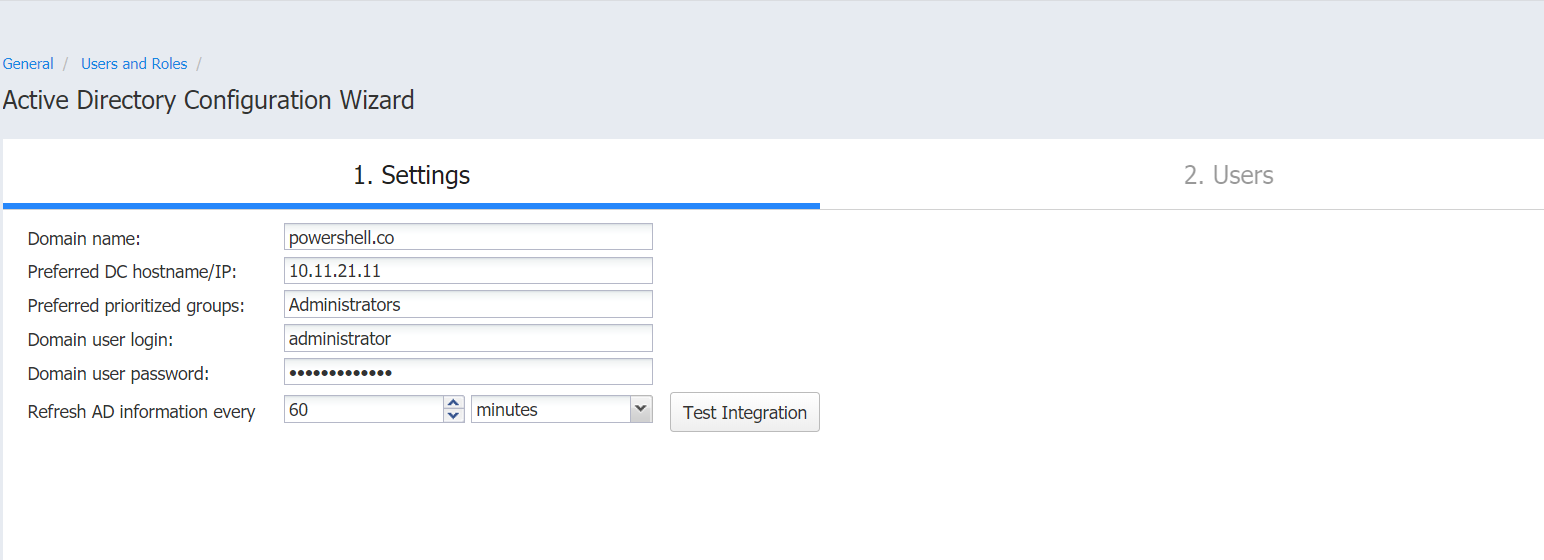
The Active Directory Configuration Wizard opens on the Settings page. Proceed as follows:
-
In the Domain name box, enter the domain name.
-
In the Preferred DC hostname/IP box, enter the name of the preferred domain controller or its IP address.
-
Optionally, you can enter the name of the preferred Active Directory groups in the Preferred prioritized groups box.
Note
If a user is a member of two or more Active Directory groups, enter the prioritized group’s name in this field. -
In the Domain user login box, enter the username that will be applied when integrating Active Directory.
-
In the Domain user password box, enter the user password that will be applied when integrating Active Directory.
-
Refresh AD information every: Specify a periodicity of refreshing Active Directory information.
-
Click the Test Integration button to verify the successful integration with Active Directory.
-
If Active Directory integration is tested successfully, a checkmark appears beside the Test Integration button. Then click Next to go to the next page of the wizard. If you fail to connect to the AD domain, refer to the Knowledge Base article for possible causes.
-
On the Users page of the wizard, proceed with adding an Active Directory user.
-
When the wizard closes, the Users & Roles page opens, displaying the newly-added Active Directory users in the list of users.