Configuring Active Directory Integration
To configure Active Directory integration, follow these steps:
-
Go to Settings > General > Users and Roles.
-
The Users & Roles page opens. Click the Configure AD Integration button.
-
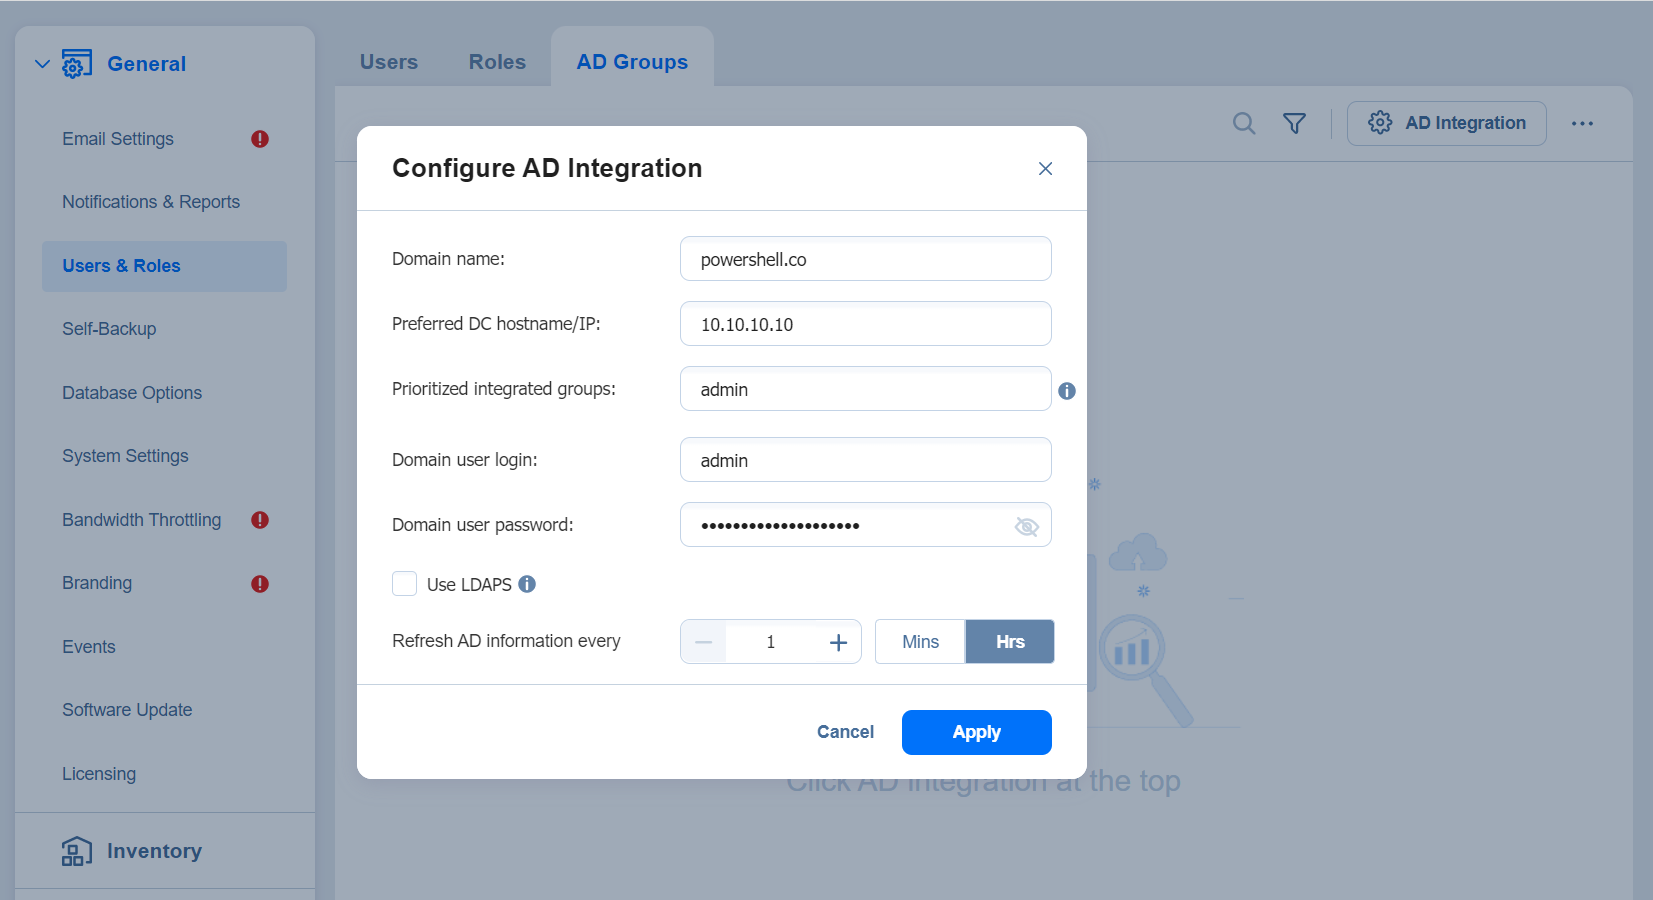
The Active Directory Configuration Wizard opens on the Settings page. Proceed as follows:
-
In the Domain name box, enter the domain name.
-
In the Preferred DC hostname/IP box, enter the name of the preferred domain controller or its IP address.
-
Optionally, you can enter the name of the preferred Active Directory groups in the Prioritized integrated groups box.
Note
If a user is a member of two or more Active Directory groups, enter the prioritized group’s name in this field. -
In the Domain user login box, enter the username that will be applied when integrating Active Directory.
-
In the Domain user password box, enter the user password that will be applied when integrating Active Directory.
-
Optionally, enable Use LDAPS option. If checked, port 636 is used for LDAP (Lightweight Directory Access Protocol) over SSL.
-
Refresh AD information every: Specify a periodicity of refreshing Active Directory information.
-
In case Active Directory integration was successfully completed before, you can optionally click Remove AD Integration to cancel the AD integration.
Note
The Remove AD Integration option is disabled if AD integration is not configured.
-
Click Apply after you're done.
-
On the Users page of the wizard, proceed with adding an Active Directory user.
-
When the wizard closes, the Users & Roles page opens, displaying the newly-added Active Directory users in the list of users.