Replication Job Wizard for Hyper-V: Destination
On the Destination page, select a location for your Hyper-V replicas.
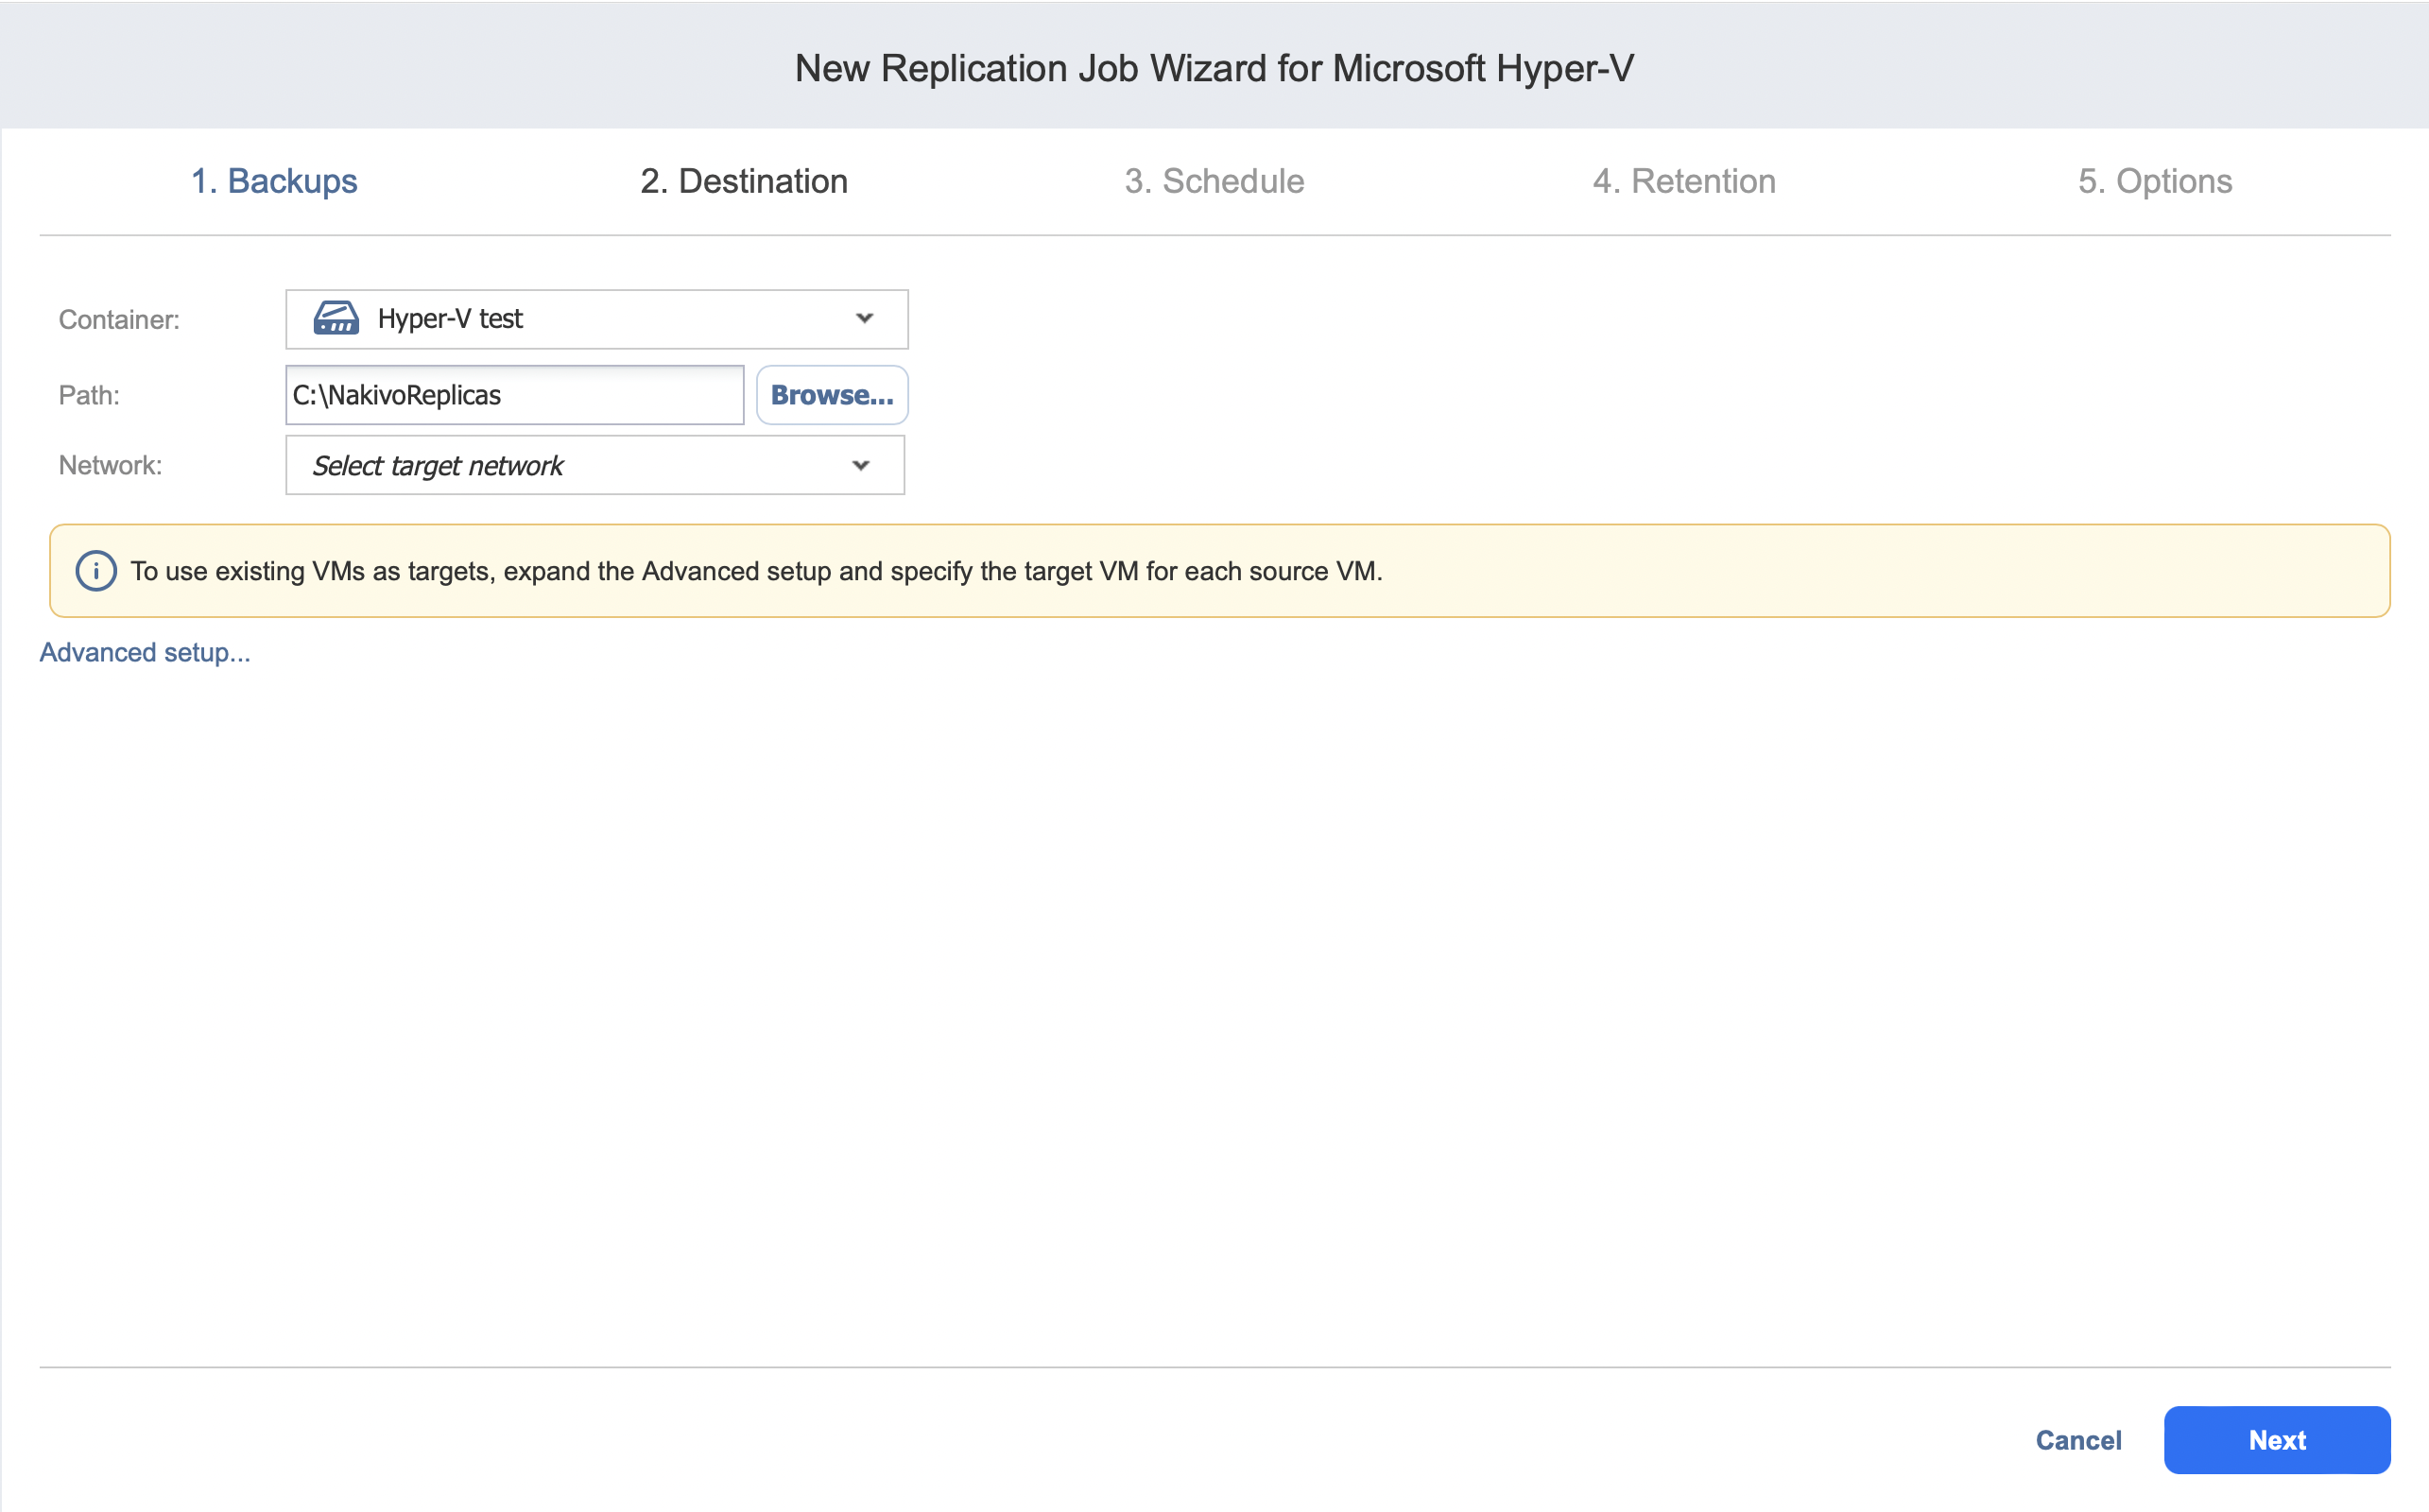
Setting the Same Host and Path for All Replicas
To replicate all VMs to the same server and location, and to connect all replicas to the same network:
-
Choose a server from the Container drop-down list.
-
Enter a path to the location where you want to store VM replicas in the Path field. Optionally, use the Browse button to navigate to the path. It can be either a local or shared path.
Notes
To connect to a shared path successfully, make sure that the following requirements are met:-
The shared path is created with the same credentials as the corresponding Hyper-V container. See Adding Microsoft Hyper-V Servers for details on adding Hyper-V containers to the inventory of NAKIVO Backup & Replication.
-
The logon session in which you created the shared path has not ended. As a workaround, create a symbolic link to the shared path from the Hyper-V container. Refer to Step 7 in High Availability of NAKIVO Backup & Replication for details.
-
-
If you are creating a Replication job from an existing Backup job, select the target network from the Network drop-down list. For more details, see Replication Job Wizard for Hyper-V: Source.
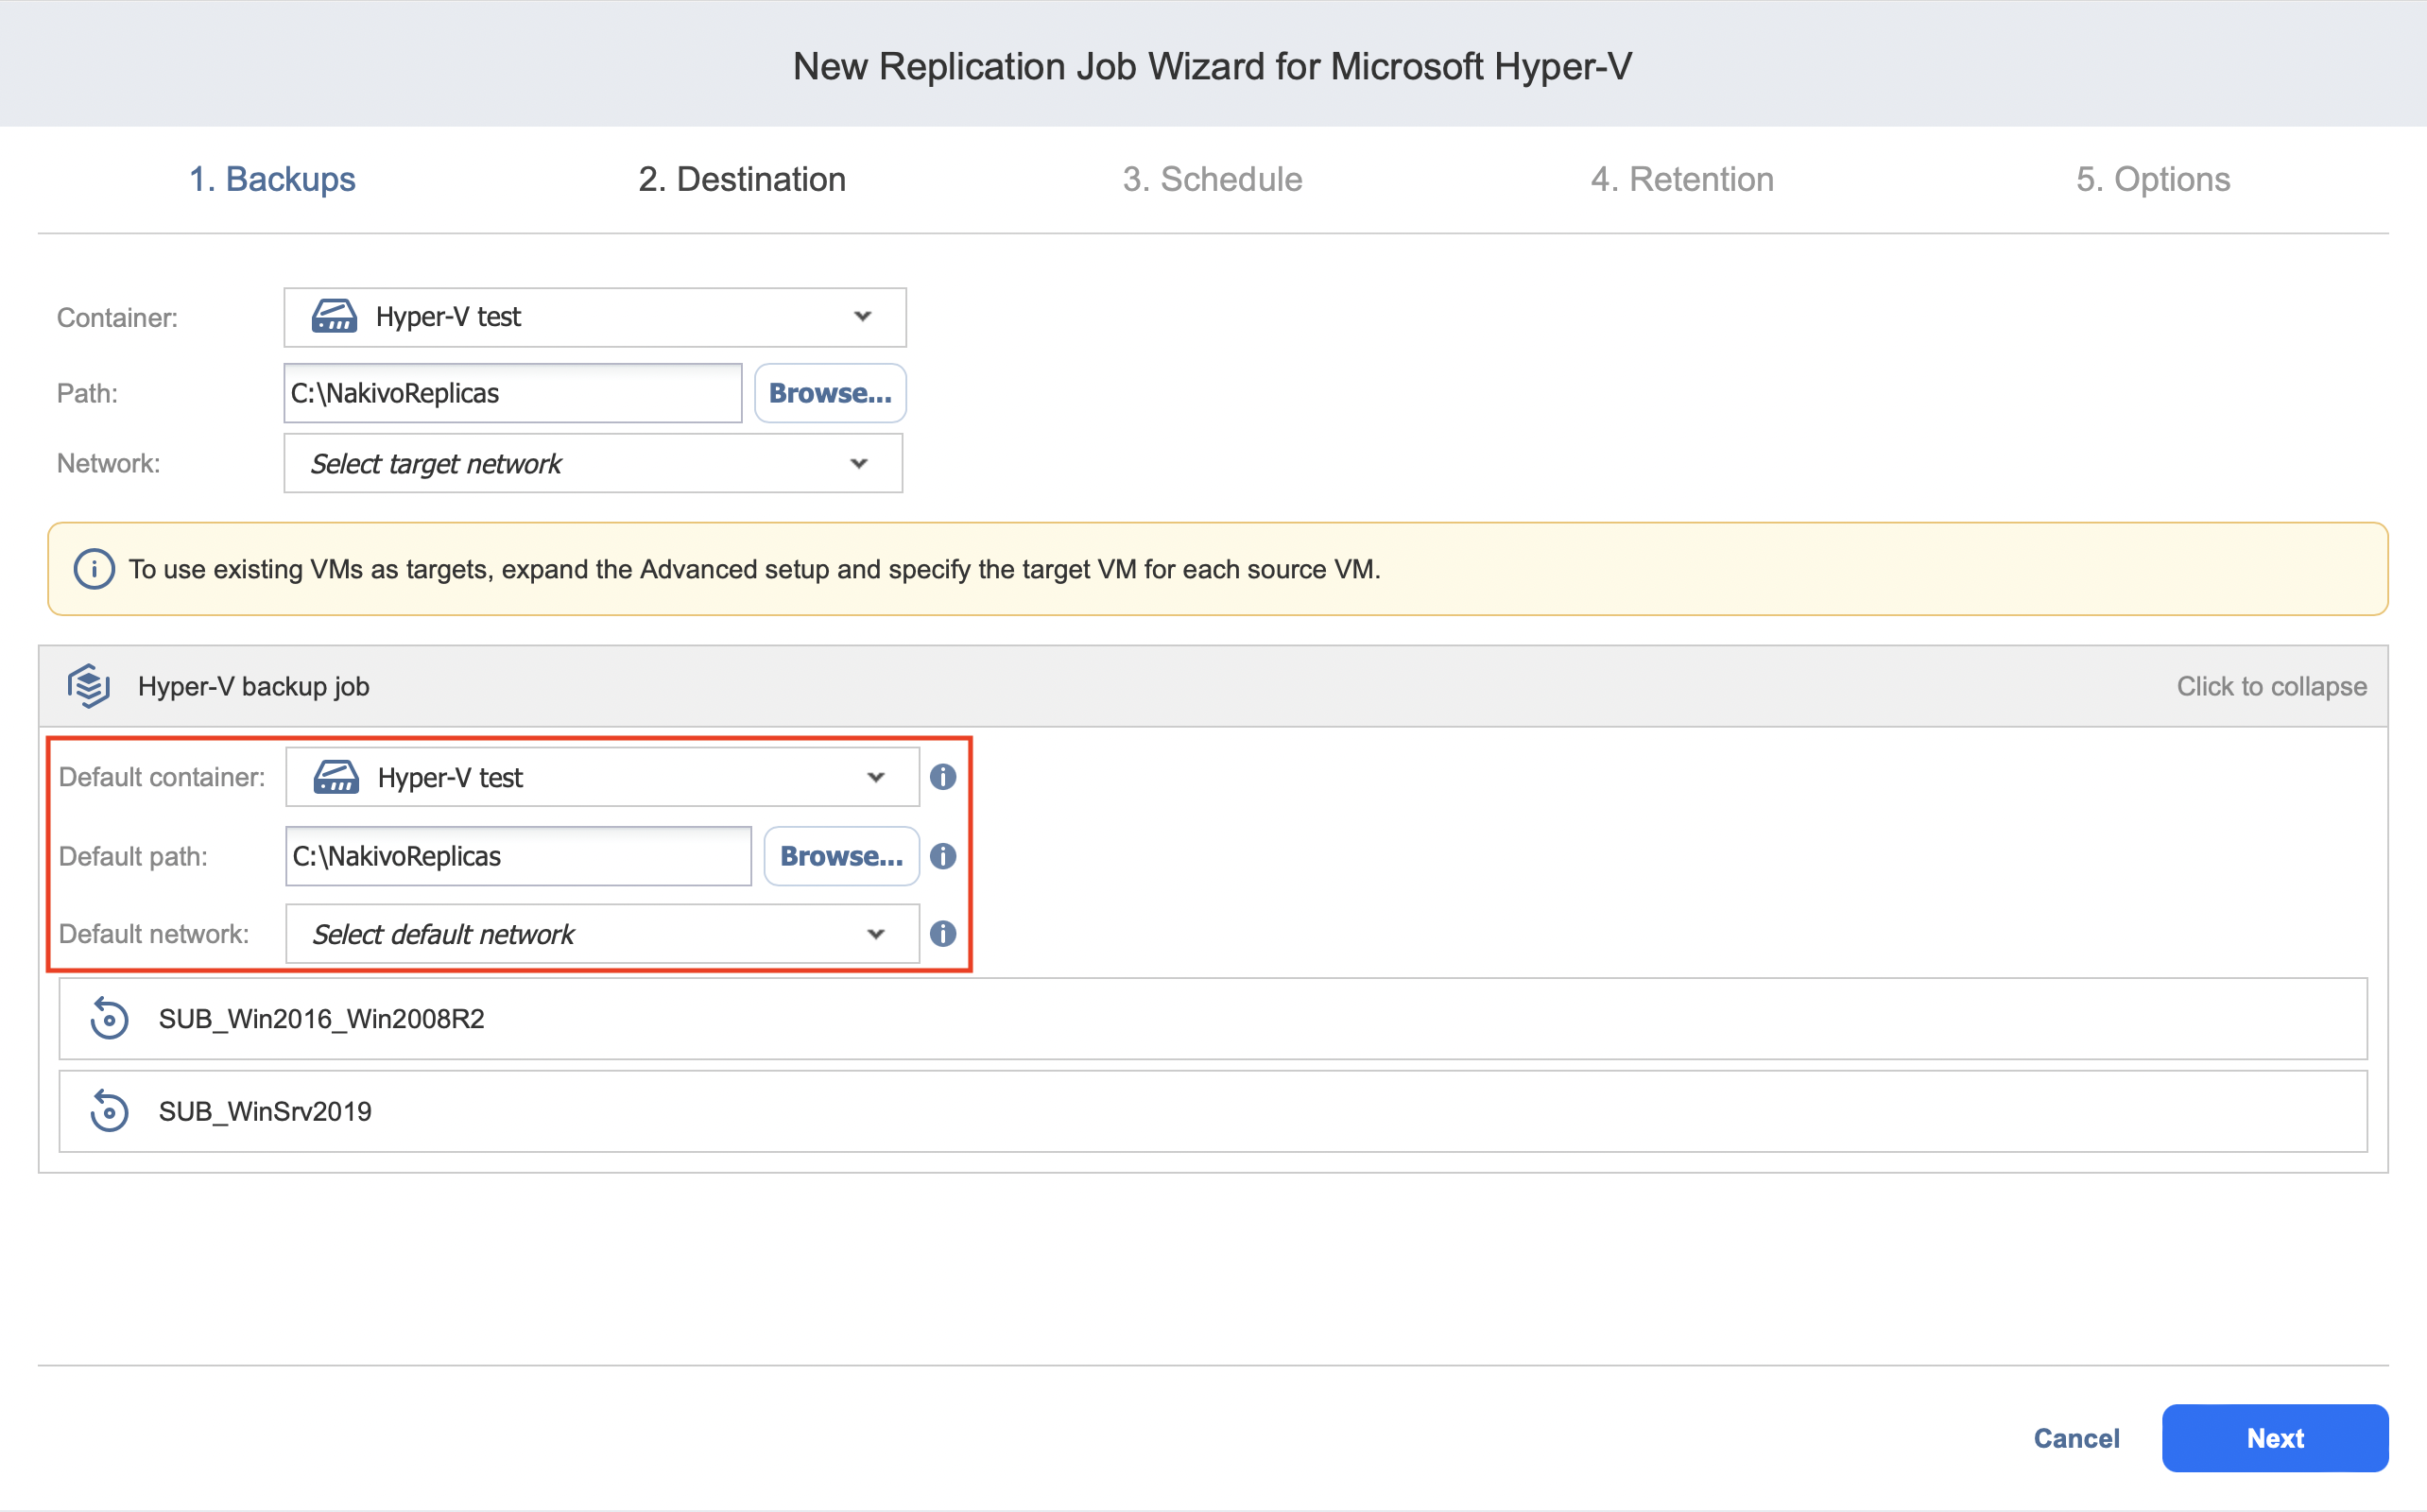
Setting the Default Destination for Replicas
If you have chosen a host, cluster, folder, or a resource pool as a source for your replication job on the Source wizard page, you can set a default container, datastore, and VM folder for replicas. To do this:
-
Click Advanced setup and then click on the name of the chosen host, cluster, folder, or resource pool.
-
Choose a Default container.
-
If you have chosen a Backup job on the Source page, you can choose a Default Network.
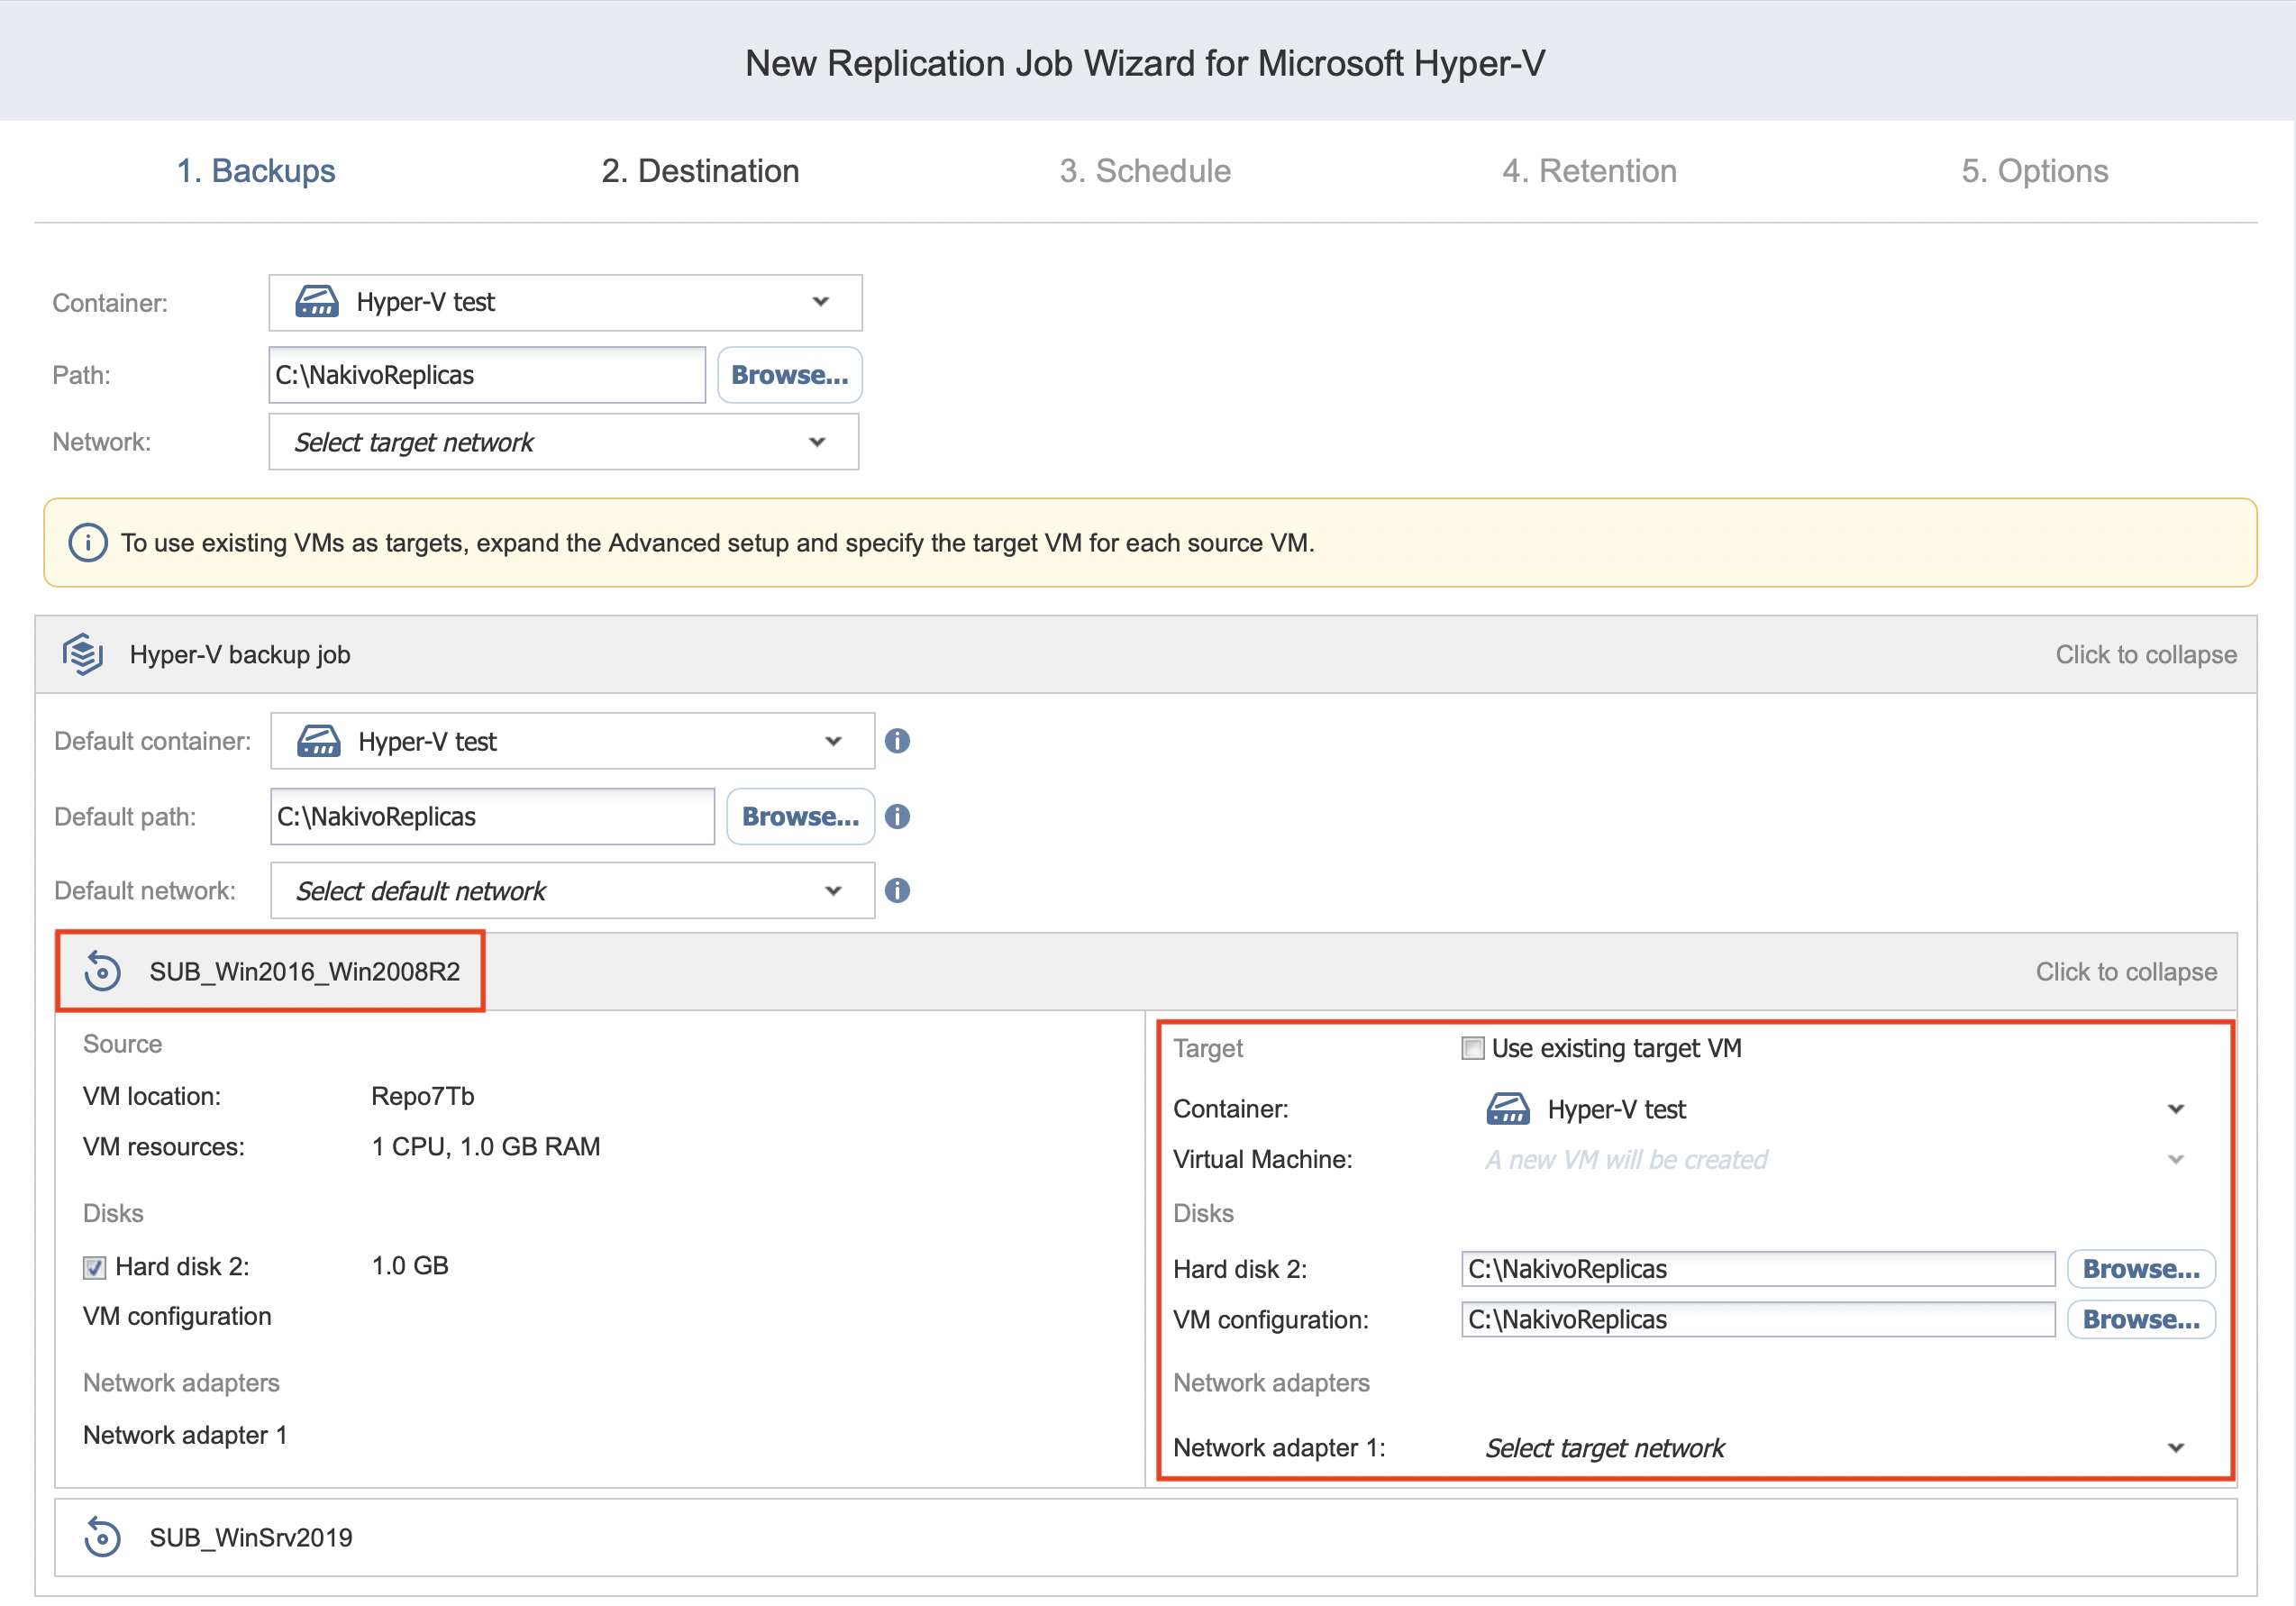
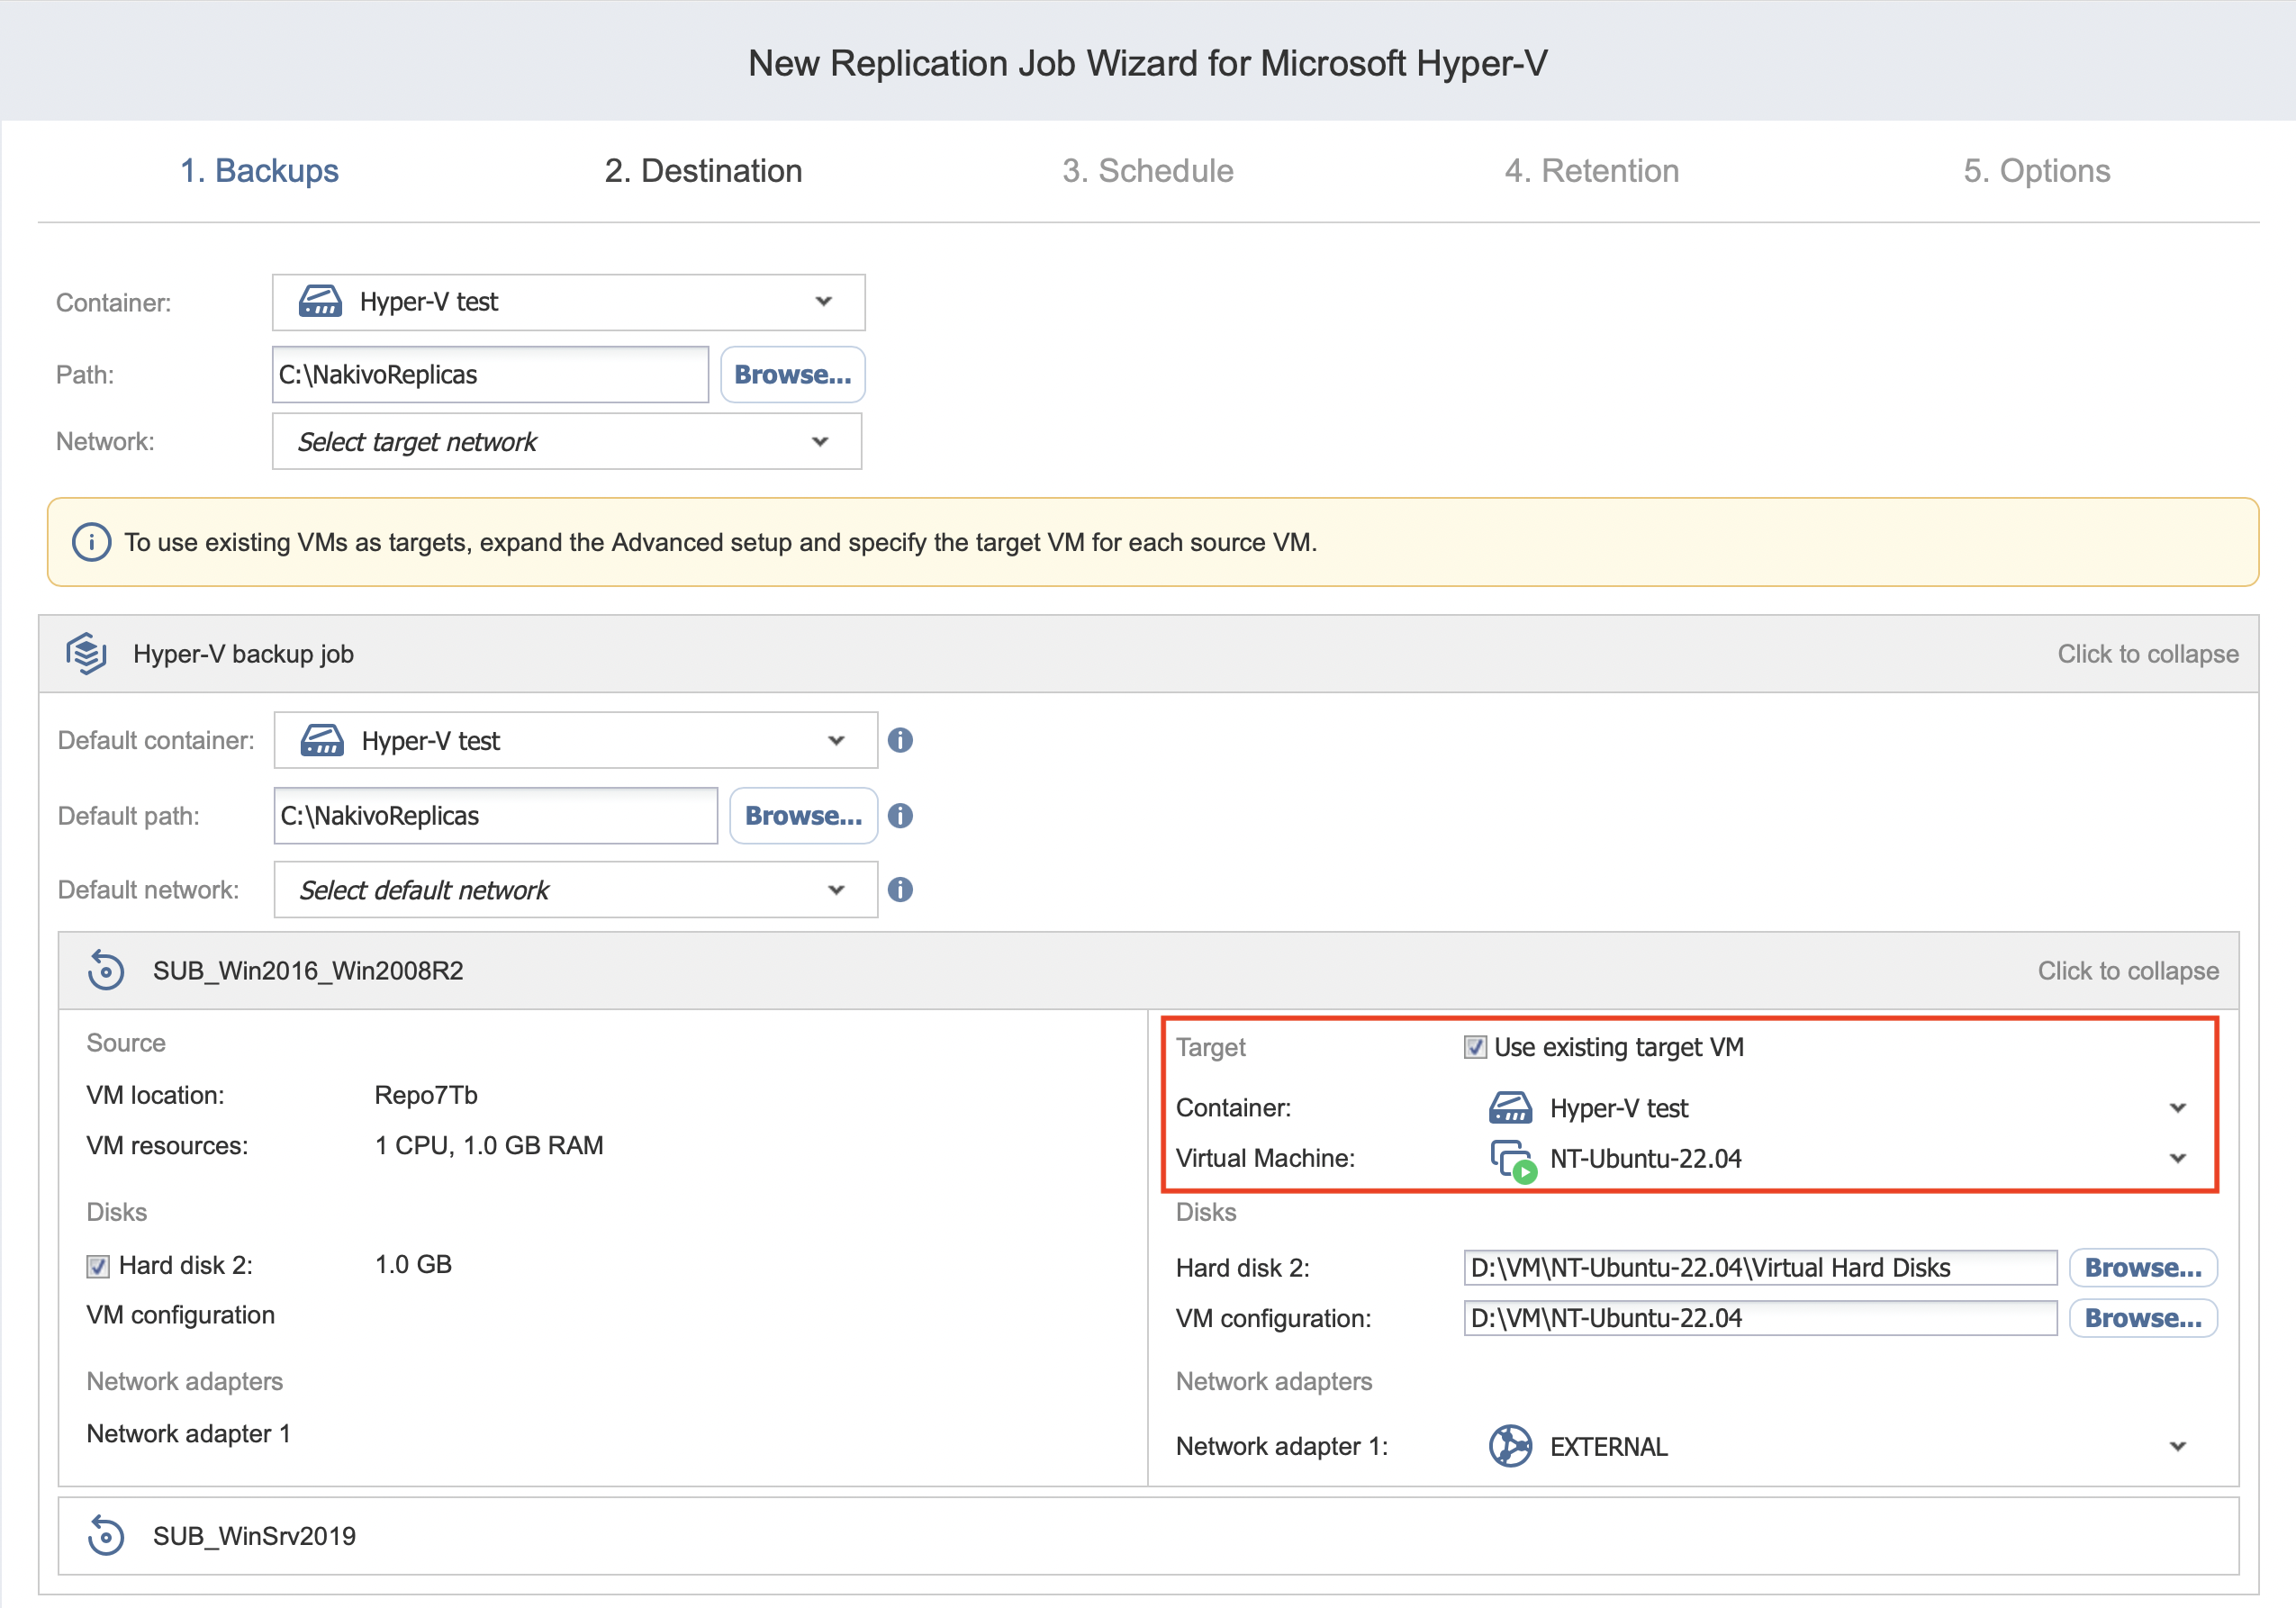
Setting Different Options for Replicas
To specify different replication options for VMs, follow the steps below:
-
Click Advanced setup.
-
Set a target server, path, and network for each VM.