Viewing Tenant Licensing Details in Multi-Tenant Mode
Important
This tab is only displayed for users with an MSP license, Beta instance, Promo license, or Trial license.
To check the license details of all local and remote tenants connected to a managed service provider (MSP) through the MSP Console, follow these steps:
-
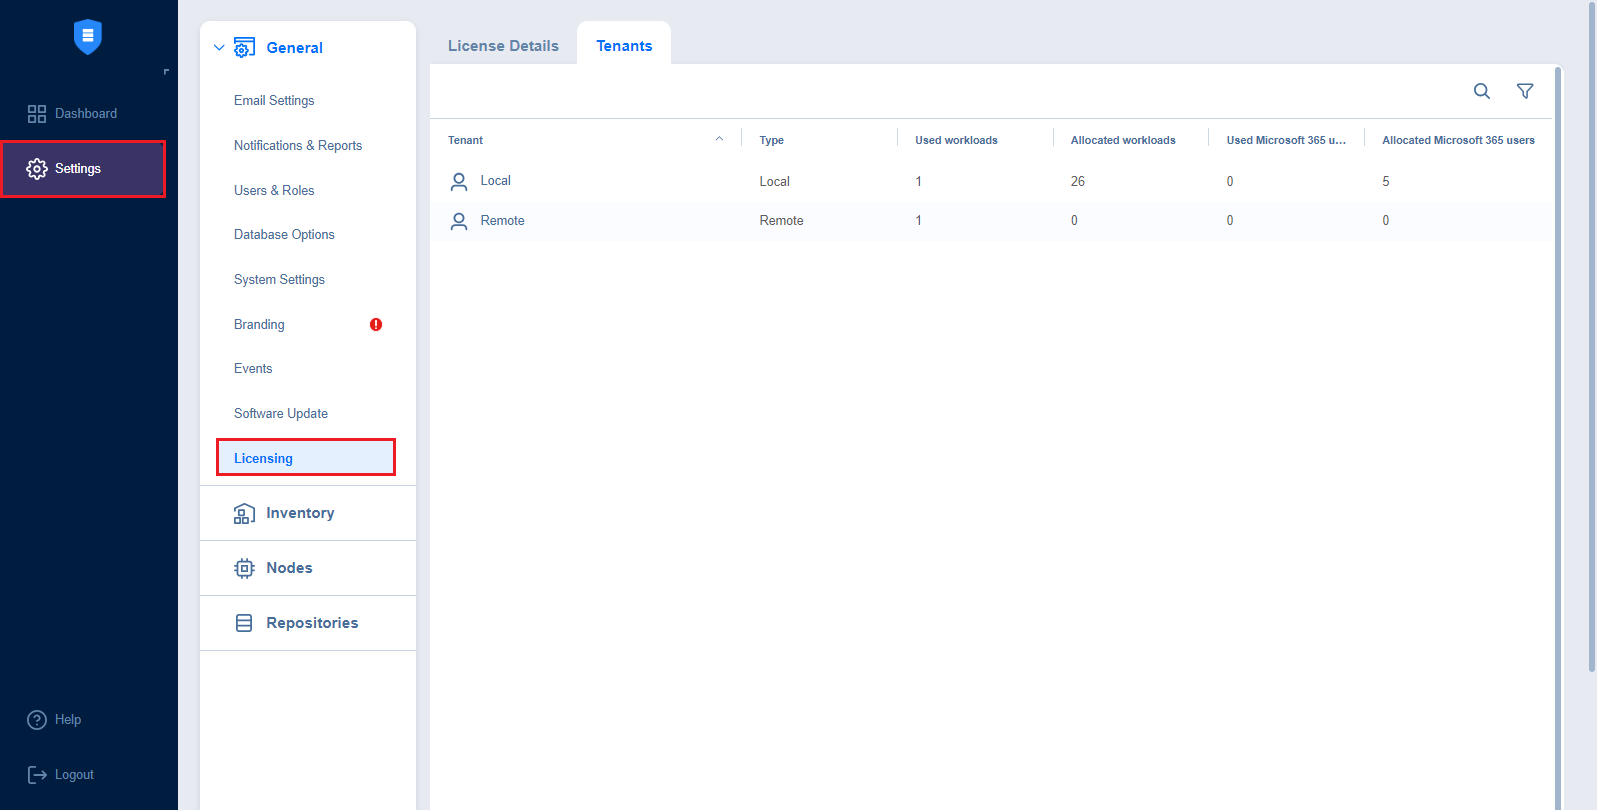
Go to the main menu of NAKIVO Backup & Replication and click Settings > General.
-
Go to the Licensing > Tenants tab.
Note
To display the MSP Console, you must have the multi-tenancy mode installed.
-
The tab opens the page with the Tenants table that allows viewing the licensing data of all existing tenants.
The table has the following columns:
-
Tenant: The name of the tenant.
Notes:
-
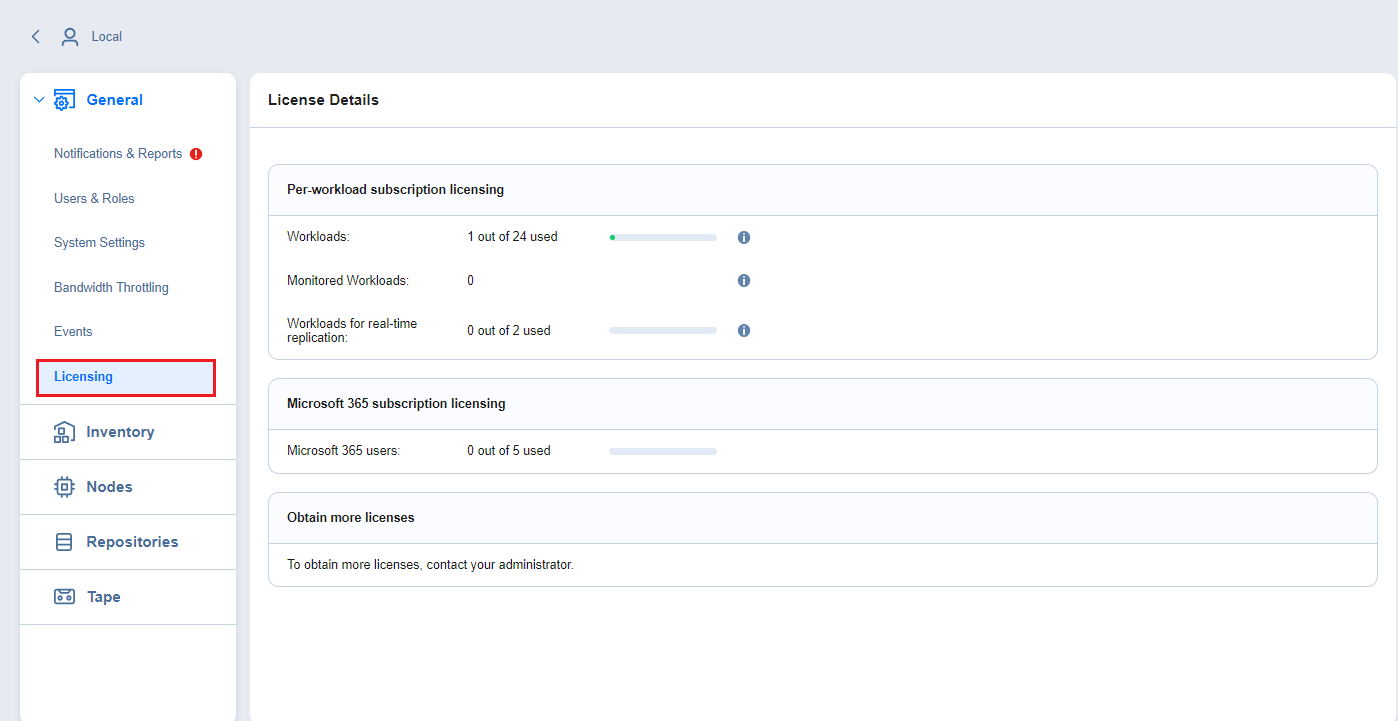
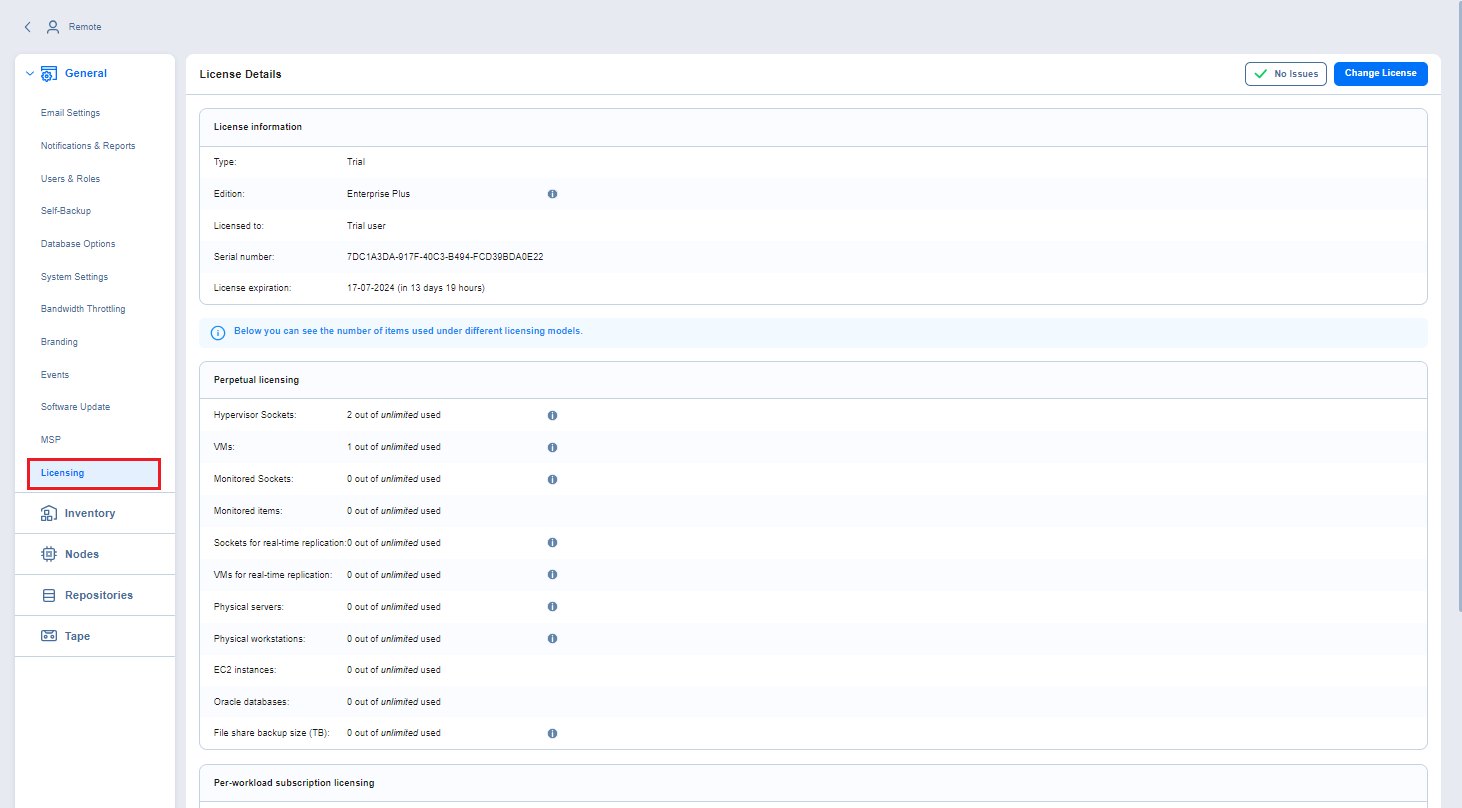
Clicking the name opens the Licensing tab of the corresponding tenant.
-
Disabled, Disconnected, and Inaccessible tenants are disabled.
-
Hovering over a tenant’s data point (for example, tenant’s name, type, workloads, etc.) displays the text with the time since the tenant’s data was last updated.
-
-
Type: The tenant’s connection type – Local or Remote.
-
Used workloads: The number of a tenant’s used workloads.
Note
For the tenants with a perpetual license, the Perpetual link is displayed instead; clicking the link opens the Tenant licensing details popup displaying the Perpetual licensing block in the Licensing tab of the corresponding tenant.
-
Allocated workloads:
-
For remote tenants, displays the number of workloads available to the tenant.
-
For local tenants, displays the number of workloads allocated to the tenant.
Note:
For the tenants with a perpetual license, the Perpetual link is displayed instead. Clicking the link opens the Tenant licensing details popup displaying the Perpetual licensing block in the Licensing tab of the corresponding tenant.
-
-
Used Microsoft 365 users: The number of Microsoft 365 users used by the tenant.
-
Allocated Microsoft 365 users:
-
For local tenants, displays the number of Microsoft 365 users allocated to the tenant.
-
For remote tenants, displays the number of Microsoft 365 users available to the tenant.
-
Using Filtering
You can search or filter tenants from the Tenants table.
Use the Search field to browse or search for a specific tenant. Search can be performed on the Name column only.
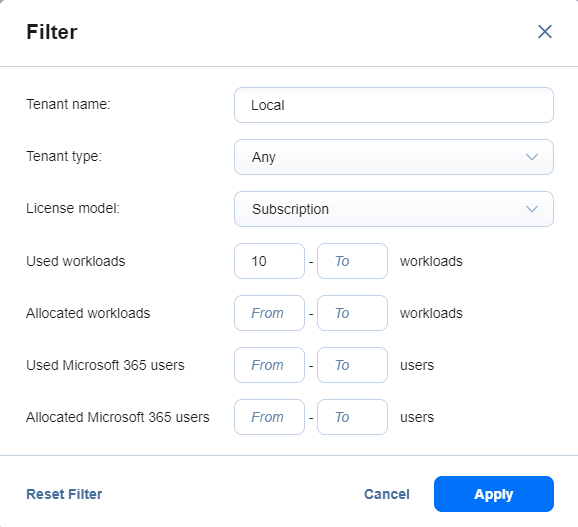
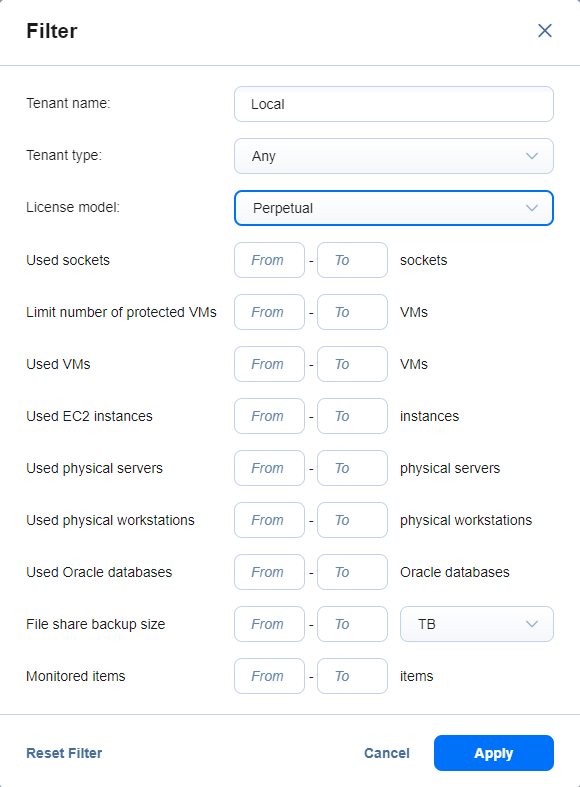
To access filtering options, click the Filter icon in the top right corner. In the dialog box that opens, you can select one or more filtering criteria. The following filtering options are available:
-
Tenant name: Allows you to filter by tenant name.
-
Tenant type: Allows you to filter by the following options:
-
Any (default): Both Local and Remote tenant types
-
Local
-
Remote
-
-
License model: Allows you to filter by the following options:
-
Any (default): If selected, no extra fields are displayed.
-
Subscription: If selected, the following range input fields are displayed:
-
Perpetual: If selected, the following range input fields are displayed:
-
Note
All range inputs can accept numeric values from 0 to 9999.
Click Apply to close the dialog box and apply the filtering.
Click Reset Filter to reset the fields in the Filter dialog box to the default.
Click the Cancel or X button to close the dialog box without applying any changes.
Optionally, you can show/hide columns or modify the number of items per page in the Tenants licensing table configuration table. In the lower right corner, click the controls icon. In the dialog window that opens, select/deselect checkboxes and click Apply.
Click Reset Settings to reset the configuration settings to the default.
Click the Cancel or X button to close the dialog box without applying any changes.
