Adding Wasabi Accounts
Add a Wasabi account to NAKIVO Backup & Replication as described in the sections below.
Creating Wasabi Access Key ID and Secret Access Key
Prior to adding your Wasabi account to the inventory, you need to create and retrieve a Wasabi Access Key ID and Secret Access Key. They are used by NAKIVO Backup & Replication to sign the programmatic requests sent to Wasabi, such as retrieving the list of instances, creating snapshots, and etc.
To create a Wasabi Access Key ID and a Secret Access Key, follow the steps below:
-
If you don't have a Wasabi account, create a new one at wasabi.com/sign-up/.
-
Log in to your Wasabi account.
-
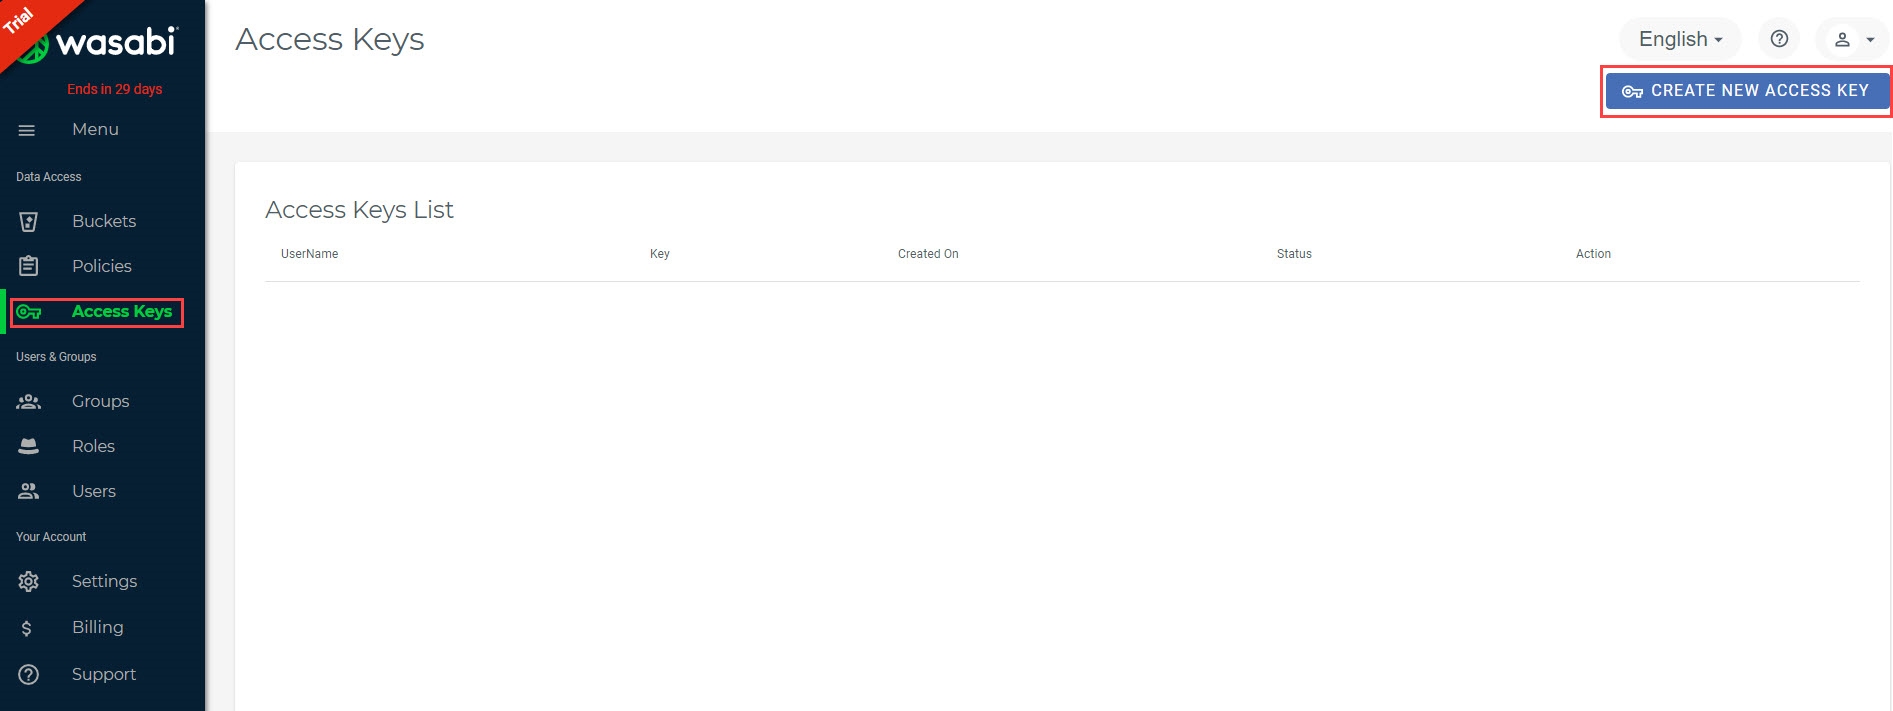
Navigate to the main menu and click Access Keys.
-
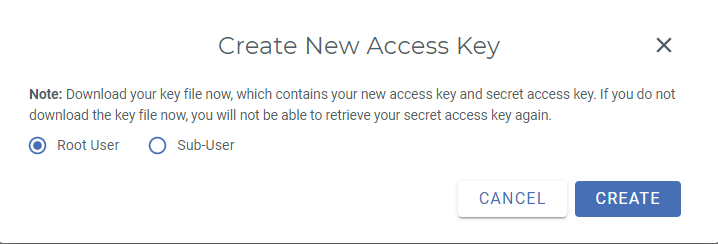
Click Create New Access Key.
-
In the dialog box that opens, select one of the following:
-
Root user: Select this option and click Create.
-
Sub-User: Select a sub-user from the Assign to a user drop-down list and click Create. Note that the original user access key of the selected user will be changed.
Notes
-
To use the Sub-User option, you need to have at least one user created in your Wasabi account. For details, refer to Creating a User and How do I set up Wasabi for user access separation?
-
For the sub-user to use the immutable backup, the following set of IAM rules must be used:
Copy{
"Version": "2012-10-17",
"Statement": [
{
"Sid": "BucketPolicy",
"Effect": "Allow",
"Action": "s3:*",
"Resource": [
"arn:aws:s3:::<YOUR BUCKET NAME>/*",
"arn:aws:s3:::<YOUR BUCKET NAME>"
]
},
{
"Sid": "RepoRefresh",
"Effect": "Allow",
"Action": "s3:ListAllMyBuckets",
"Resource": "*"
}
]
}

-
-
-
Click Download CSV and save the file with the generated keys in a secure location. Keep the Access key confidential to protect your account.


Adding a Wasabi Account to Inventory
Before adding a Wasabi Account to Inventory, make sure that your system can reach the storage provider:
-
Check if the hostname of the Wasabi Storage can be resolved correctly by the Transporter (that you assign to the Repository).
-
Confirm that port 443 is open.
-
Check SSL/TLS connectivity to the storage provider.
For more information, refer to Troubleshooting S3 Compatible Repositories.
To add a Wasabi account to NAKIVO Backup & Replication, follow the steps below:
-
Click Settings.
-
Go to the Inventory page and click +.
-
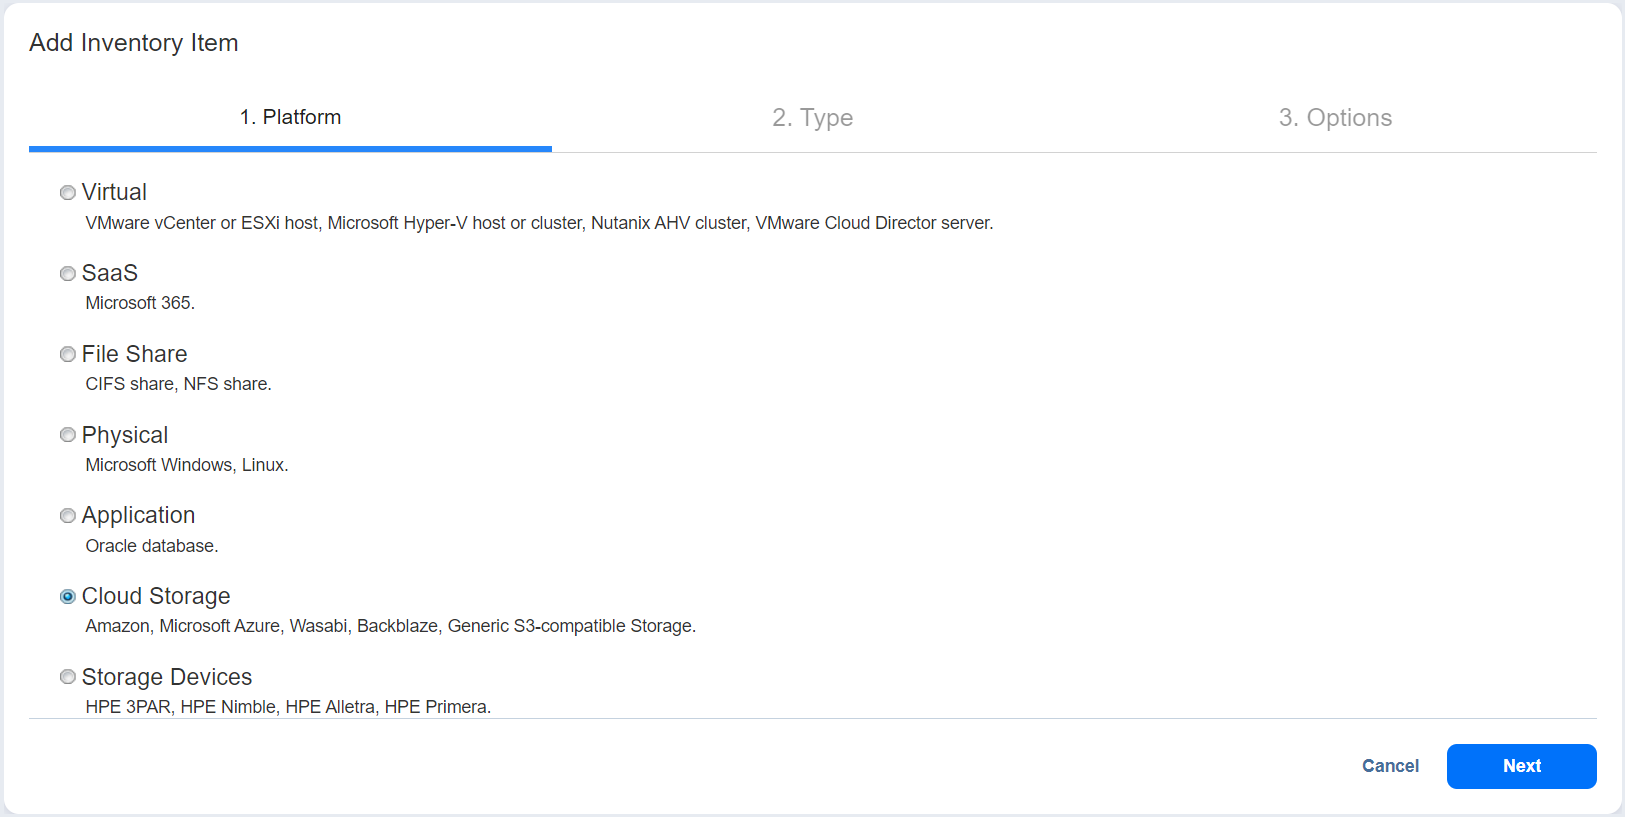
On the Platform page of the wizard, select Cloud Storage and click Next to proceed.

-
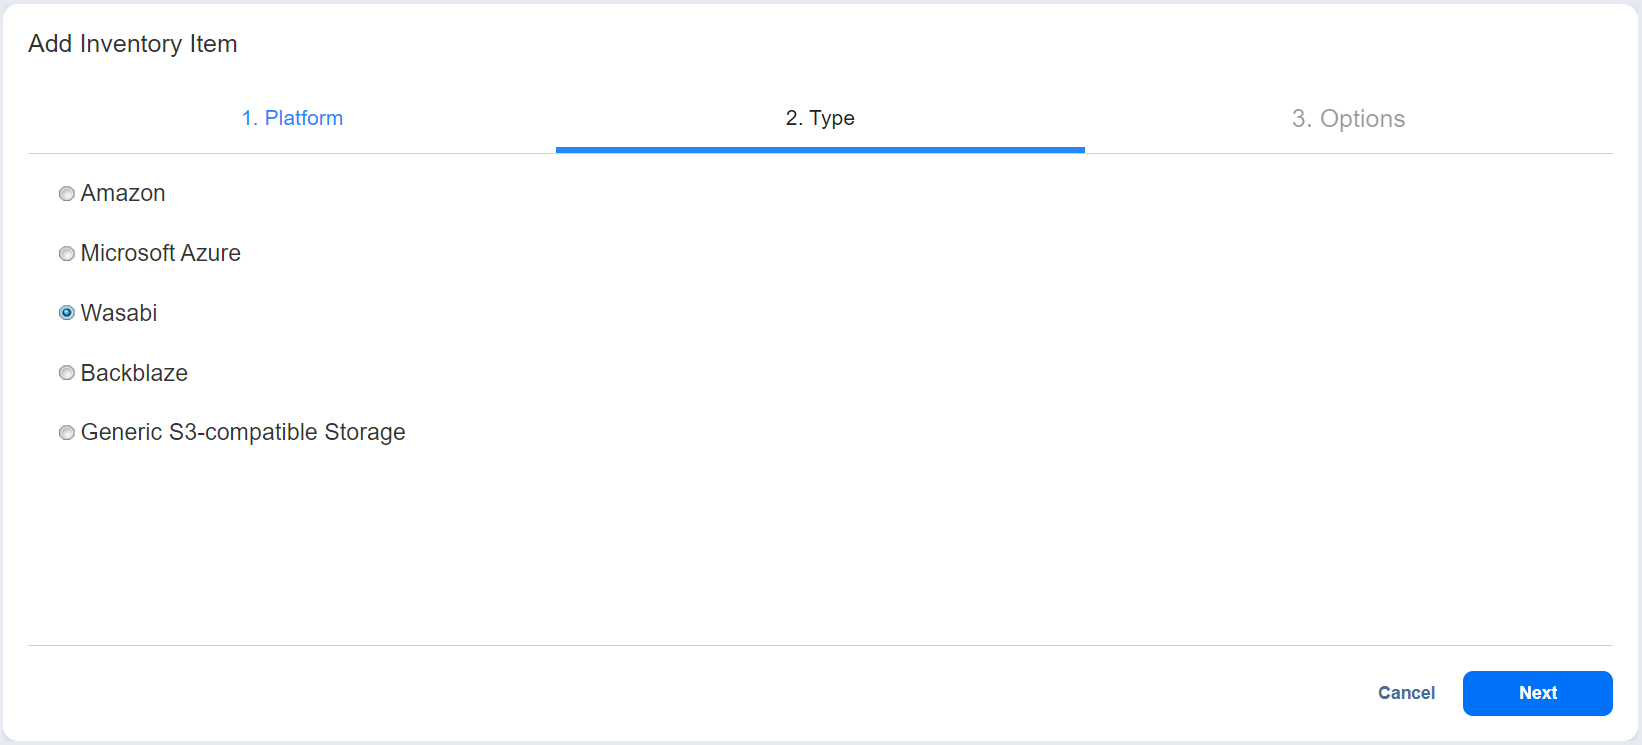
On the Type page of the wizard, select Wasabi and click Next to proceed.

-
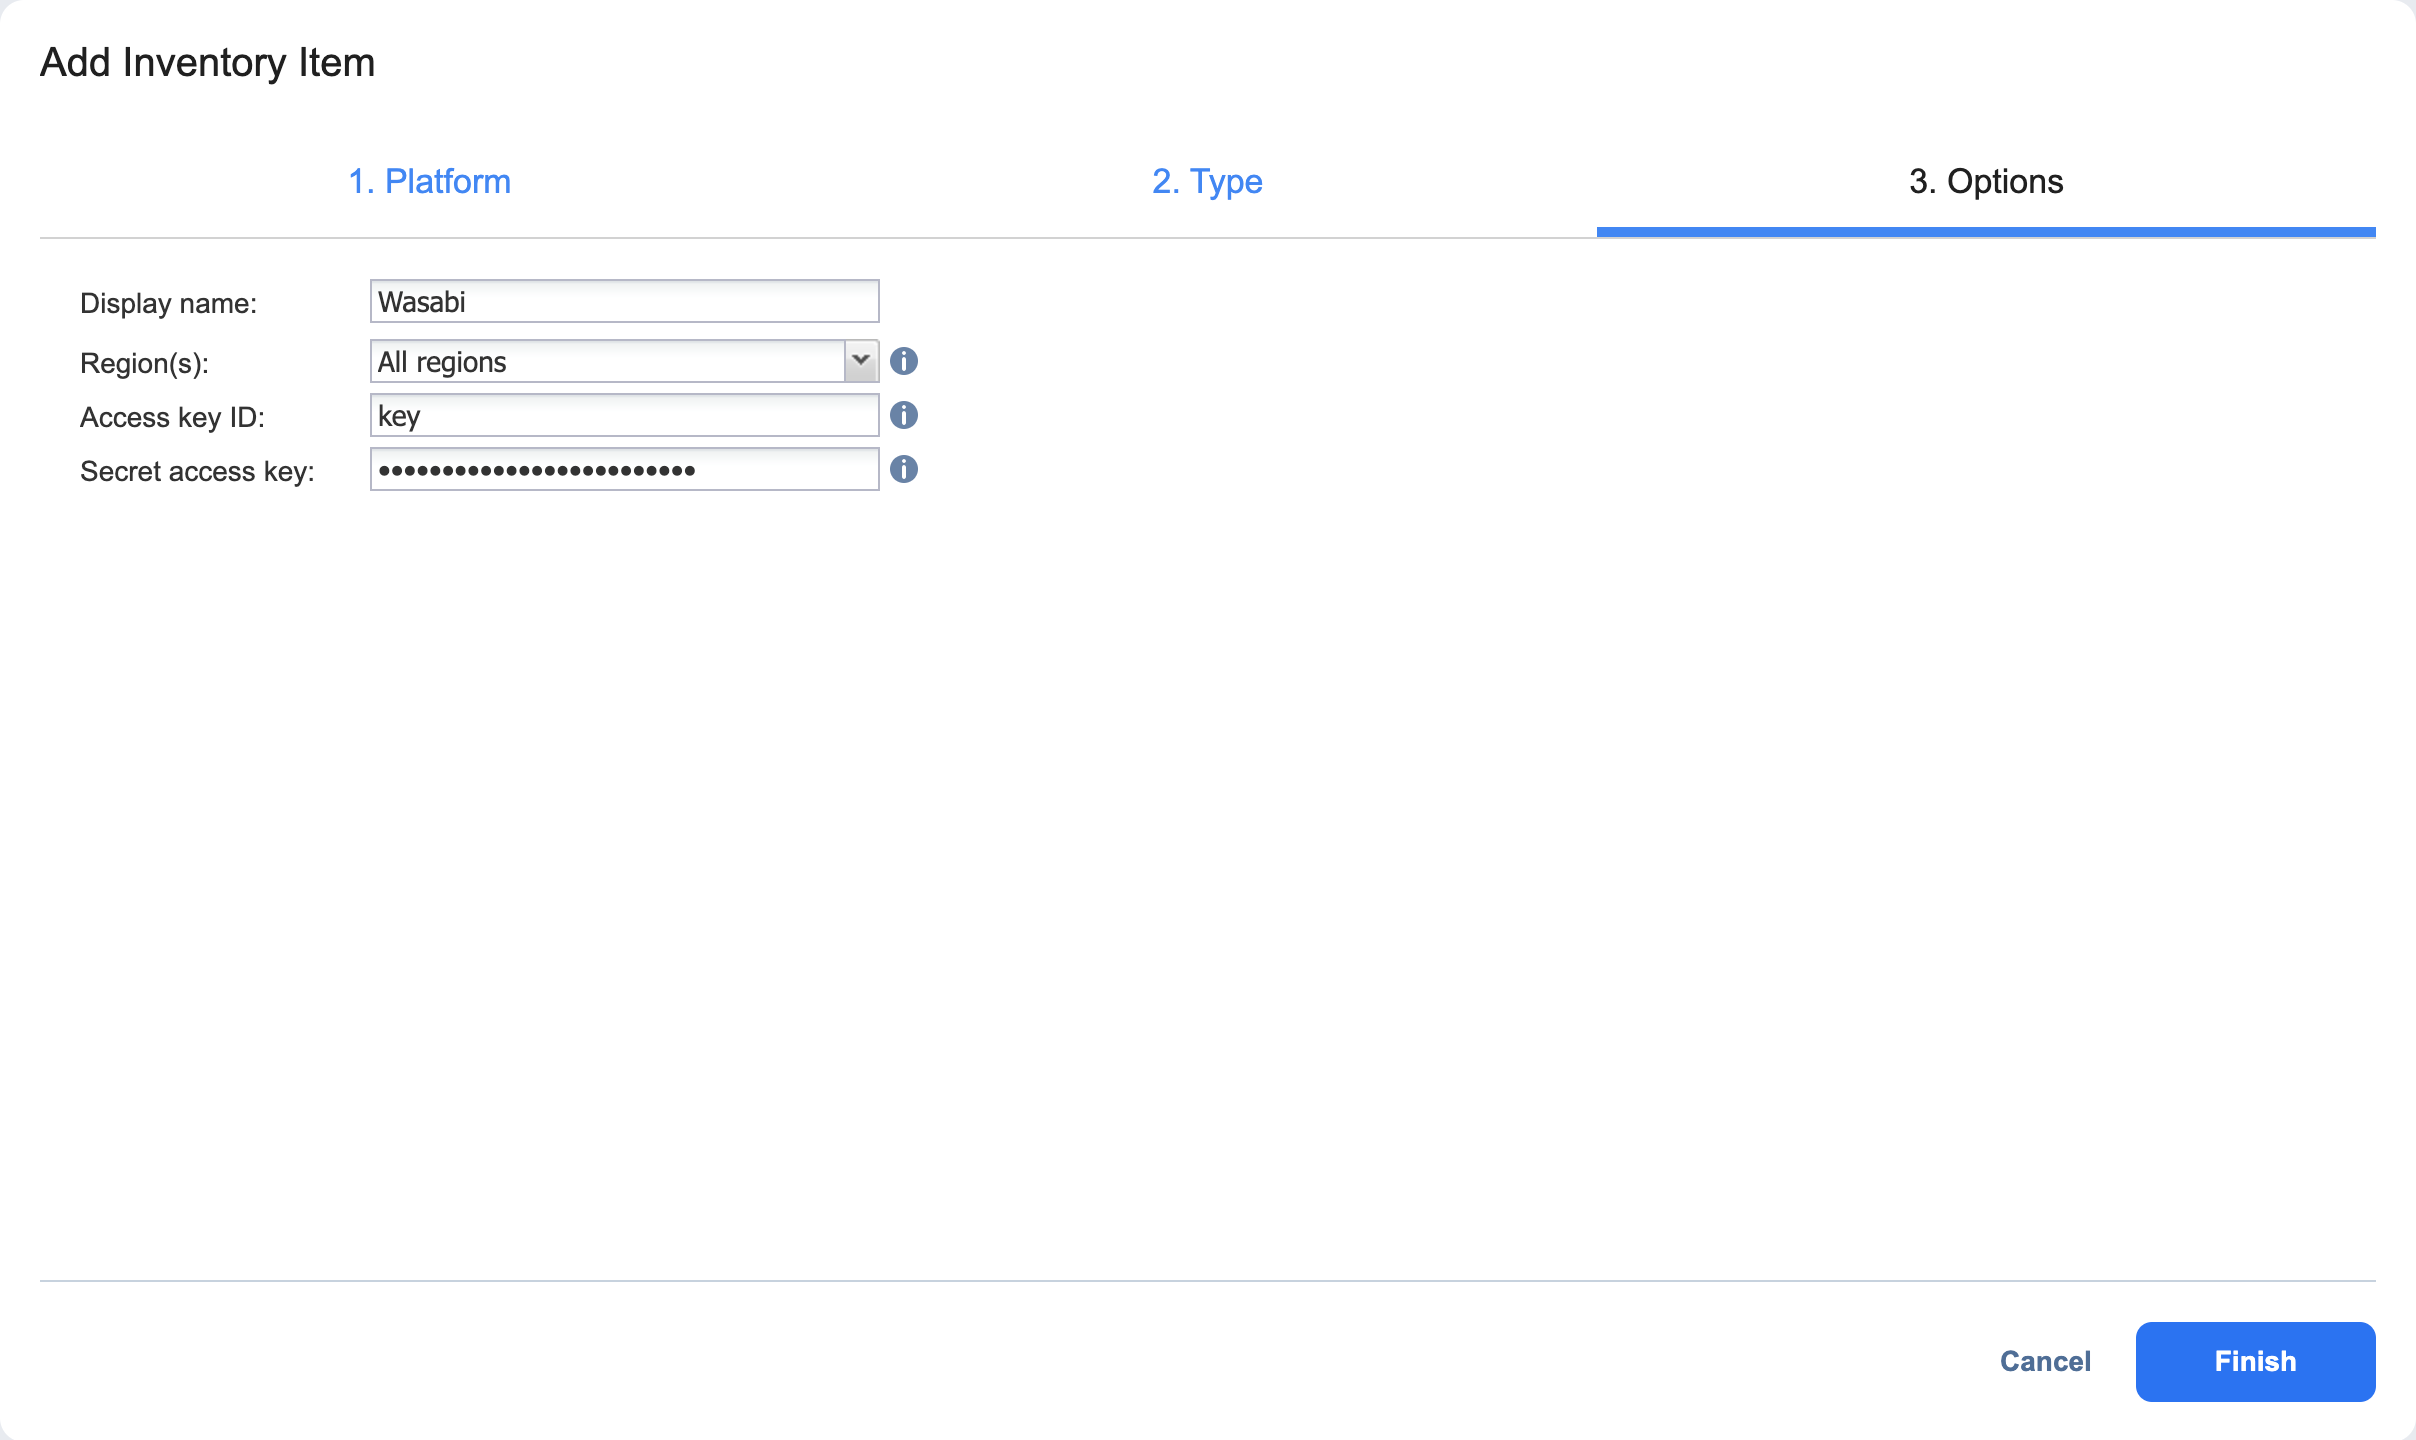
On the Options page of the wizard, fill in the following fields:
-
Enter the name in the Display name box.
-
Select the Wasabi region from the Region(s) drop-down list.
-
Enter the Access Key ID and Secret Access Key of a root user or a sub-user in the corresponding fields.
-
-
Click Finish.