Adding VMware Cloud Director
To add a VMware Cloud Director server to Inventory in NAKIVO Backup & Replication, follow the steps below:
Notes
Add VMware Cloud Director at the provider level only. In the Username and Password fields, enter the credentials of a System administrator (the System organization). NAKIVO Backup & Replication does not accept a tenant-level account, such as an Organization Administrator, and does not support a tenant-only VMware Cloud Director.
Provide credentials for each underlying vCenter as well. The provider sign-in and the vCenter credentials are both mandatory pages of the Add New VMware Cloud Director Server wizard, and you cannot skip them.
-
Navigate to the main menu of NAKIVO Backup & Replication and click Settings.
-
Go to the Inventory page and click +.
-
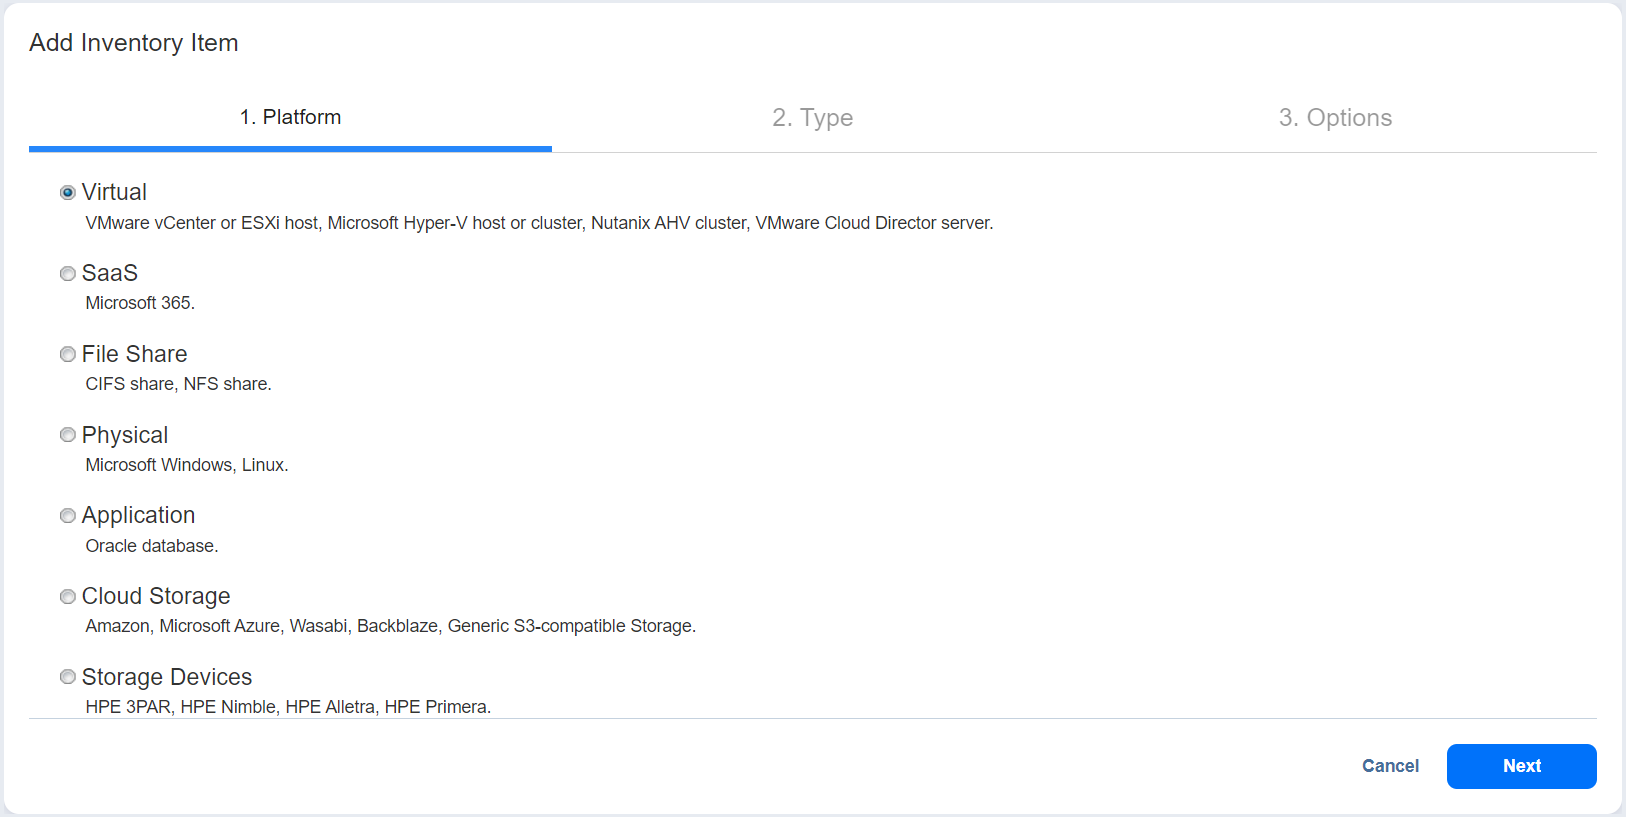
On the Platform page, select Virtual and then click Next to proceed.

-
On the Type page, select VMware Cloud Director server and then click Next to proceed.
-
Complete the wizard as described in the sections below.
Adding VMware Cloud Director Server
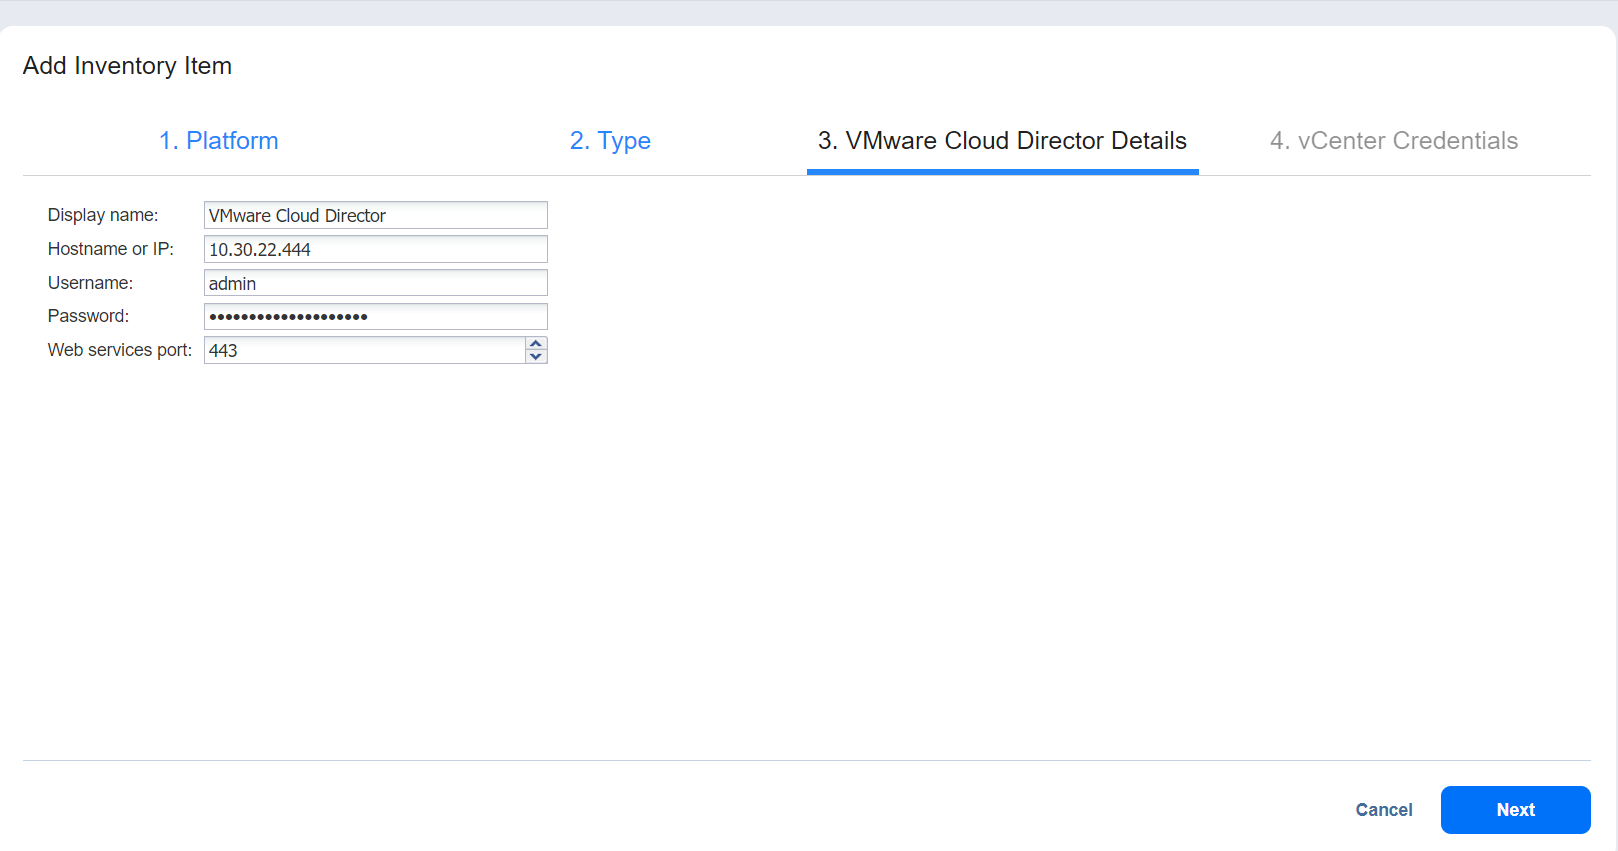
On the VMware Cloud Director Details page of the Add New VMware Cloud Director Server wizard, enter the following information:
-
Display name: Specify a name for the VMware Cloud Director server. This name will be displayed in the Inventory. If you leave the field empty, the contents of the hostname or IP are displayed.
-
Hostname or IP: Specify the hostname or IP address of the VMware Cloud Director server that you want to add to the Inventory.
-
Username: Provide the username of a VMware Cloud Director System administrator (provider level). A tenant-level account, such as an Organization Administrator, is not supported.
-
Password: Provide a password to the VMware Cloud Director server.
-
Port: Specify the port for the VMware Cloud Director server.
-
Click Next to proceed to the next page.
Providing vCenter Credentials
On the vCenter Credentials page of the wizard, provide credentials for each vCenter that backs the VMware Cloud Director. This step is mandatory; you cannot complete the wizard without it. Proceed as follows:
-
On the left side of the screen, select the checkboxes of the vCenters to be added to the Inventory.
-
In the Username field, provide the username.
-
In the Password field, enter the password.
-
Click Finish.