Adding Proxmox VE Items to Inventory
To discover the supported Proxmox VE items: clusters and standalone hosts (nodes) and add a discovered Proxmox VE item to the Inventory, follow the steps below:
-
Make sure the feature requirements are met.
-
Click Settings in the left pane of NAKIVO Backup & Replication.
-
Go to the Inventory page and click +.
-
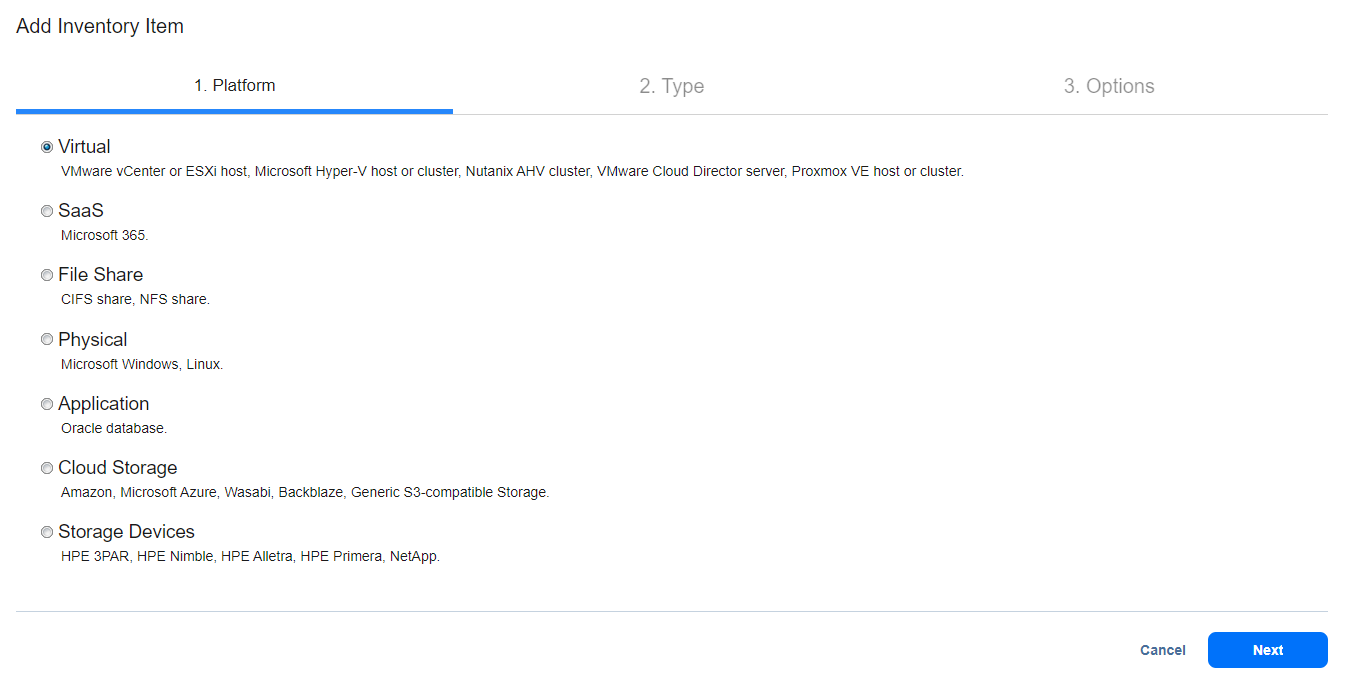
On the Platform page, select VMware vCenter or ESXi host, Microsoft Hyper-V host or cluster, Nutanix AHV cluster, VMware Cloud Director server, Proxmox VE host or cluster.
-
Click Next to proceed.
-
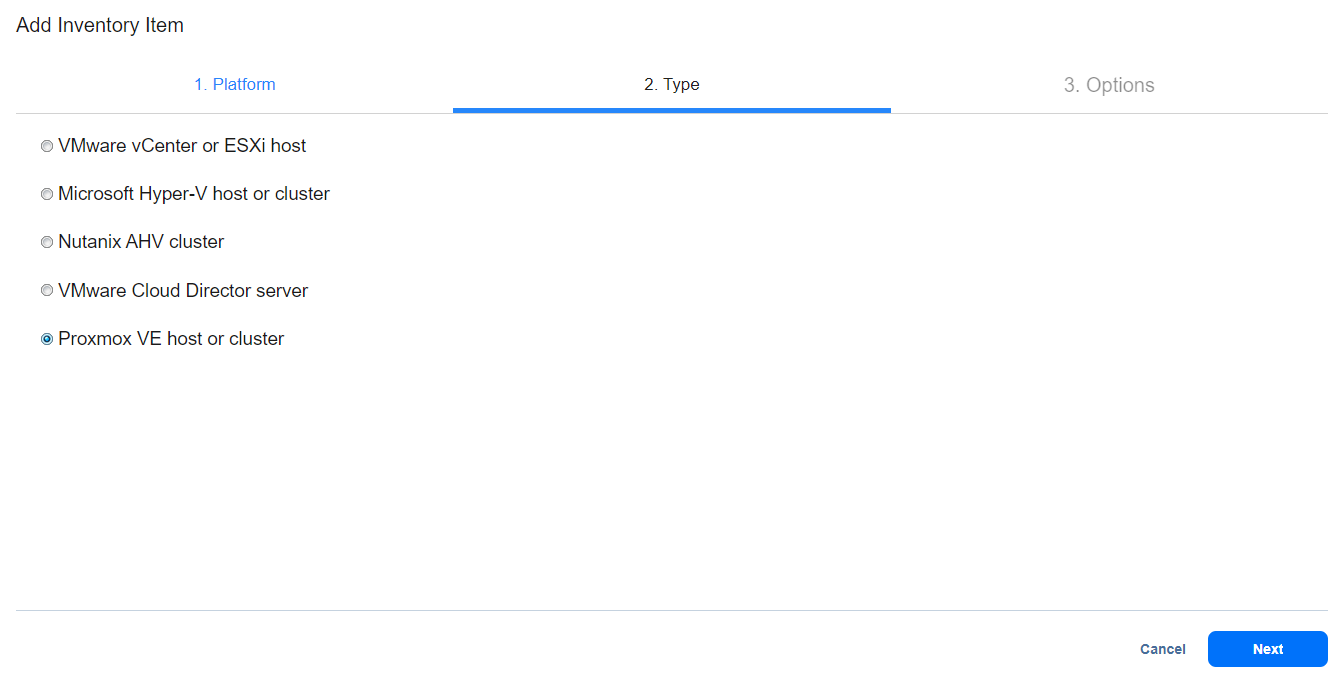
In the Type step, select Proxmox VE host or cluster and click Next.
-
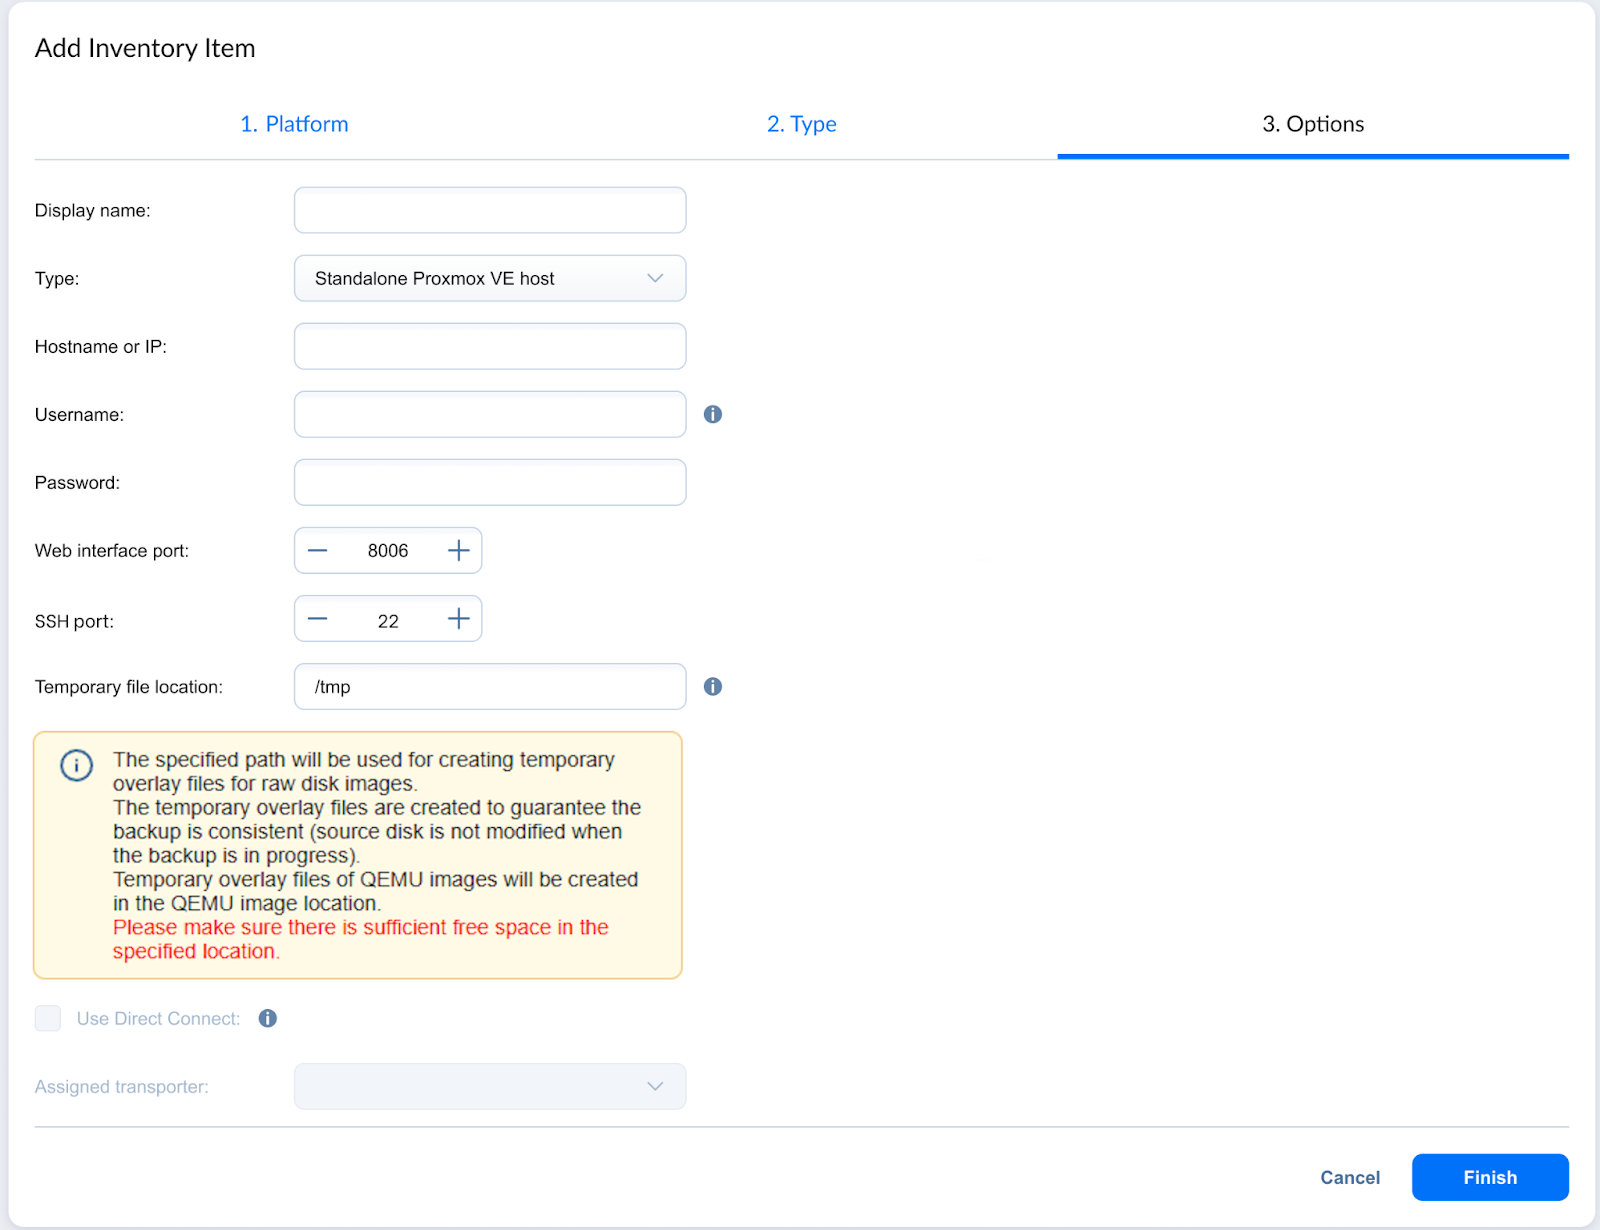
Display name: Specify a name for the Proxmox VE host or cluster to be displayed in the Inventory. If the field is left empty, the contents of the hostname or IP are displayed.
-
Type dropdown: Select whether you want to add a Proxmox VE cluster or a standalone Proxmox VE host.
-
Hostname or IP: Specify the hostname or IP address of the Proxmox VE cluster or standalone Proxmox VE host you want to add to the Inventory.
-
Username and Password: Specify the credentials of the Proxmox VE cluster or standalone Proxmox VE host you want to add to the Inventory.
Notes
-
Host(s) in a cluster that has different credentials may not operate properly.
-
The specified credentials should have full administrative privileges to the Proxmox VE cluster or standalone Proxmox VE host.
-
-
Web interface port: Specify the web interface port.
-
SSH port: Specify the SSH port.
Important
SSH connection is required for successful Proxmox VE discovery. Therefore, while adding or editing the Proxmox VE host, make sure that the port you specify is correct.
-
Temporary file location: Specify the path where temporary overlay files are stored. The location of these files depends on the storage type:
-
For Block Storage, the temporary overlay files are created in the /tmp or other directory specified in the Temporary file location field.
-
For File Storage, the temporary overlay files are created in the same directory as the VM disk. The format can be RAW, QCOW2(QEMU) or VMDK.
Important
Ensure sufficient free space for temporary overlay files to prevent the job failures. NAKIVO Backup & Replication monitors available space in the course of backup job runs. If storage is insufficient, the job fails to avoid data inconsistencies (the source disk is not modified while the job is running).
-
-
Limitations:
-
Maximum 160 characters
-
The following characters are not valid:
-
< (less than)
-
> (greater than)
-
" (double quote)
-
| (vertical bar or pipe)
-
? (question mark)
-
* (asterisk)
-
-
Characters whose integer representations are in the range from 0 through 31
-
Use Direct Connect: Select this checkbox to route all communication with the Proxmox VE host or cluster through the Assigned Transporter using Direct Connect.
Notes
-
If there are no Transporters with Direct Connect enabled, or Direct Connect is not allowed by the license, the Use Direct Connect checkbox is disabled.
-
If the Use Direct Connect checkbox is not selected, the Assigned Transporter dropdown is disabled. For details, refer to Enabling Direct Connect.
-
-
Assigned Transporter: In the Assigned transporter dropdown, choose the Transporter that was installed in the remote environment with Direct Connect enabled. This option is only available when there is a Transporter with Direct Connect enabled on a remote site.
Notes
-
The Assigned Transporter dropdown contains a list of Transporters with enabled Direct Connect.
-
The following Transporters in the Assigned Transporter dropdown are disabled:
-
Inaccessible Transporters
-
Transporters installed on systems using ARM architecture-based CPU
-
Transporters installed on FreeBSD systems
-
-
Click Finish.
Notes
-
The Proxmox VE (host/cluster) of the version lower than the oldest supported version cannot be discovered.
-
The Proxmox VE (host/cluster) of the version higher than the newest supported version can be discovered, but confirmation of the operation is required to proceed.
-
A warning is shown if the product discovers a standalone Proxmox VE host that belongs to a cluster.
-
The product checks the connection to the standalone Proxmox VE hosts that are being discovered.
-
After adding a Proxmox VE cluster or host to the inventory, the transporter creates 64 NBD devices on each host automatically.
-
The Proxmox VE size units differ from the units used by NAKIVO Backup & Replication which results in mismatching the sizes displayed by NAKIVO Backup & Replication and Proxmox VE. However, the actual size of the data is identical
Refer to the size units conversion comparison table below:
Size Units NAKIVO Backup & Replication Unit Conversion Proxmox VE Unit Conversion Kilobyte (KB) 1024 Bytes 1000 Bytes Megabyte (MB 1024 Kilobytes 1000 Kilobytes Gigabyte (GB) 1024 Megabytes 1000 Megabytes Terabyte (TB) 1024 Gigabytes 1000 Gigabytes After completing the process, you can exit Settings and create jobs with the newly discovered VMs added to the instance Inventory.
Proxmox Transporter Management
The product uses the Linux transporter package for deploying transporters. A transporter is injected inside each Proxmox VE host /node.
The product supports multiple transporters (one transporter per host).
Automated deployment of transporters into hosts is allowed.
The transporter supports manual installation via the command line, installer, or a similar tool.
The transporter is installed in the same path as the default path used by Linux (“/opt/nakivo”).
Transporter deployment onto the host/all cluster nodes is initiated automatically within the Proxmox VE host discovery.
If a transporter already exists on the host/node of the cluster, it is re-used and the existing pre-shared key of the transporter is replaced.
If there is no pre-shared key, it is generated and injected automatically.
Exception
A new pre-shared key is not injected, and the transporter shall be used as is if the transporter is already available in the product and does not have a pre-shared key.
Existing transporters are imported on a per-host basis. The import occurs automatically within host/cluster discovery if the transporter is installed.
If the transporter being imported is out-of-date, it is auto-updated during the import.
Transporter software is automatically updated to a new version after the product version update.
You can edit the transporter locked with the job run.
Note
The IP address or hostname of the transporter cannot be edited.
If the parent host has a new IP address or hostname, it is automatically applied to the appropriate transporter.
Removal of the existing transporter is supported.
Check below for the product behavior related to transporters removal:
-
Transporter removal is initiated automatically within the process of removing the host from the Inventory.
Notes
-
Transporter auto removal requires the user's confirmation and is not allowed for the transporter used by other inventory items or in case existing jobs are using it.
-
Transporter removal is not allowed in case the parent host of the Transporter is added to the Inventory.
-
-
It is possible to uninstall transporter locally on the host by running an uninstaller that is supplied with transporter at the deployment stage and is available from the server OS interface.
-
Upon the transporter removal, the physical transporter instance can be treated as follows:
-
The transporter service is kept on the host intact.
-
The transporter service is uninstalled from the host.
-
-


