Adding Oracle Database
To add an Oracle Database to the Inventory, follow the steps below:
-
Make sure you meet the necessary requirements.
-
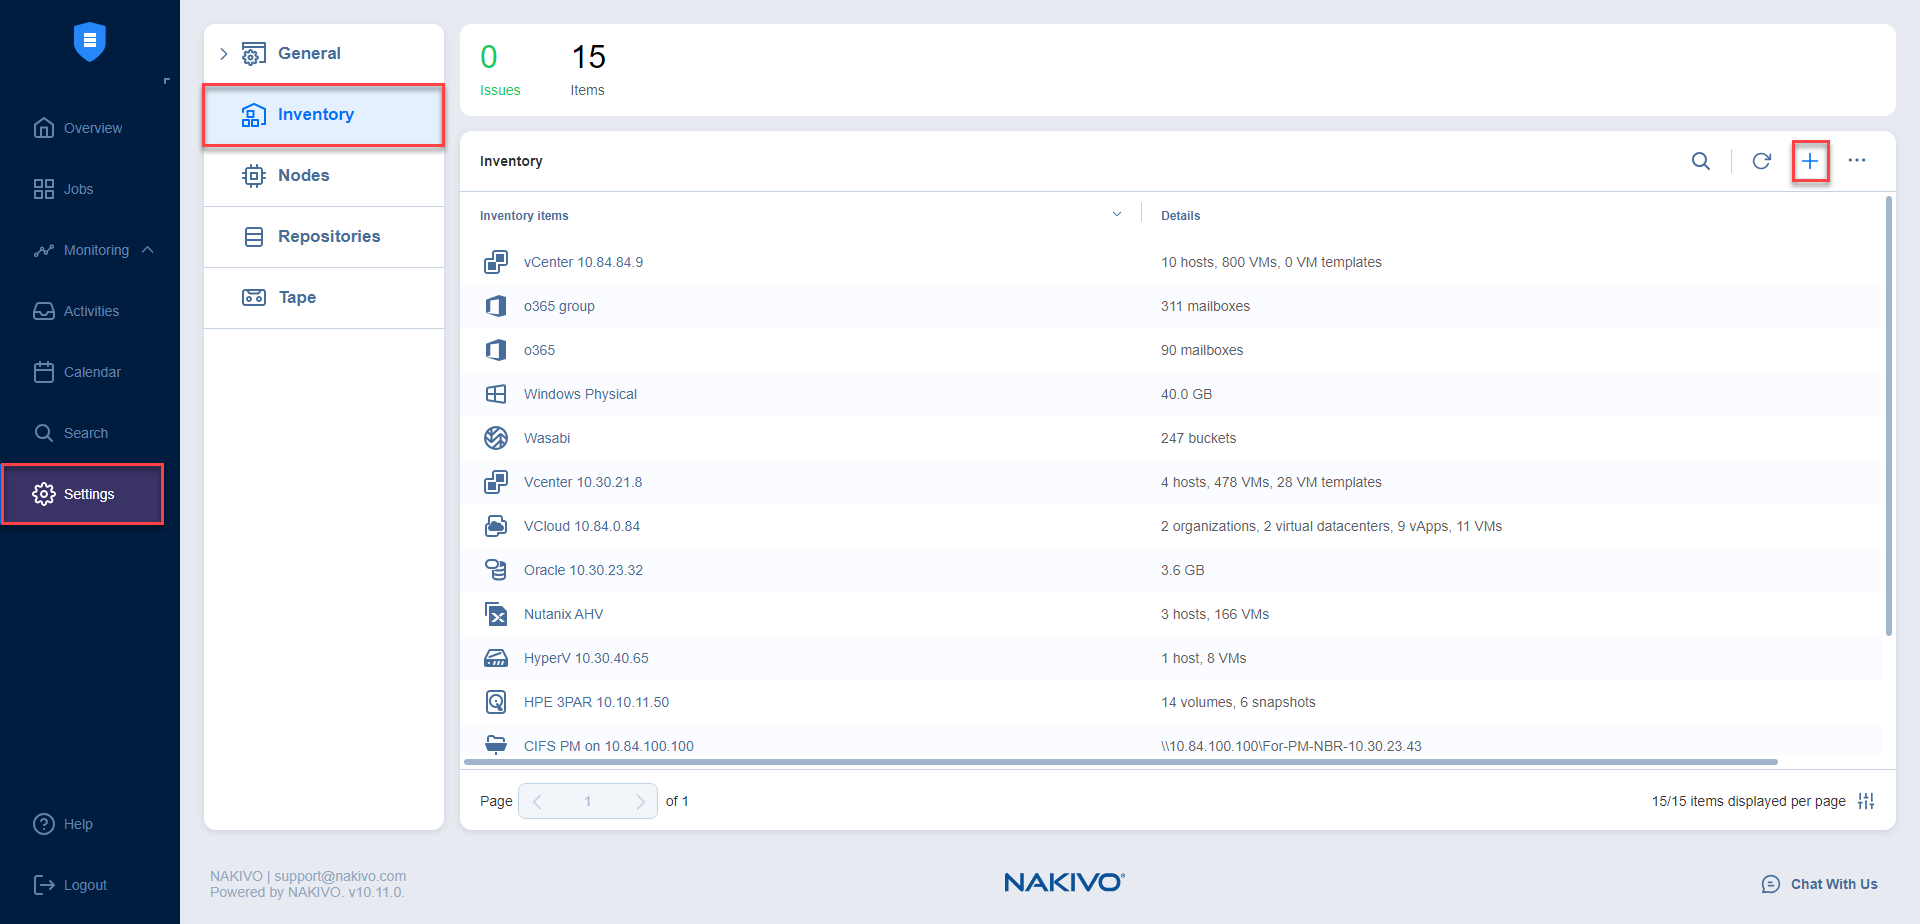
Click Settings in the left pane of NAKIVO Backup & Replication.
-
Go to the Inventory page and click +.

-
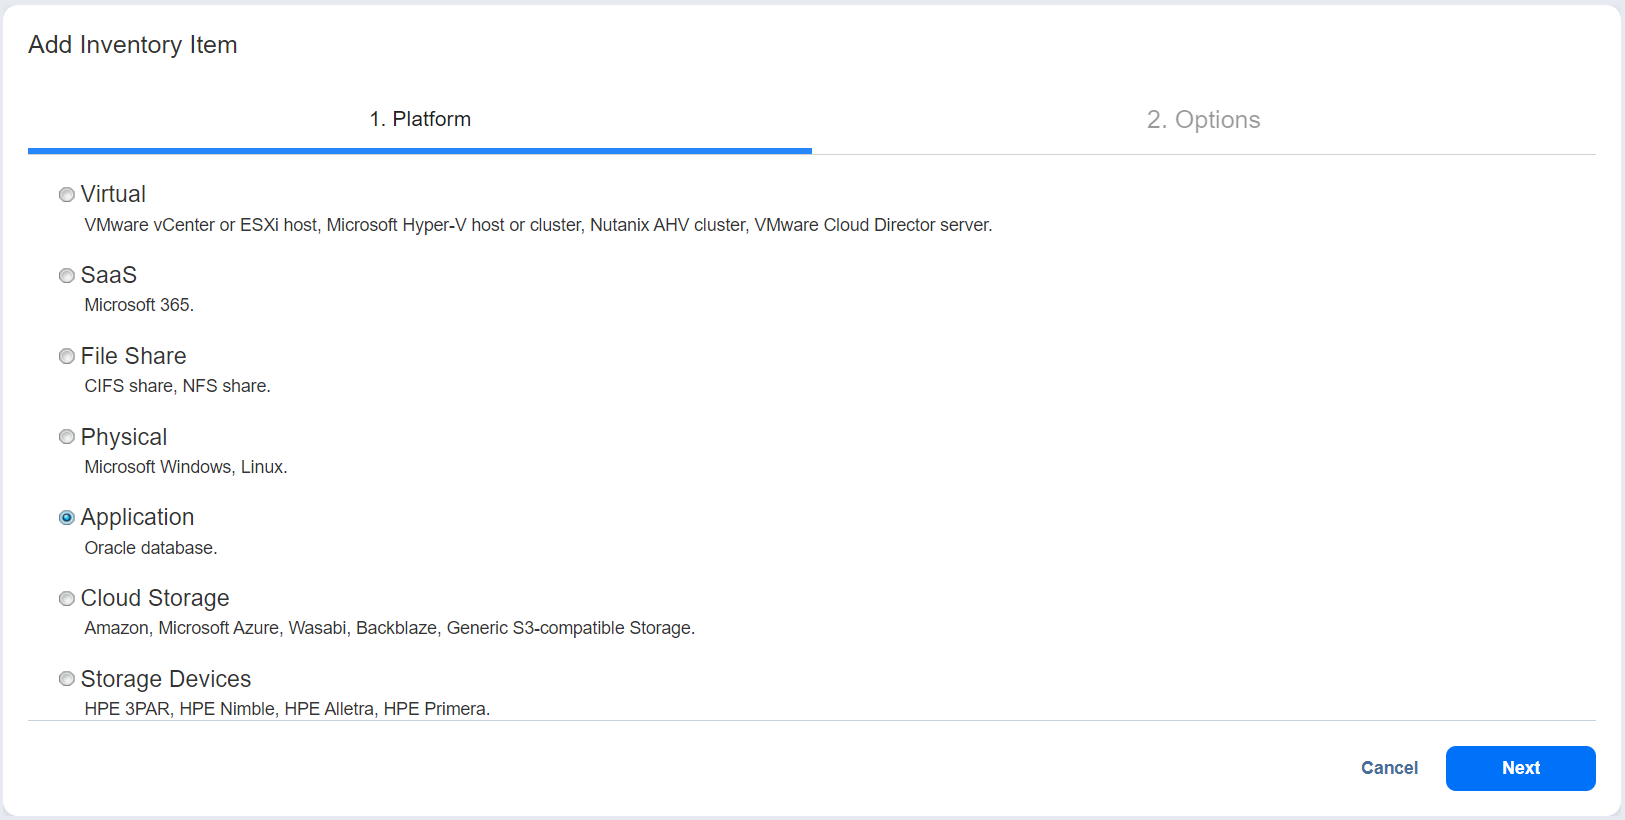
On the Platform page of the wizard, select Application and click Next to proceed.

-
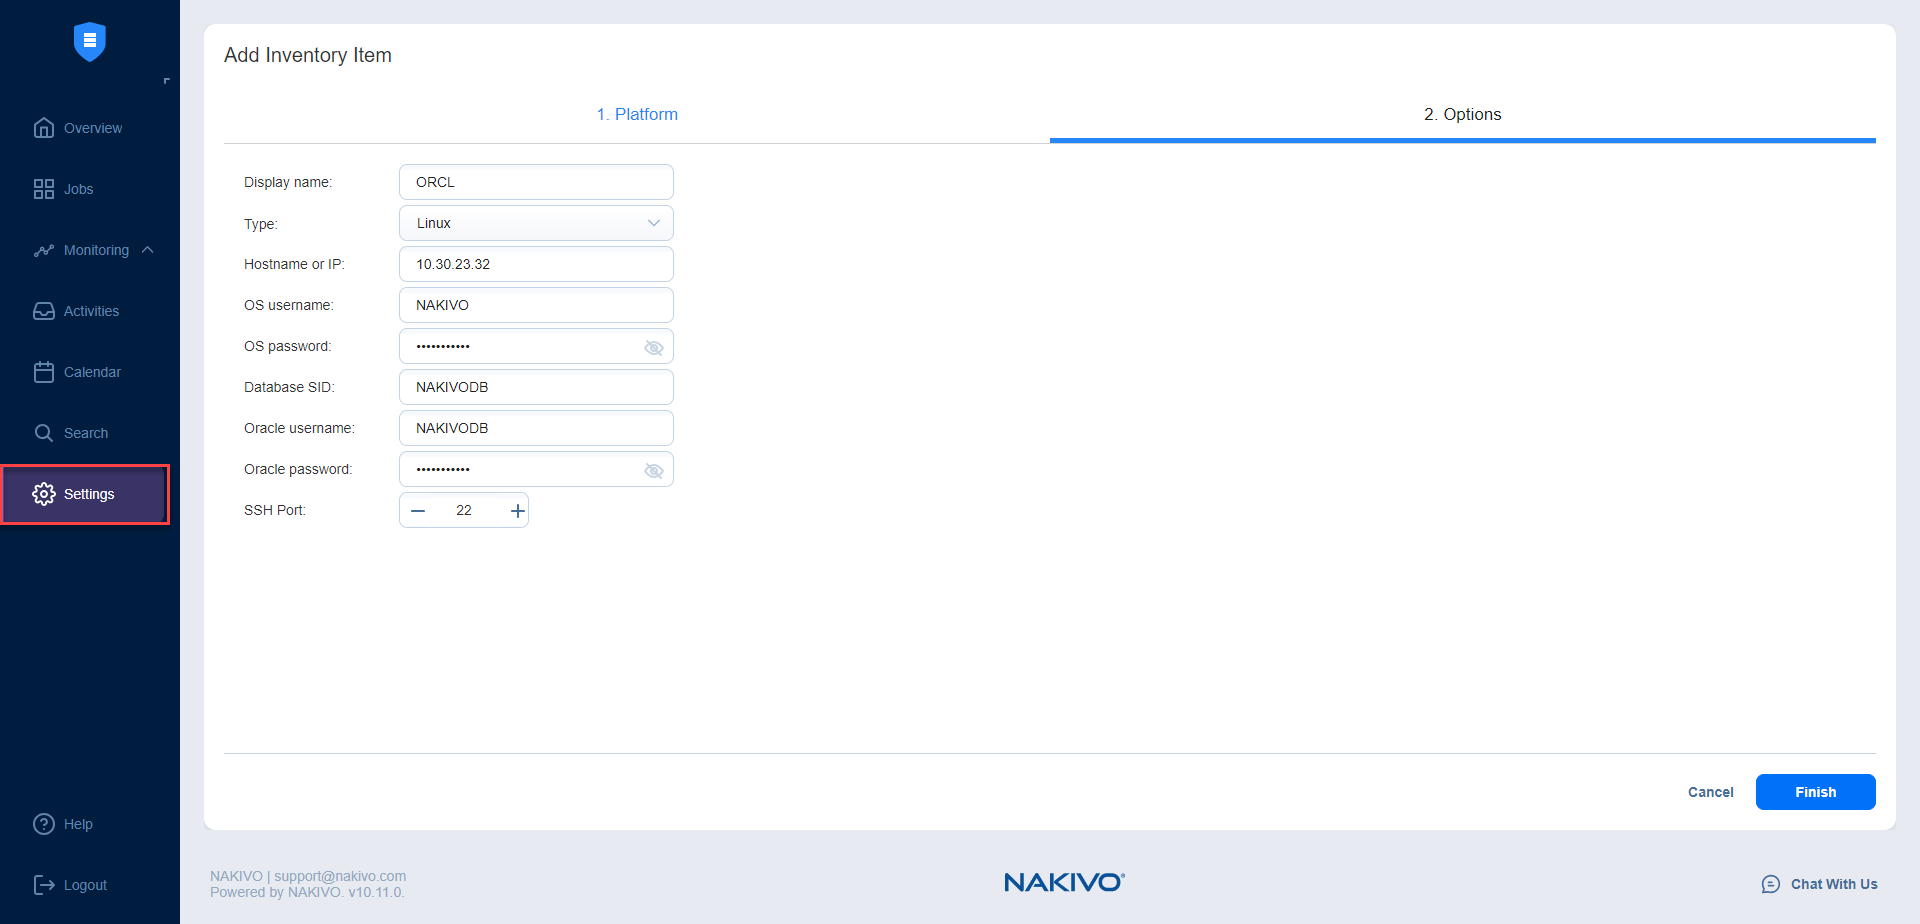
On the Options page of the wizard, provide the following information:
-
Display name: Enter the preferred name for the database.
-
Type: Select the preferred database type from the drop-down list: Microsoft Windows or Linux.
-
Hostname or IP: Specify the hostname or IP address of the Oracle database you want to add.
-
OS username: Enter your OS username.
-
OS password: Enter your OS password.
-
Database SID: Enter your database SID, that is, the Oracle System Identifier specific to that database.
-
Oracle username: If the OS credentials do not belong to special Oracle groups (OSDBA/OSOPER), enter your Oracle username. Otherwise, leave the field empty.
-
Oracle password: If the OS credentials do not belong to special Oracle groups (OSDBA/OSOPER), enter your Oracle password. Otherwise, leave the field empty.
-
SSH port: For Linux Oracle database, specify the SSH port. By default, 22 is selected.
-
Click Finish. The Oracle database is added to the Inventory.
Note
-
When adding a new Oracle database to the Inventory, NAKIVO Backup & Replication automatically installs the physical machine agent service onto the server.
-
If the host containing the Oracle database has an already installed physical machine agent or a Transporter , that agent/Transporter is used to discover and manage the physical machine.
-
Physical machine agents can manage tape devices.
-
Physical machine agents can be upgraded to Universal Transportersthat can be used to discover and back up Hyper-V VMs, Oracle databases, and Physical servers located on the same host.
-
Optionally, check the following options to enable additional capabilities for the Universal Transporter and click Proceed when done:
-
Repository management
-
VMware vSphere support
-
-
Transporter capabilities can be modified at any point in the Editing Nodes tab.
-

Obtaining Oracle Database SID
To obtain your Oracle Database SID, follow the steps below:
-
Open the Run command box (Windows key + R key).
-
To open the registry editor, type
regeditin the Run command dialog box and click OK.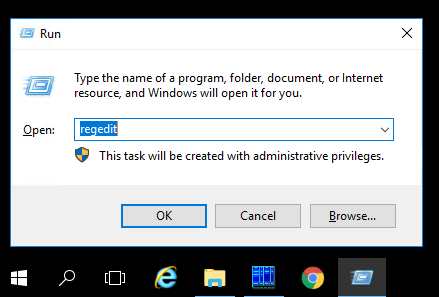
-
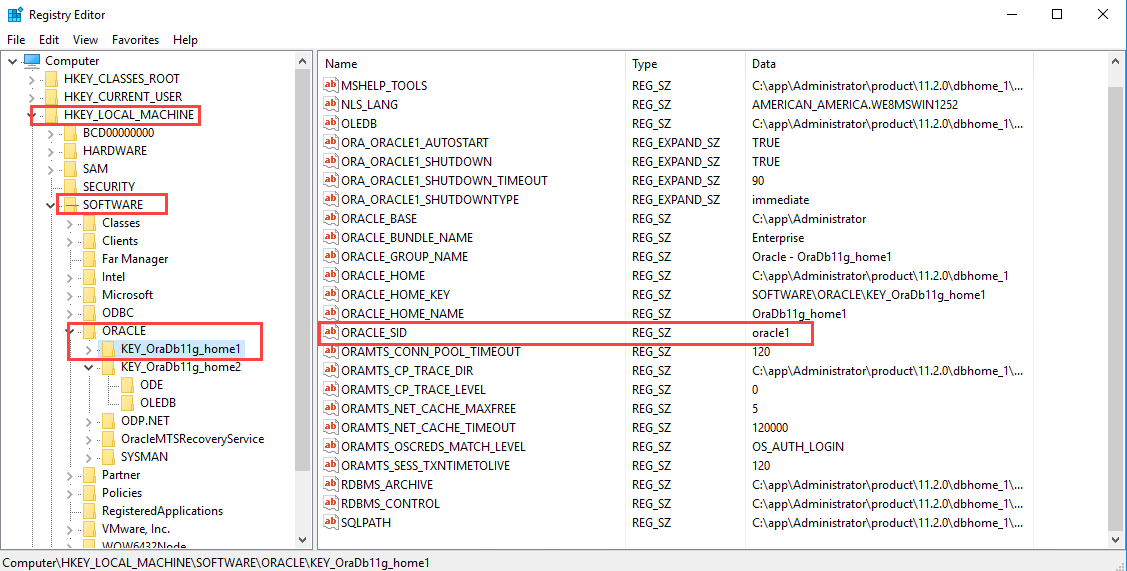
Navigate to the Key Registry of your Oracle Home. The location path is the following: HKEY_LOCAL_MACHINE >SOFTWARE >ORACLE>

-
The ORACLE_SID entry shows your SID.