Adding Microsoft Azure Storage Accounts
Configure and add a Microsoft Azure Storage account to NAKIVO Backup & Replication as described in the sections below.
Configuring a Microsoft Azure Storage Account
To configure a Microsoft Azure Storage account to work with NAKIVO Backup & Replication, follow the steps below.
-
Open the Azure Portal by going to portal.azure.com.
-
Sign in to Microsoft Azure with your Microsoft account credentials.
-
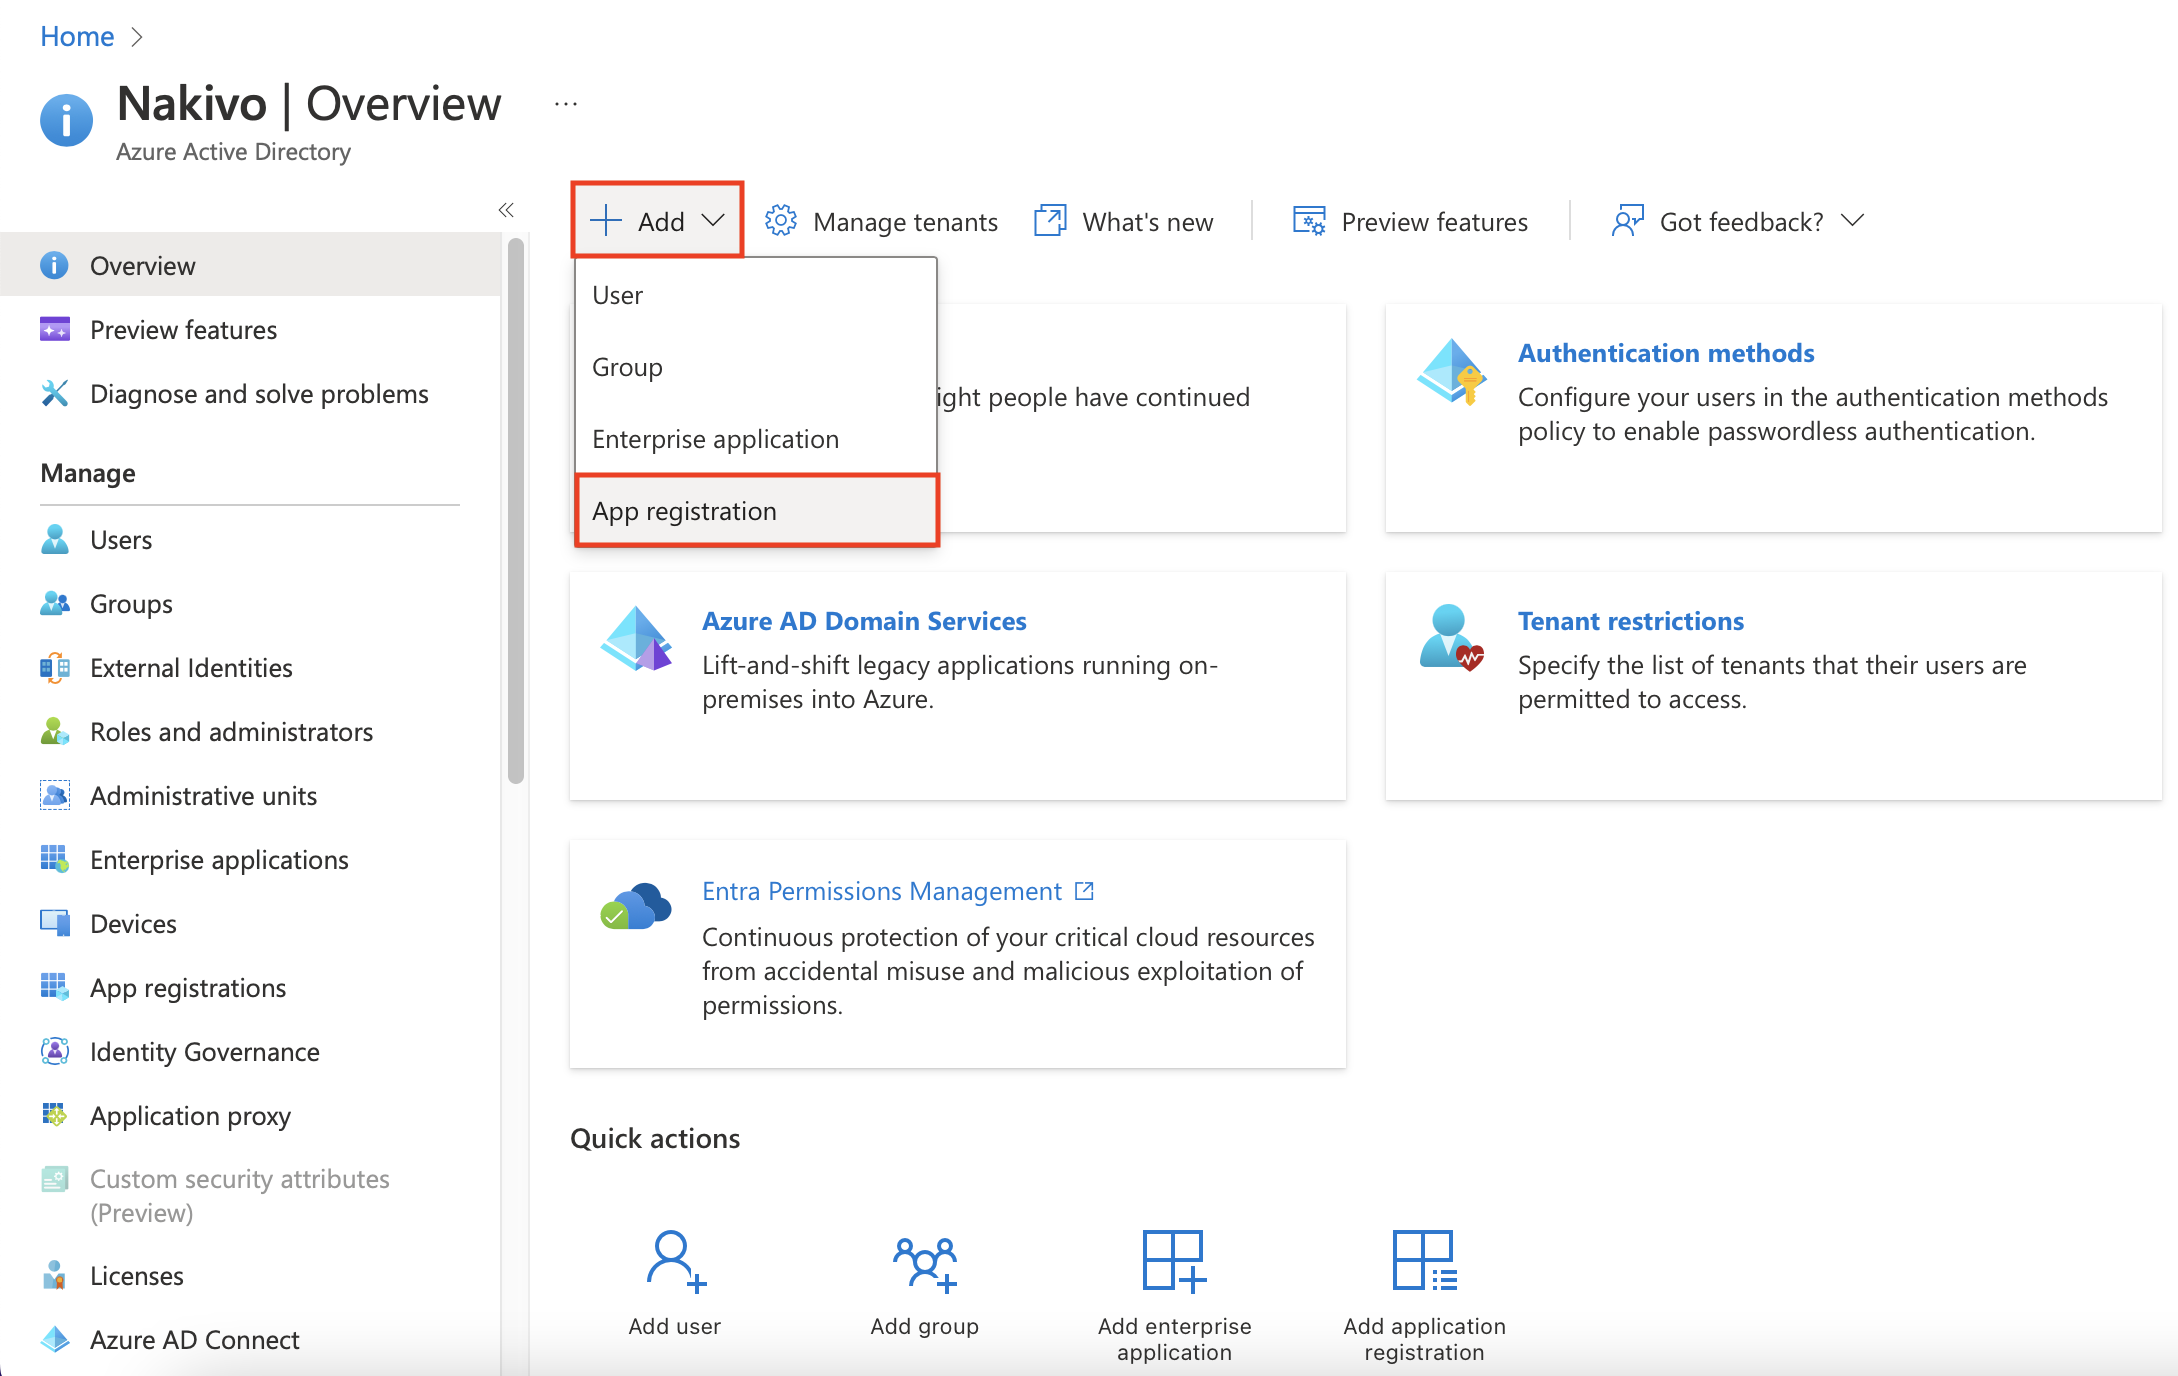
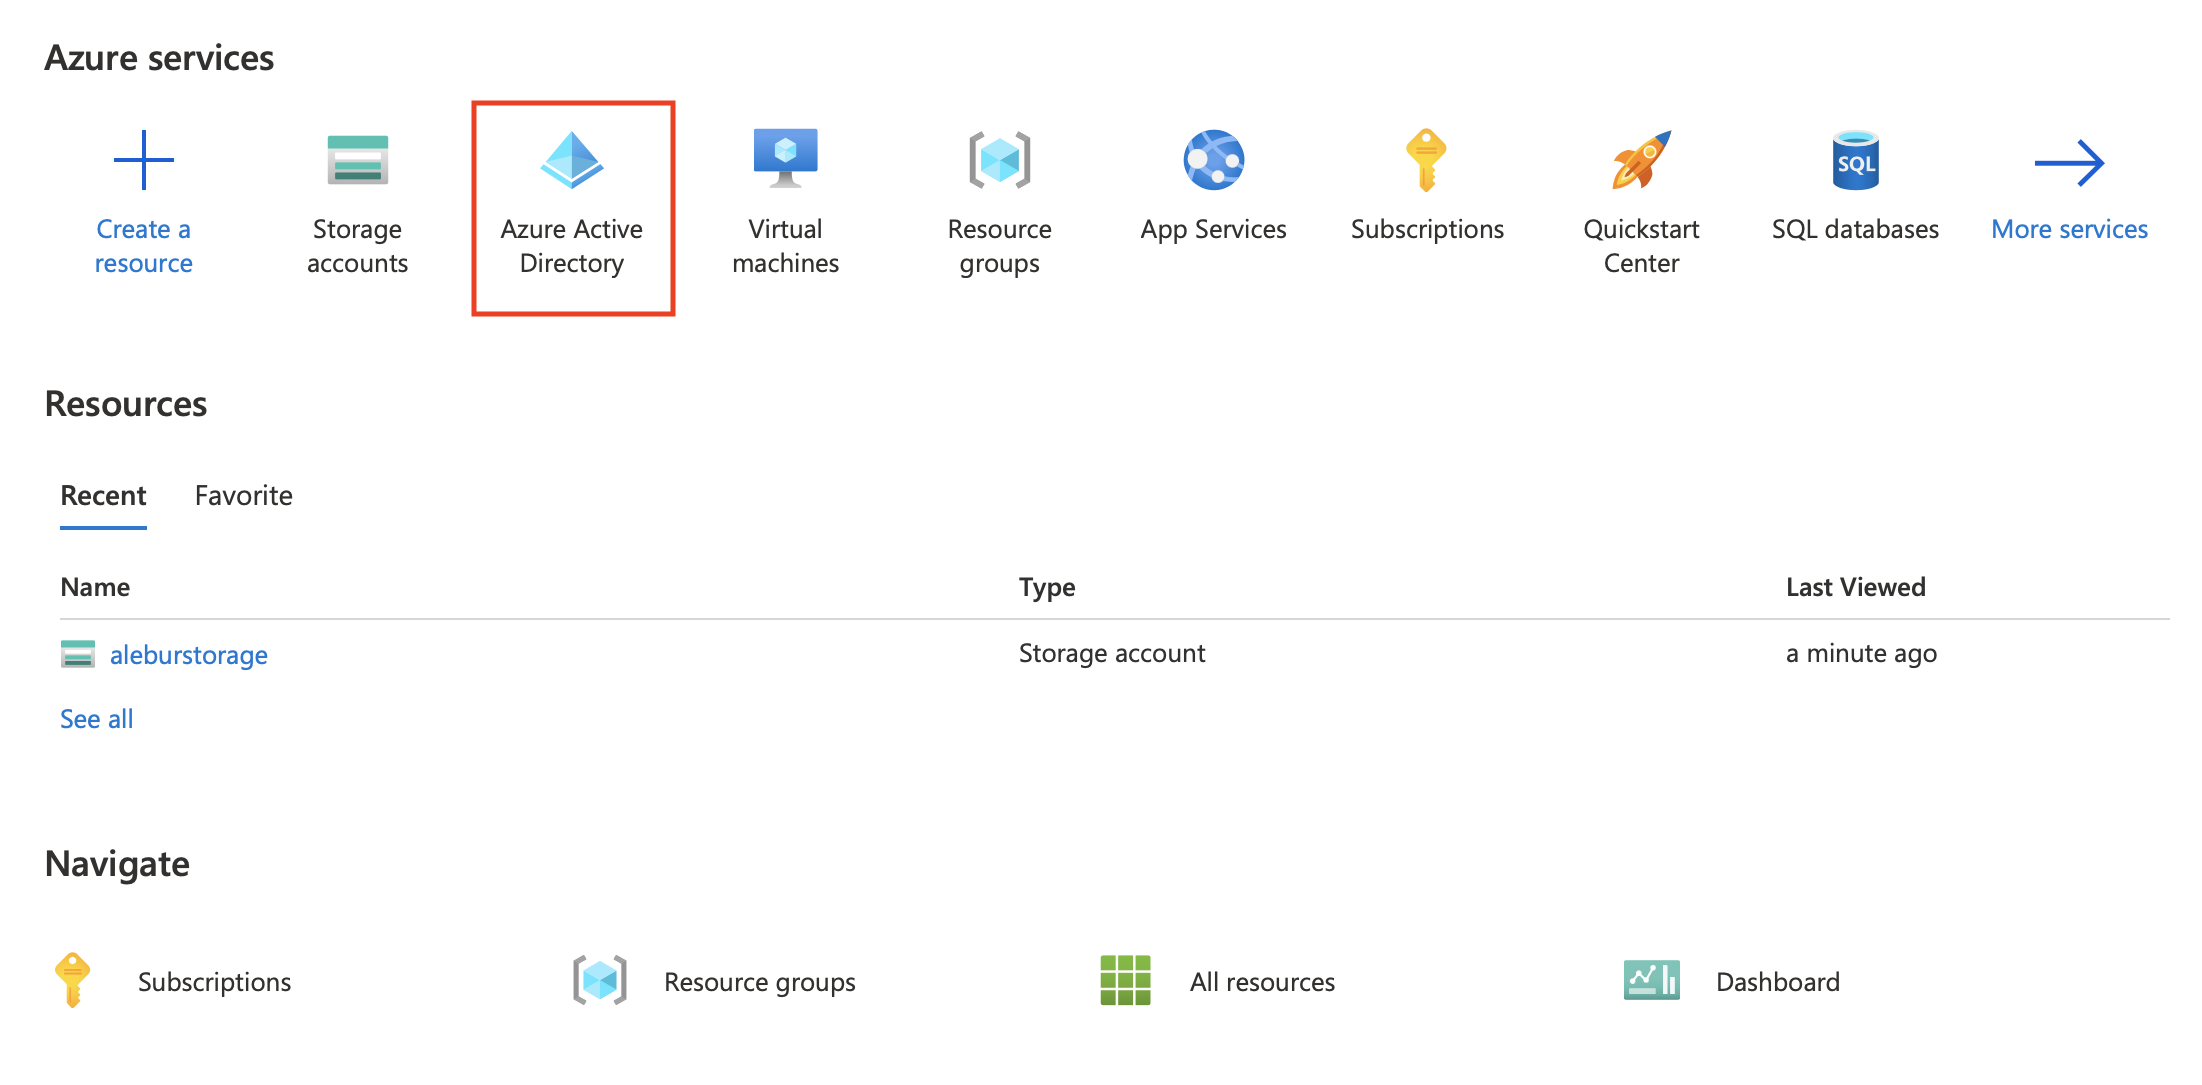
Open Azure Active Directory from the services dashboard.

-
Register a new application by clicking Add > App registration from the Overview or App registrations menu. If you already have an application for use with NAKIVO Backup & Replication, skip to step 6.
-
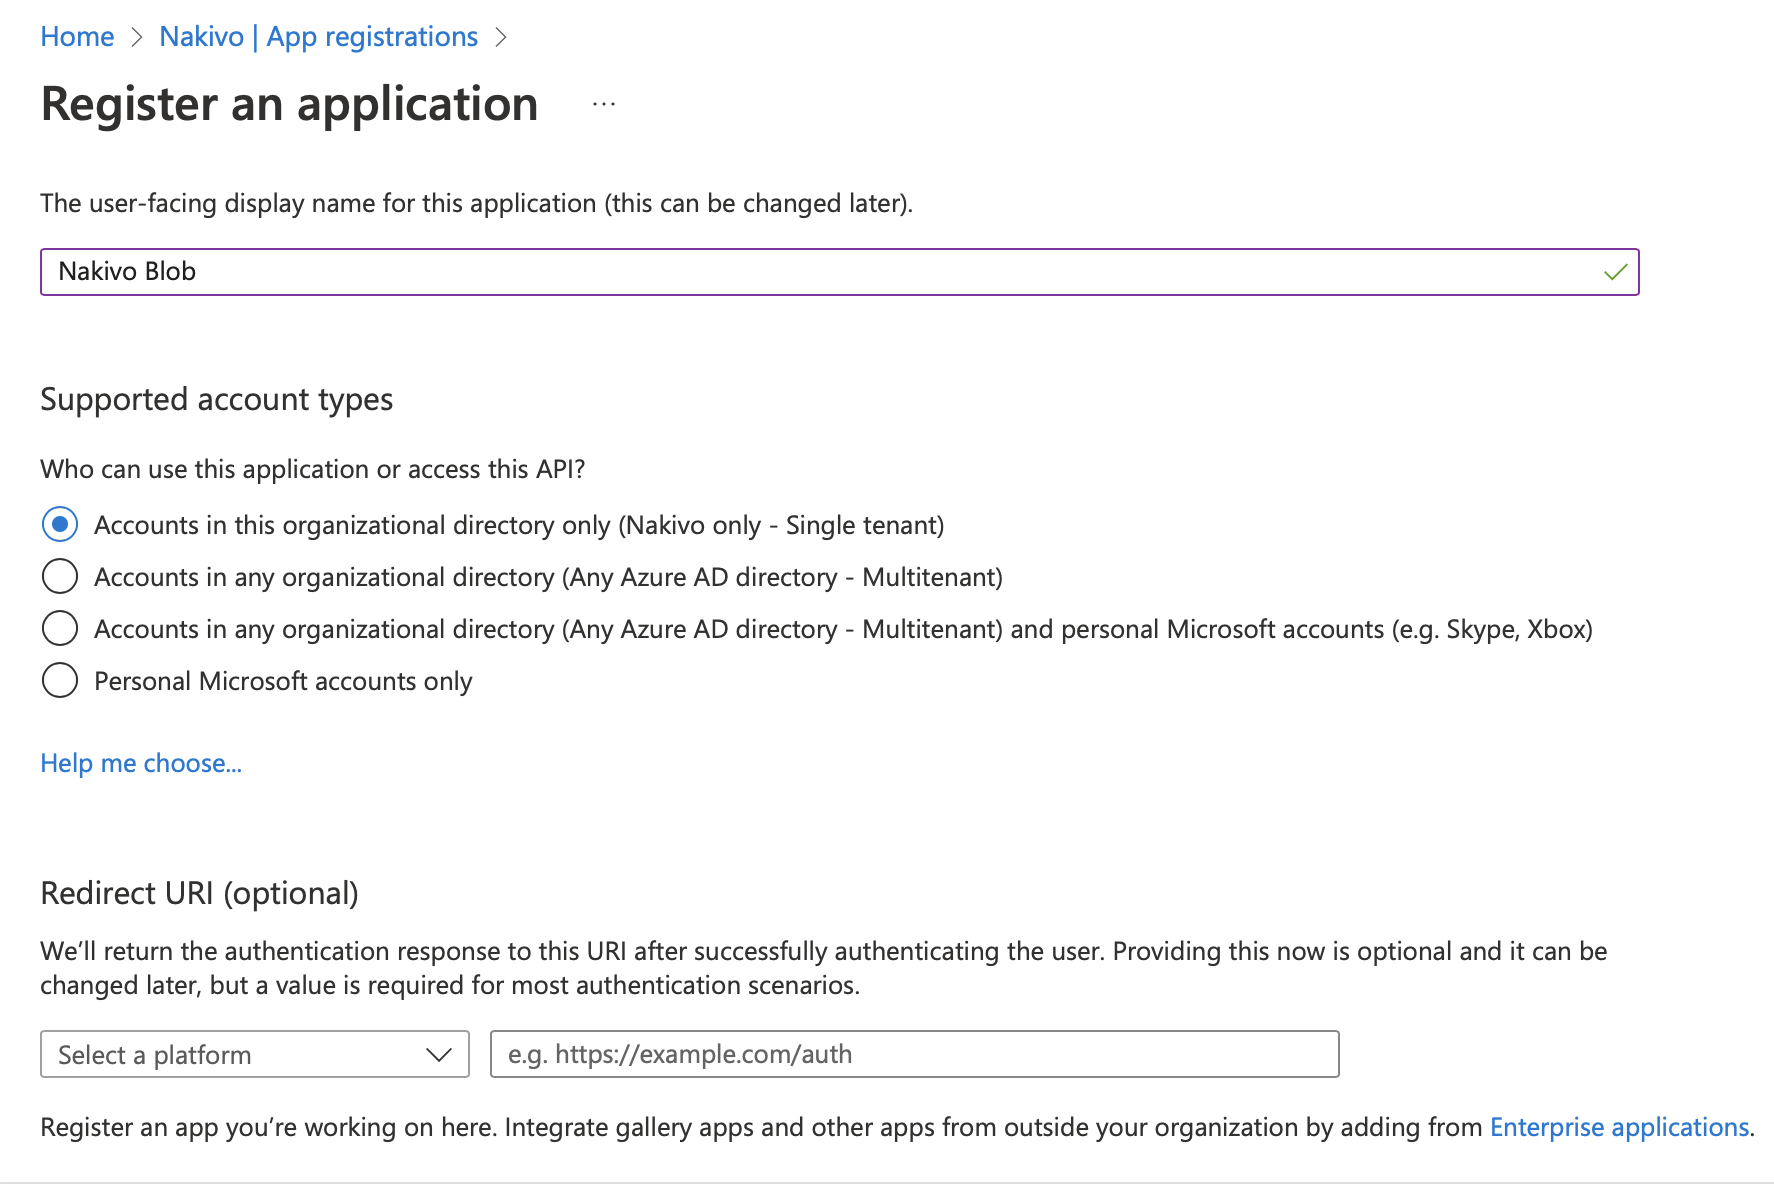
Enter a name for your application and set the access level per your requirements. When you're done, click Register.
-
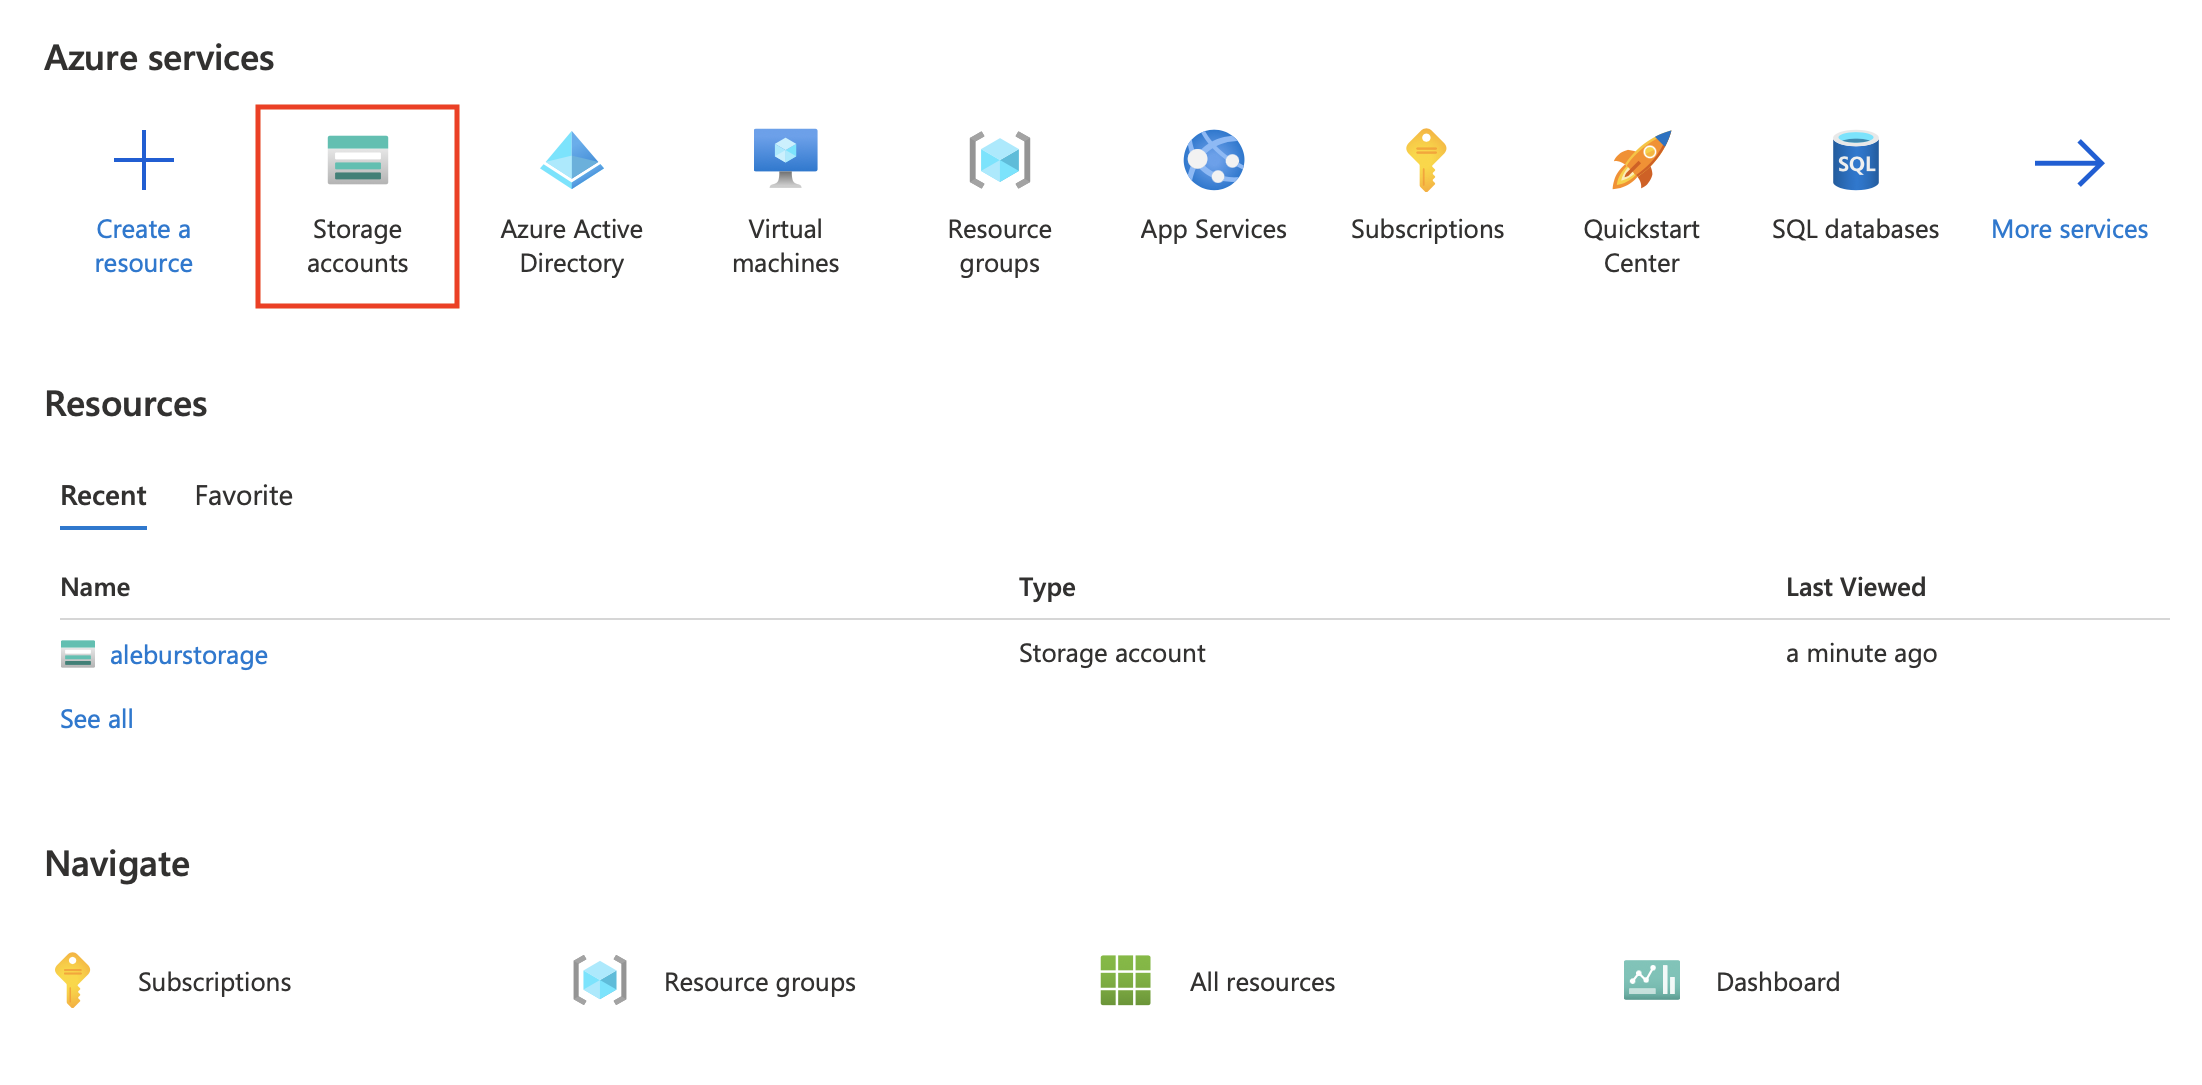
Next, return to the Azure homepage an open Storage accounts from the services dashboard.
-
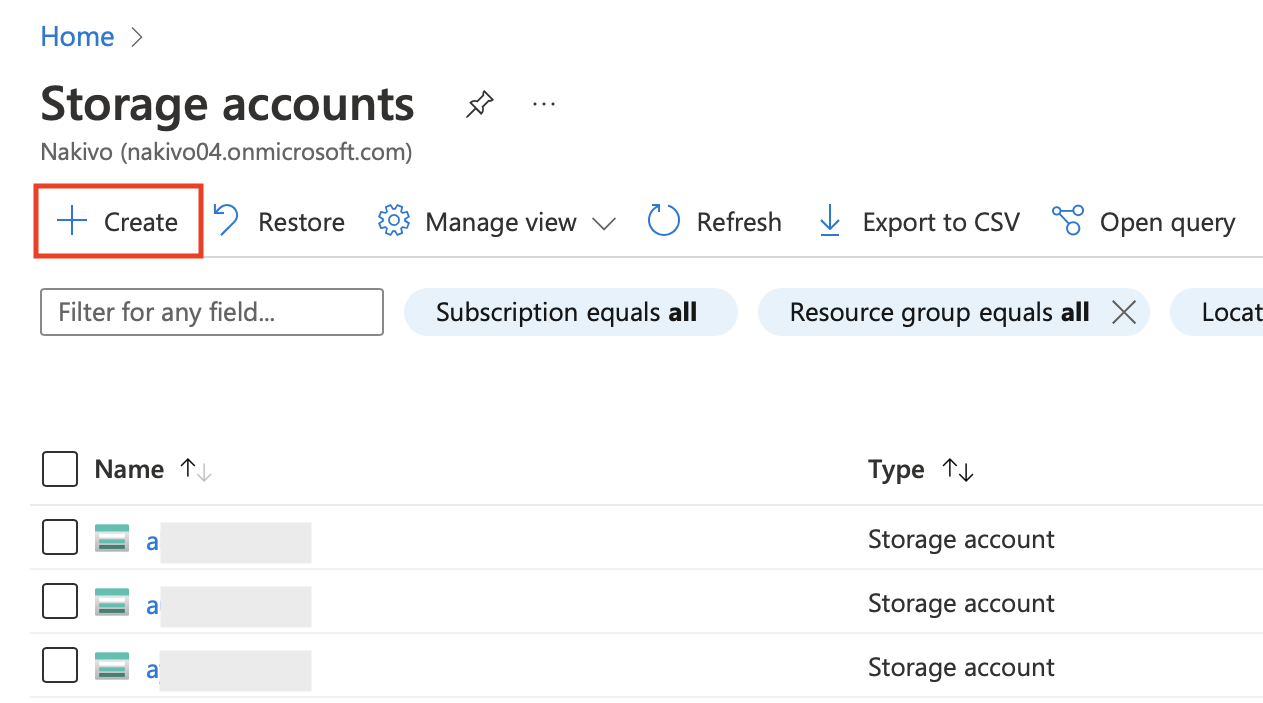
Click Create to create an Azure storage account. If you already have a storage account, skip to step 9.
-
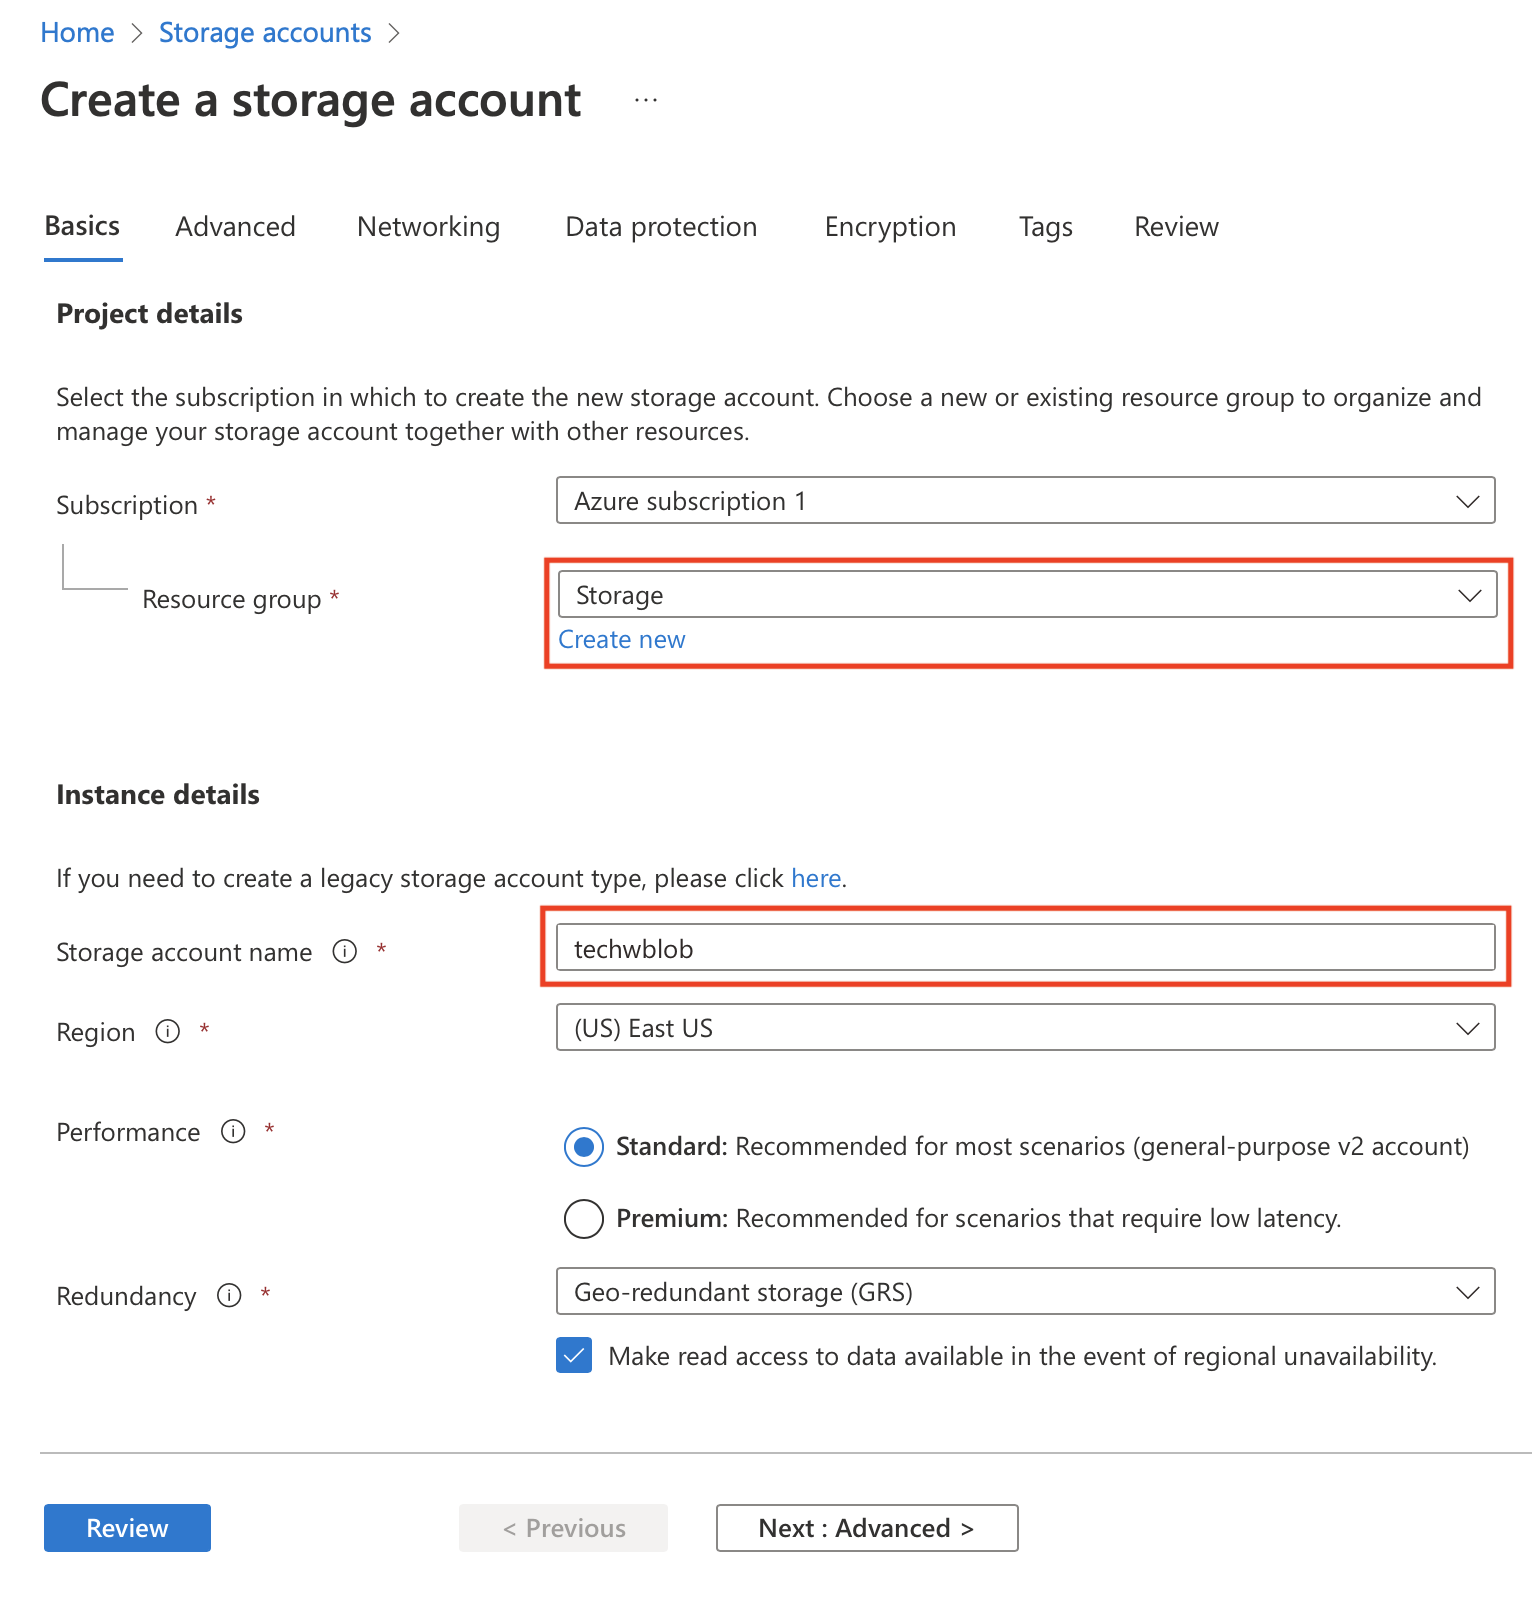
Select the appropriate Subscription and Resource group from the respective drop-down menus. You may also create a new resource group by clicking the Create new button under the Resource group drop-down menu. Name your storage account and configure the Region, Performance, and Redundancy settings based on your preference.
-
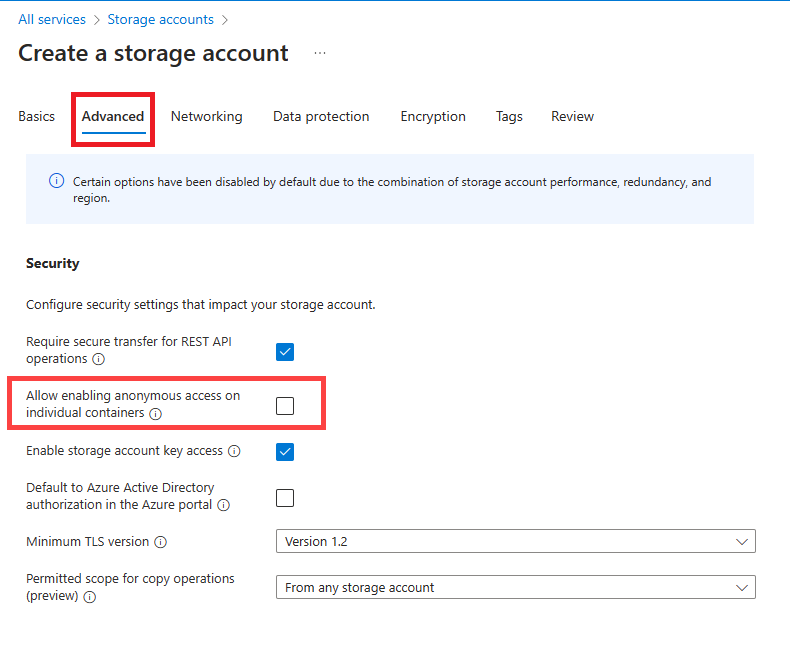
On the Advanced tab, it is recommended to disable Allow enabling anonymous access on individual containers option.
-
If you wish to enable Backup Immutability for this storage account, go to the Data protection tab. Under Tracking, find and enable the Enable versioning for blobs setting. Under Access control, find and enable the Enable version-level immutability support setting.
_thumb_0_0.png)
-
Optionally, configure advanced settings within the other tabs. When you're done, click Review. Review the account configuration and click Create if everything is in order.
Note
After clicking Create, the storage account will undergo a short deployment stage before it appears in the Storage accounts menu. -
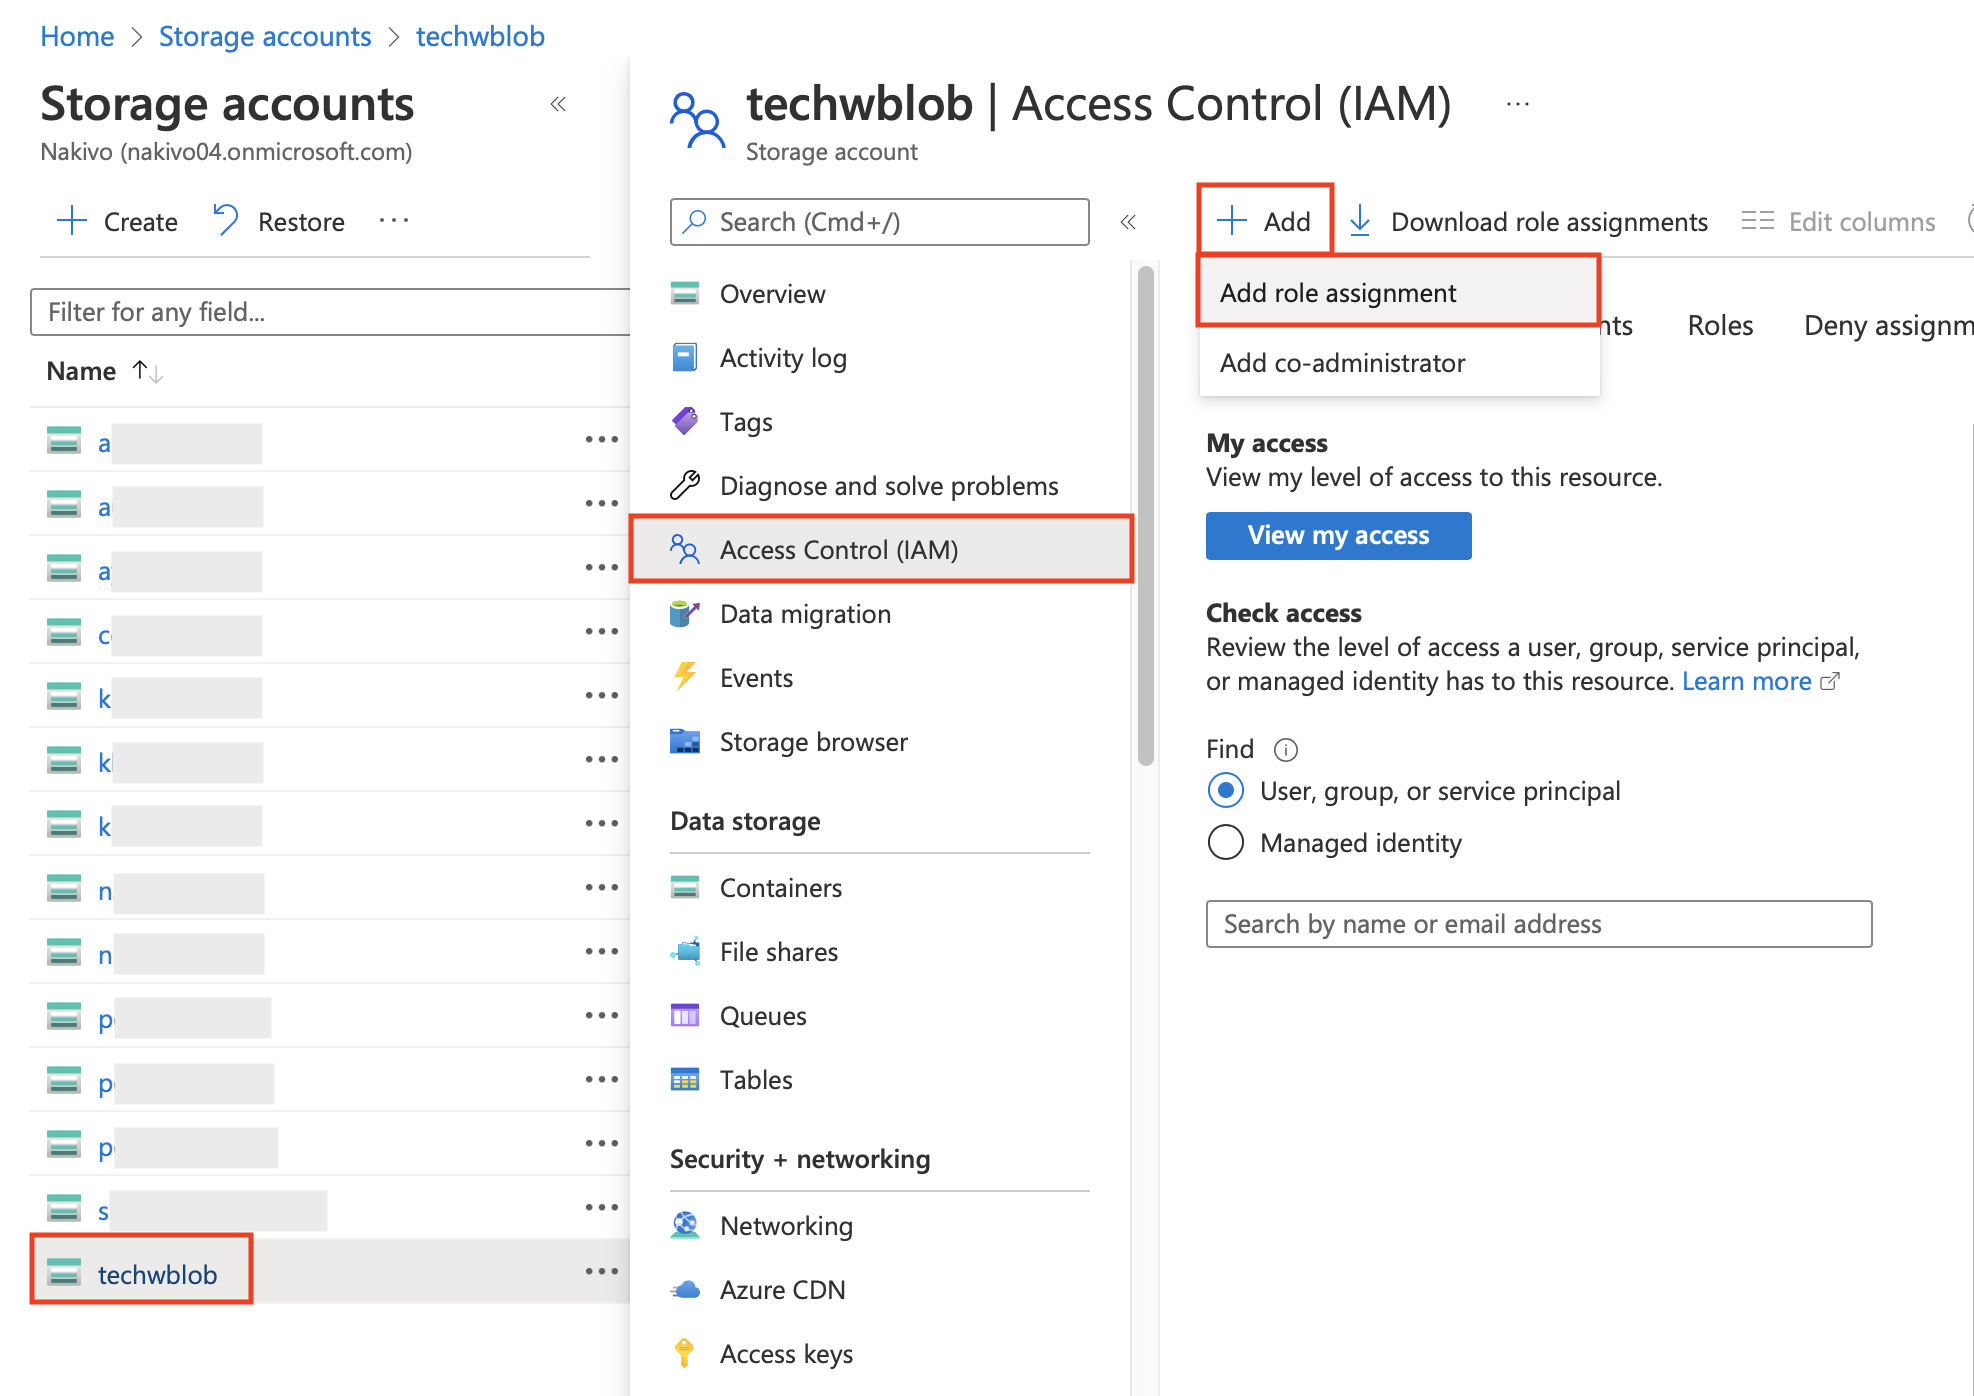
Locate your storage account in the Storage accounts menu and click on it to open the account settings. Go to the Access Control (IAM) tab and click Add > Add role assignment.
-
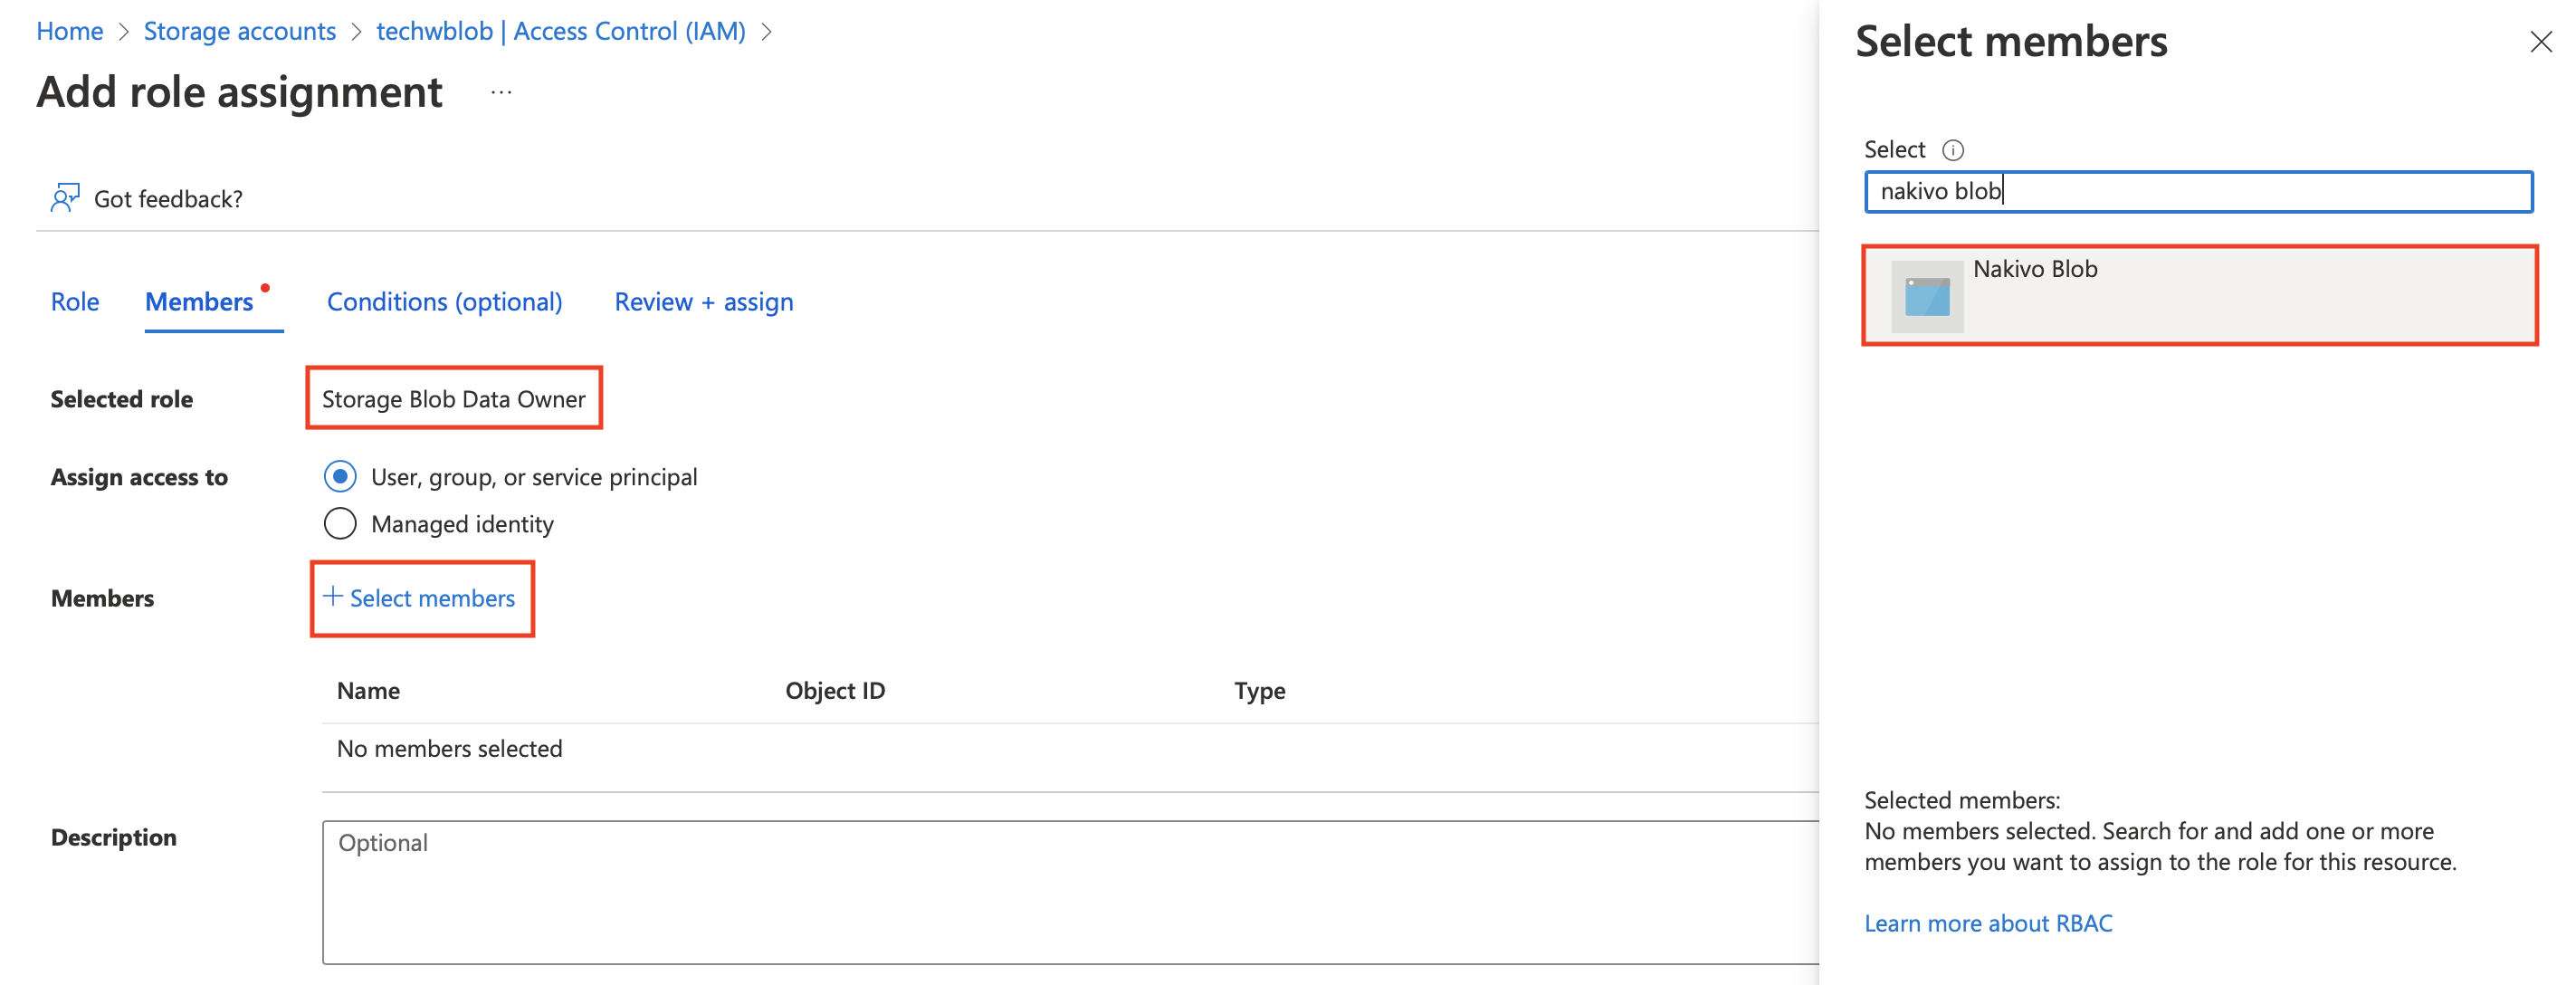
Find the Storage Blob Data Owner role and select it. Click Next.

-
Click Select members and find the application registered in the previous steps using the search bar. Click on the application name and click Select below to confirm. Click Review + assign to add the role.
-
To add storage containers to the storage account and configure immutability, go to the Containers tab and click + Container.
Note
NAKIVO Backup & Replication automatically detects containers created after adding a Microsoft Azure Storage account to inventory.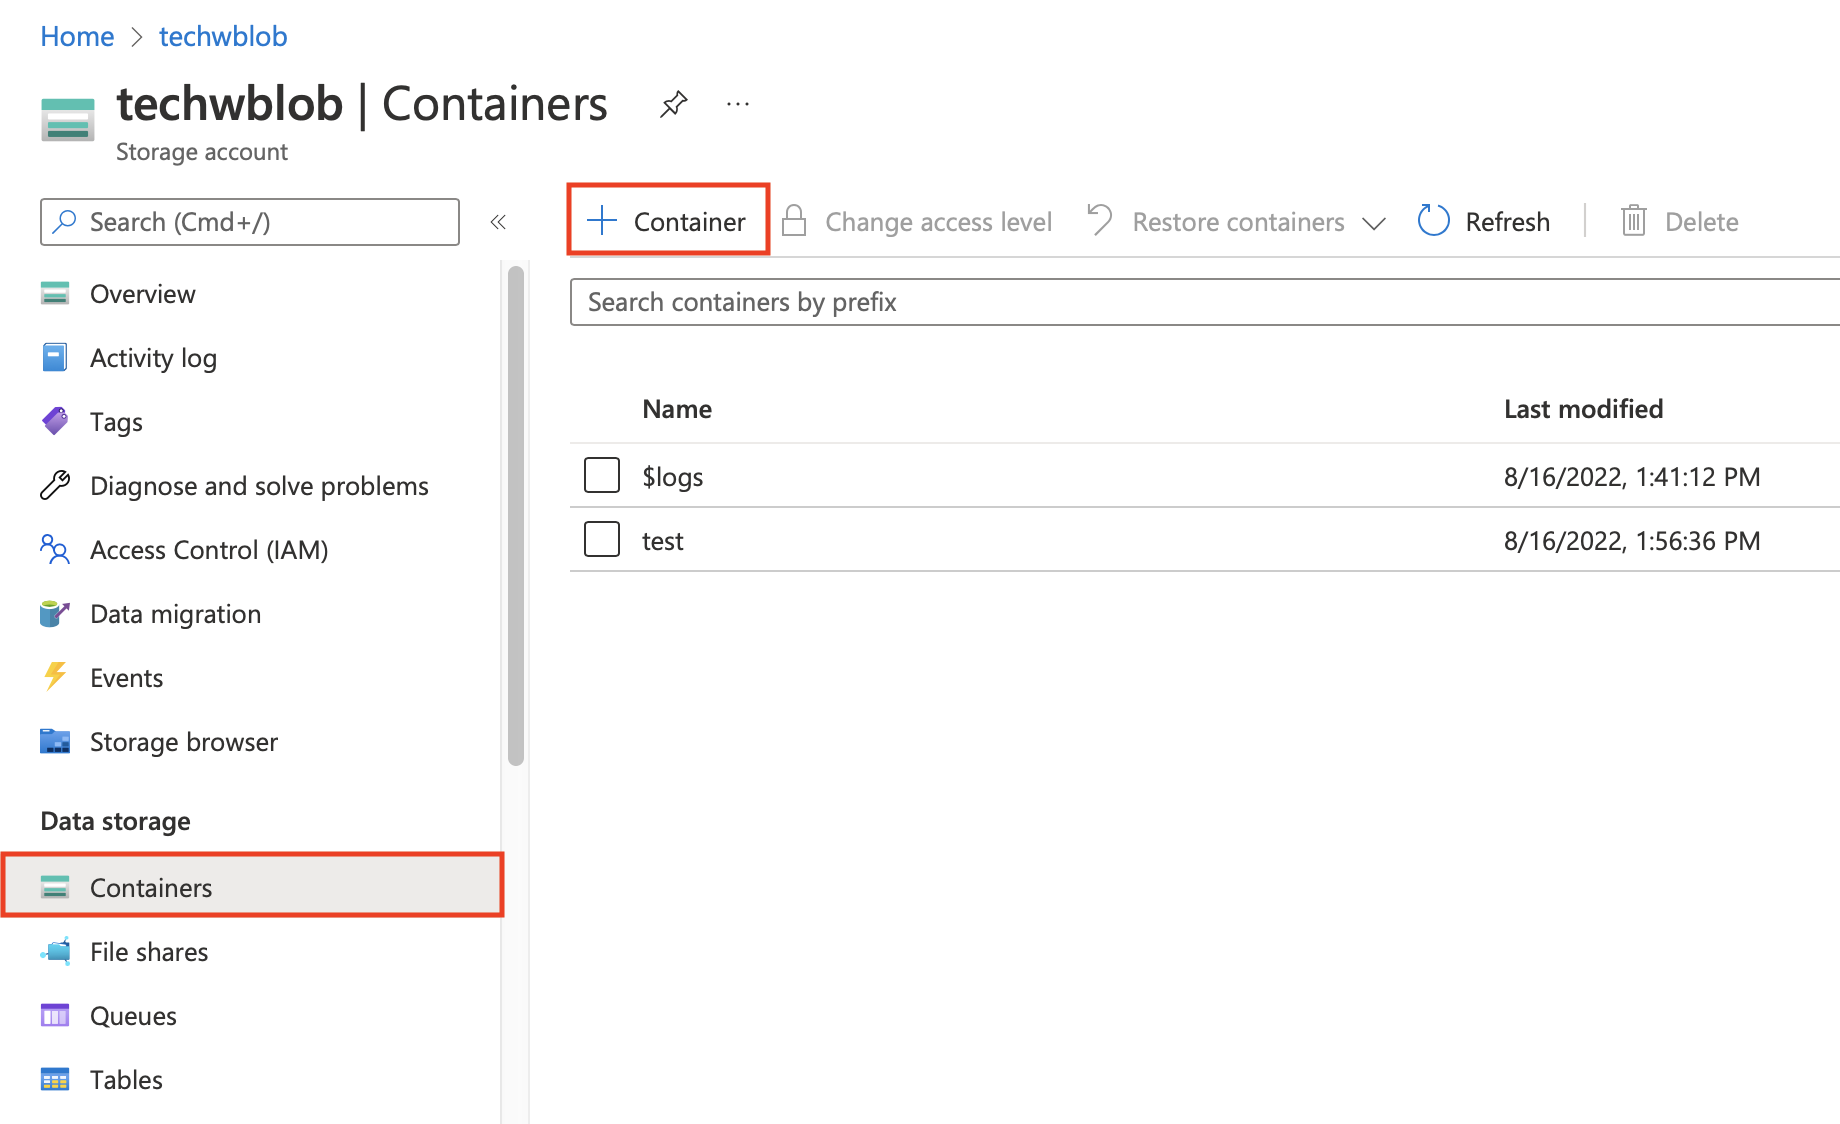
-
Name the container and configure its access level as needed. Select Enable version-level immutability support under Advanced settings if you wish to enable Backup Immutability for this container.
_thumb_0_0.png)
Note
If your storage account does not have version-level immutability support enabled (as described in step 9), you will need to enable this option per container. Existing containers without the Enable version-level immutability support option enabled will not be able to make use of Backup Immutability.
-
-
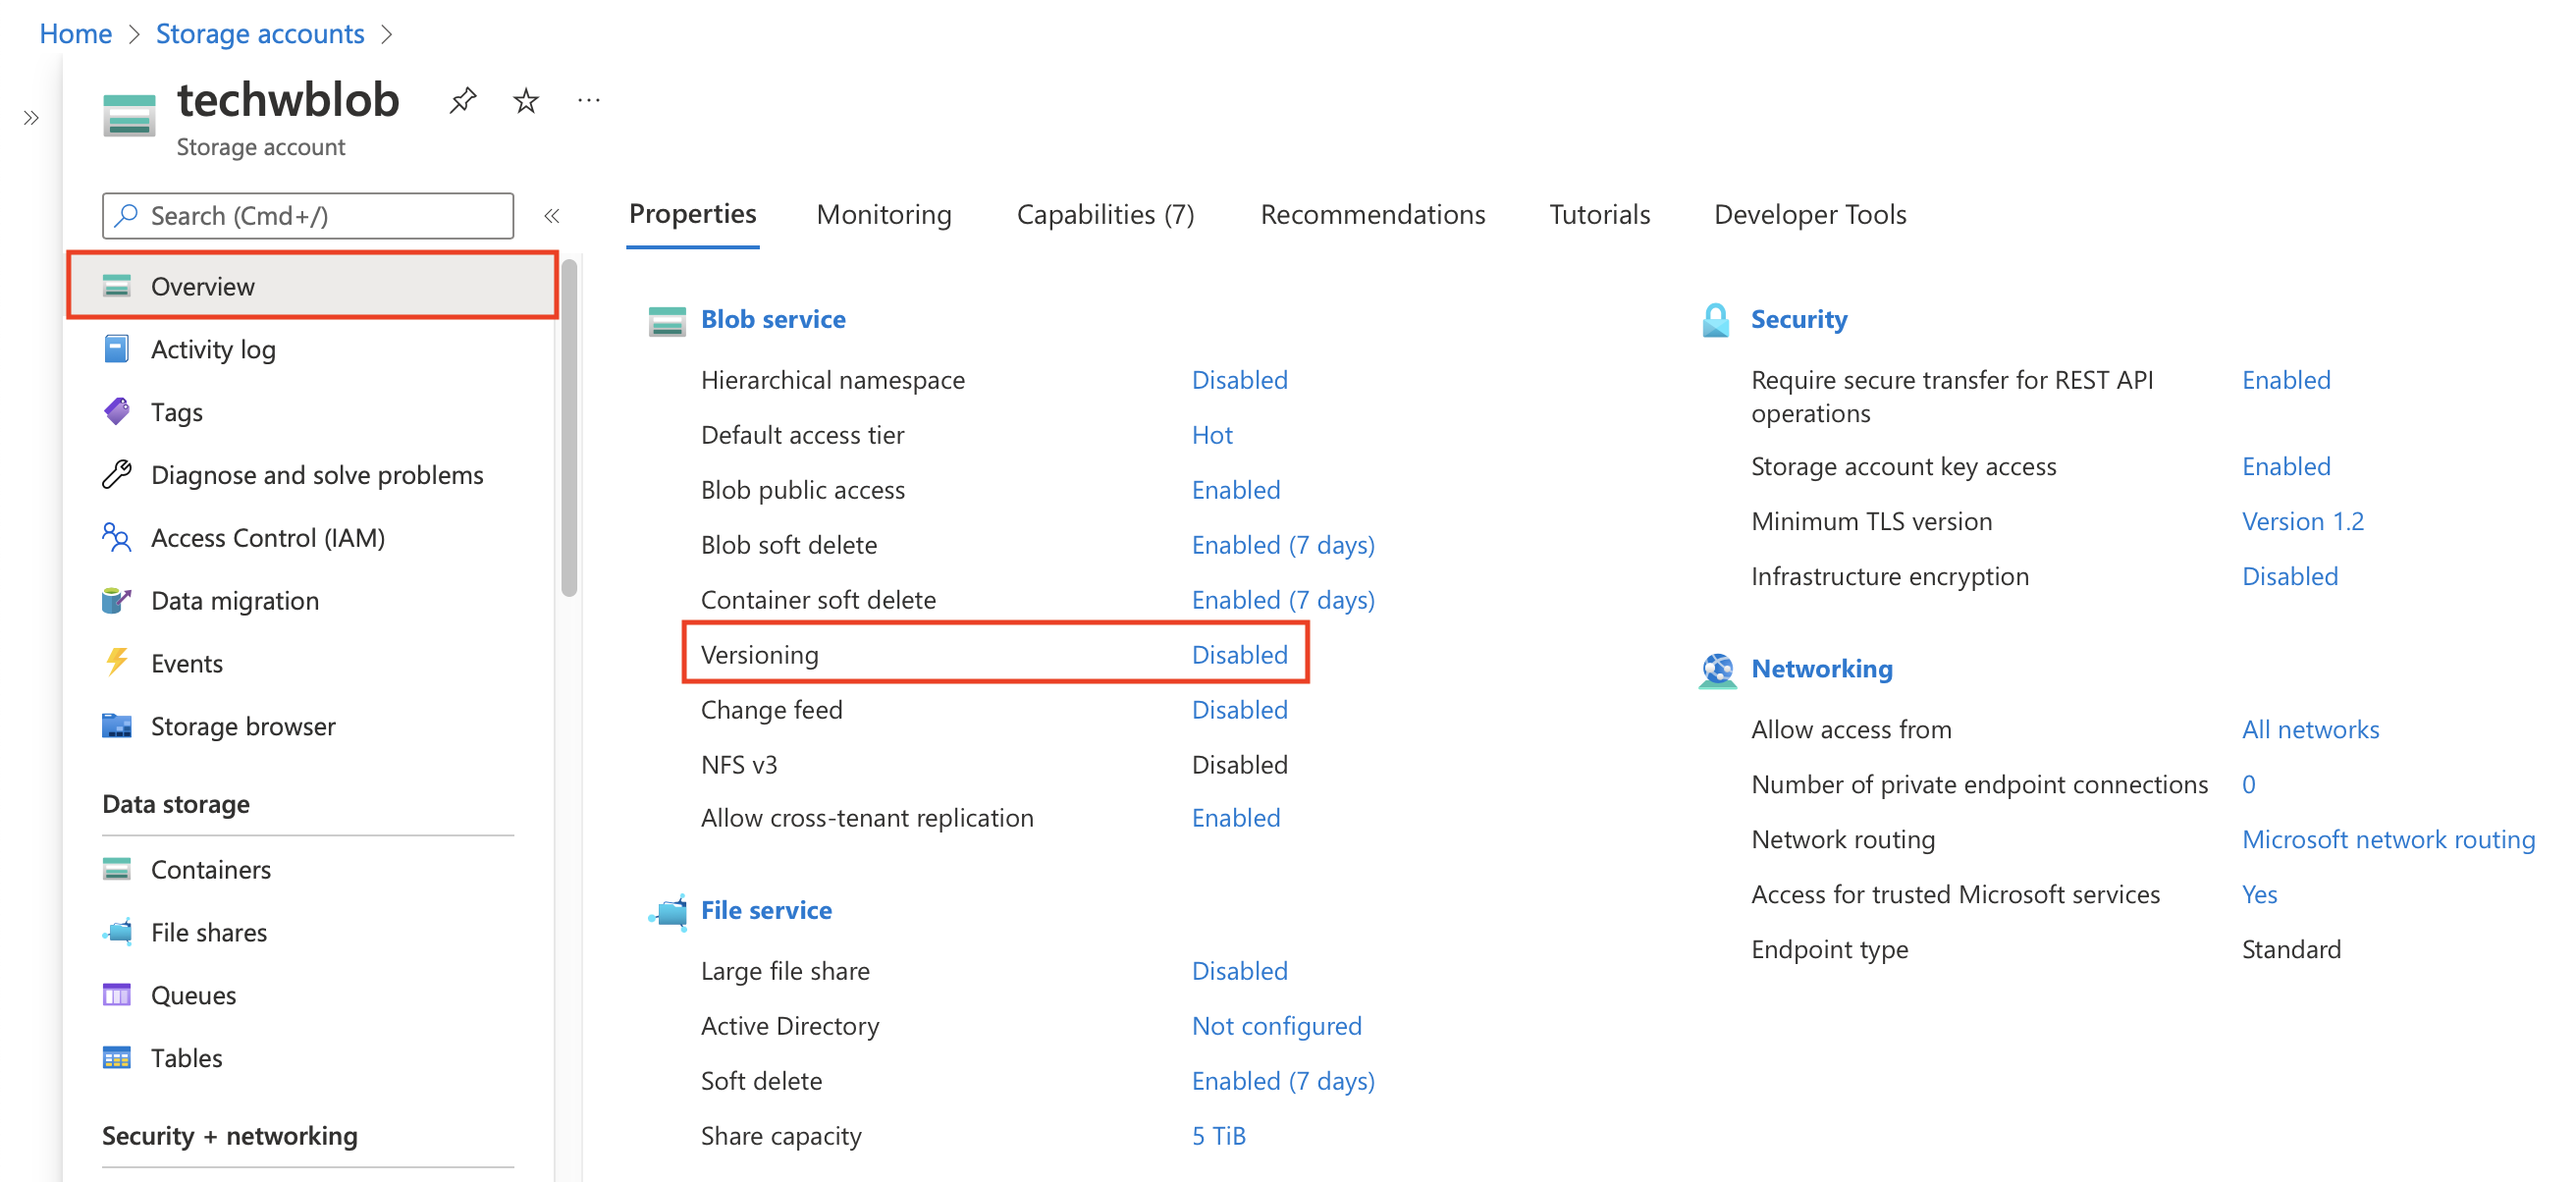
If you enabled version-level immutability support in any of the previous steps, also make sure that versioning for blobs is enabled. Return to the storage account's Overview menu and scroll down to find Versioning in the Properties tab. If your versioning is Disabled, click Disabled.
-
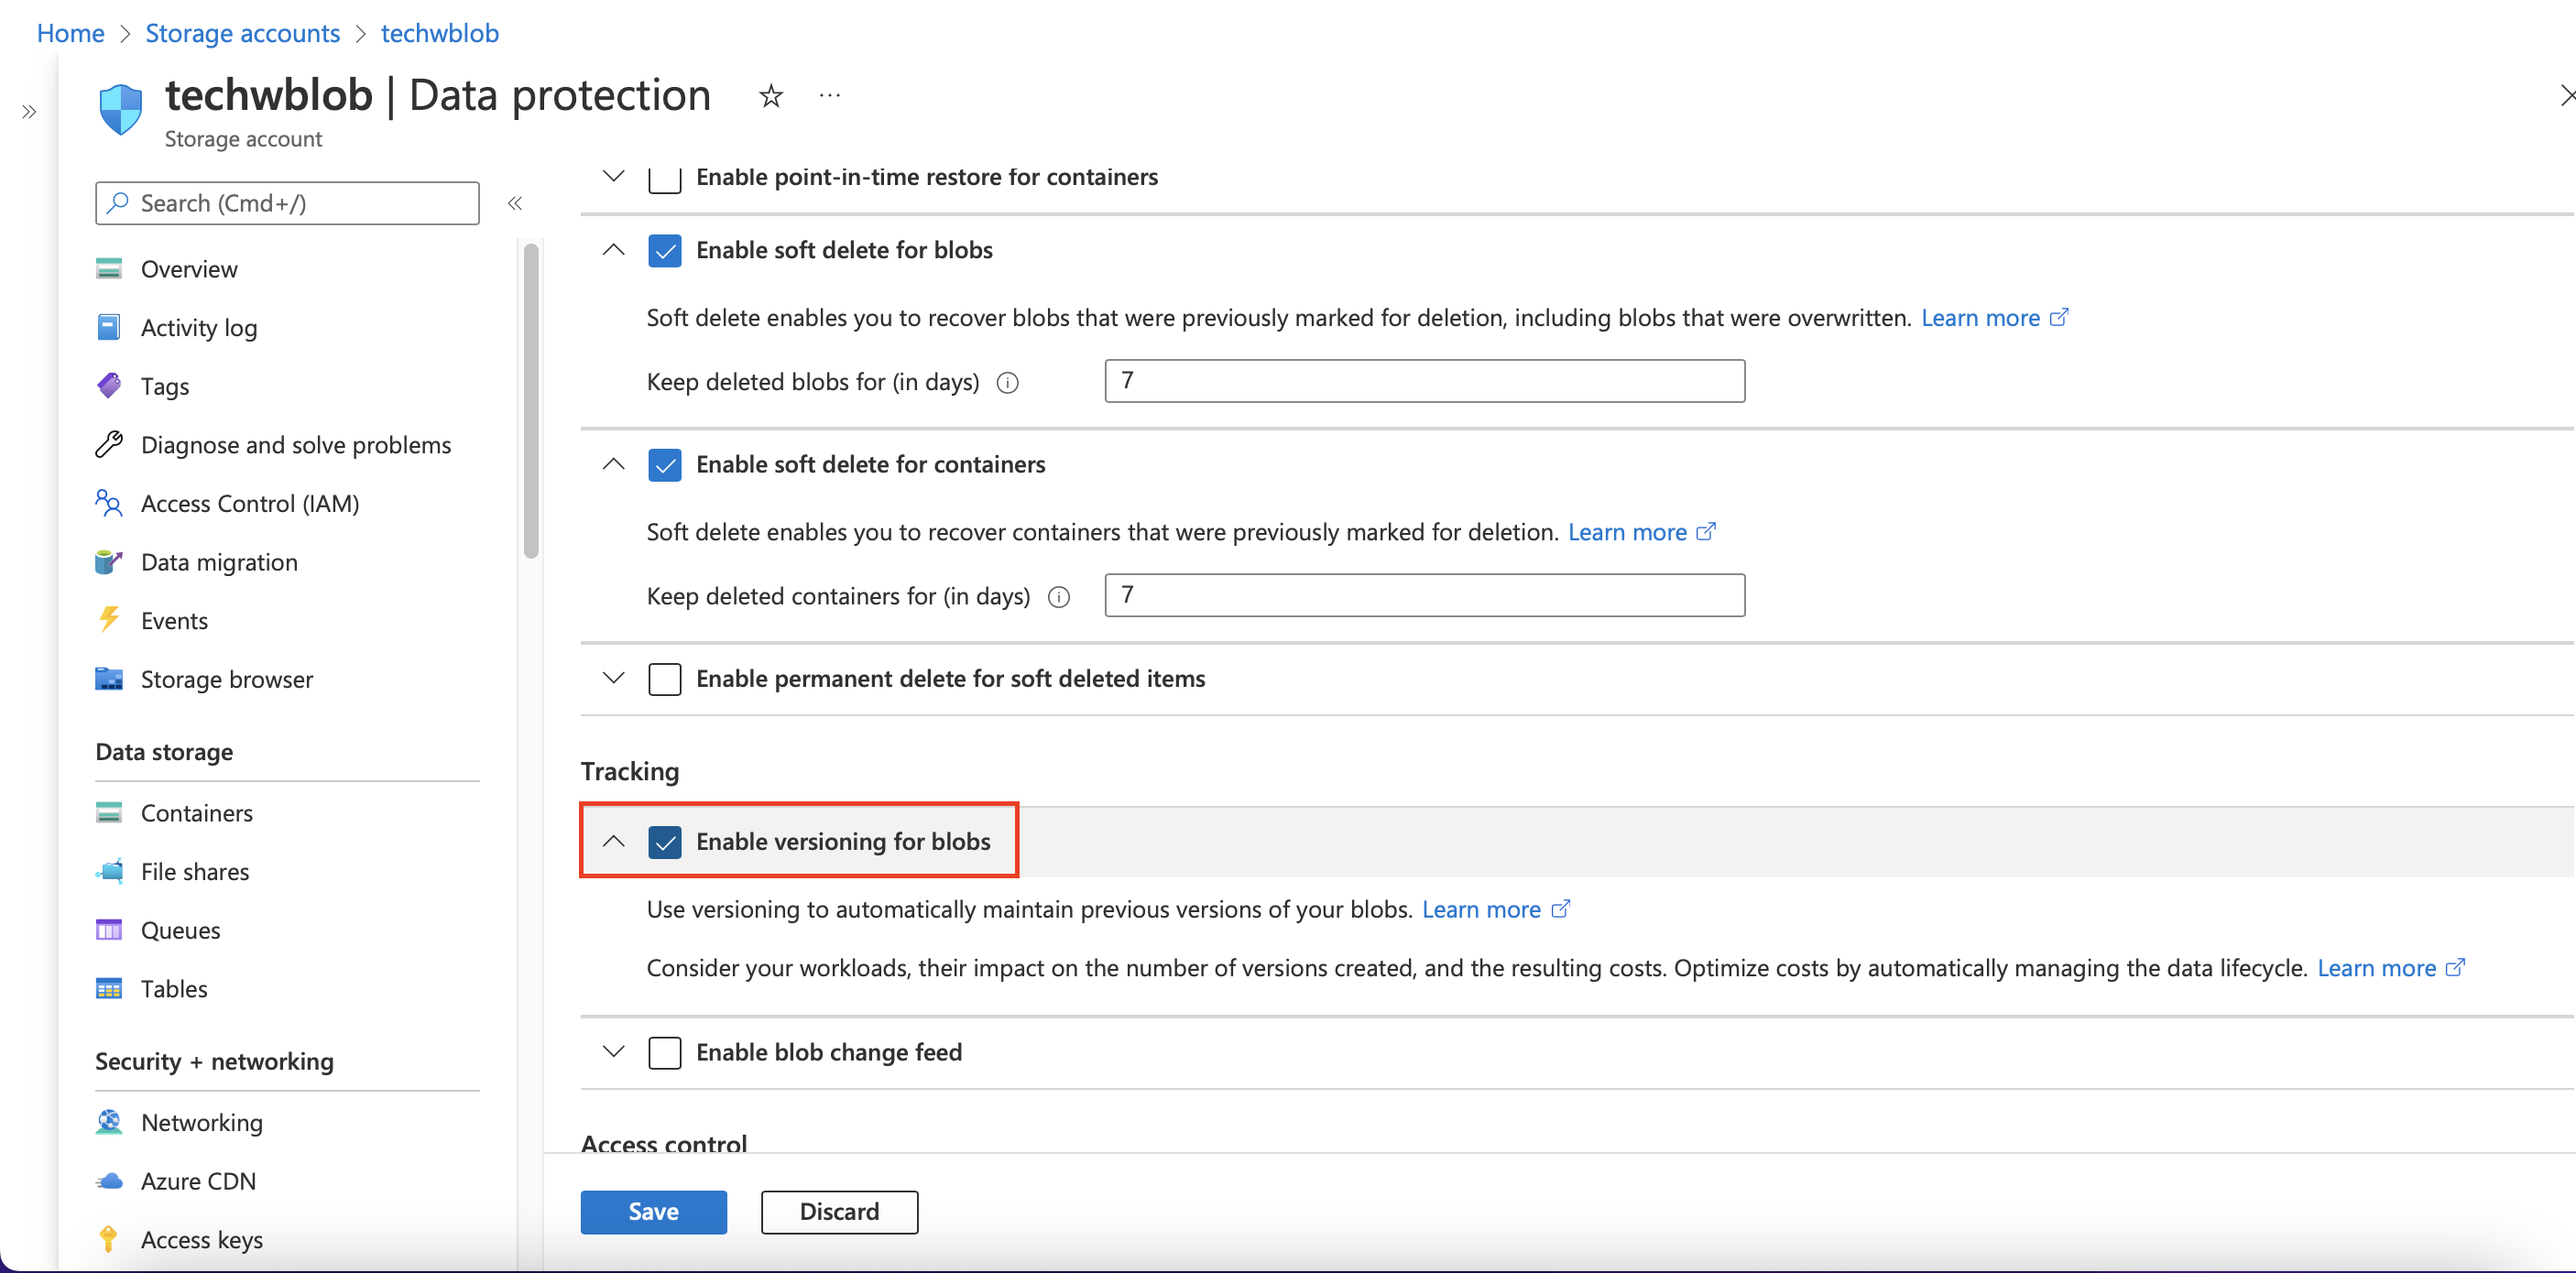
Scroll down to find Enable versioning for blobs under Tracking. Enable this feature and click Save below.


.png)


.png)


Obtaining Microsoft Azure Credentials
To obtain the credentials required to add a Microsoft Azure Storage account to the NAKIVO Backup & Replication Inventory, follow the steps below.
-
Open the Azure Portal by going to portal.azure.com
-
Sign in to Microsoft Azure with your Microsoft account credentials.
-
Select Azure Active Directory from the Dashboard or from the Portal Menu.
-
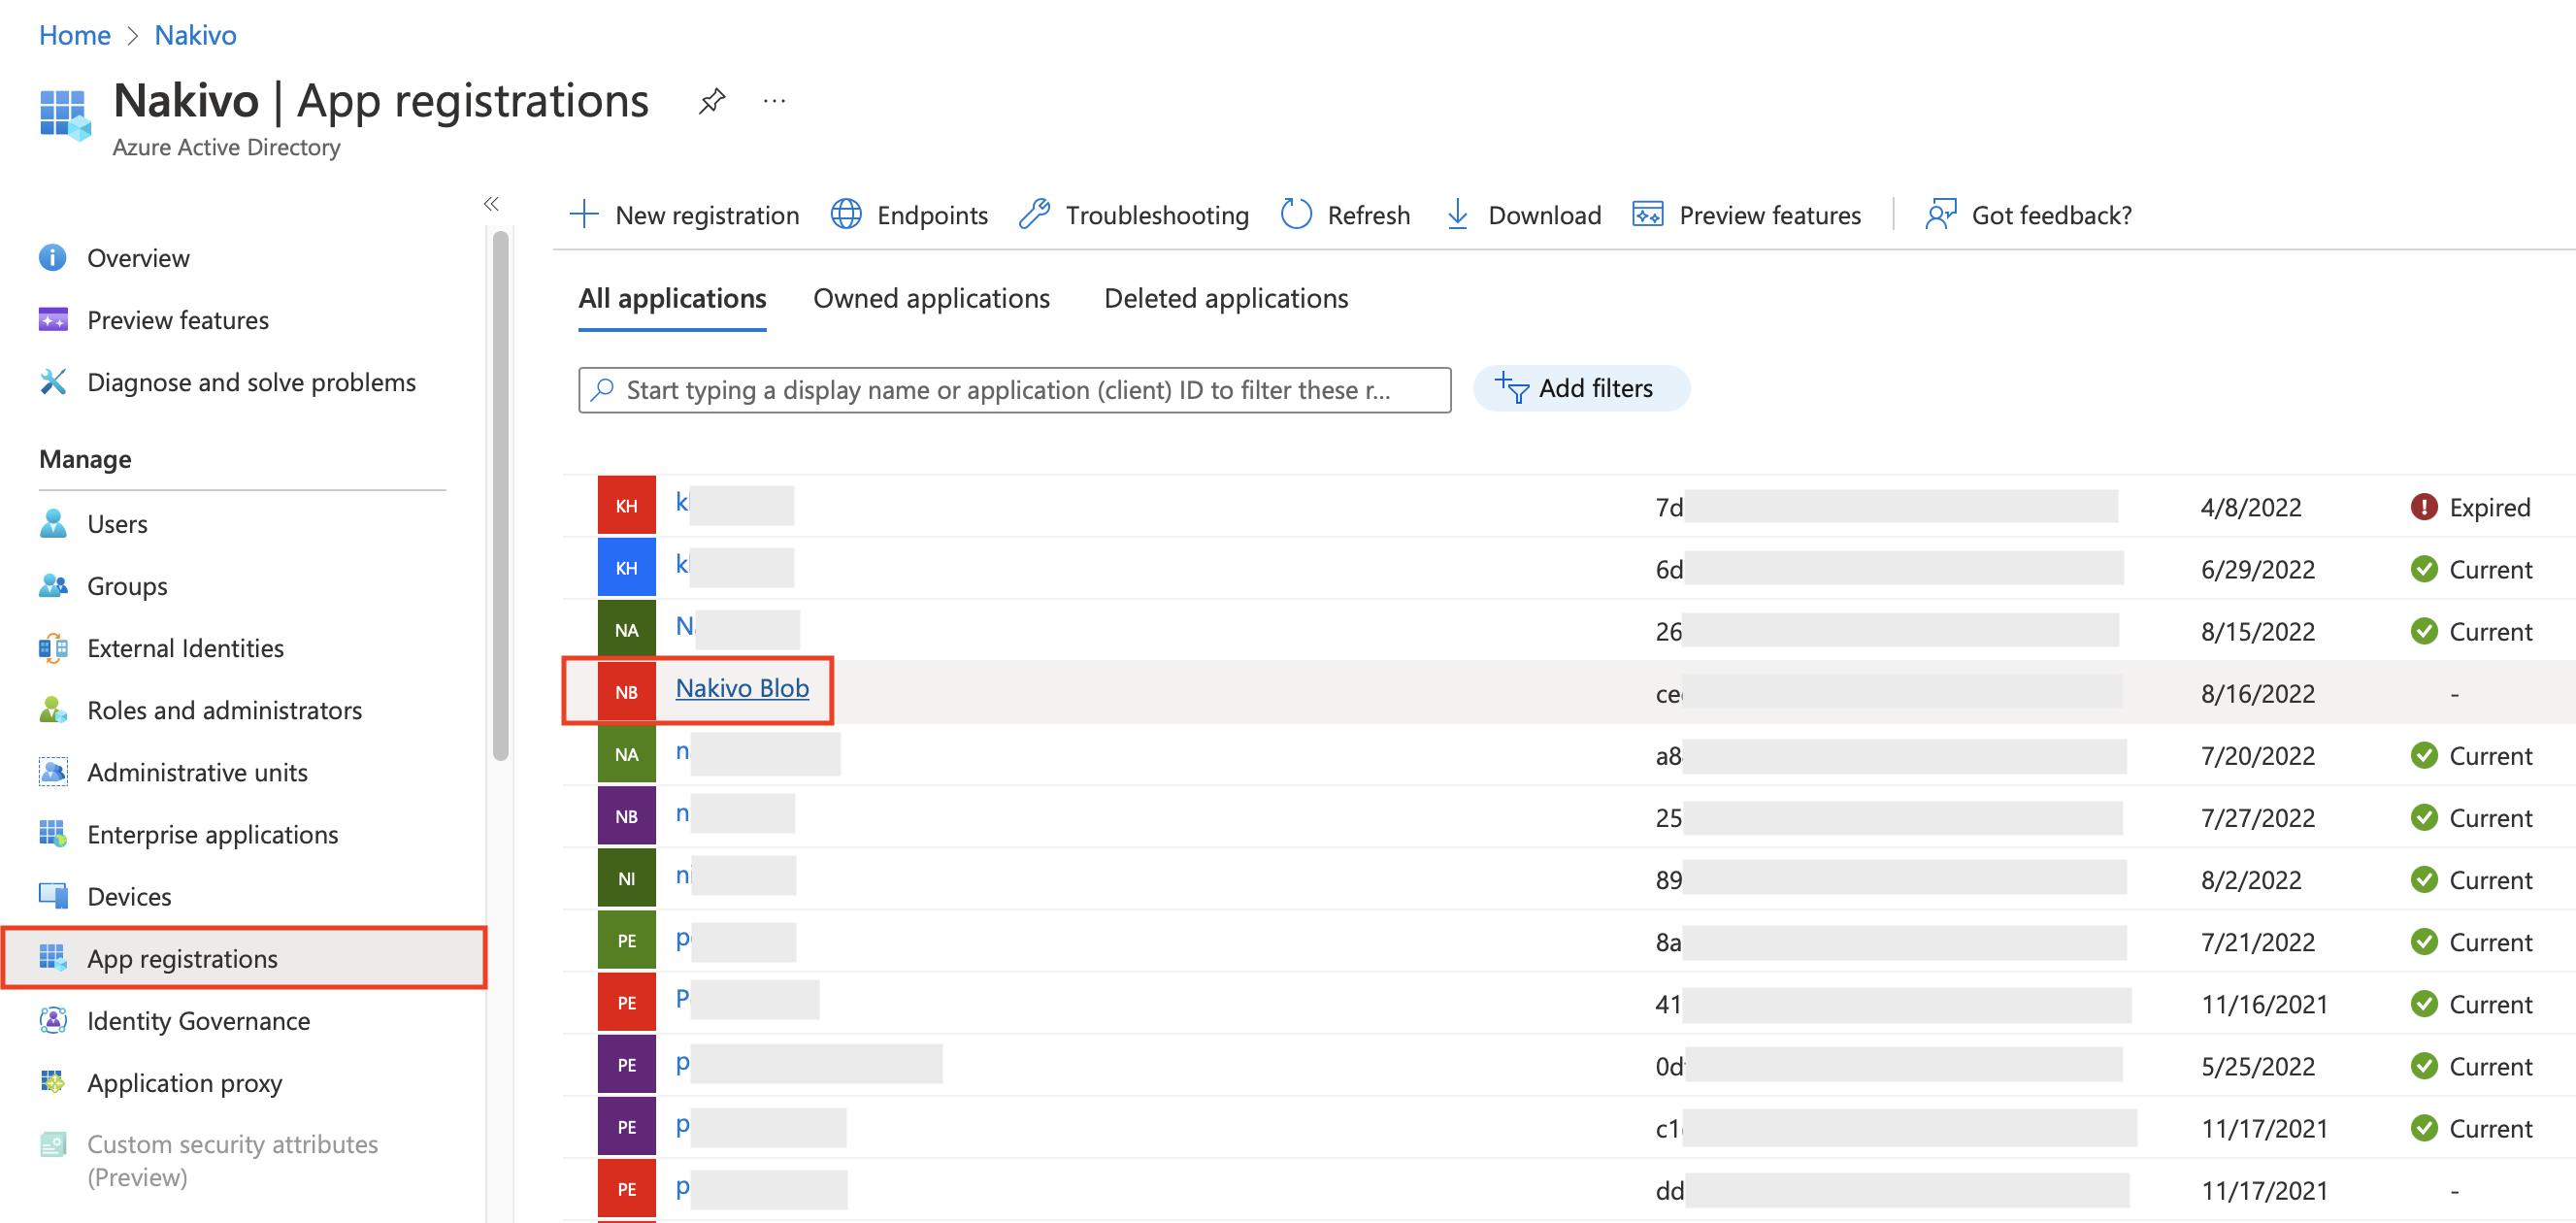
In the left menu, click App registrations and locate the application registered for use with NAKIVO Backup & Replication. Click on its name to open the application's settings.
-
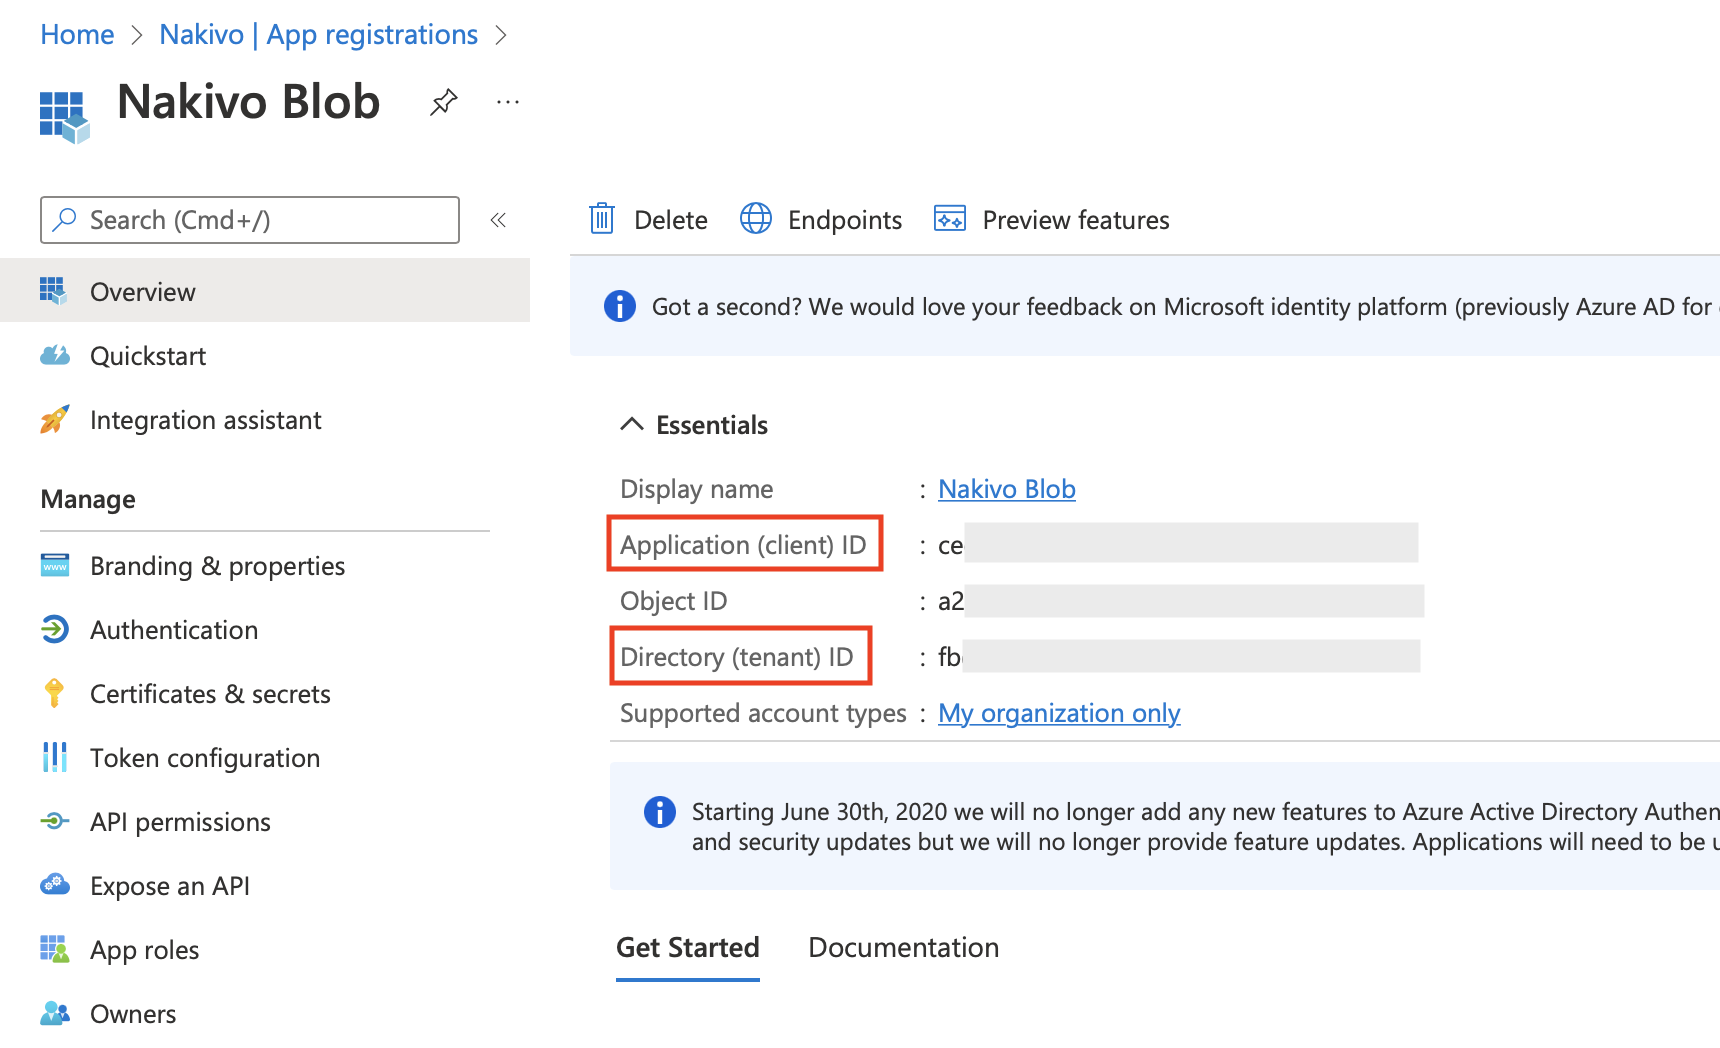
Locate and make a note of the Client ID and Tenant ID near the top of the Overview menu.
-
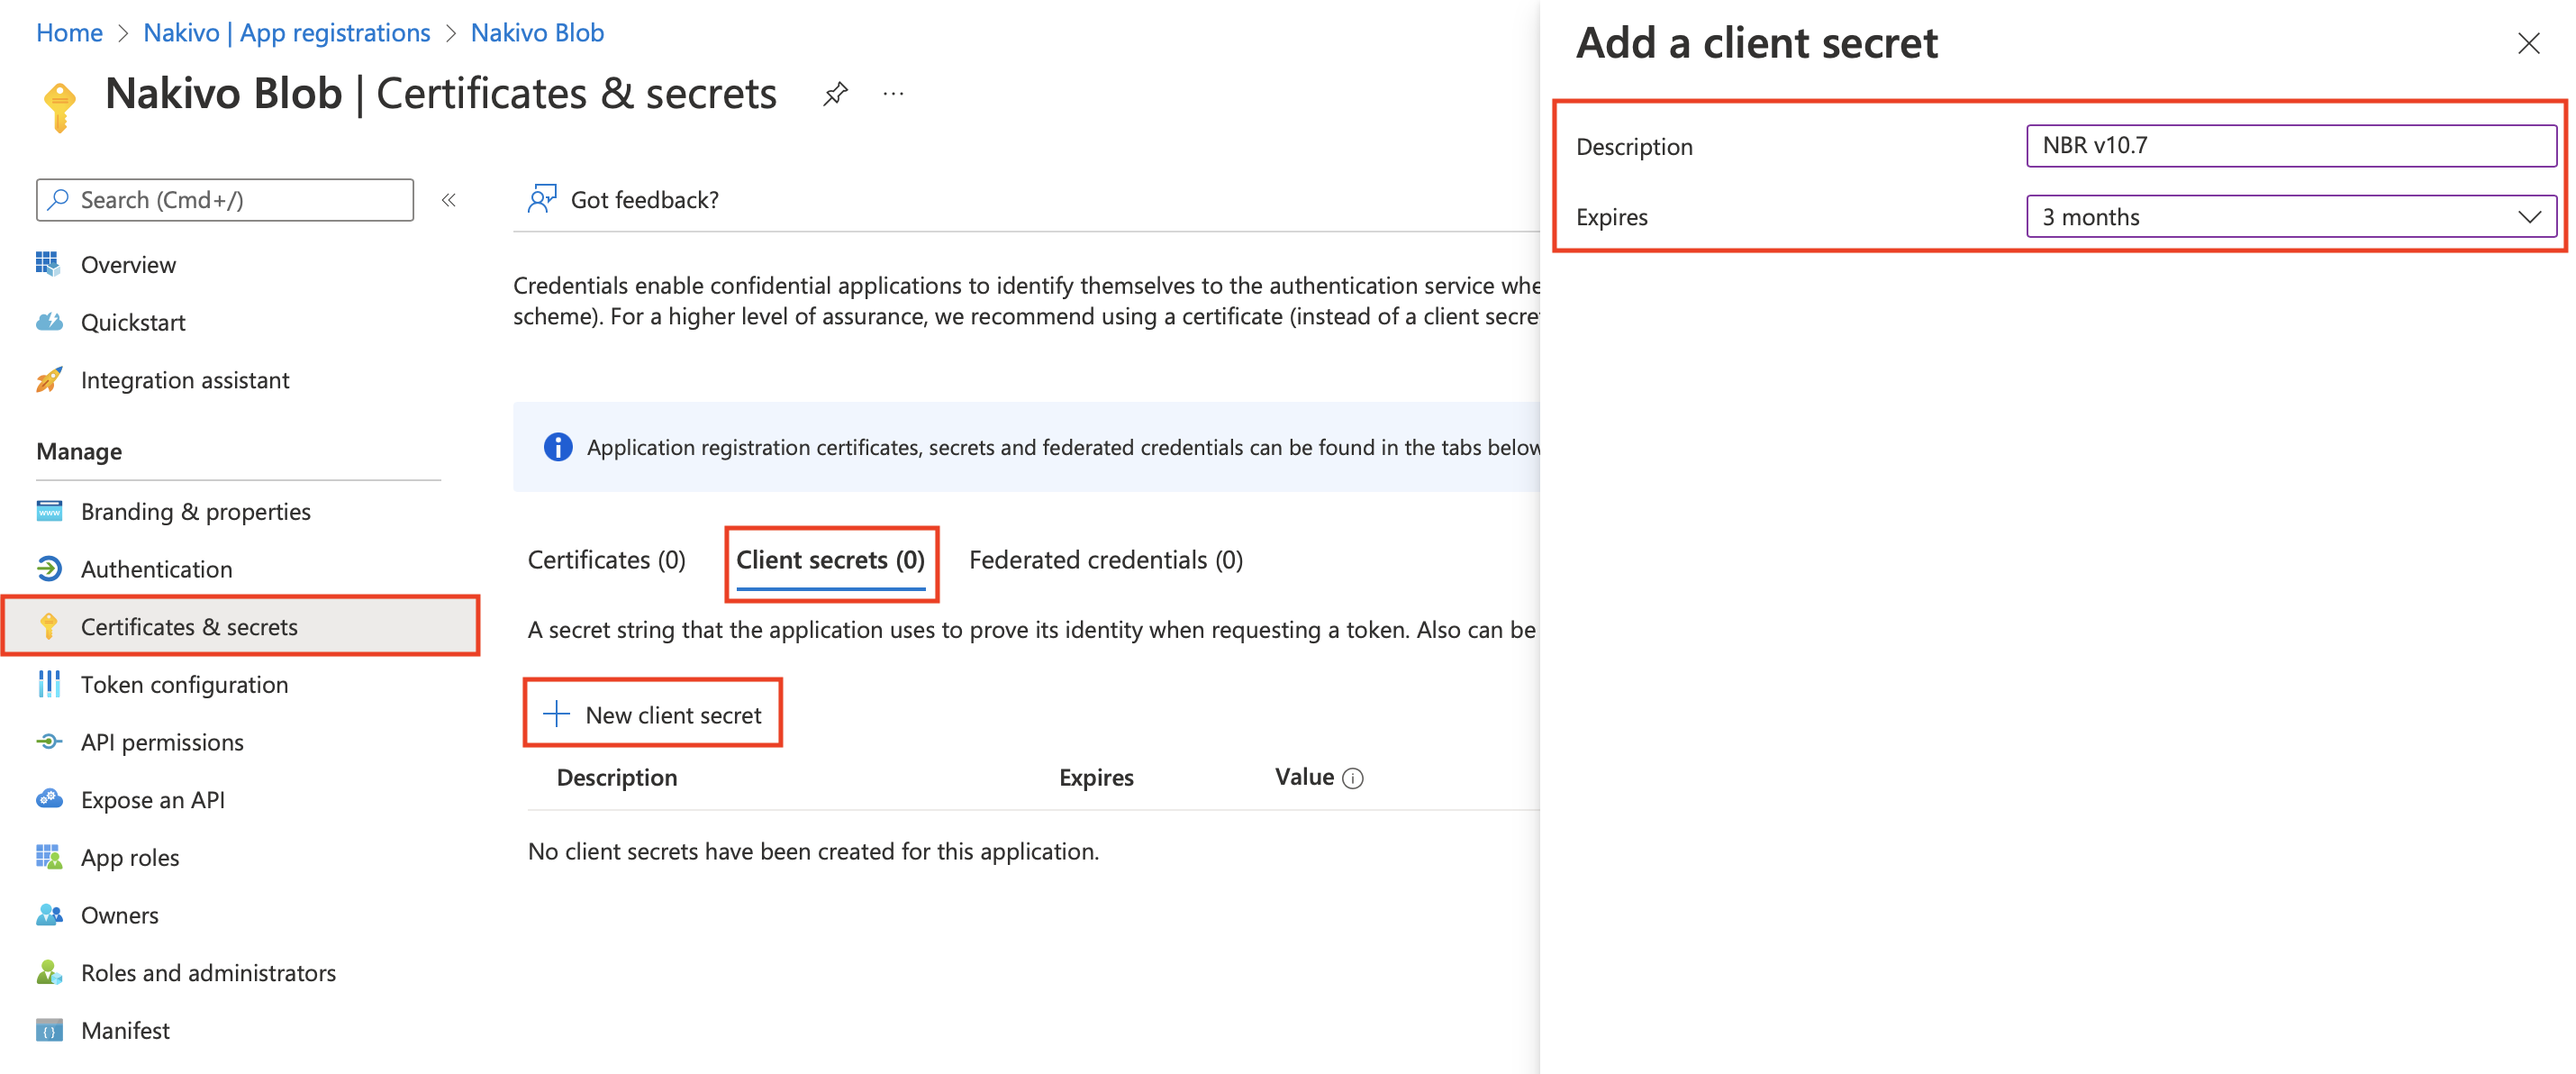
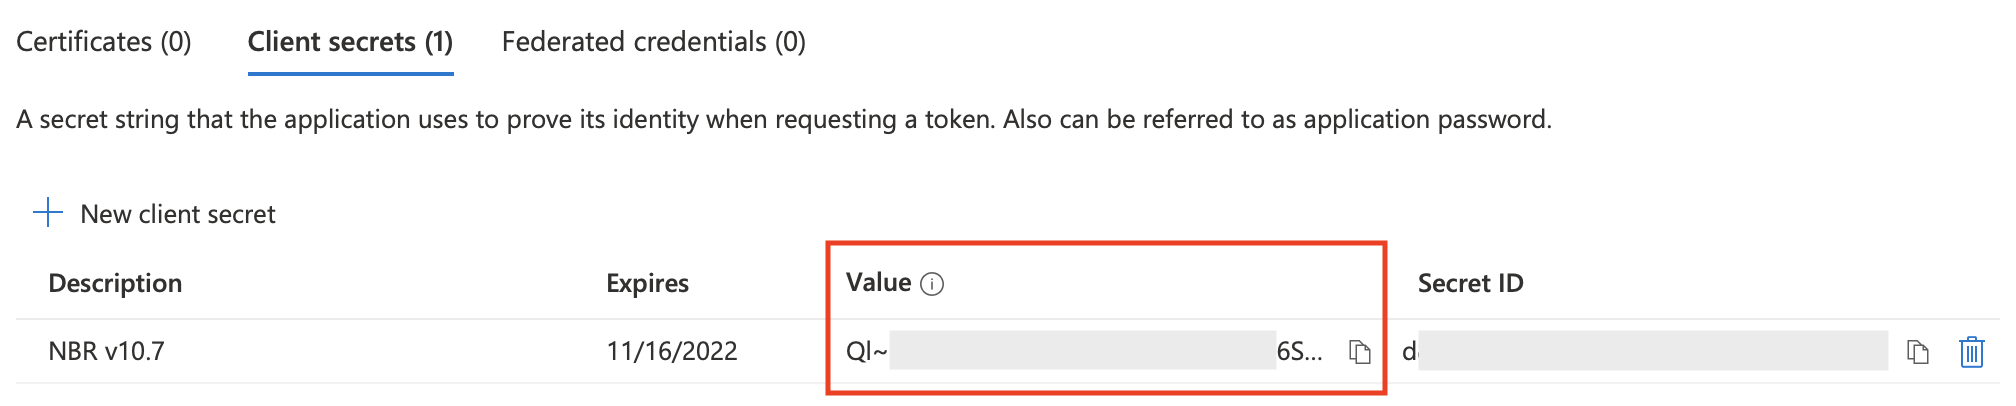
Go to the Certificates & secrets tab. If you already have a client secret for this application, skip this portion. Otherwise, generate a new client secret for the application by clicking New client secret in the Client secrets tab. Set a description and expiration period for your client secret and click Add below.
-
Find your newly generated client secret in the Client secrets tab in the Value column. Store the client secret in a reliable location, as you will have to generate a new one if you lose it.


Adding Microsoft Azure Storage Account to Inventory
To add a Microsoft Azure Storage account to the NAKIVO Backup & Replication Inventory, follow the steps below.
-
Click Settings in the left pane.
-
Go to the Inventory tab and click +.
-
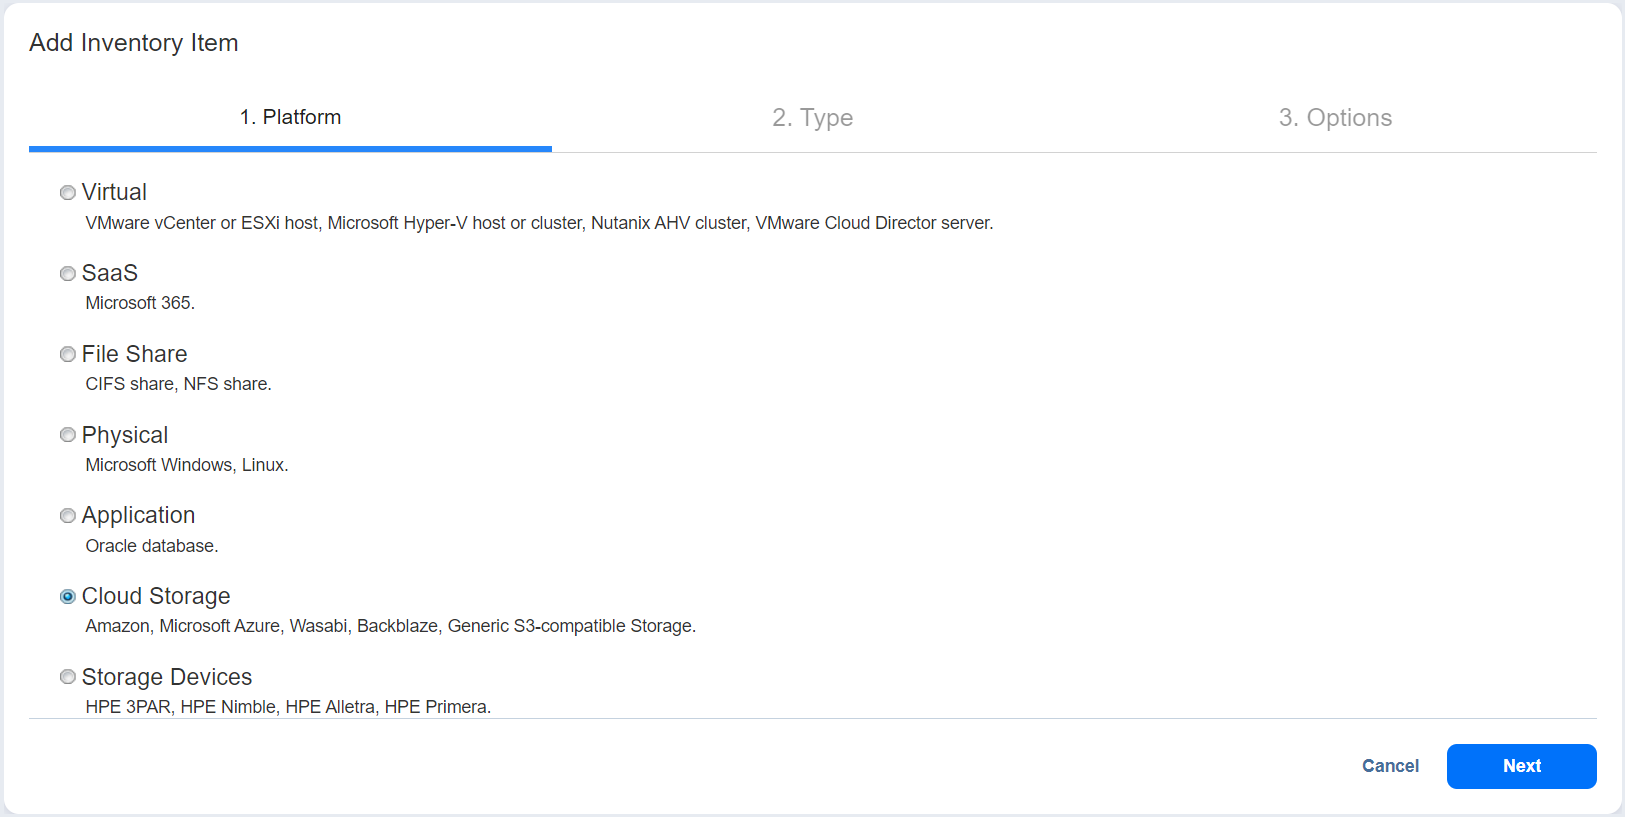
On the Platform page of the wizard, select Cloud Storage. Click Next to proceed.

-
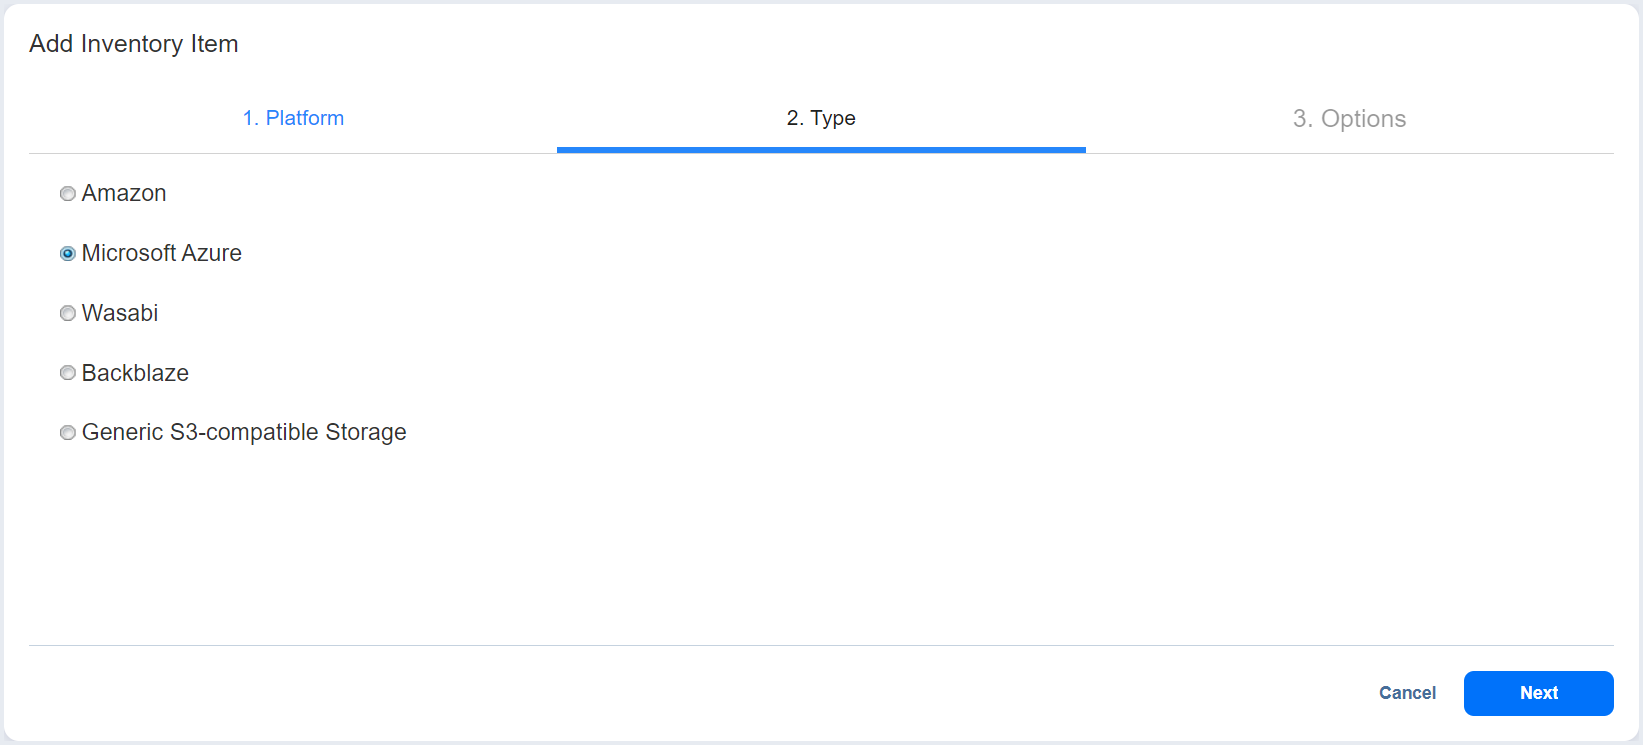
On the Type page, choose Microsoft Azure. Click Next to proceed.
-
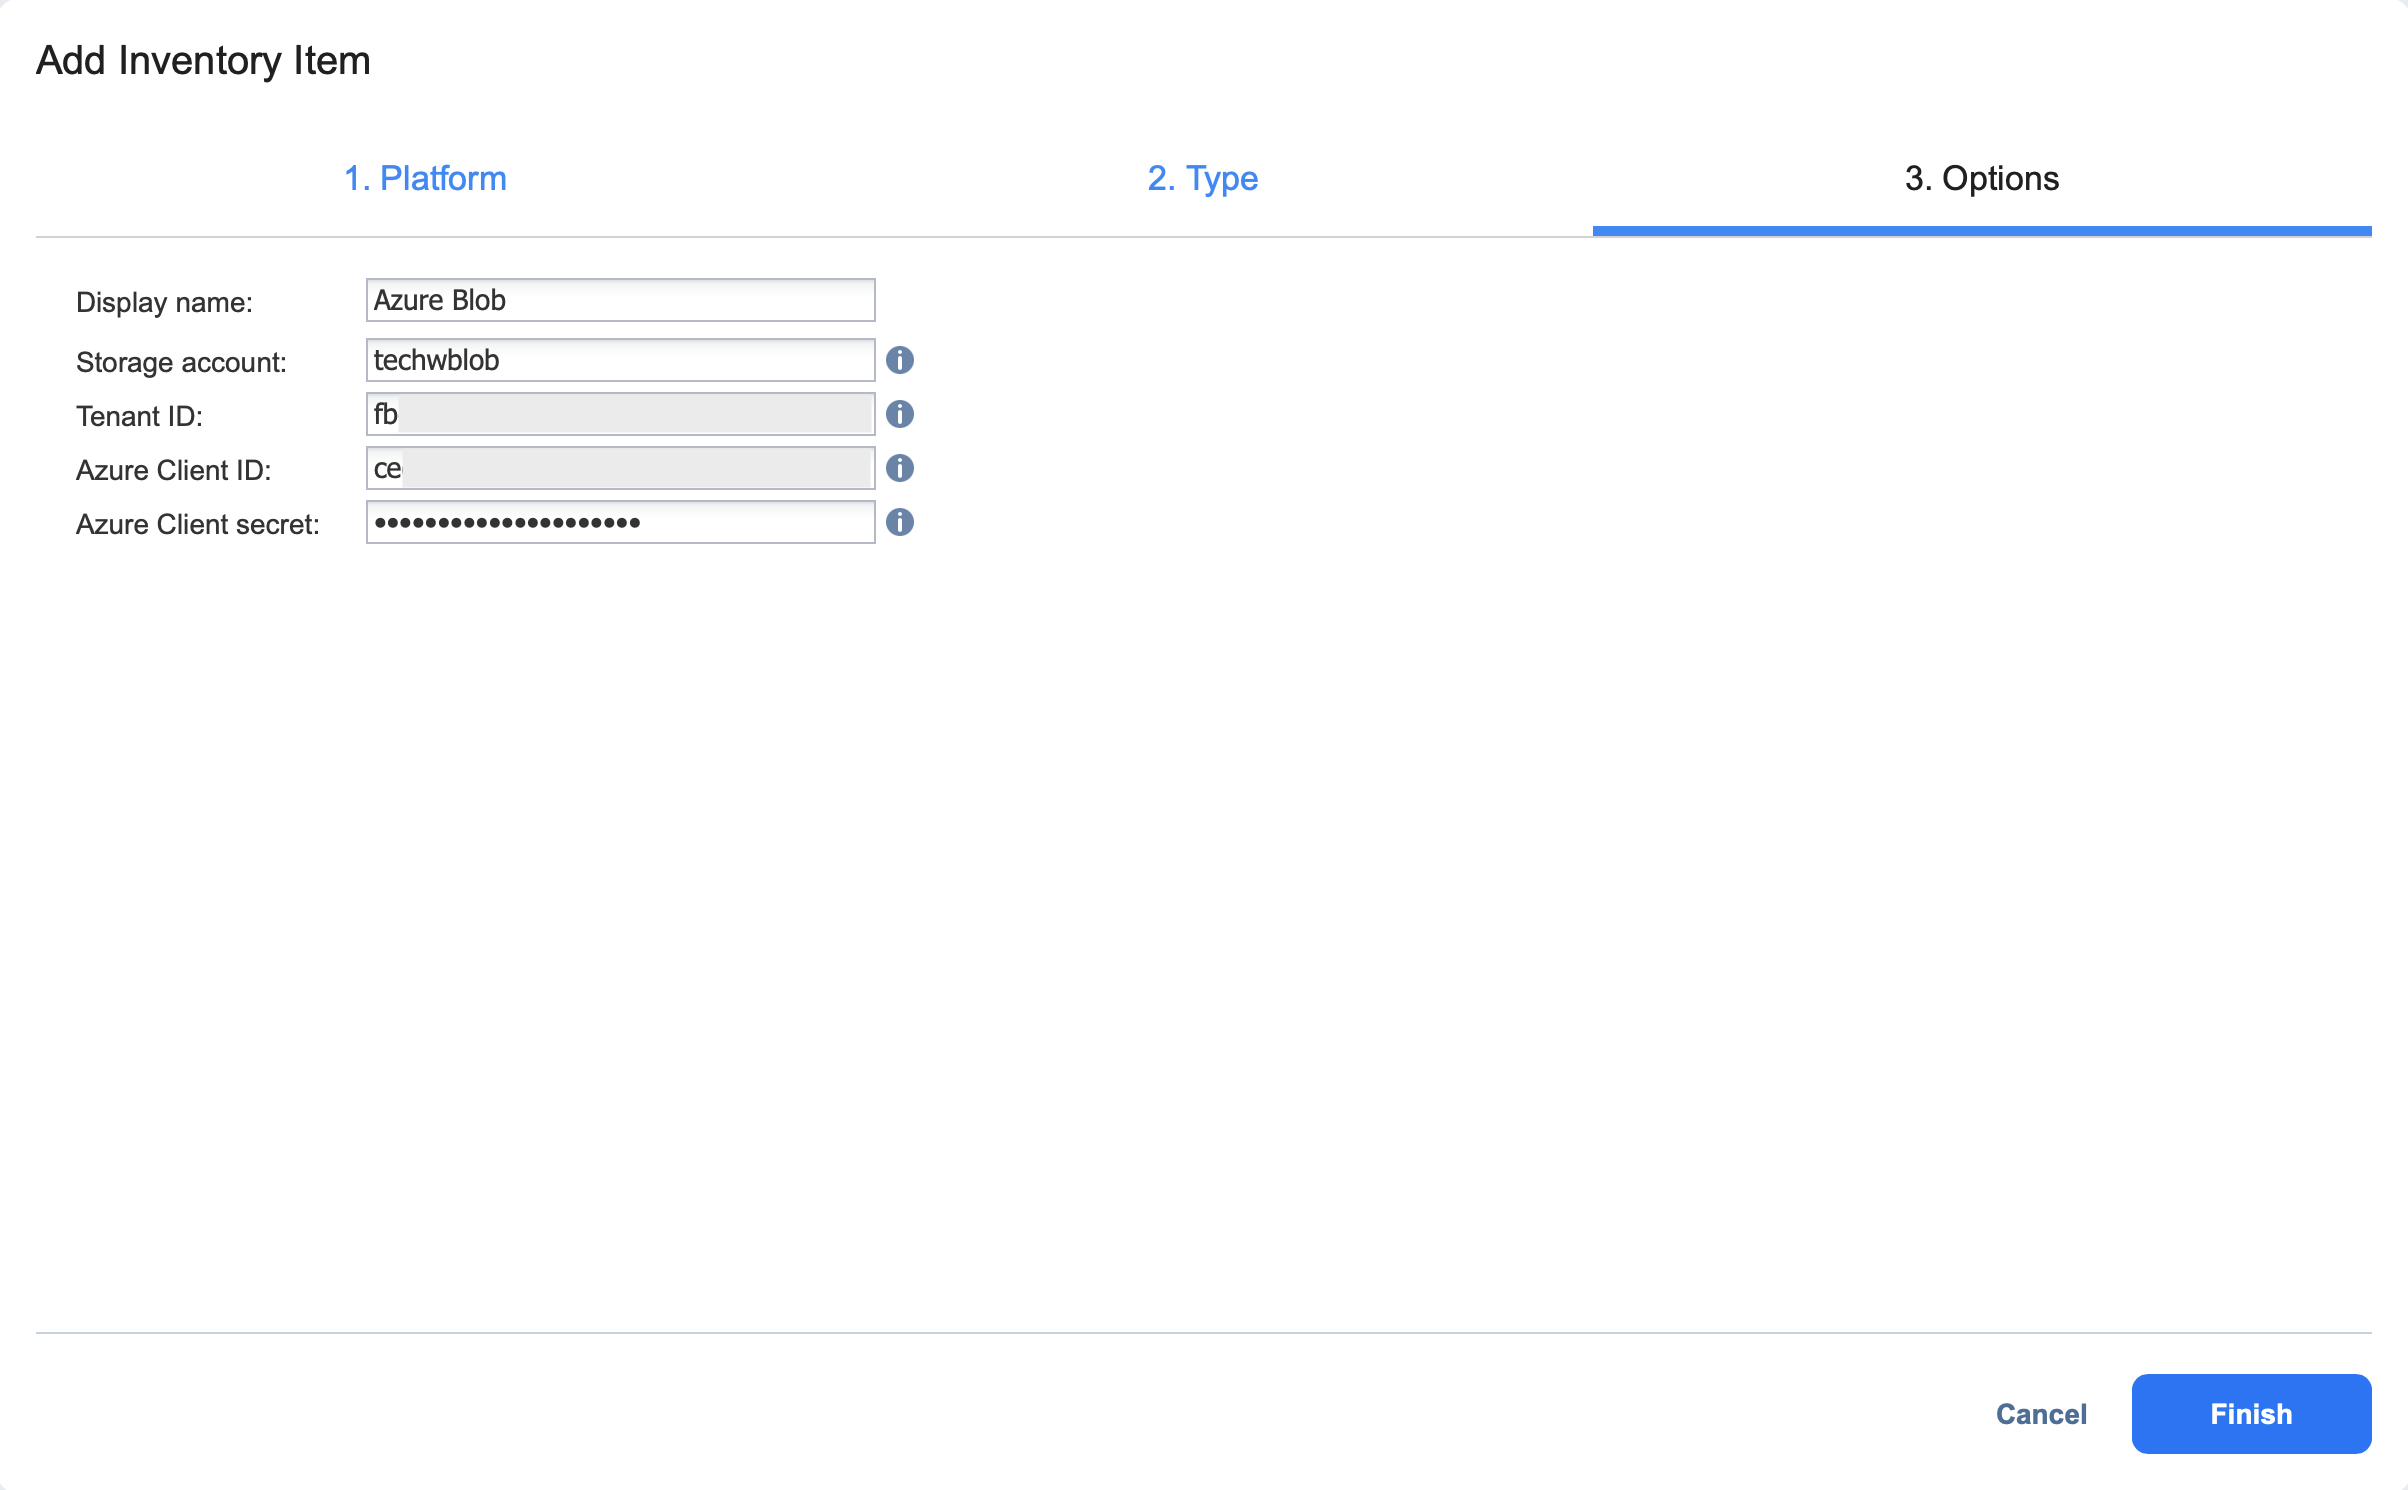
On the Options page, configure the following:
-
Display name: Enter a desired Inventory display name for the Microsoft Azure Storage account.
-
Storage account: Enter the name of the storage account created in the Azure portal.
Notes
-
The following Microsoft Azure storage account types are supported:
-
General-purpose V2: Blob storage (block blob, page blob)
-
Premium Block blobs: Blob storage (block blob only)
-
-
Newly added General Purpose V2 accounts utilize block blob type instead of page blob type.
-
Existing Azure storage accounts added in previous releases may still be used.
-
-
Tenant ID: Enter the Azure Tenant ID created when registering your Microsoft Azure account in the Azure Portal.
-
Azure Client ID: Enter the Azure Client ID created when registering your Microsoft Azure account in the Azure Portal
-
Azure Client Secret: Enter the Azure Client Secret obtained in the Azure Portal. For more information on obtaining Azure credentials, refer to the Obtaining Microsoft Azure Credentials section above.
Note
In order to add a Microsoft Azure Storage account to NAKIVO Backup & Replication, the account must be registered in Azure Active Directory. In addition, NAKIVO Backup & Replication must be assigned an appropriate role within Azure's access control. See the Configuring a Microsoft Azure Storage Account section above for more details.
-
-
Click Finish to add the account to the Inventory.