Adding Backblaze Accounts
Add a Backblaze account to NAKIVO Backup & Replication as described in the sections below.
Obtaining Backblaze Credentials
If you have not already generated and saved application key information in your Backblaze account, you will need to do so. To obtain the credentials required to add a Backblaze account to the NAKIVO Backup & Replication Inventory, follow the steps below:
-
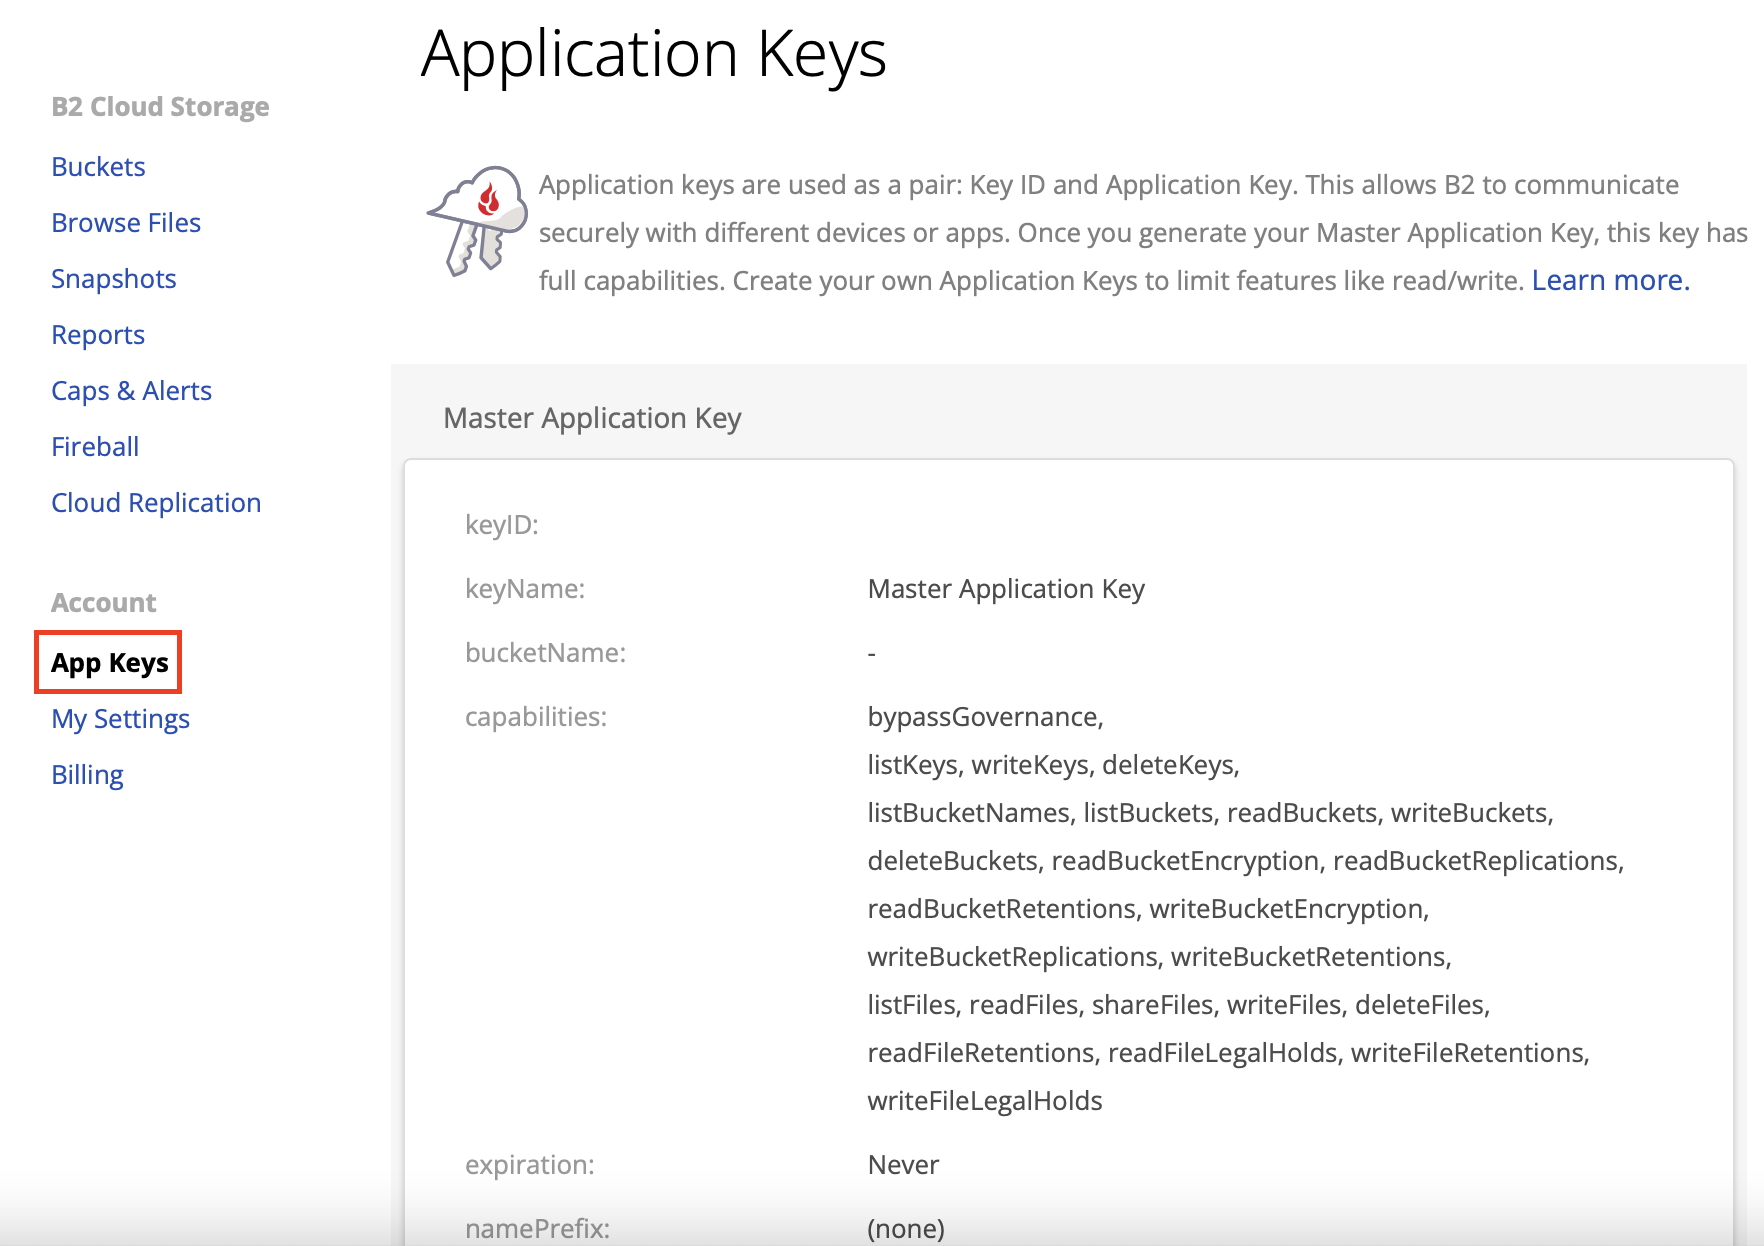
Log in to your Backblaze account.
-
Locate the Account tab on the left side and click App Keys.

-
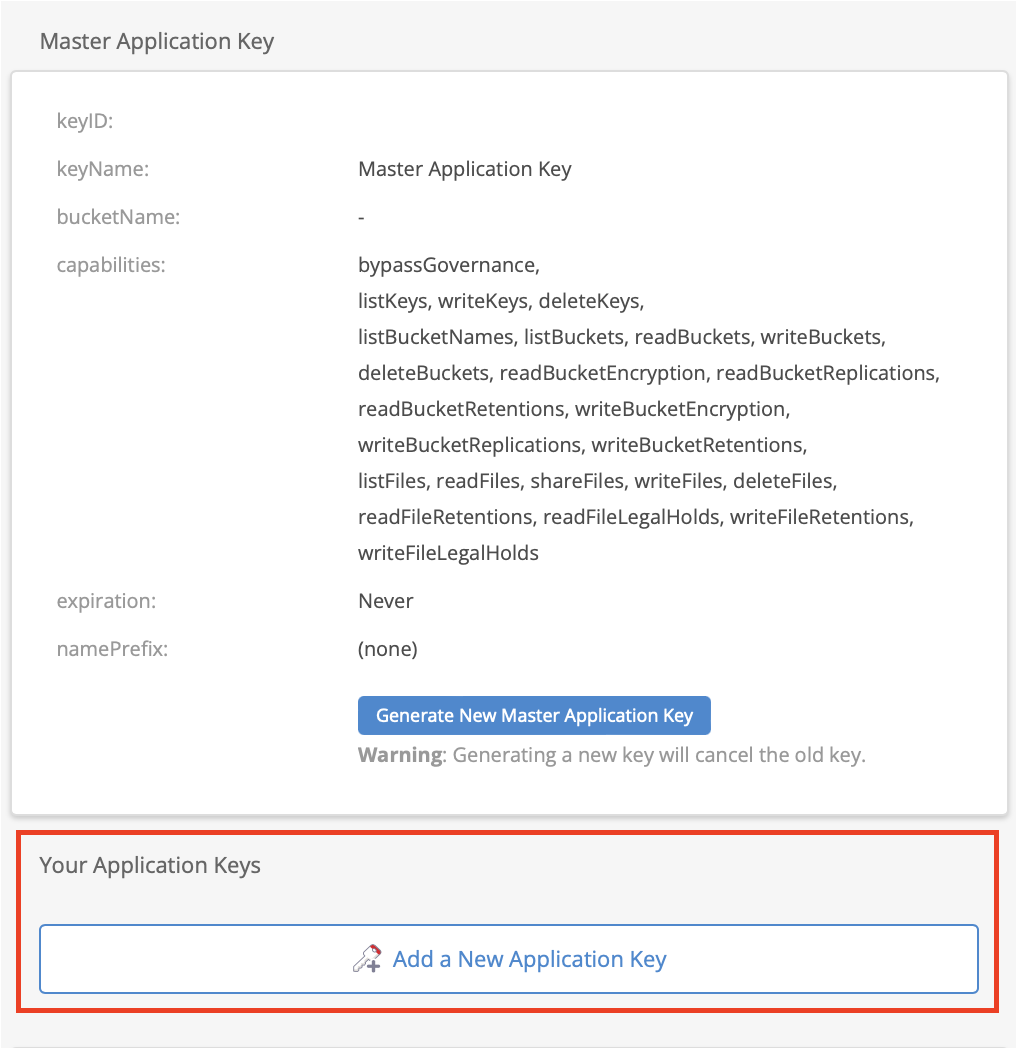
Find the Add a New Application Key button and click it.

-
Fill in the following information:
-
Name of Key: Enter a key name of your choice.
-
Allow access to Bucket(s): Select a specific bucket or all buckets.
-
Type of access: Choose the level of access given to external applications.
-
Allow List All Bucket Names: Check to allow listing of all bucket names for S3 API purposes (required).
-
File name prefix: Limits access to files that begin with the specified text.
-
Duration (seconds): Validity duration of the key in seconds (leave blank to keep it indefinite).
-
-
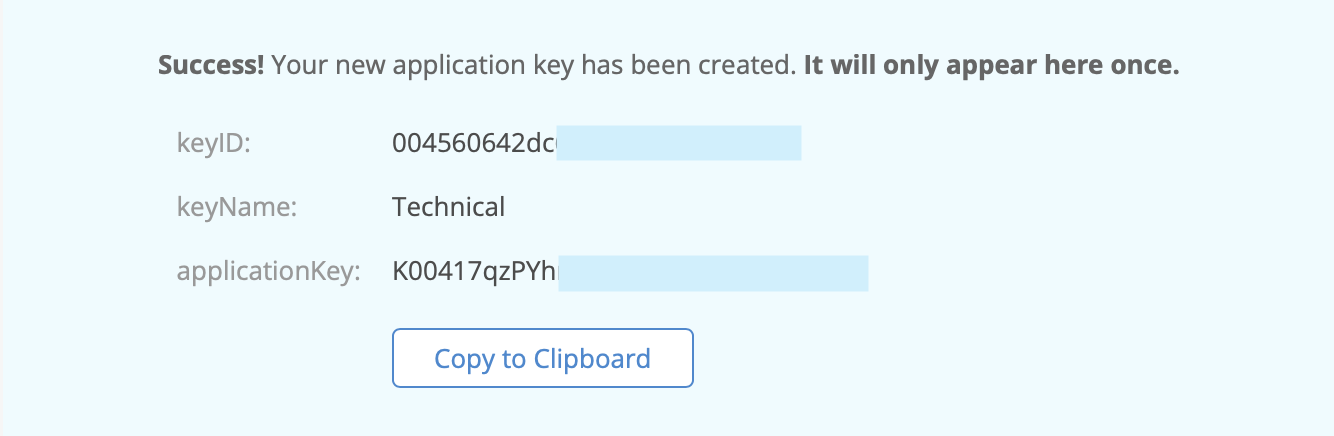
Click Create New Key.

-
Locate the generated key and note the following information:
-
keyID
-
Application Key
-


Adding a Backblaze Account to Inventory
To add a Backblaze storage account to the Inventory, do the following:
-
Click Settings in the left pane.
-
Go to the Inventory tab and click +.
-
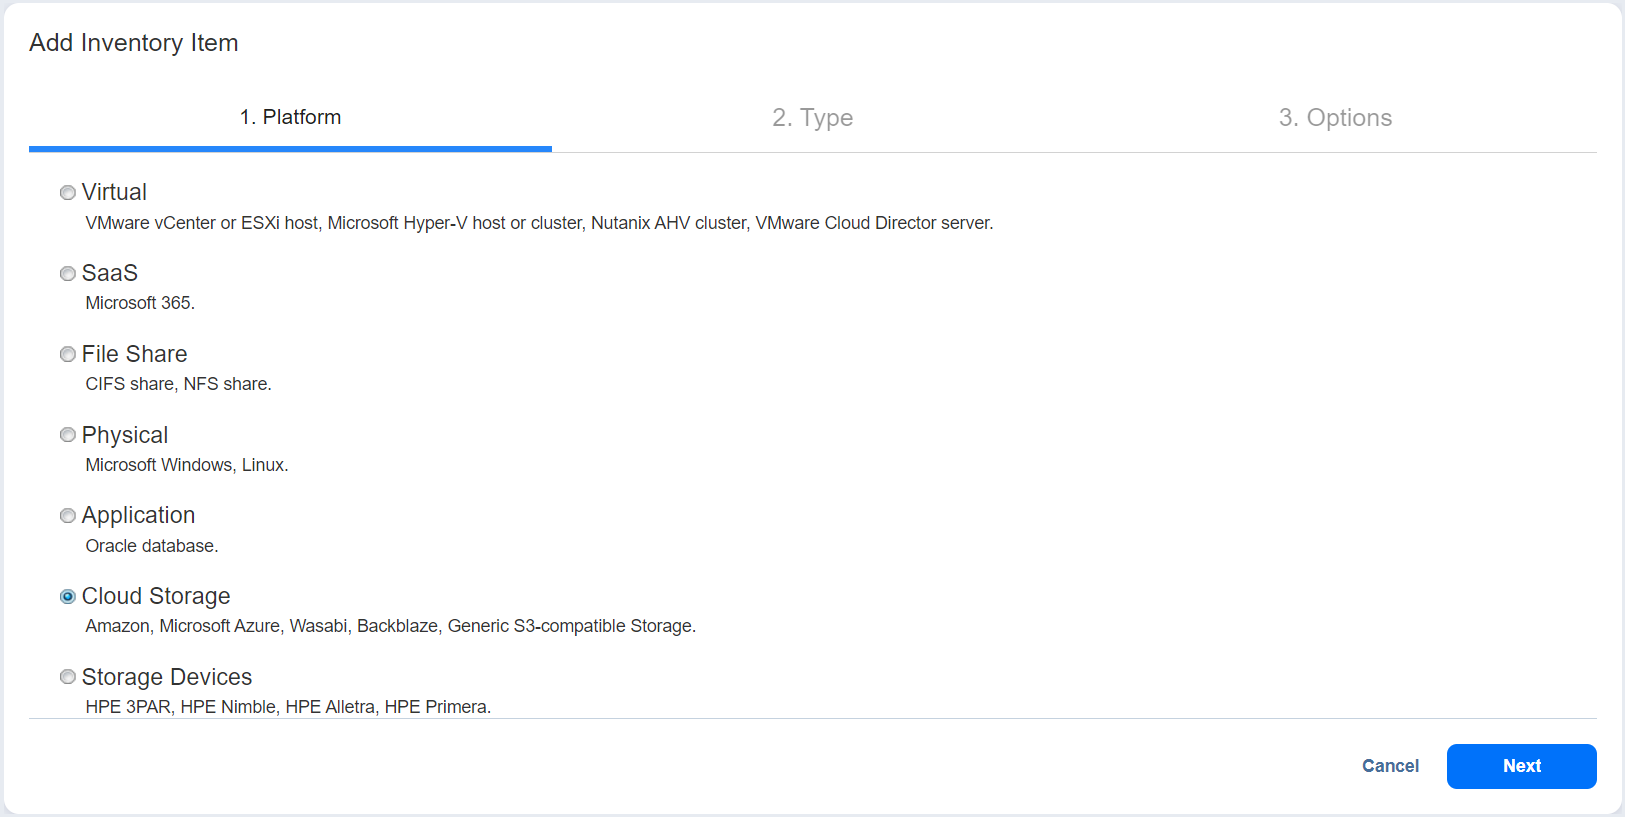
On the Platform page of the wizard, select Cloud Storage. Click Next to proceed.

-
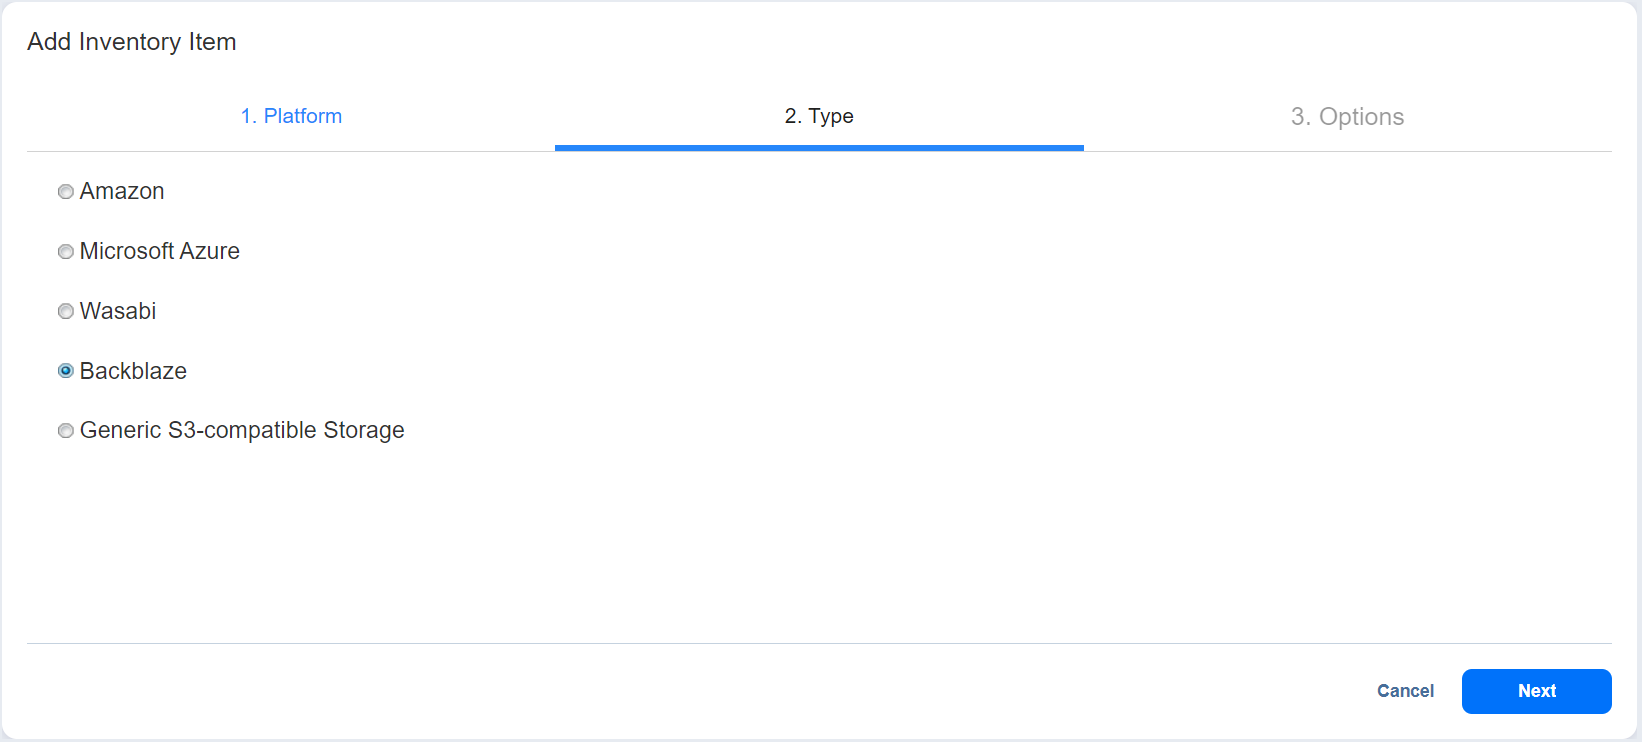
On the Type page, choose Backblaze. Click Next to proceed.

-
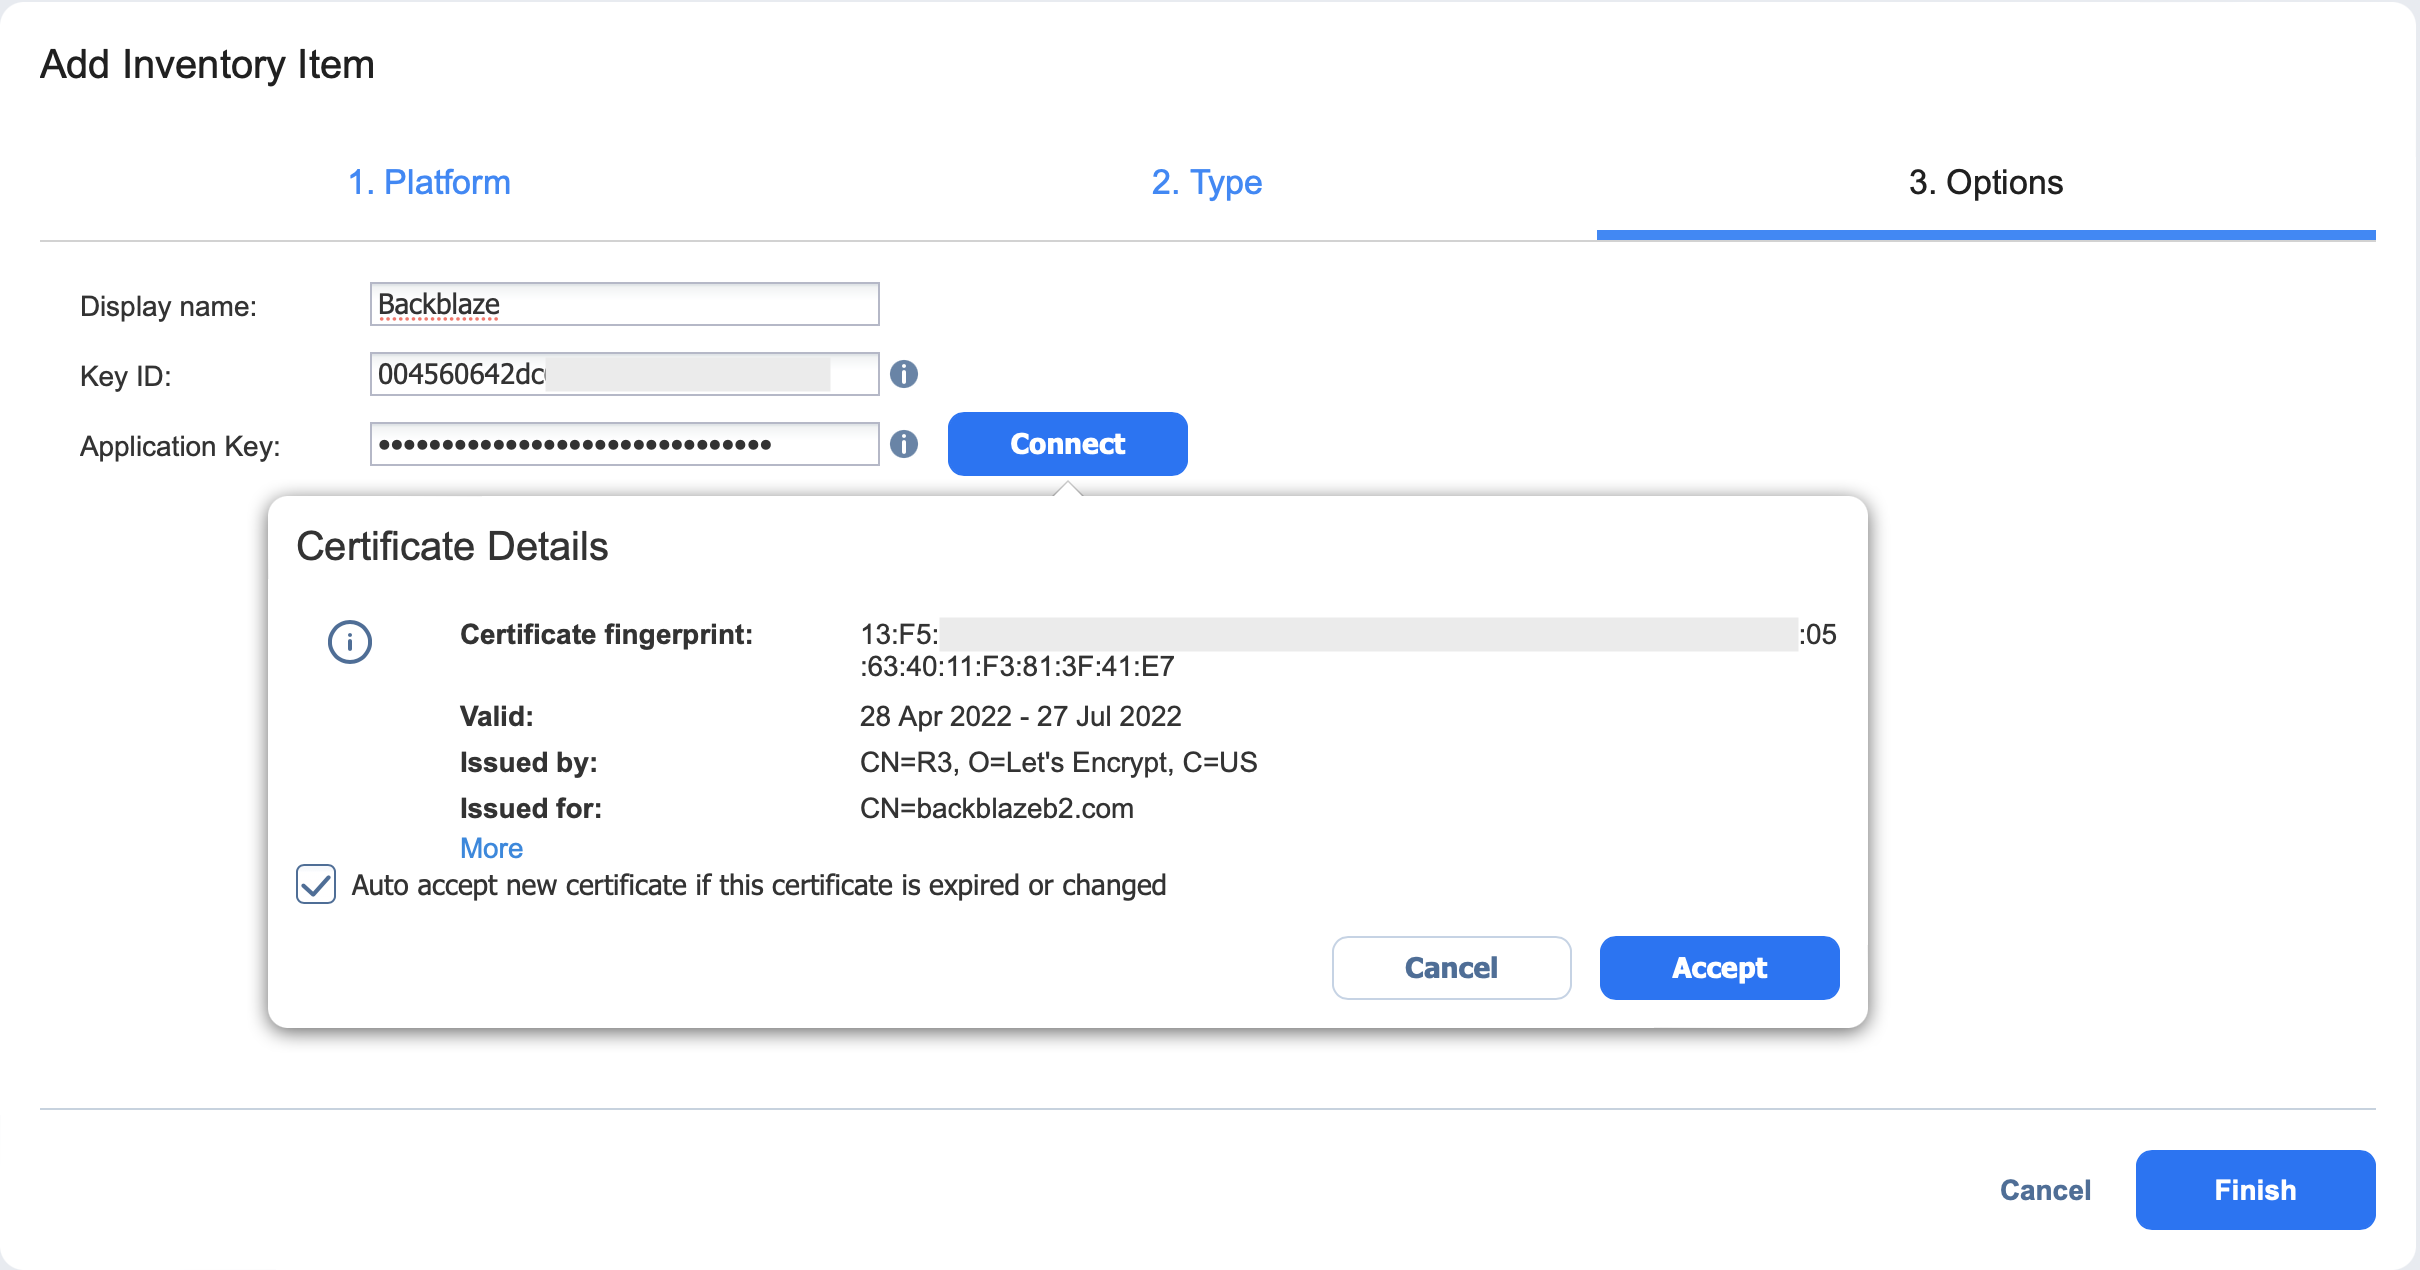
On the Options page, configure the following:
-
Display name: Enter a display name for the Backblaze storage account.
-
Key ID: Enter the keyID generated on the App Keys page in your Backblaze account.
-
Application Key: Enter the Application Key generated on the App Keys page in your Backblaze account.
-
-
Click Connect. This should bring up the Certificate Details pop-up window.

-
Optionally, you can select Auto accept new certificate if this certificate is expired or changed. Click Accept to confirm the certificate.
-
Click Finish to add the account to Inventory.