Users and Roles
Accessing NAKIVO Backup & Replication is possible either with a user account created in the product or with an account added to the product from Active Directory. Each user in the product is assigned a role, which is a set of specific permissions.
- Managing Users and Roles
- Navigating Users View
- Navigating Roles View
- Navigating AD Domains View
- Navigating AD Groups View
Managing Users and Roles
Managing users and roles can be done by following these steps:
-
Log in to NAKIVO Backup & Replication.
-
Click Settings (cog icon) in the left pane of the product.
-
Go to the General tab and click Users & Roles.
Navigating Users View
To see the list of all users, select the Users view in the upper pane. On this page of the solution you can do the following:
-
See the list of all users added to NAKIVO Backup & Replication.
-
Sort the list by User Name, Role, Tenant, Domain, Access level, Group or 2 Factor-authentication by clicking on the respective name of the column.
-
Search for users by entering the name of the user (fully or partially) into the Search bar.
Notes
-
The search phrase must be contained in the user registration name, username, or email address.
-
The Search option allows you to perform search on the following columns:
-
User name
-
Role
-
2 Factor-authentication
-
Access level
-
Group
-
-
-
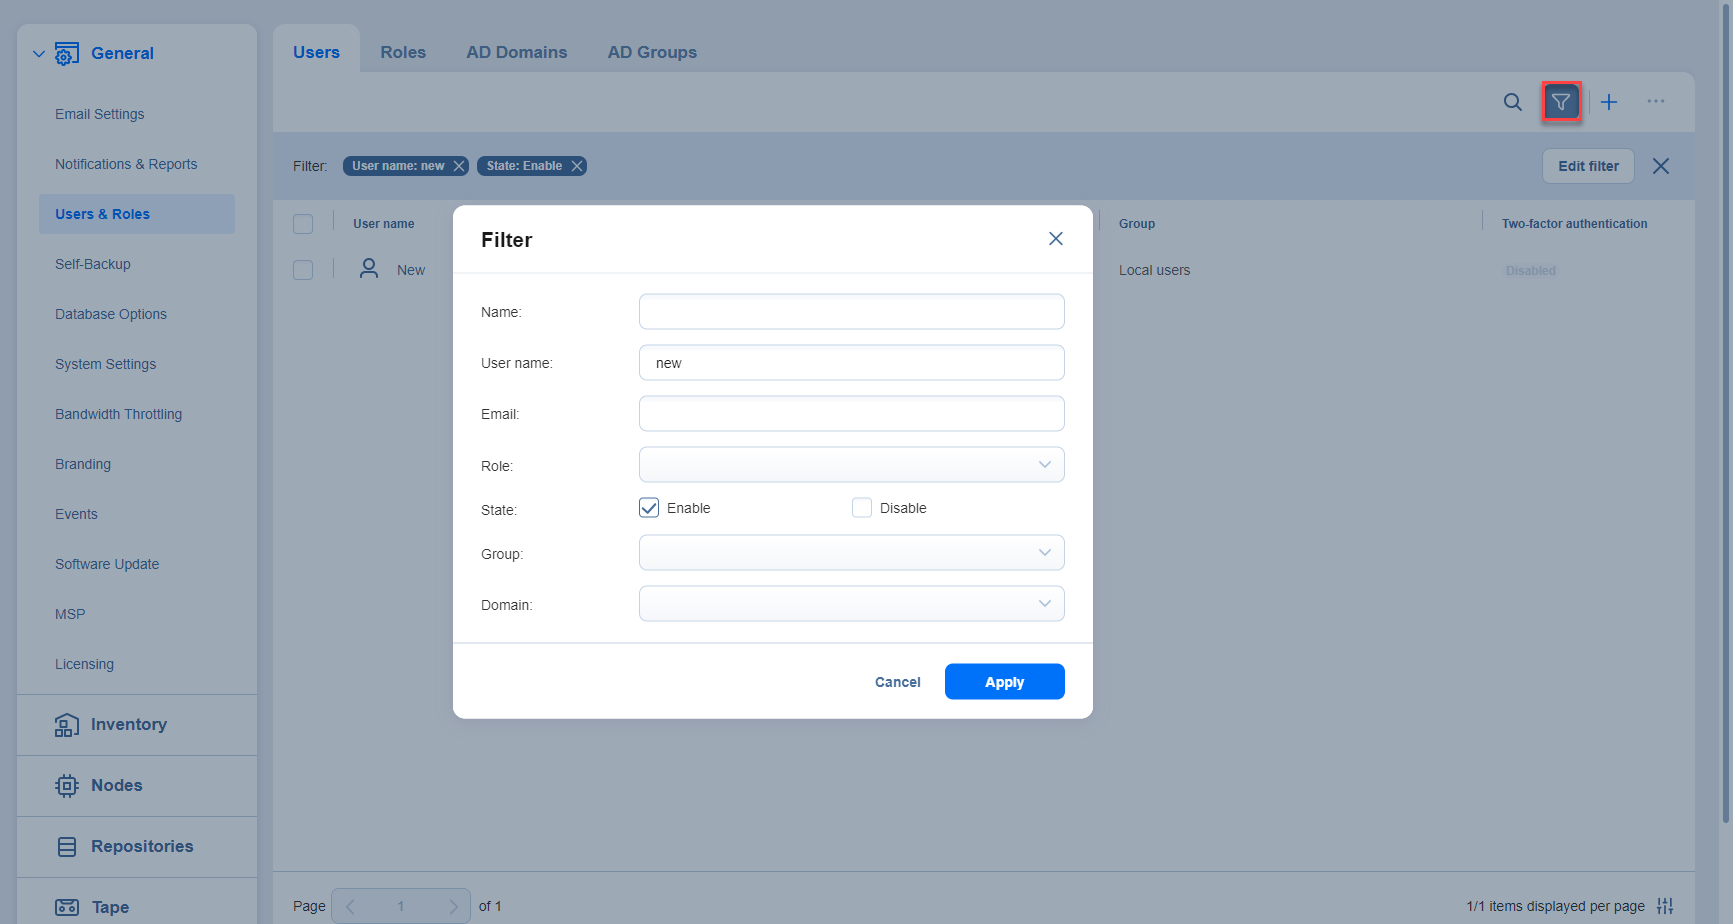
Filter the list of users by selecting the Filter option.
Note
Clicking Filter opens a new window that allows you to filter the list of local users according to User name, Role, State, Group, and Domain.

-
Add a new local user by clicking the + icon.
-
Delete, disable, enable two-factor authentication, and assign a new role to the local user individually. These actions, except Edit, can also be done in bulk by checking the box in the upper left pane to select all users and clicking the ... (ellipsis) button.
Notes
-
When selecting all local users to apply a bulk action, NAKIVO Backup & Replication selects only those users that are displayed on the screen.
-
When a user is deleted, the name of the user becomes Deleted in places where this user is referenced to.
-
You can create another user with the same username as the deleted user.
-
-
Edit the role assigned to the local use by clicking on the name of the role in the respective column.
Configuring Users Table
You can show/hide columns or modify the number of items per page in the Users table. In the lower right corner, click the controls icon. In the dialog window that opens, select/deselect checkboxes and click Apply. The following options are available:
-
User name
-
Group
-
Domain
-
Role
- Two-factor authentication
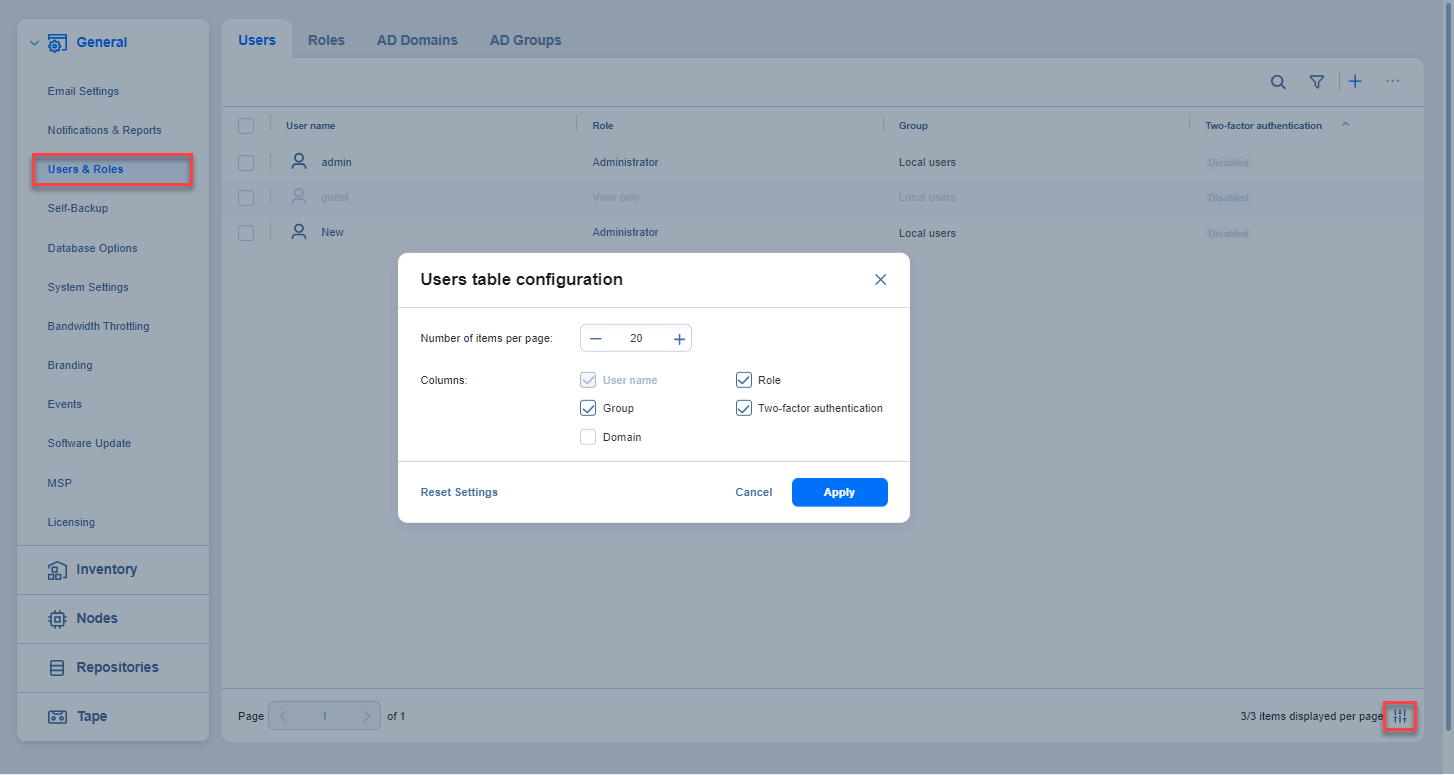
Note
You cannot modify the User name column in this dialog window. Refer to Editing Local User to learn more about editing users.
Navigating Roles View
To see the list of all local users, select the Roles view in the upper pane. On this page of the solution you can do the following:
-
See the list of all user roles added to NAKIVO Backup & Replication.
-
Sort the list by Role name, Access level, or Number of users by clicking on the respective name of the column.
Note
The Access level column is displayed only for the Master tenant in Multi-tenant mode. It displays the access level that the role has.
-
Filter the list of users by entering the name of the user fully or partially into the Search bar or by selecting the Filter option.
Note
Clicking Filter opens a new window that allows you to filter the list of local users according to Role name or Number of users.
-
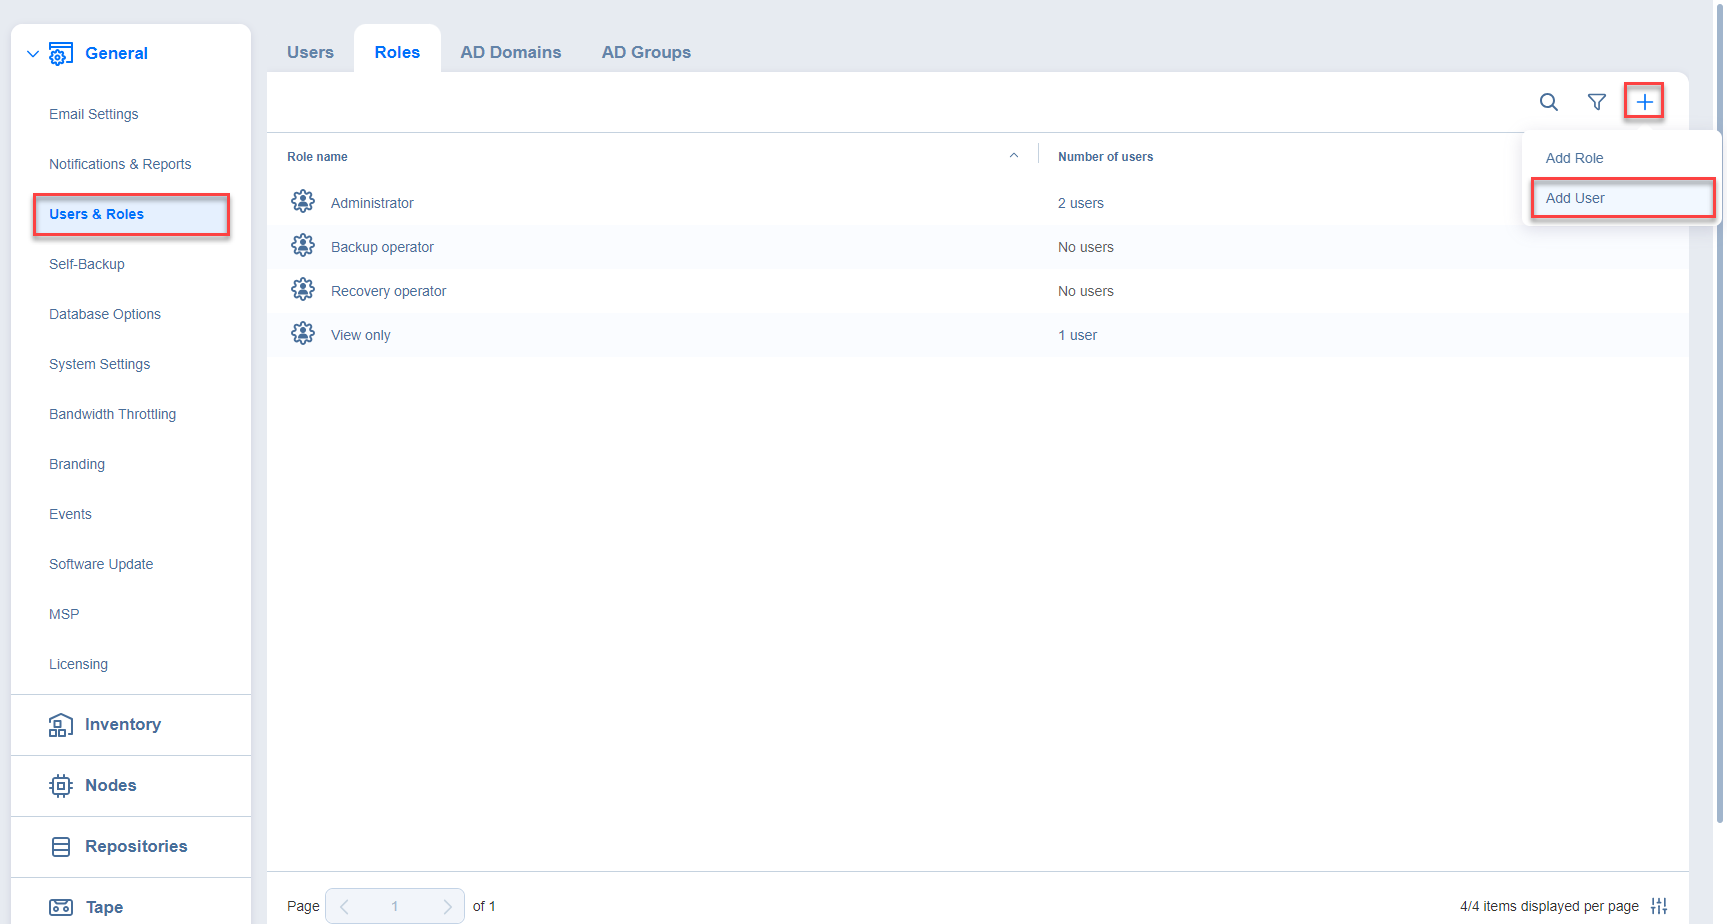
Add a new role by clicking the + icon and selecting Add Role.

-
Add a new local user by clicking the + icon and selecting Add User.
-
Edit, delete, or clone the user roles individually. These actions, except Edit, can also be done in bulk by checking the box in the upper left pane to select all users and clicking the ... (ellipsis) button. When selecting all local users to apply a bulk action, NAKIVO Backup & Replication selects only those users that are displayed on the screen.
-
Edit, Delete, Clone the role by clicking the ellipses to the right of the role's name.
Configuring Roles Table
You can show/hide columns or modify the number of items per page in the Roles table. In the lower right corner, click the controls icon. In the dialog window that opens, select/deselect checkboxes and click Apply. The following options are available:
-
Role name
-
Number of users
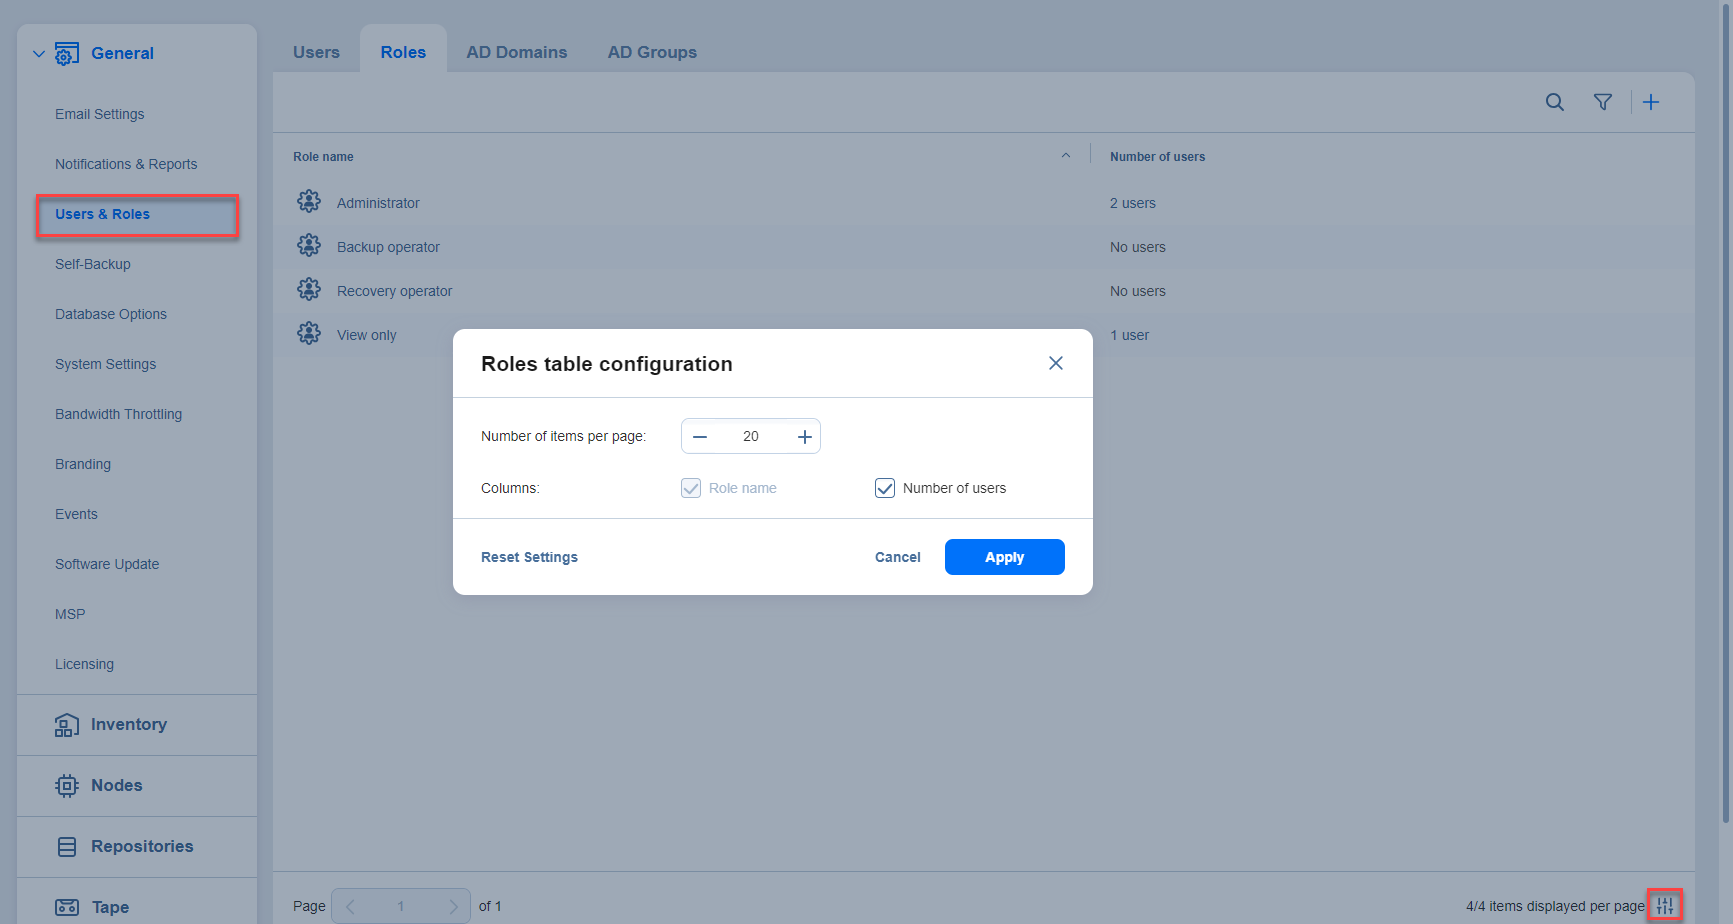
Note
You cannot modify the Role name column in this dialog window. Refer to Editing User Role to learn more about editing alert user roles.
-


Navigating AD Domains View
To see the list of all Active Directory domains, select the AD Domains view in the upper pane. On this page of the solution you can do the following:
-
See the list of all AD domains added to NAKIVO Backup & Replication.
-
Sort the list by Domain name, DC/Hostname IP, Prioritized integrated groups, Domain user, Refresh AD or Status by clicking on the respective name of the column.
-
Search the list of AD domains by entering the name of the user fully or partially into the Search bar.
-
Add a new AD domain by clicking the + icon.
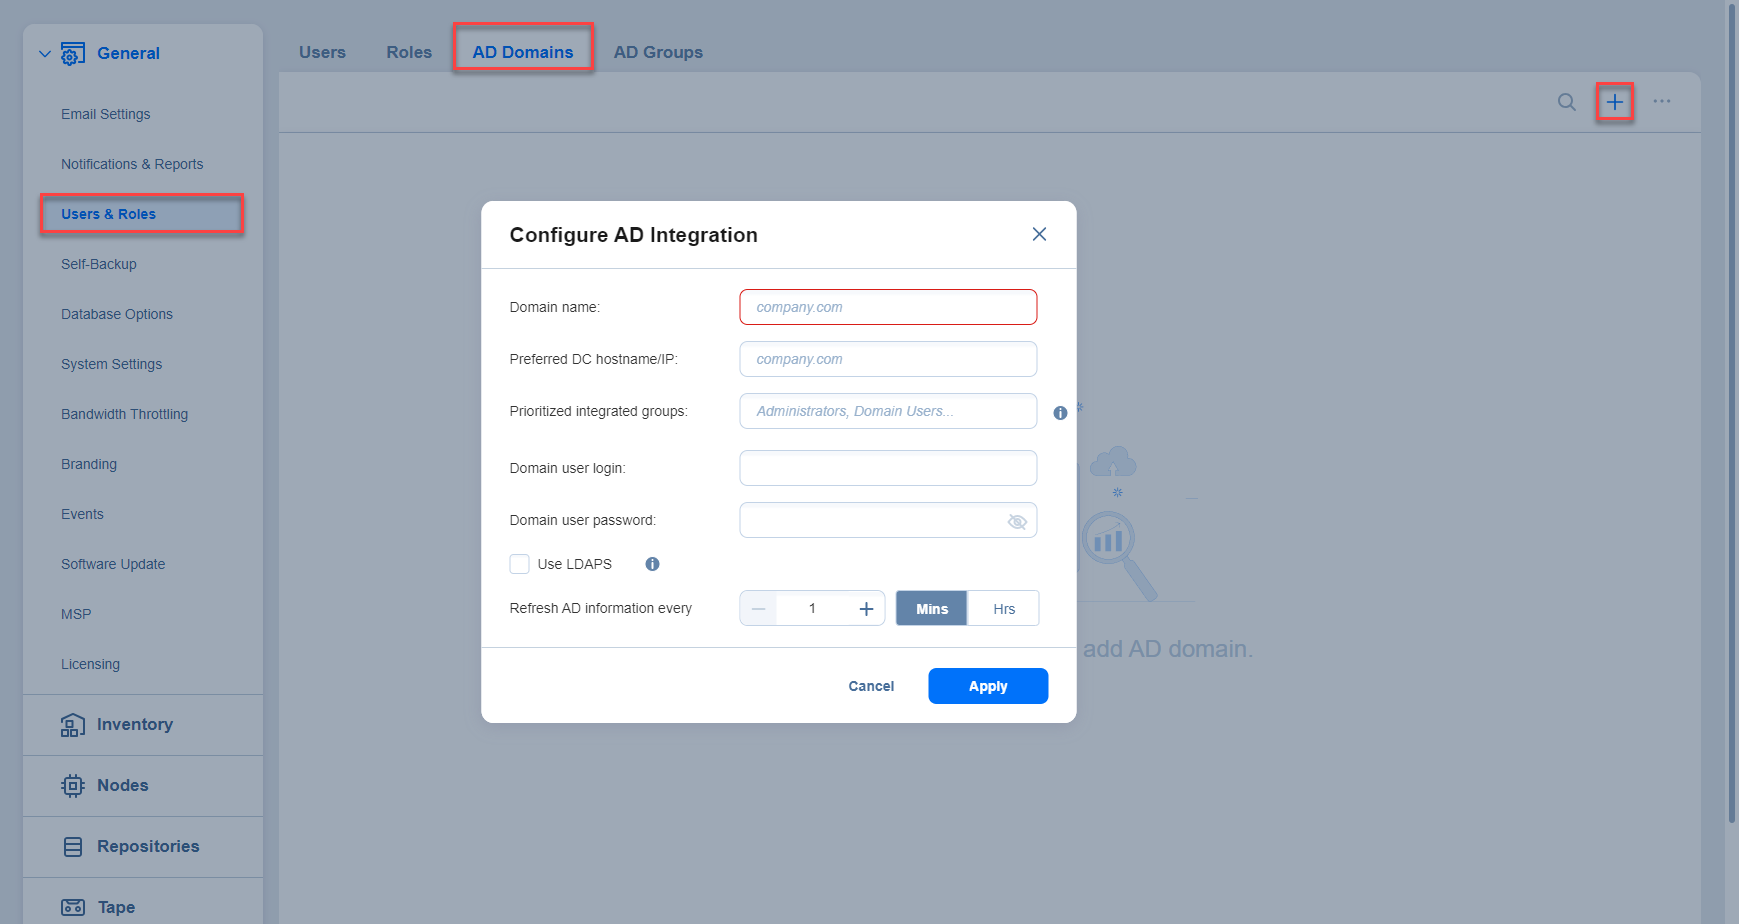
Note
You can add and then manage two or more AD domains and add AD groups from multiple domains. Refer to Configuring Active Directory Integration for more details.
-
Edit, delete, disable/enable AD domains. These actions, except Edit, can also be done in bulk by checking the box in the upper left pane and clicking the ... (ellipsis) button.
Note
The user associated with the disabled AD domain cannot log in to the solution.
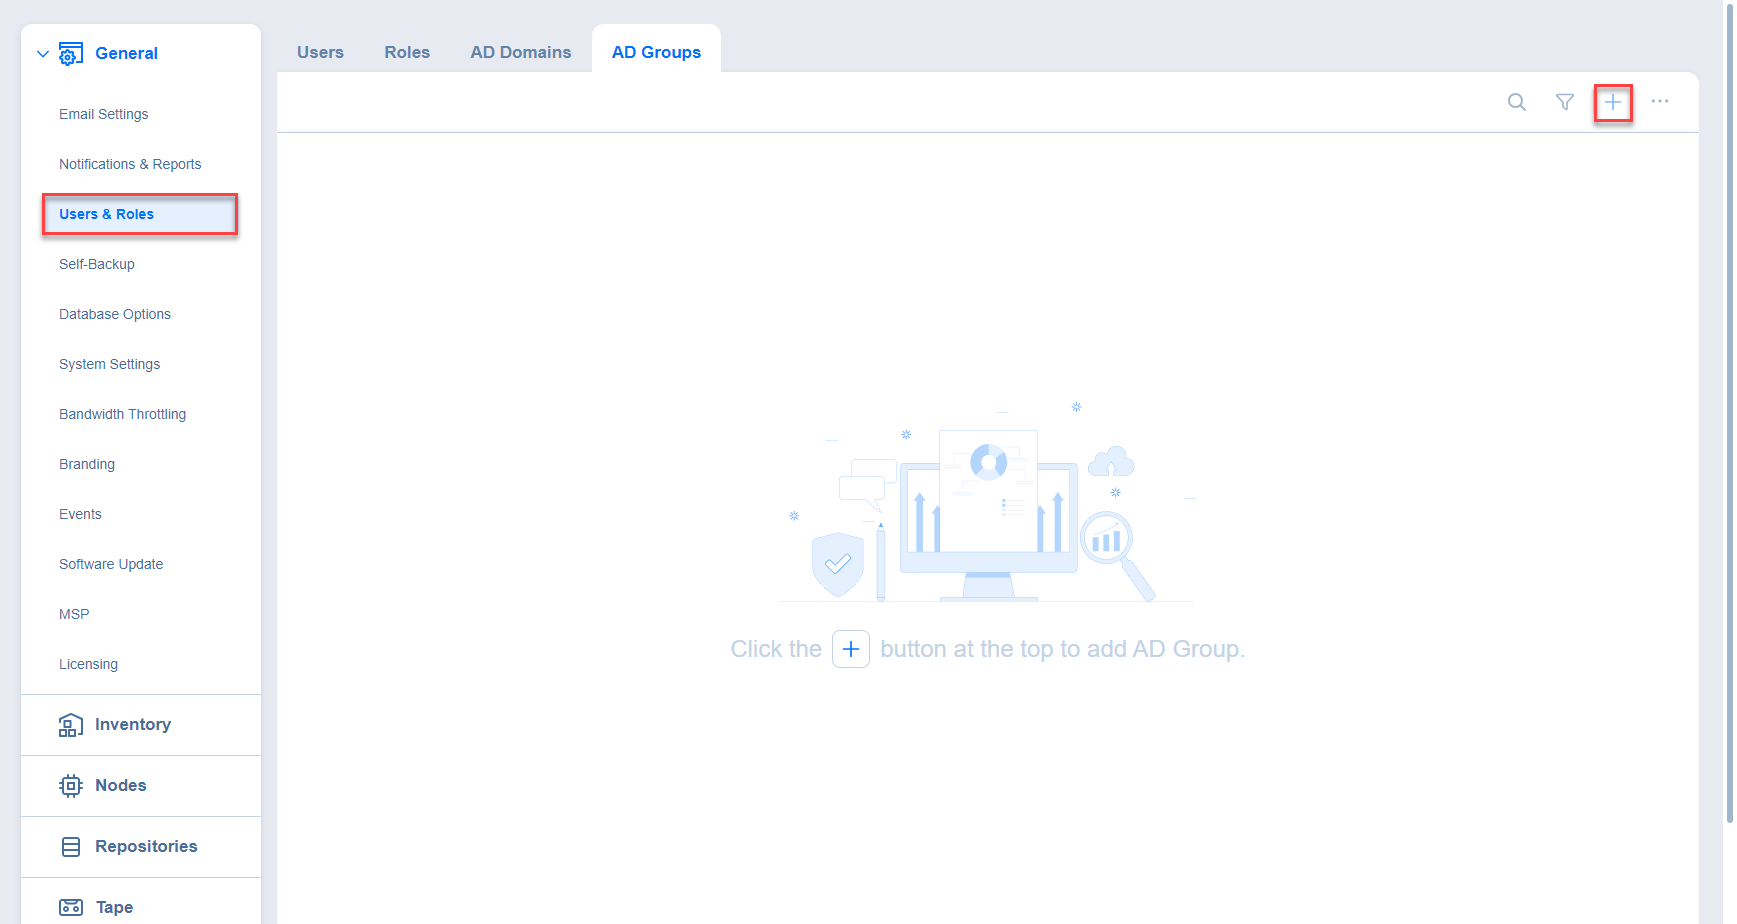
Navigating AD Groups View
To see the list of all Active Directory groups, select the AD Groups view in the upper pane.
On this page of the solution you can do the following:
-
See the list of all AD groups added to NAKIVO Backup & Replication.
-
Sort the list by Group name, Logged in users, Access level, or Role by clicking on the respective name of the column.
Note
The Access level column is displayed only for Master tenant in Multi-tenant mode. It displays the access level assigned to the AD group.
-
Filter the list of users by entering the name of the user (fully or partially) into the Search bar or by selecting the Filter option.
Note
Clicking Filter opens a new window that allows you to filter the list of local users according to Group name, Role, Number of users, and Status.
-
Add a new AD group by clicking the + icon.

Notes
-
You can add AD groups from multiple domains.
-
The AD groups list is disabled if the domain is disabled.
-
-
Edit, delete, disable, enable two-factor authentication, and assign a new role to the local user individually. These actions, except Edit, can also be done in bulk by checking the box in the upper left pane to select all users and clicking the ... (ellipsis) button.
Note
When selecting all AD groups to apply a bulk action, NAKIVO Backup & Replication selects only those groups that are displayed on the screen. -
Edit the role assigned to the user by clicking on the name of the role in the respective column.
For details, refer to the following sections: