Adding Active Directory User
After configuring AD integration in the Active Directory Configuration wizard, you can proceed with adding AD user(s). Alternatively, switch to AD Groups tab and then click on the "+" icon.
Proceed as follows:
-
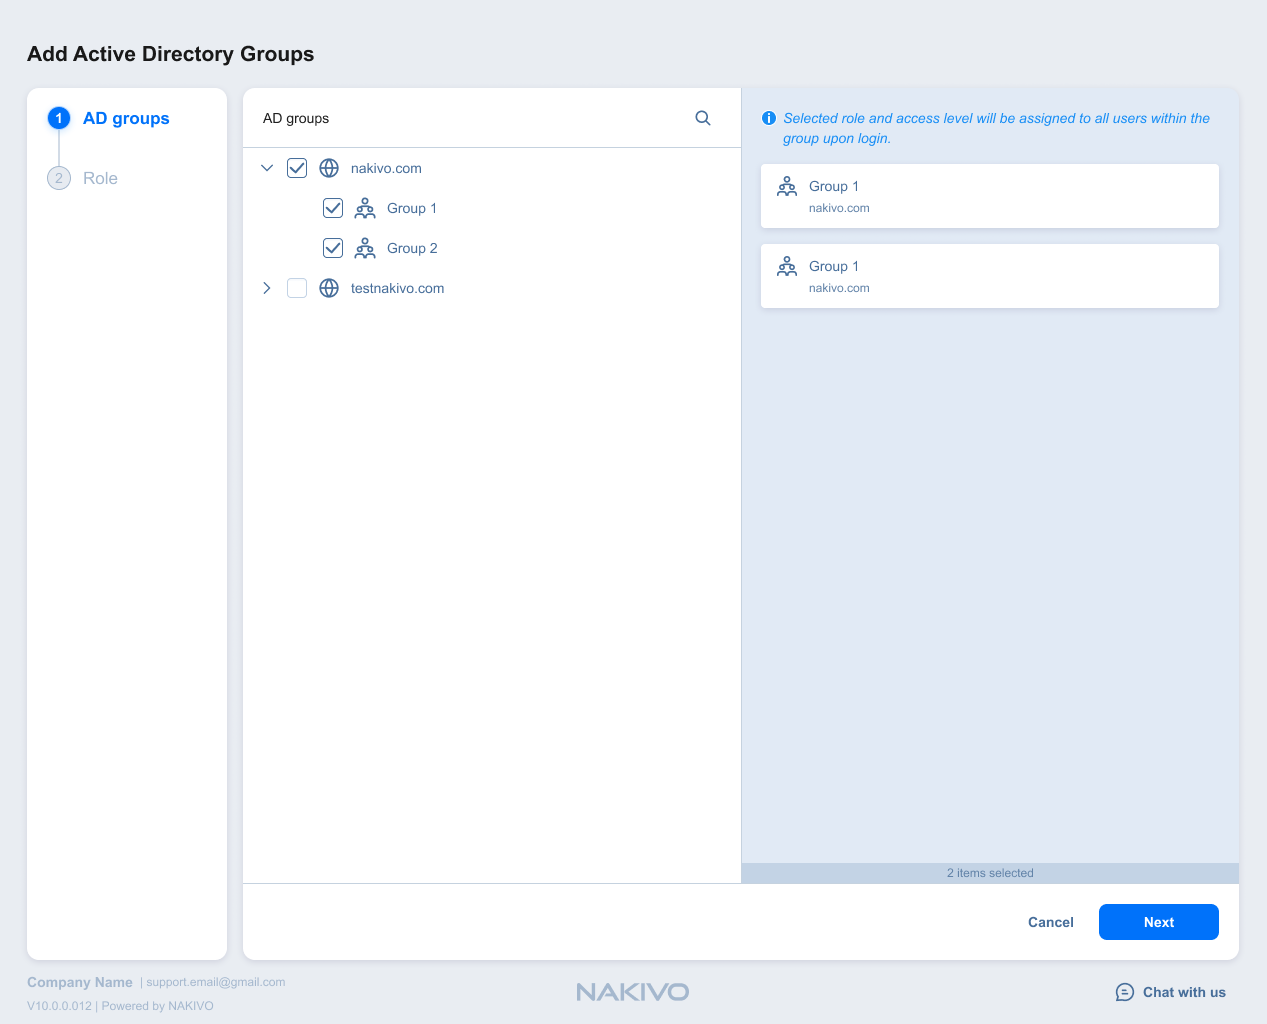
Optionally, you can filter the tree of Active Directory users by entering a string to the Search box. You can enter a section or the whole name of the item.
-
Select Active Directory users and groups by placing a checkmark to their left.
-
The selected items appear in the right pane of the page. If necessary, reorder the selected items by dragging them to a new position. By doing so, you can specify to add the most important users and groups first.
Note
Only logged in users that belong to the group can be added. -
Review the list of selected items. If necessary, remove a selected user or group from the list in either of the following ways:
-
Deselect the item in the left pane. This will remove the item from the right pane.
-
In the right pane, hover the pointer over the item you wish to remove and click the Remove button. This will deselect the item in the left pane.
-
-
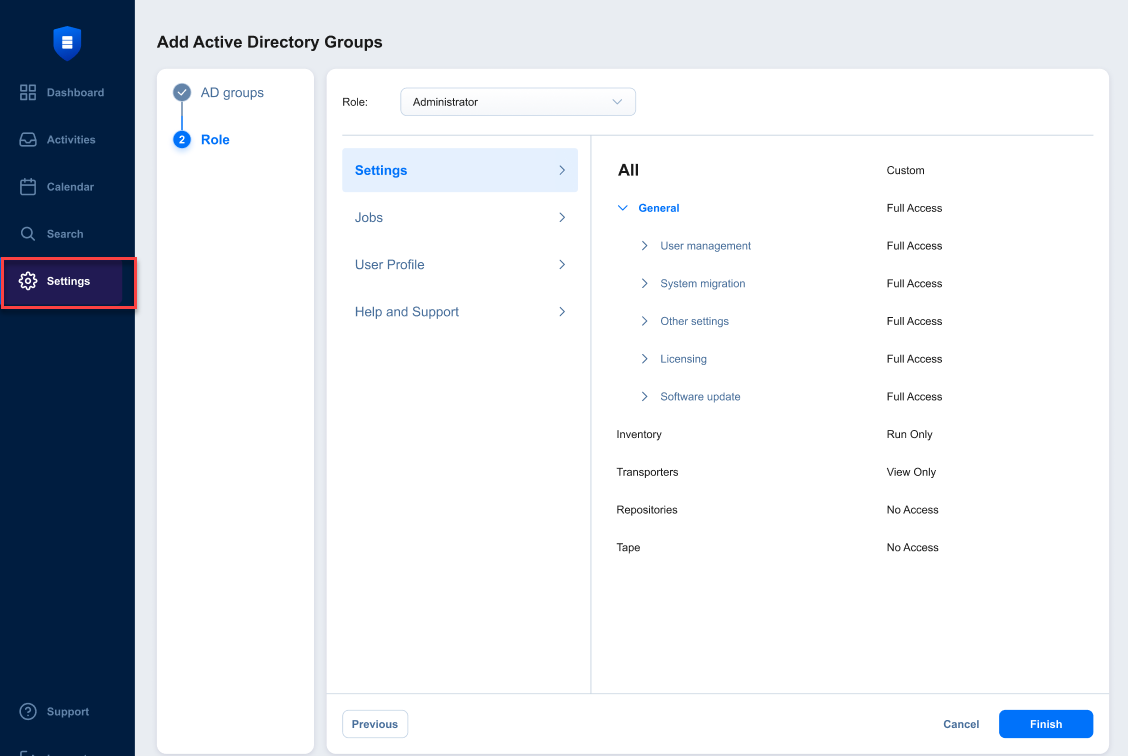
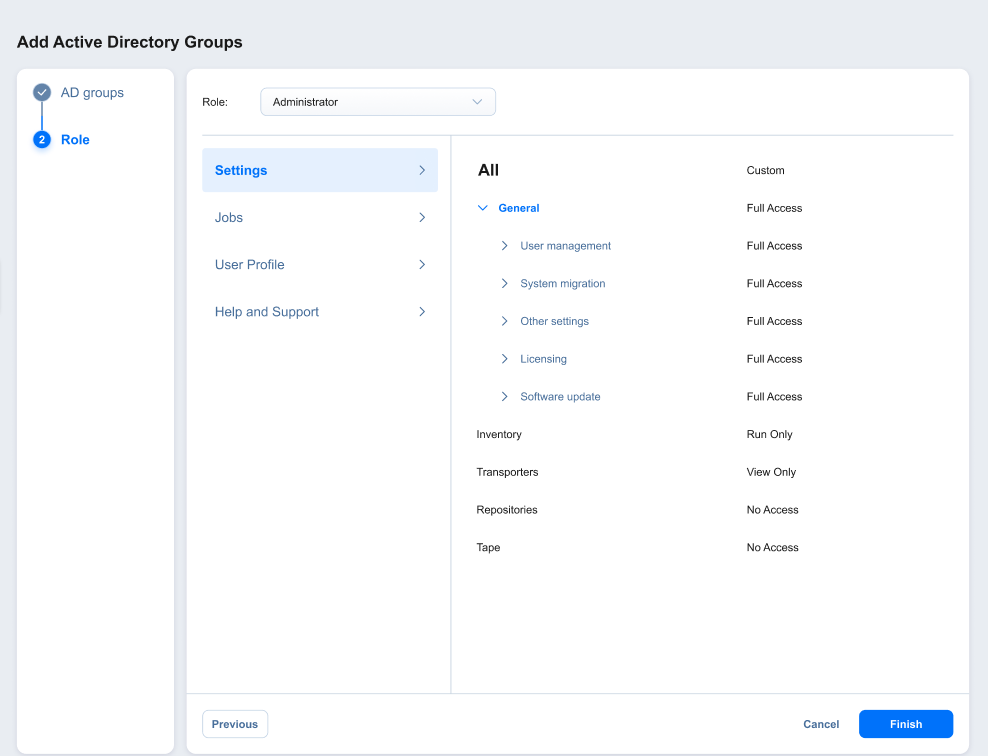
Click Next to proceed to the Role tab.
-
On the Role tab, choose a user role to be assigned to the users.
-
In the lower right corner of the page, click Finish. The selected AD groups with selected access level and role appear in the AD Groups tab.