Built-in Support Chat
You have the possibility to contact a NAKIVO representative via chat in the NAKIVO Backup & Replication interface.
The built-in Nakivo Support chat is an interface where you can get live professional support. For a detailed explanation of each component, see the sections below:
- Opening Built-in Support Chat
- Sending Files in Built-in Support Chat
- Sending Email Transcript of Built-in Support Chat
- Editing Contact Details
- Disabling/Enabling Sound Notifications
- Disabling Built-in Support Chat
- Sending Feedback to Built-in Support Chat
Opening Built-in Support Chat
To open the built-in Live Support Chat, follow the steps below:
-
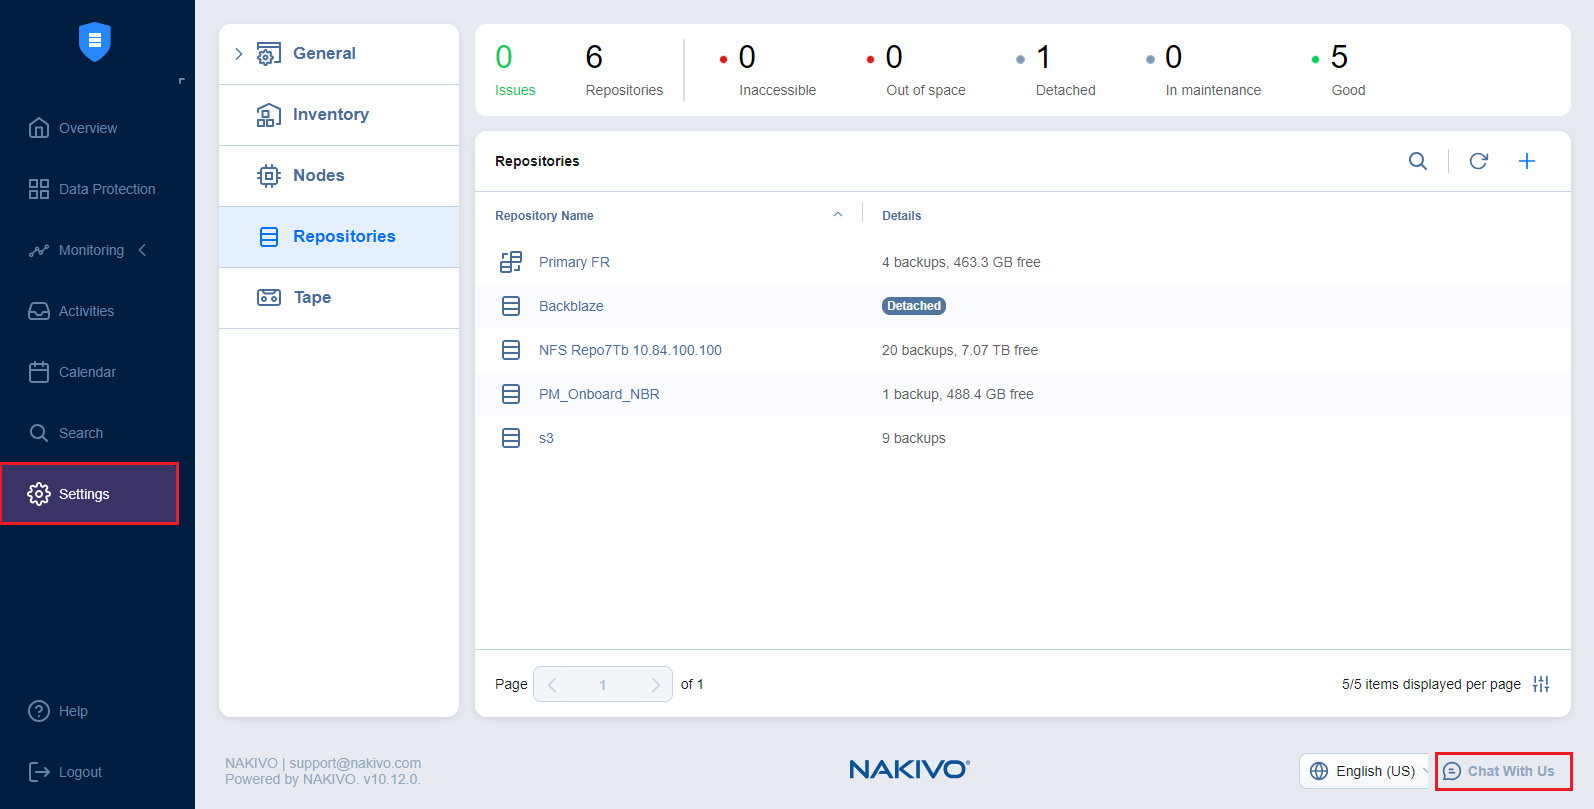
In the lower right corner of the NAKIVO Backup & Replication interface, click the Chat With Us button.
-
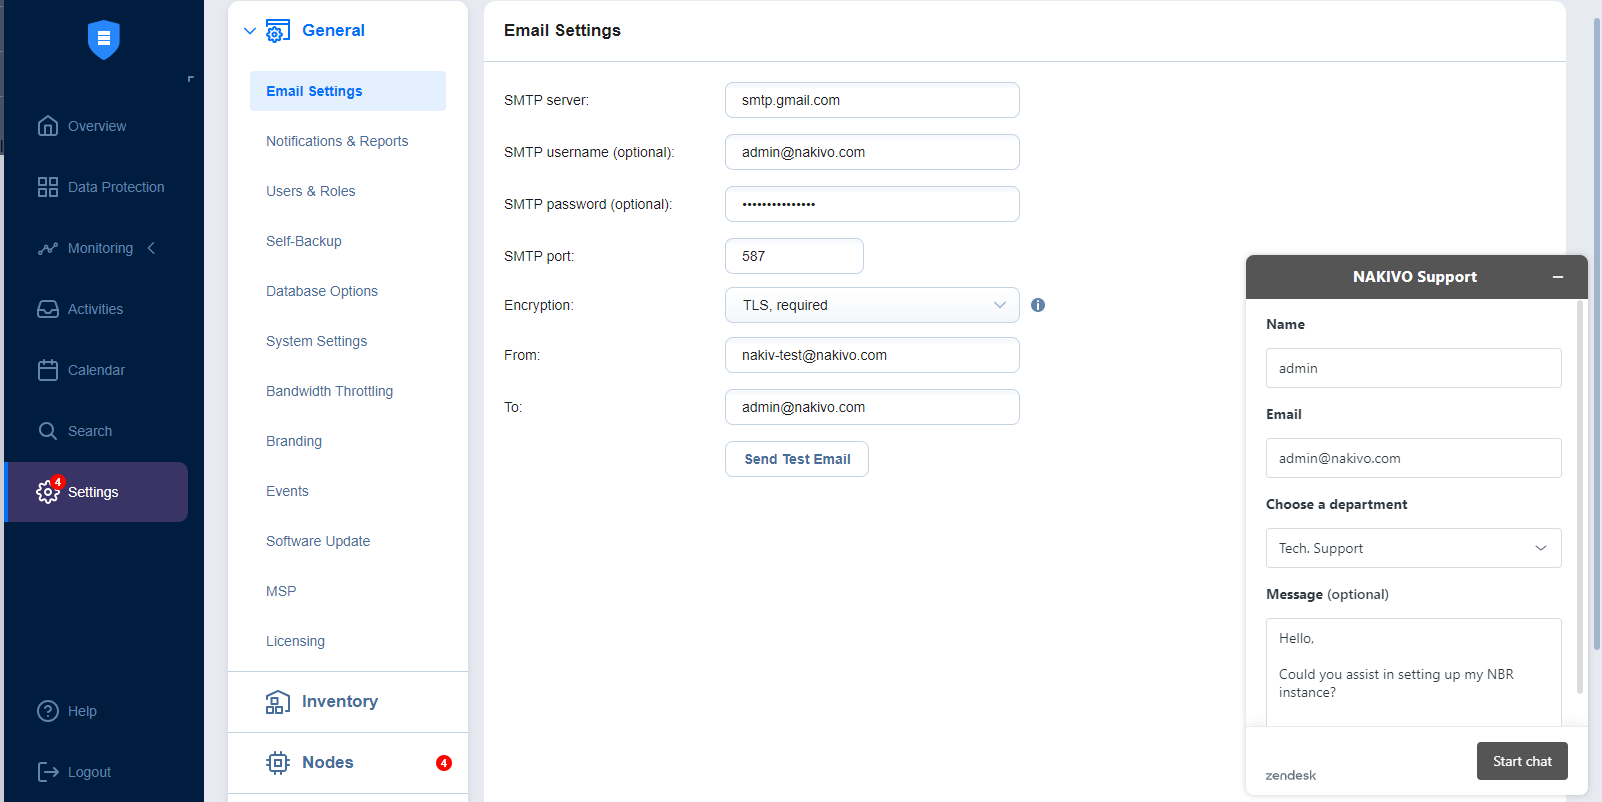
The NAKIVO Support dialog box opens. Introduce yourself by providing the following information:
-
In the upper box of the dialog box, enter your name.
-
In the box below, enter your email address.
-
-
Choose a department from the list of available departments.
-
Enter your message text and click Start chat.
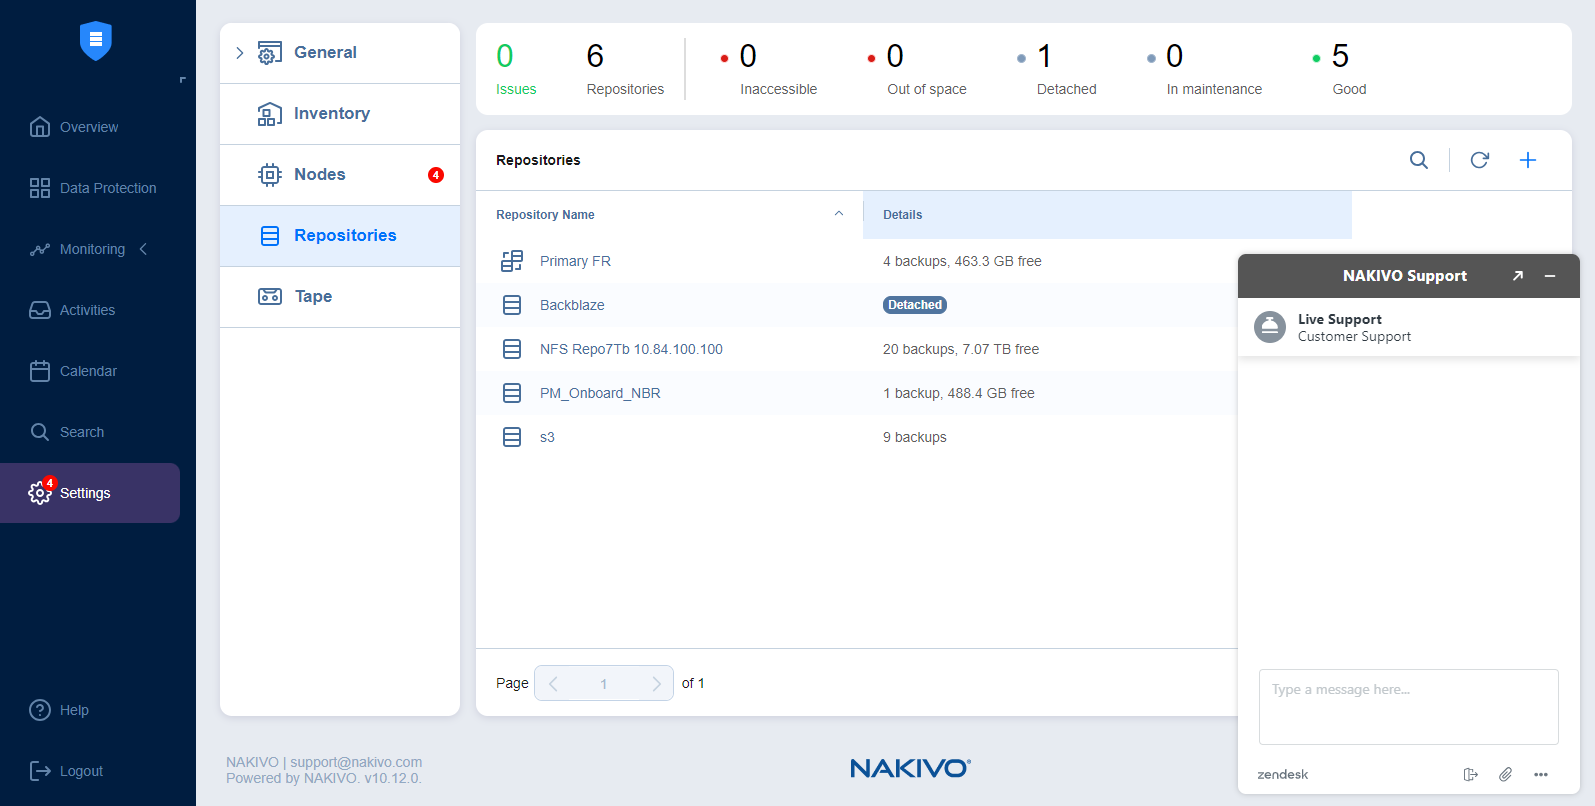
5. Your message is sent to a NAKIVO representative and the built-in Live Support Chat dialog box opens.
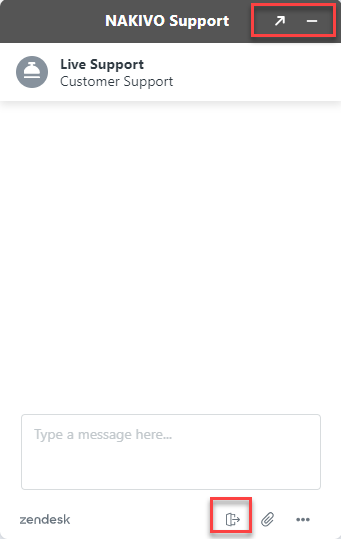
6. Optionally, you can open the Web Widget Live Chat by clicking the Up right arrow  button in the chat header.
7. To leave the chat, click the minus (-)button in the chat header or click the Exit button in the lower right corner of the built-in Live Support Chat dialog box.
Sending Files in Built-in Support Chat
Please use either of the following ways to send your files in the built-in Live Support Chat:
-
Drag and drop: open Windows File Explorer, select necessary files, and then drag them and drop to the chat dialog.
-
The built-in Live Support Chat interface:
-
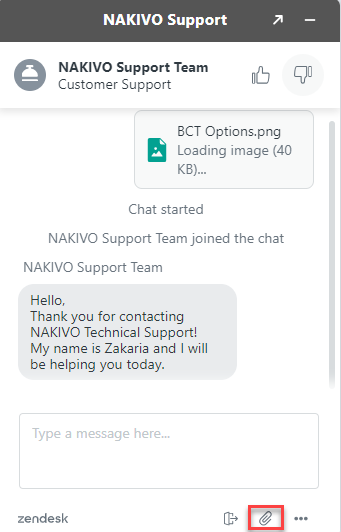
In the lower right corner of the built-in Live Support Chat dialog box, click the Attach button.
-
In the window that opens, select the needed file to attach to the chat.
-
If needed, you can provide additional details in the message field.
-
Your message is sent to a NAKIVO representative and will be processed as soon as possible.
-
Note
The following file formats are allowed:.pdf, .png, .jpeg, .gif, .txt.The maximum file size is 20 MB.
Sending Email Transcript of Built-in Support Chat
Follow the steps below to send the transcript of your built-in Live Support Chat session:
-
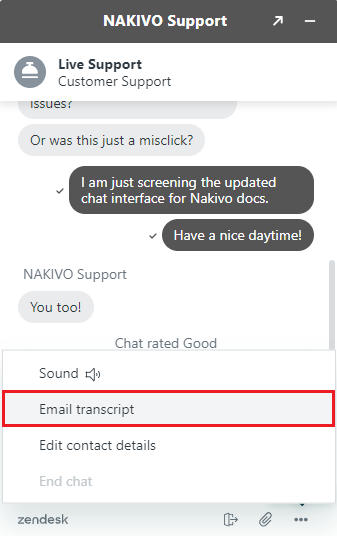
In the lower right corner of the built-in Live Support Chat dialog, click the ... (ellipsis) button.
-
In the dialog box that opens, click Email transcript.
-
In the dialog box that opens, make sure the email address of the recipient is correct, and then click Send.
Your built-in Live Support Chat transcript will be sent to the specified email recipient.
Editing Contact Details
Follow the steps below to edit the contact details of your built-in Live Support Chat session:
-
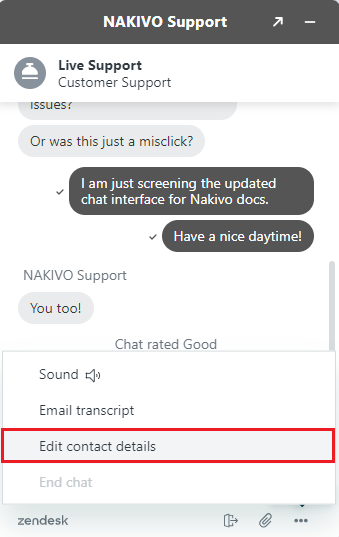
In the lower right corner of the built-in Live Support Chat dialog, click the ... (ellipsis) button.
-
In the dialog box that opens, click Edit contact details.
-
In the dialog box that opens, edit the contact name and the email address, and then click Save.
Disabling/Enabling Sound Notifications
By default, sound notifications are enabled for the built-in Live Support Chat.
Do the following to disable sound notifications:
-
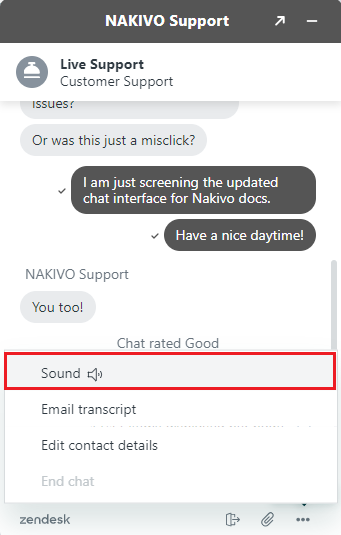
In the lower right corner of the built-in Live Support Chat dialog, click the ... (ellipsis) button.
-
In the dialog box that opens, click Sound.
-
Close the options dialog.
Sound notifications will be disabled for the built-in Live Support Chat.
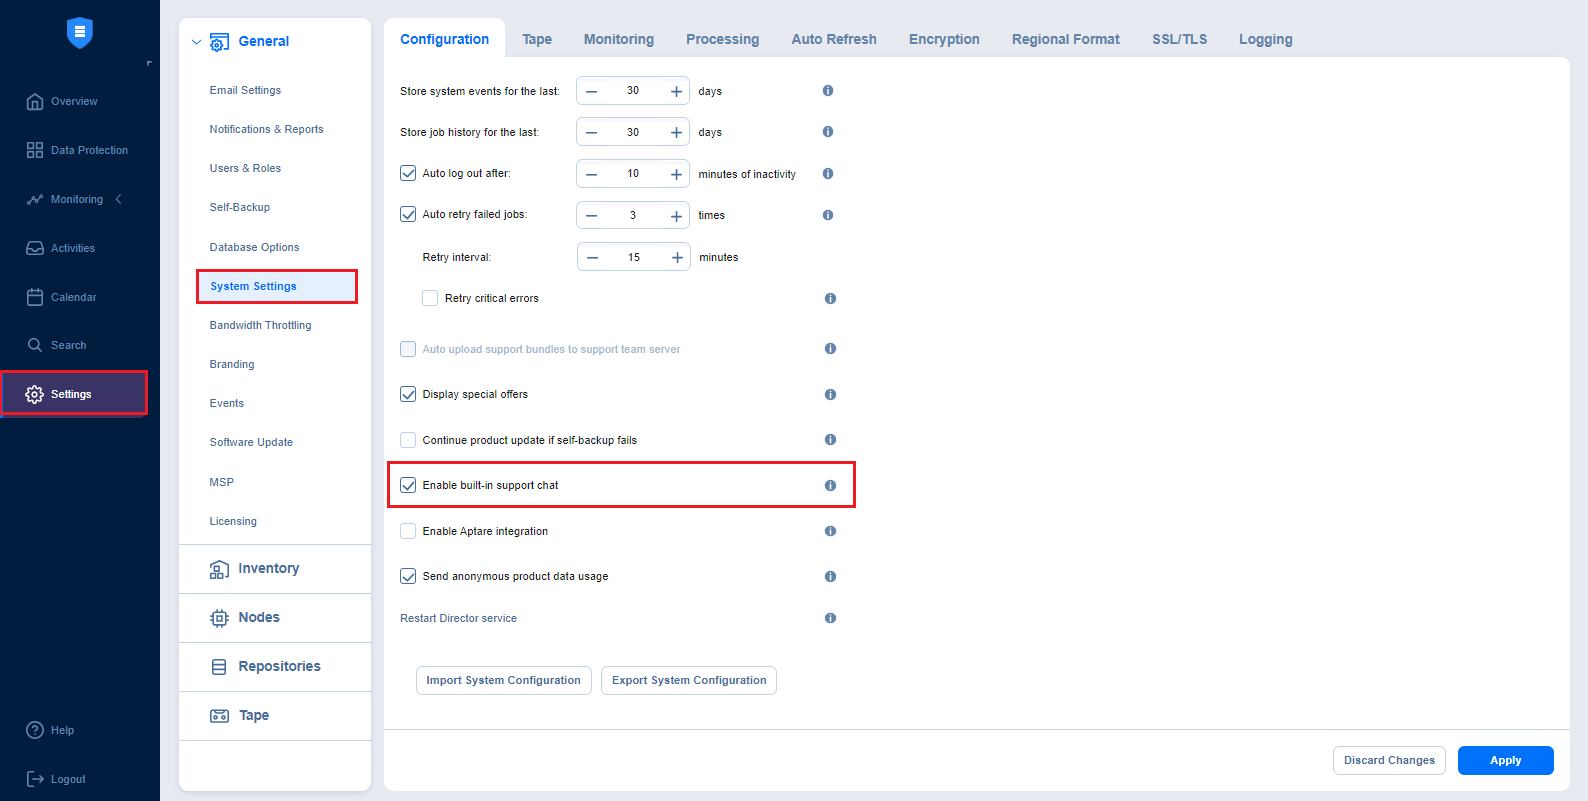
Disabling Built-in Support Chat
By default, the built-in support chat is enabled in your instance of NAKIVO Backup & Replication.
Do the following to disable the built-in Live Support Chat:
-
Go to Settings > General > System Settings.
-
Deselect the Enable built-in support chat checkbox.
-
Click the Apply button.
Note
When disabled, the Built-in Support Chat is not available in all tenants of the NAKIVO Backup & Replication instance in the Multi-tenant mode.
Sending Feedback to Built-in Support Chat
You have the possibility of sending feedback to built-in Live Support Chat: in the upper right corner of the dialog, click Good or Bad, as you deem appropriate.
If appropriate, leave a comment for the NAKIVO Support Team: click Leave a comment and in the text box that opens, enter your comment about the chat service. Then click Send.
