Backup Repository in Amazon S3
Select the Amazon S3 option if you want to create a Backup Repository in Amazon S3. Before creating a repository, grant the required S3 access permissions to NAKIVO Backup & Replication. For details, refer to Required AWS IAM Permissions for Amazon S3 and Backblaze and Permissions for the Amazon S3 Bucket.
In addition, make sure to enable the following options for the relevant Amazon S3 bucket:
-
Object Lock
-
Versioning
Since retention settings are set by NAKIVO Backup & Replication during job creation, disable the Object Lock retention mode and retention period on the S3 bucket as well.
Important
You will be charged for Amazon S3 storage/traffic according to AWS tariffs.
Forever incremental backups are not supported by this location.
Only Amazon S3 Standard storage class is supported.
To create a Backup Repository in an Amazon S3 bucket, proceed as described in the following sections:
- Create Backup Repository: Type
- Create Backup Repository: Vendor
- Create Backup Repository: Name & Location
- Create Backup Repository: Options
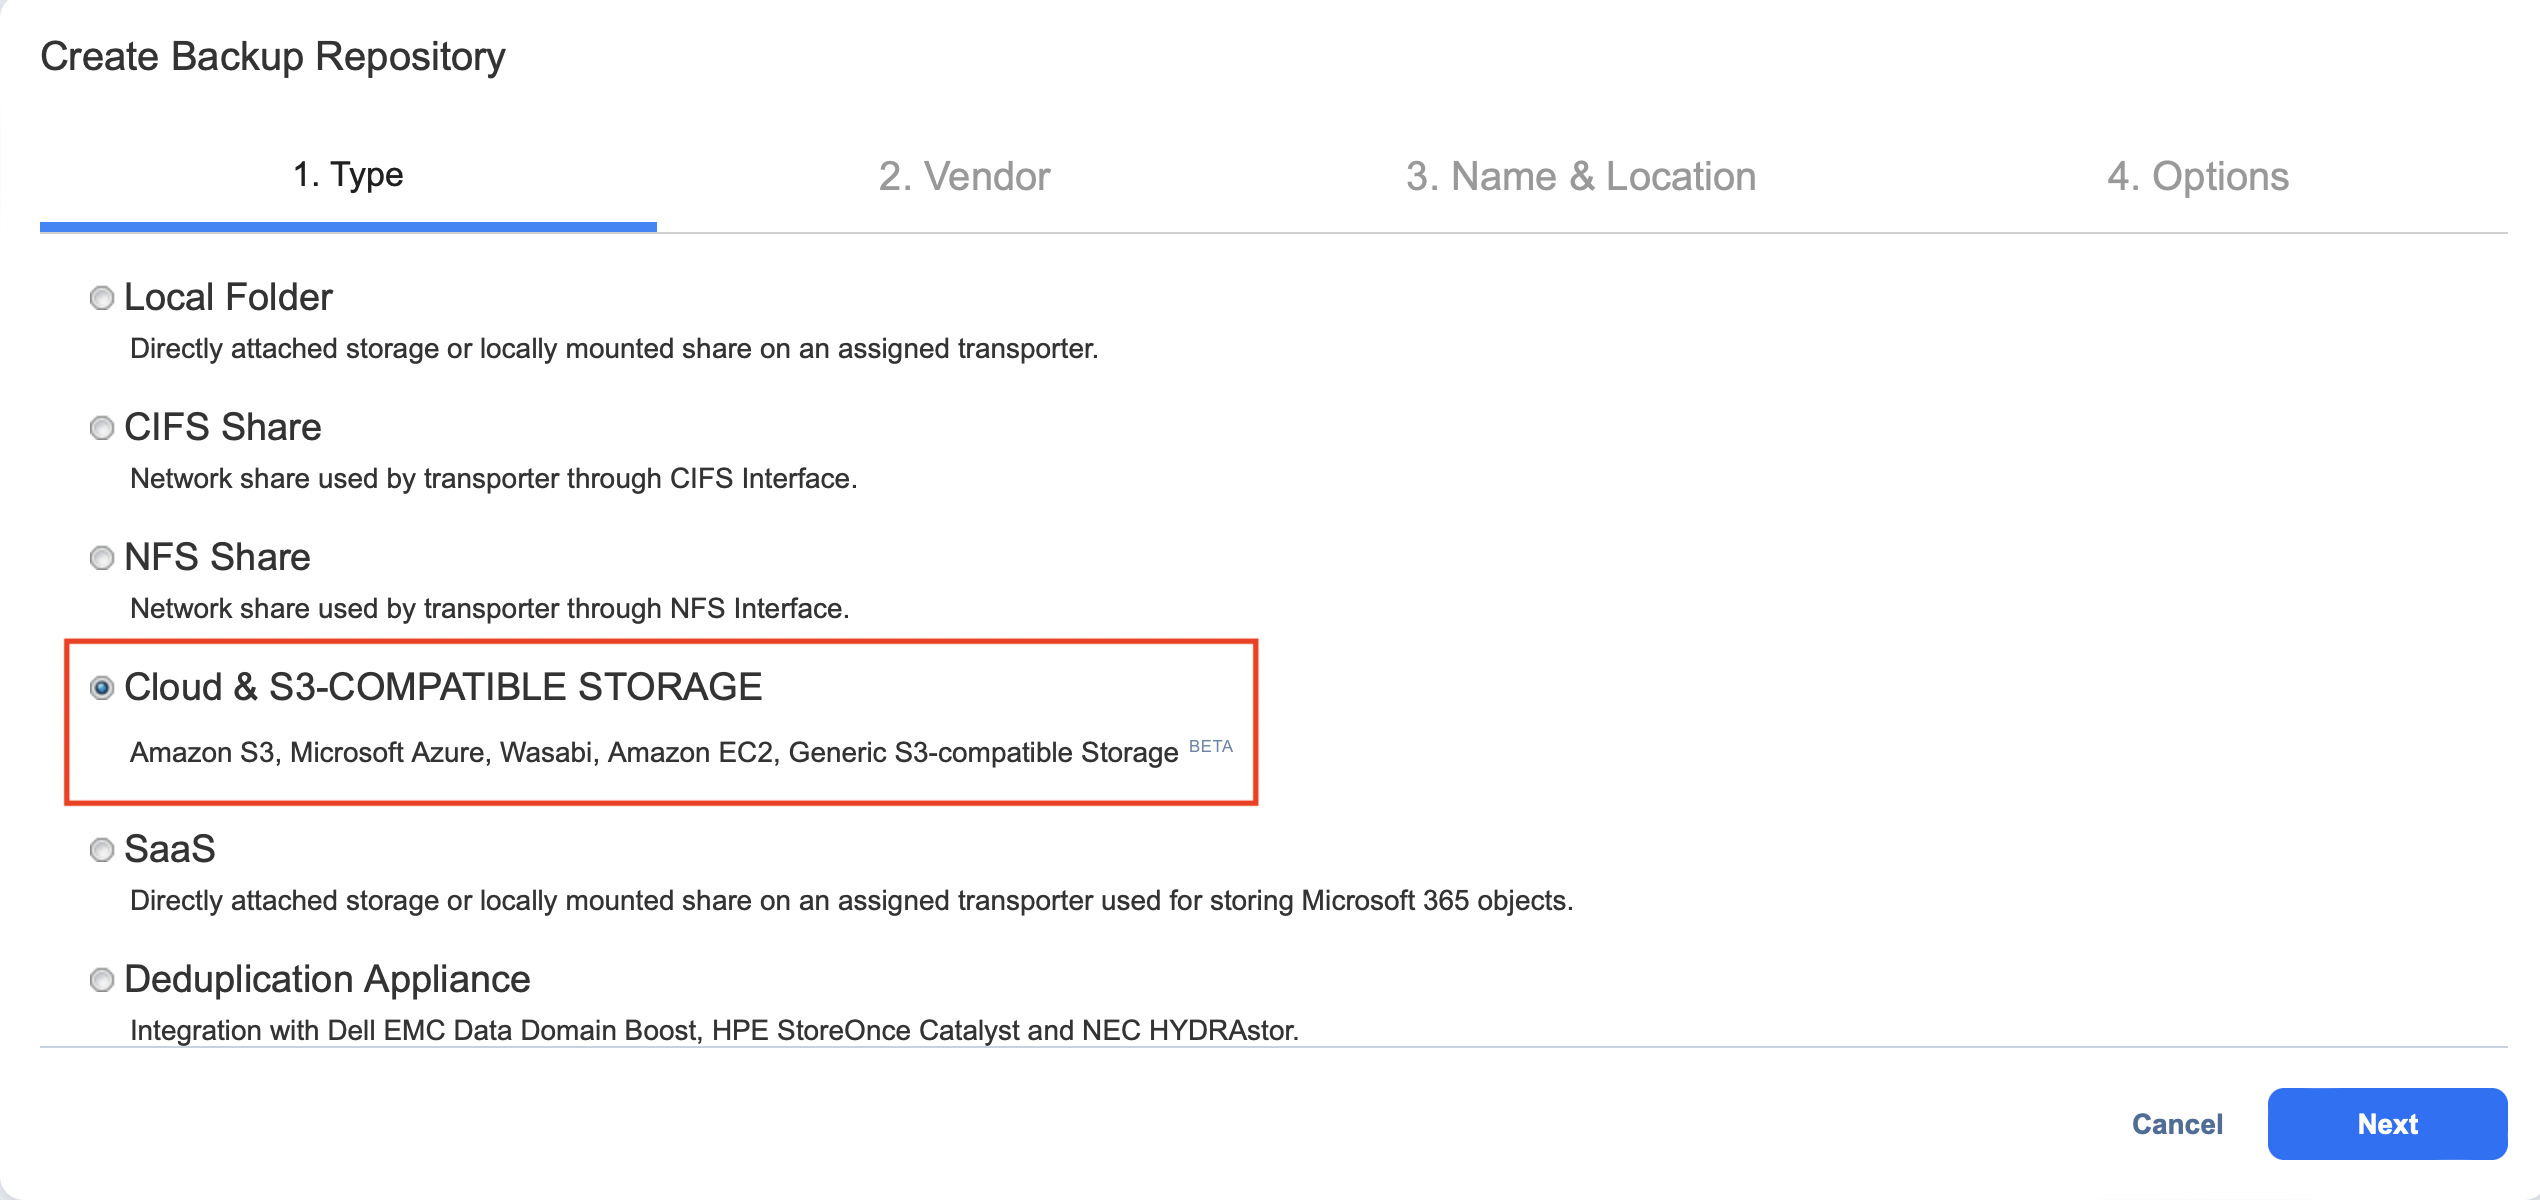
Create Backup Repository: Type
On the Type page of the Create Backup Repository wizard, select Cloud & S3-compatible Storage and click Next to go to the next page of the wizard.
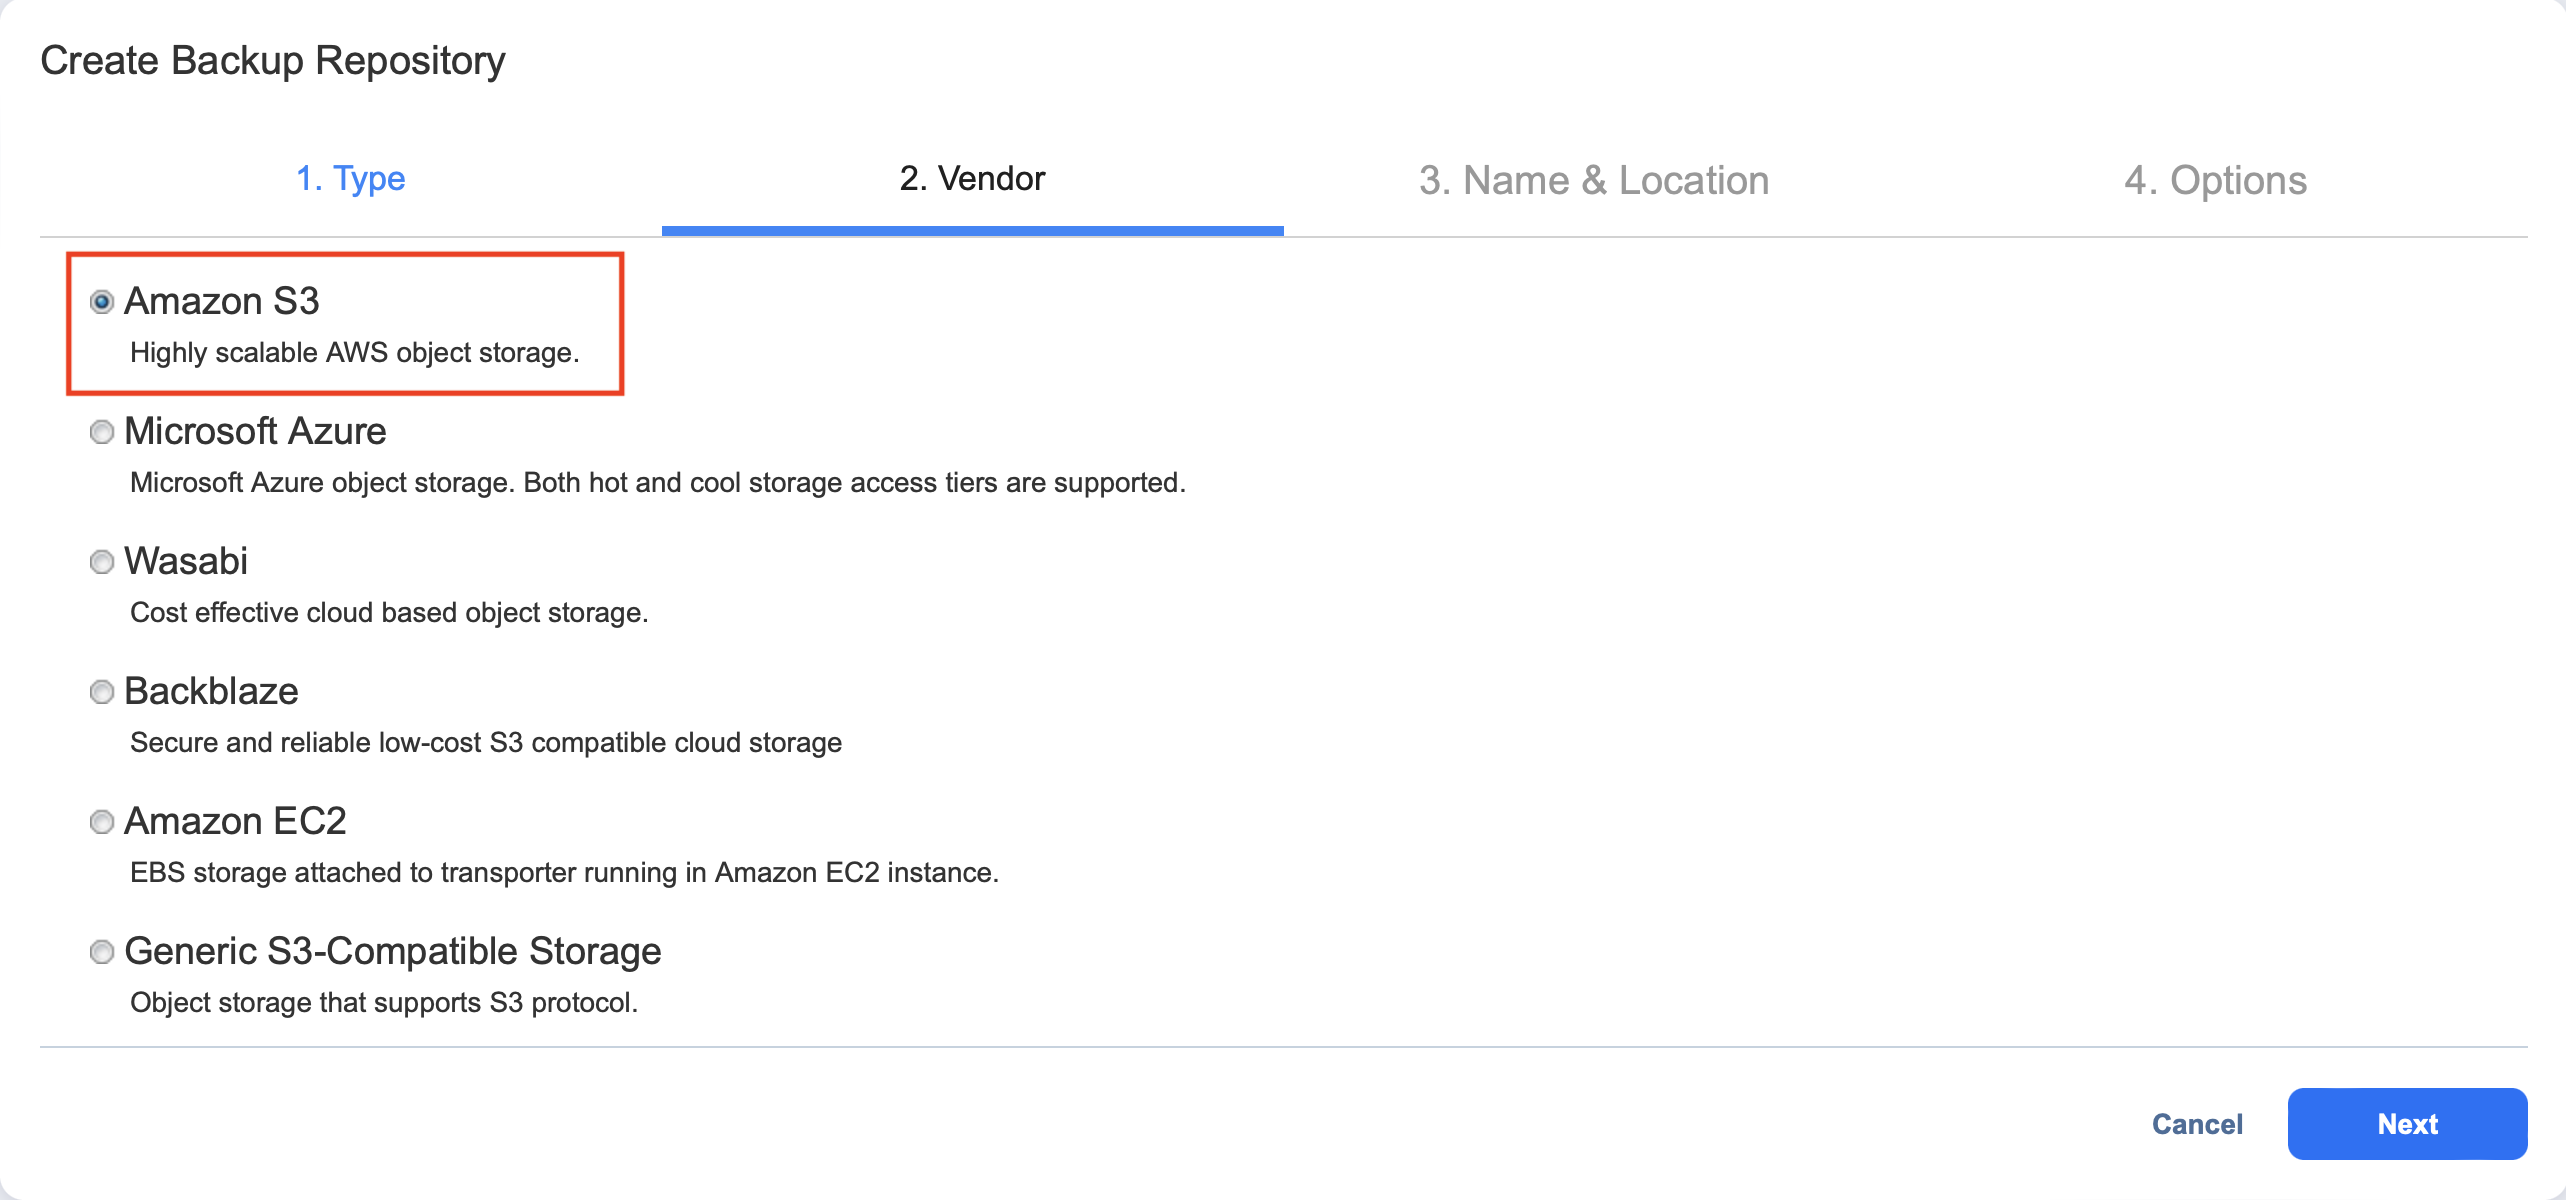
Create Backup Repository: Vendor
On the Vendor page of the wizard, select Amazon S3. Click Next to proceed to the next step.
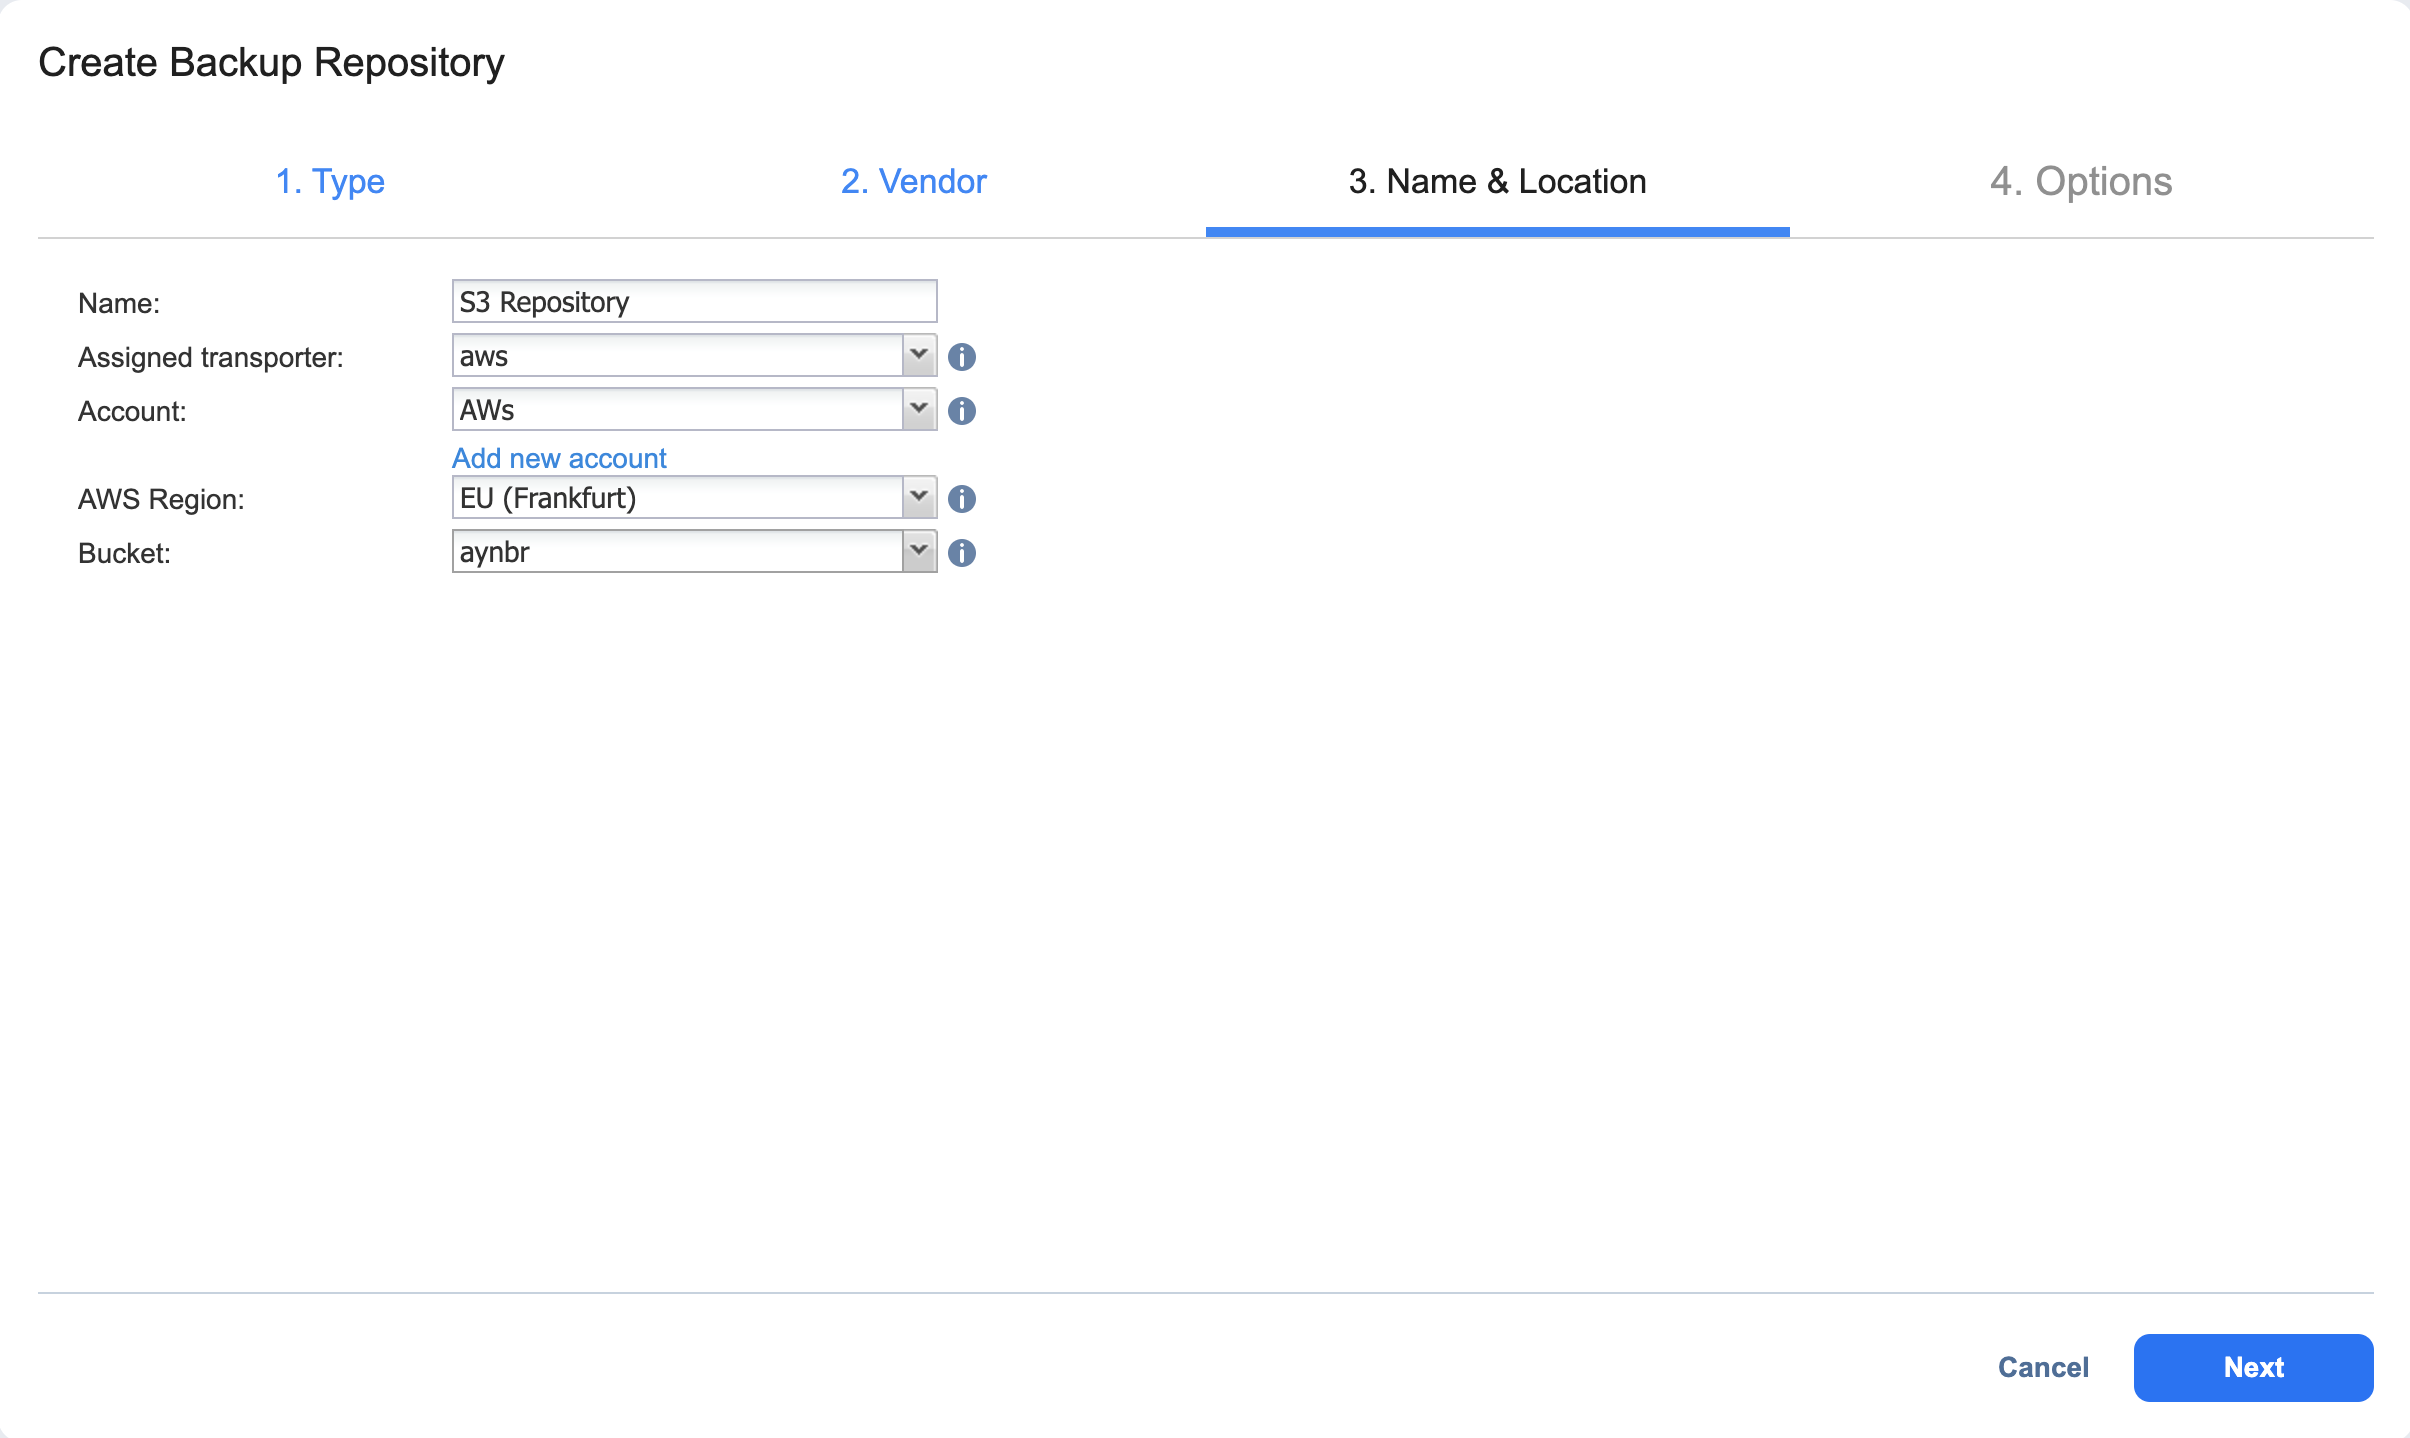
Create Backup Repository: Name & Location
On the Name & Location page of the wizard, do the following:
-
Enter the name of the Backup Repository in the Name box.
-
Select the Transporter from the Assigned transporter drop-down list.
-
Select an AWS account from the Account drop-down list.
-
Select the AWS region connected to the bucket where you want to store your backups.
-
Select the bucket where you want to store your backups from the Bucket drop-down list.
-
Click Next to go to the next page of the wizard.

Create Backup Repository: Options
On the Options page, do the following:
-
In the Storage Savings section, select a compression level for reducing the data size in the Backup Repository. Note that higher compression levels consume considerably more CPU and may slow down the backup speed. The following options are available:
-
Disabled: No compression.
-
Fast: Lowest compression level.
-
Medium: Medium compression level.
-
Best: Maximum compression level.
Note
This option cannot be configured after you create the Backup Repository.
-
-
Set up Reliability & Maintenance options:
-
Run full data verification on schedule: When selected, the product runs full verification of all data available in the Backup Repository according to the specified schedule. The product reads each block of data and ensures that it is identical to the data block that was read on the source machine during the backup. This way, the product verifies each recovery point in the Backup Repository.
When Stop backup and recovery to run full data verification is selected, any running jobs that use this Backup Repository are stopped to run scheduled data verification. When this option is not selected, scheduled data verification is skipped if there are running jobs on this Backup Repository.
Note
Backup verification is a time-consuming process and utilizes the CPU resources of the Transporter assigned to the Backup Repository. It is recommended that you schedule backup verification during non-working hours. -
Enforce explicit file system sync: When selected, explicit sync with the file system is enforced during all backup operations to this repository. This setting is considered more reliable but may lead to lower performance on certain storage devices. By default, the option is disabled.
-
-
Schedule detaching of the Backup Repository:
-
Detach this repository on schedule: Select this option if you want to detach and then attach the Backup Repository based on a schedule. Detaching a Backup Repository saves its data and metadata in a consistent state and then stops the interaction of the product with the Backup Repository (so that it can be copied or moved). You can use this feature, for example, for the disk-to-disk-to-tape (D2D2T) data protection approach, in which backups are stored on a disk for fast operational recovery and copied to a tape (while the repository is detached) for archiving and long-term storage.
-
Delete and re-create the repository on attach: When this option is selected, all the data in the Backup Repository is erased prior to attaching it to the product. As a result, jobs that write to this Backup Repository create full backups. You can use this option, for example, to create full daily, weekly, or monthly VM backups and write them to tape or removable media.
-
-
Click Finish to complete Backup Repository creation.

