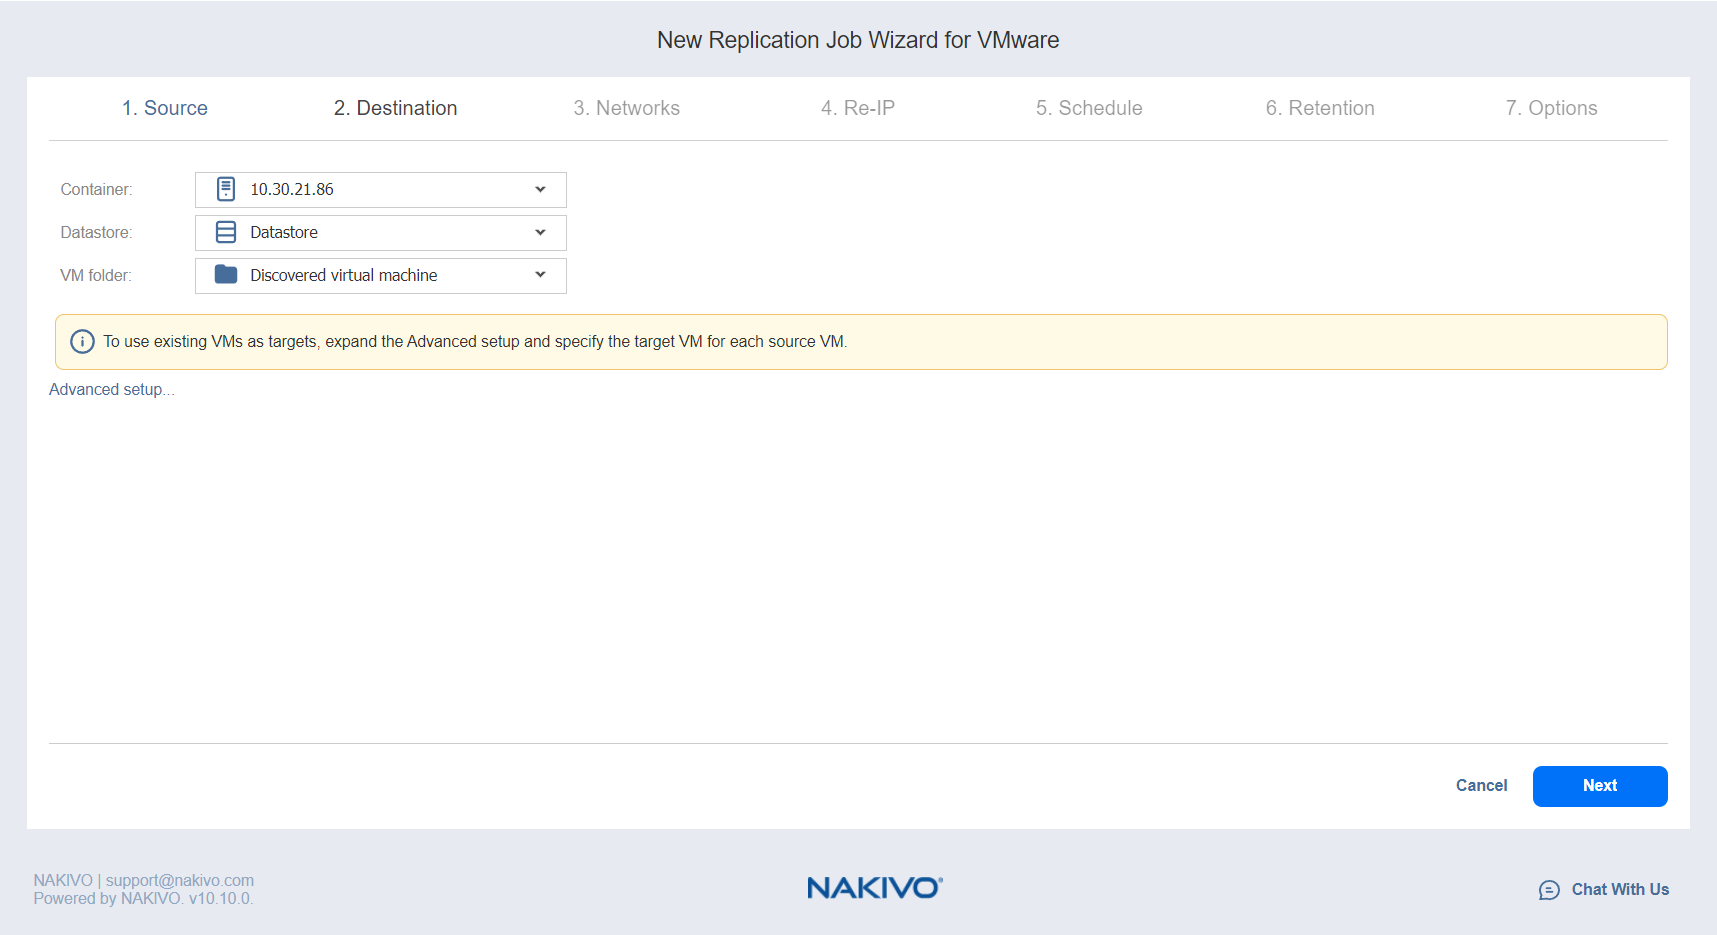
Replication Job Wizard for VMware: Destination
On the Destination page, select a location for your replica(s).
Note
When replicating an ESXi 8.0 VM to an ESXi 7.0 host, the VirtualMachineConfigSpec > VirtualMachineSgxInfo property is skipped.
Setting the Same Host, Datastore, and Network for All Replicas
To replicate all VMs to the same container and datastore, and to connect all replicas to the same network, follow the steps below:
-
Choose a cluster, host, or resource pool from the Container drop-down list.
-
Choose a datastore from the Datastore drop-down list.
-
If you are creating a Replication job from an existing Backup job (Jobs & Groups or Backup repository view), select a target network from the Network drop-down list.
-
Optionally, you can choose a target VM folder from the VM folder drop-down list.

Setting the Default Destination for Replicas
If you have chosen a host, cluster, folder, or a resource pool as a source for your replication job on the Source wizard page, you can set the default container, datastore, and VM folder for replicas. To do this, follow the steps below:
-
Click Advanced setup and then click on the name of the chosen host, cluster, folder, or a resource pool.
-
Choose a Default container.
-
If you have chosen the backup job on the Source page, you can choose a Default Network.
-
Optionally, you can also choose a Default VM folder.
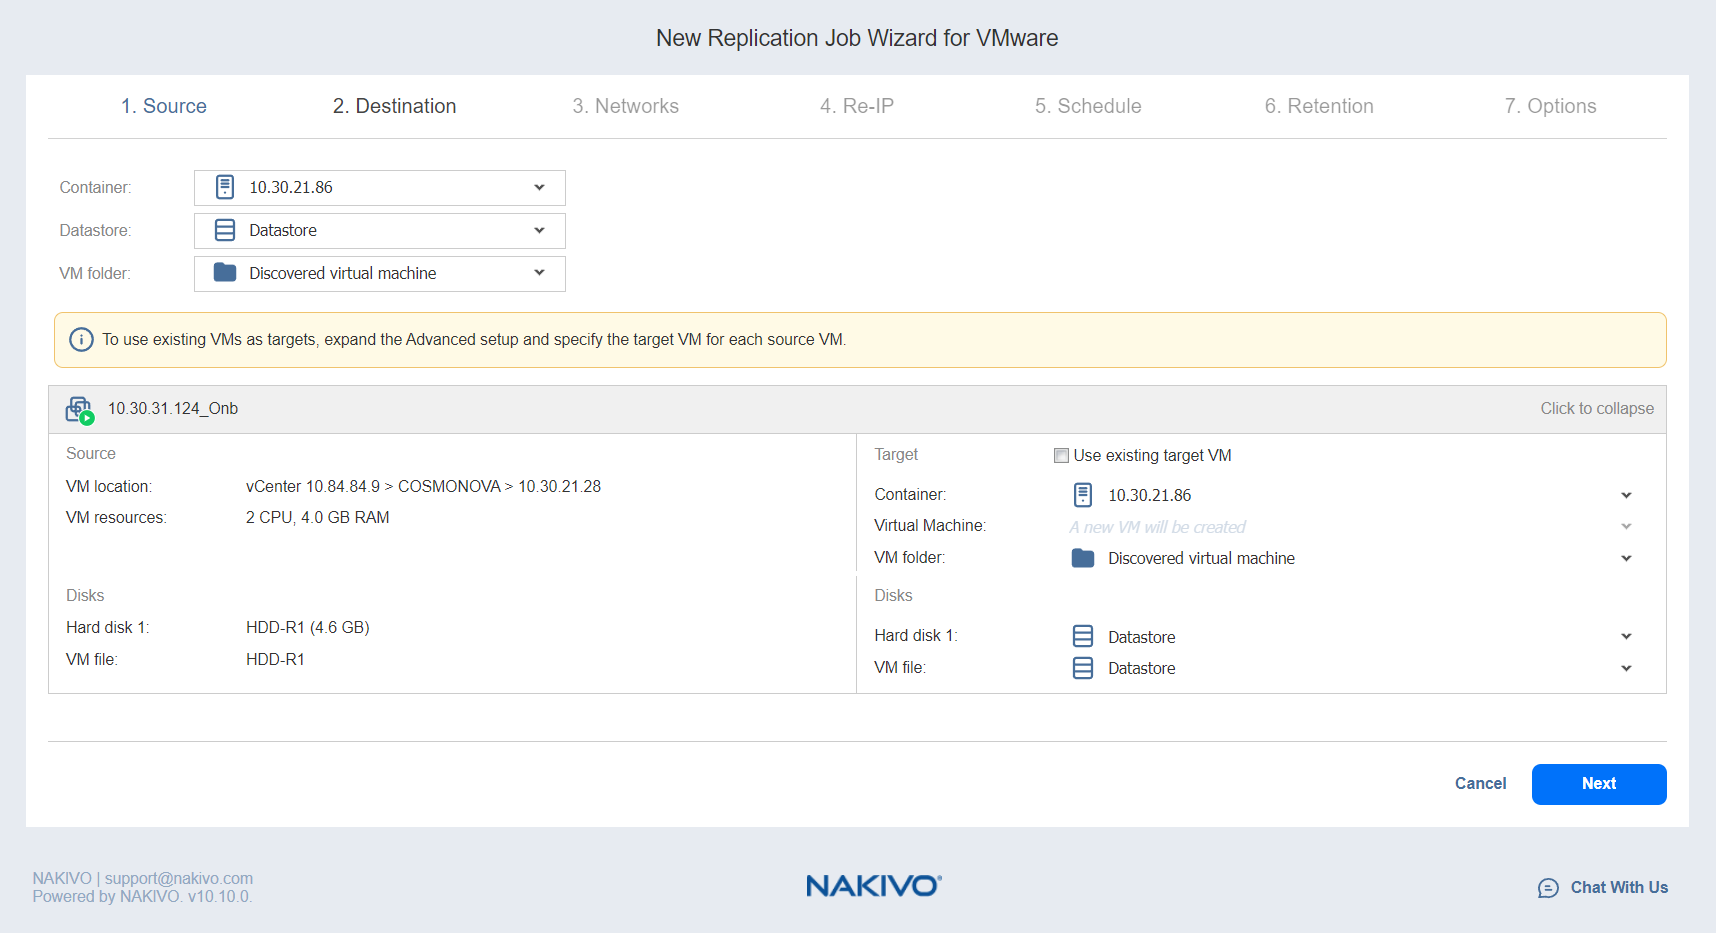

Setting Different Options for Replicas
To specify different replication options for VMs, follow the steps below:
-
Click Advanced setup.
-
Choose a target container, target VM, and target datastore for each VM.


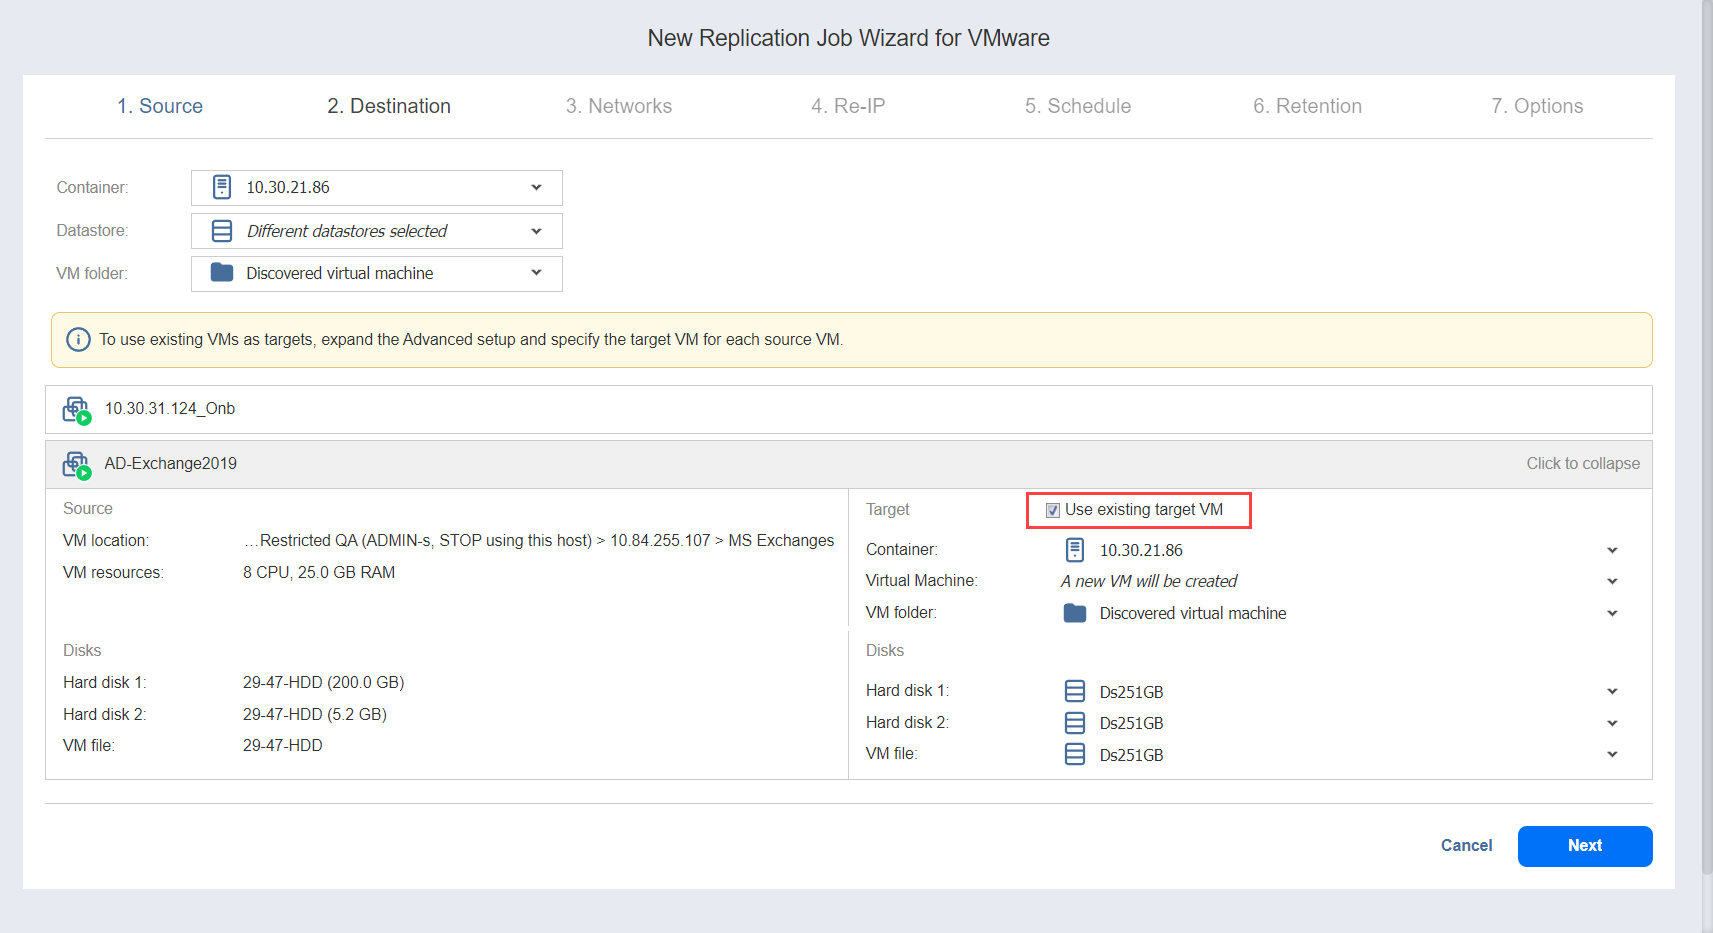
Mapping Source VMs to Existing Replicas
If you want to perform staged replication or if you lose the replication job (due to accidental job deletion or because you need to recreate jobs in a new copy of the product), you can map source VMs to existing replicas to avoid running full VM replication again.
To map source VMs to existing VMs, follow the steps below:
-
Click Advanced setup.
-
Open the target VM drop-down list and select the Use existing target VM option.
-
Select the VM that should be used as a target for replication in the Virtual Machine drop-down list.

When you run the job, the product analyzes the target VM you have selected, determines how it is different from the source VM, and transfers only the differential data.
VM replication mapping can be a time-consuming process that can be equal to the time required to create a full VM replication.
After the job completion, a new recovery point will be created and existing recovery points will not be changed or overwritten.
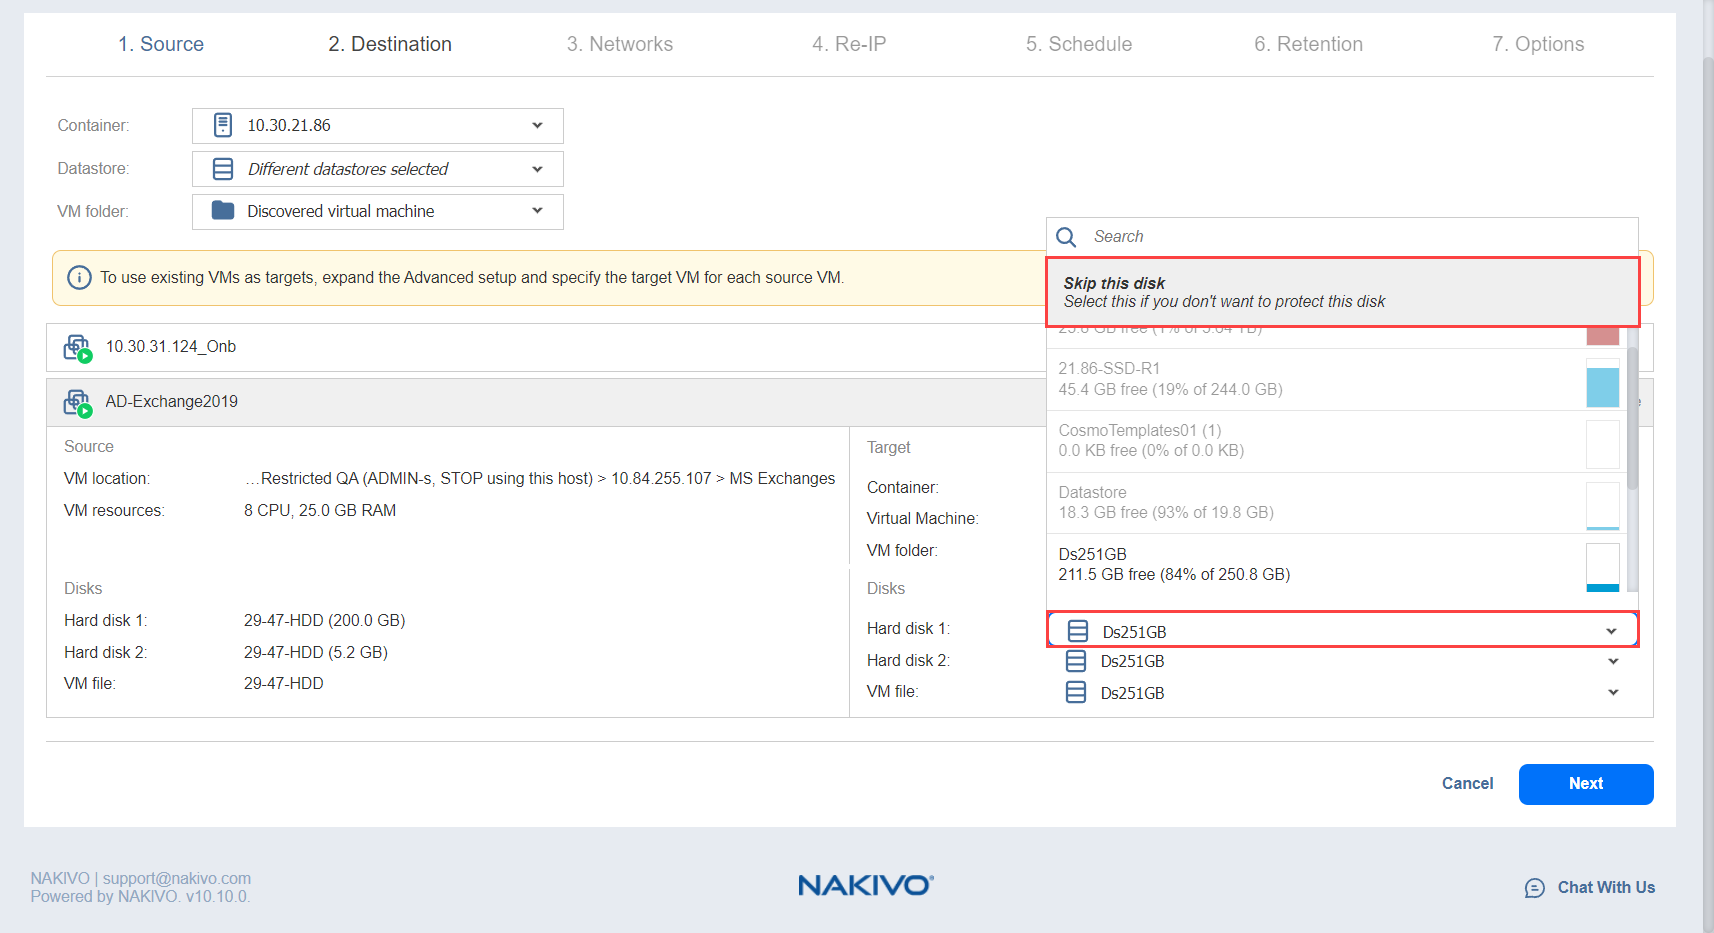
Excluding a VM Disk from the Replication Job
If you do not want to replicate some disks of a VM, you can exclude those disks from the replication job. Follow the steps below:
-
Click Advanced setup.
-
Open the target VM drop-down list.
-
Click the drop-down list next to the disk that you want to skip and select the Skip this disk option.
-
After you have specified replica location options, click Next to go to the next page.