Site Recovery Job Wizard: Networks
On the Networks page of the Site Recovery Job Wizard you can map source VM virtual networks to appropriate target virtual networks and test networks.
Please proceed as follows:
-
Select Enable network mapping.
Note
A failover or a failback action needs to be on the actions list to allow enabling network mapping for your site recovery job. -
The Network Mapping section opens. You have the following options:
-
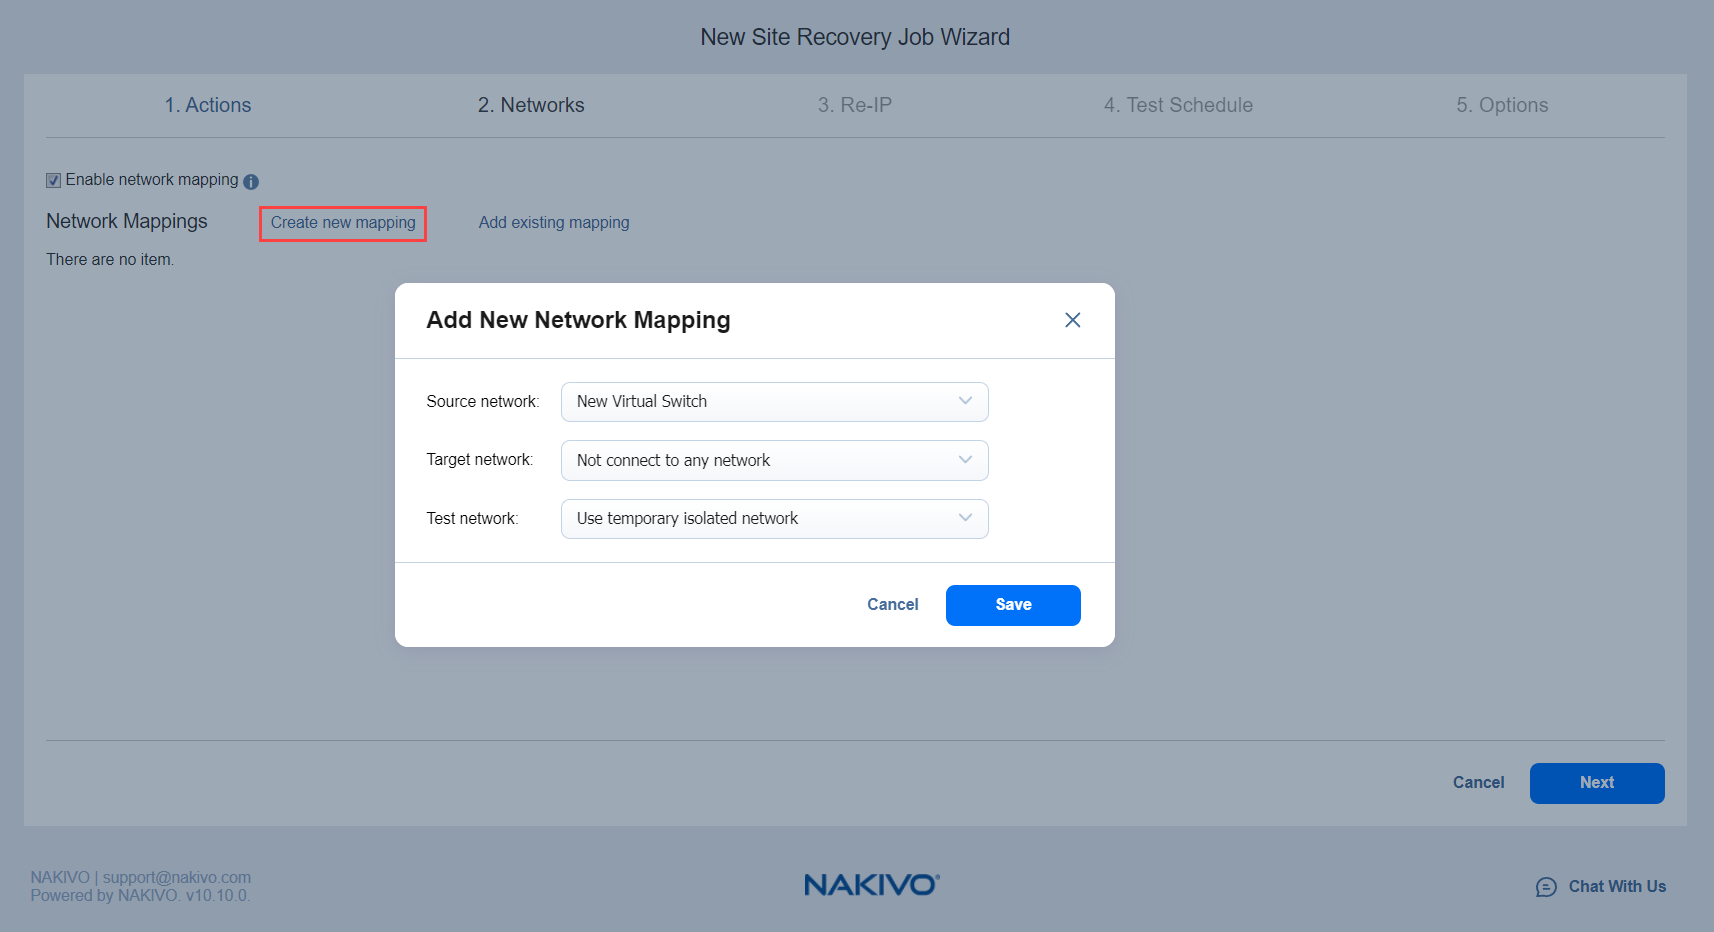
Create a new network mapping:
-
Click Create new mapping.
-
The Add New Network Mapping dialog opens. Choose a source network, a target network and a test network, and click Save.

-
-
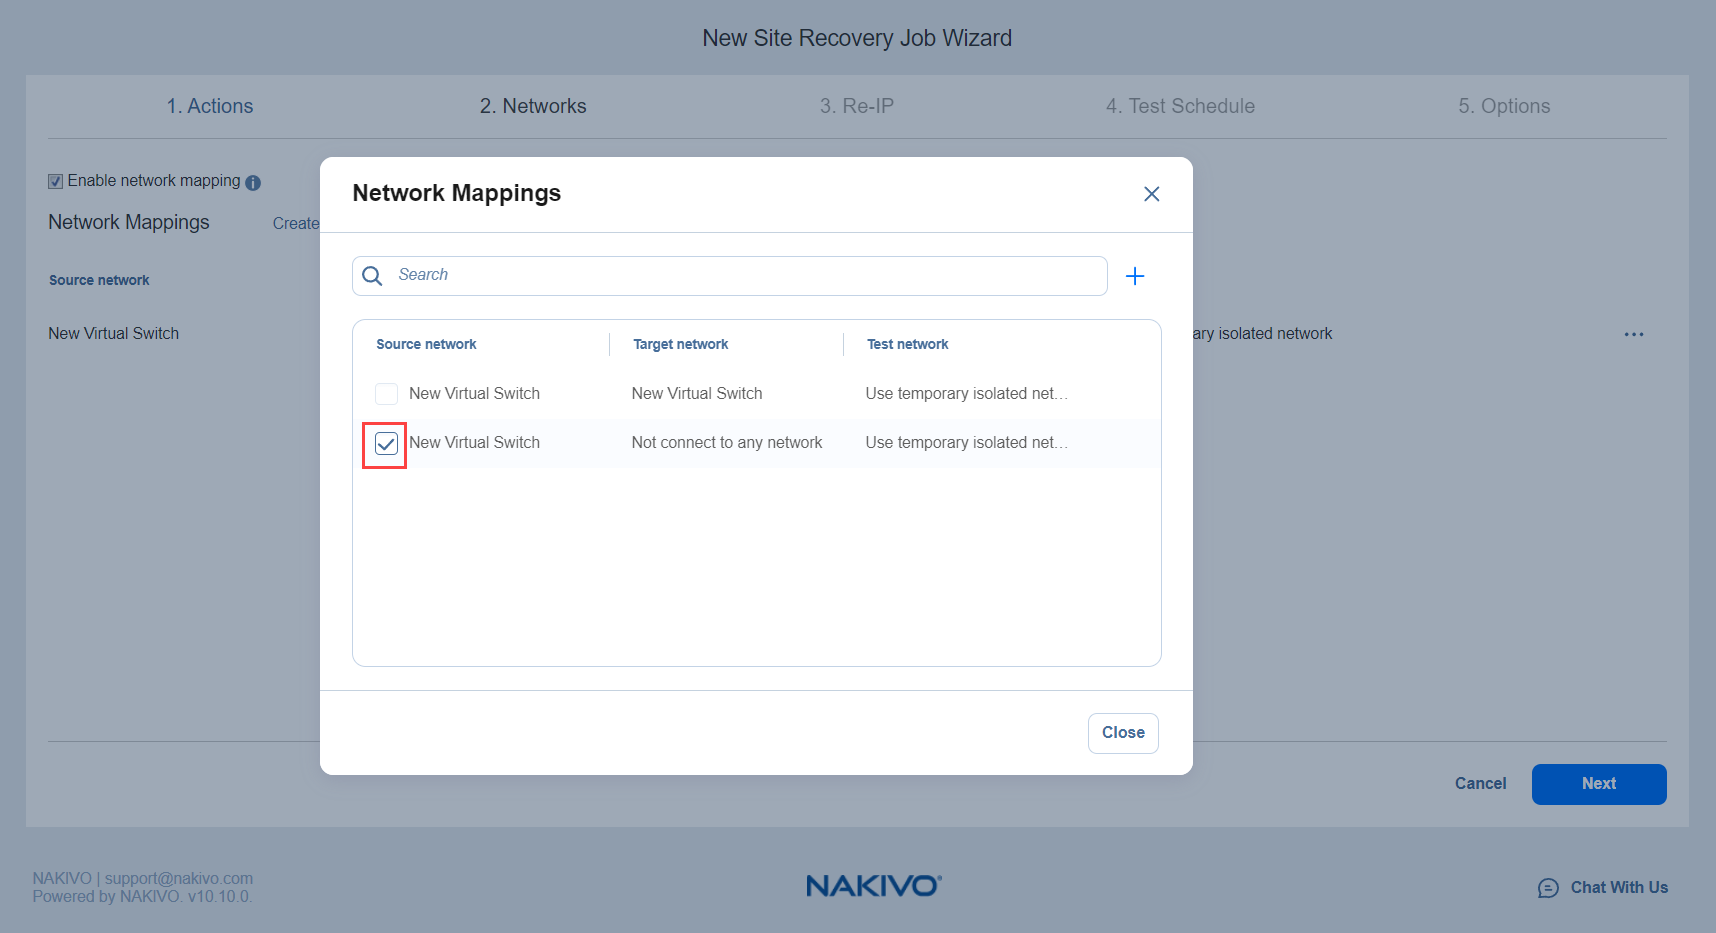
Add an existing network mapping:
-
Click Add existing mapping.
-
The Network Mappings dialog opens. Choose an appropriate network mapping and close the dialog box.

-
-
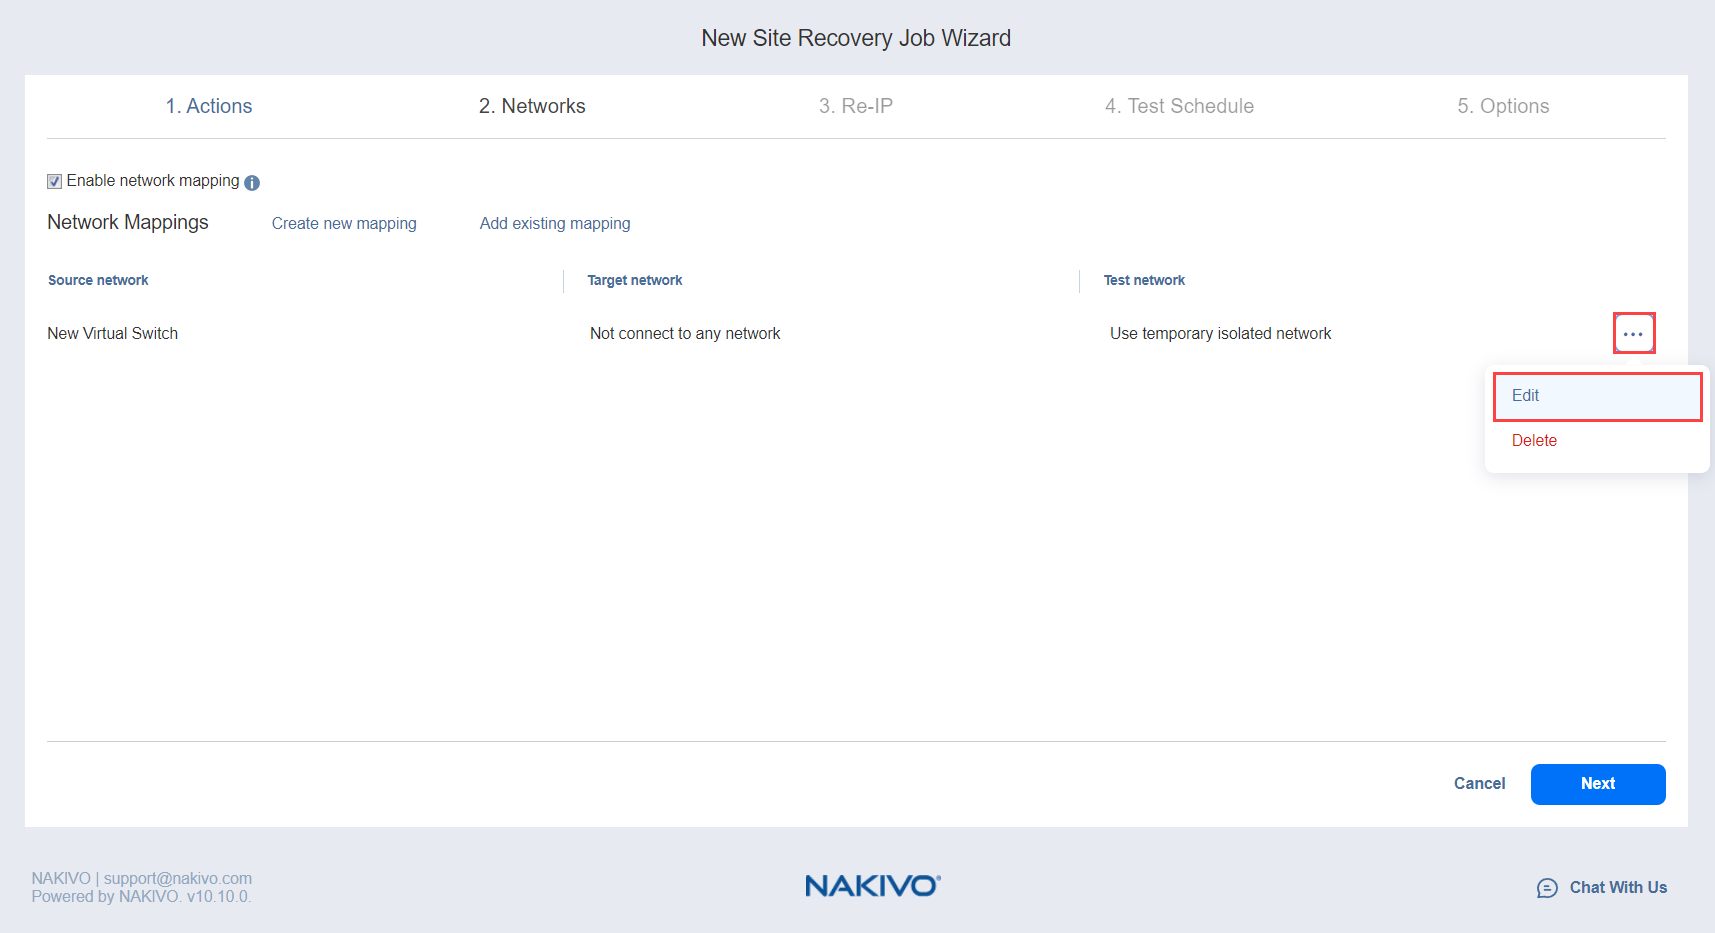
Edit an existing network mapping:
-
Hover the pointer over the necessary item in the Network Mappings list and then click the Edit button to the right of the item.
-
The Edit Network Mapping dialog box opens. Choose appropriate items from the Target network and the Test network lists and then click Save.

-
-
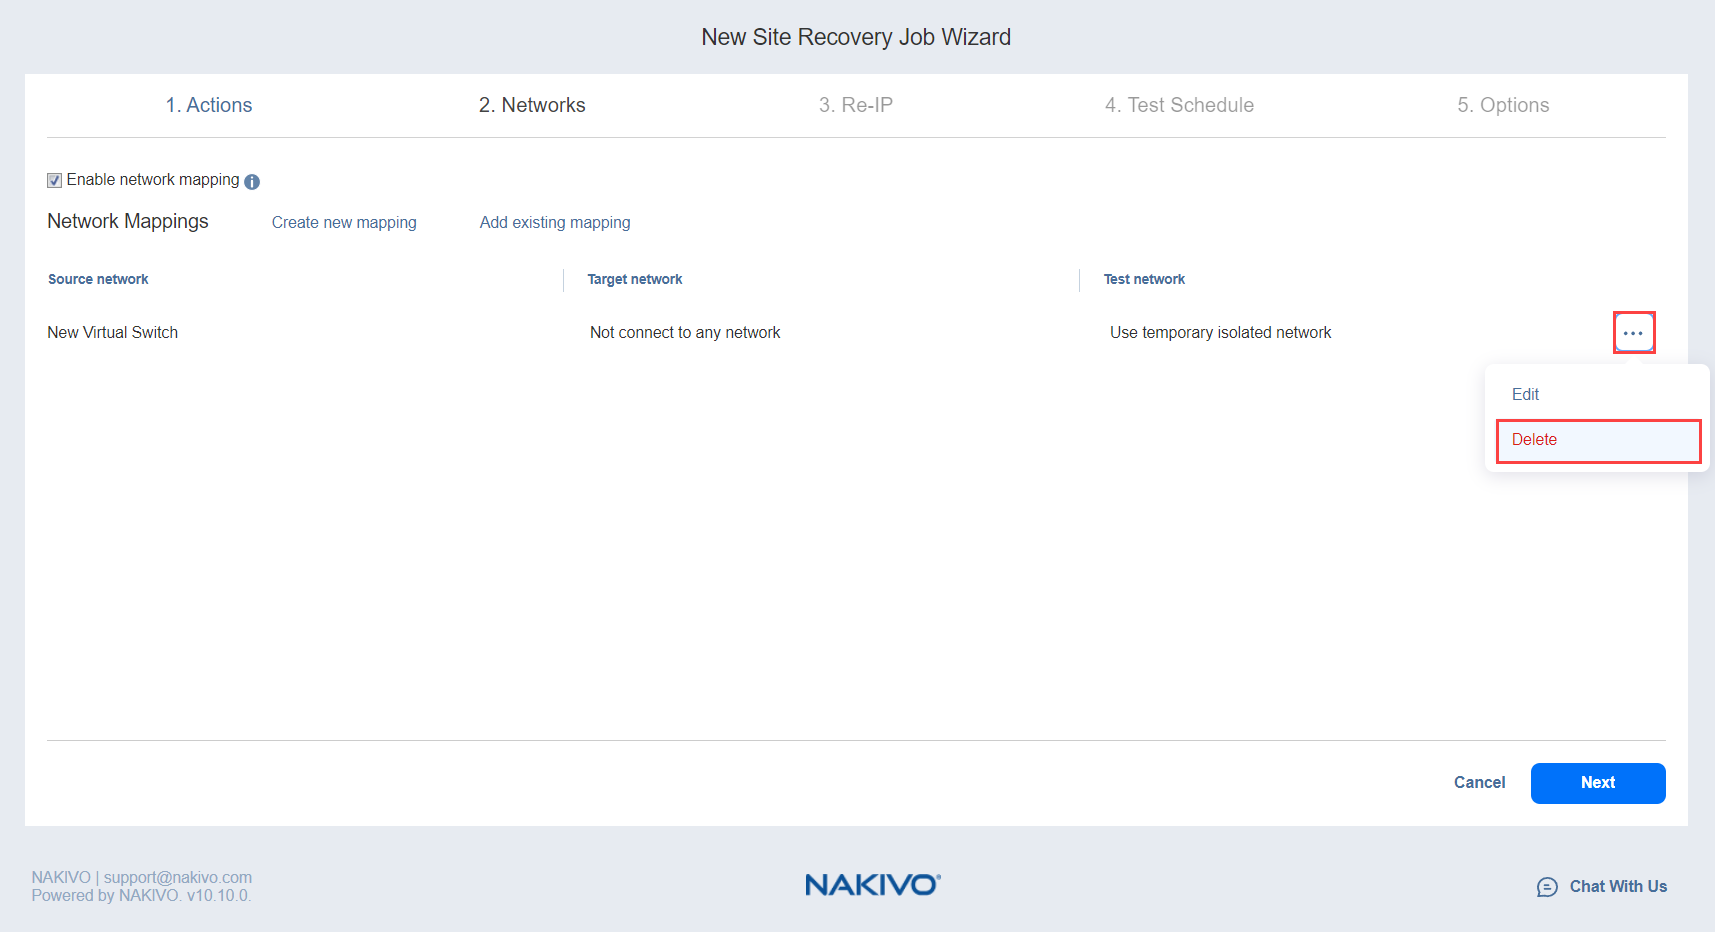
Delete an existing mapping: hover the pointer over the necessary item in the Network Mappings list and then click the Delete icon to the right of the item.
-
To leave the list of existing network mappings intact, go to the next page of the wizard.
-
-
Click Next to go to the next page of the wizard.