Failback Job Wizard for Microsoft Hyper-V: Networks
When the replica network address differs from the network address where the source VMs are deployed, your failback job needs a relation between these networks to be performed successfully. This relation is called a network mapping.
To map source VM virtual networks to the appropriate target virtual networks, please do the following on the Networks page of the wizard:
-
Select Enable network mapping.
-
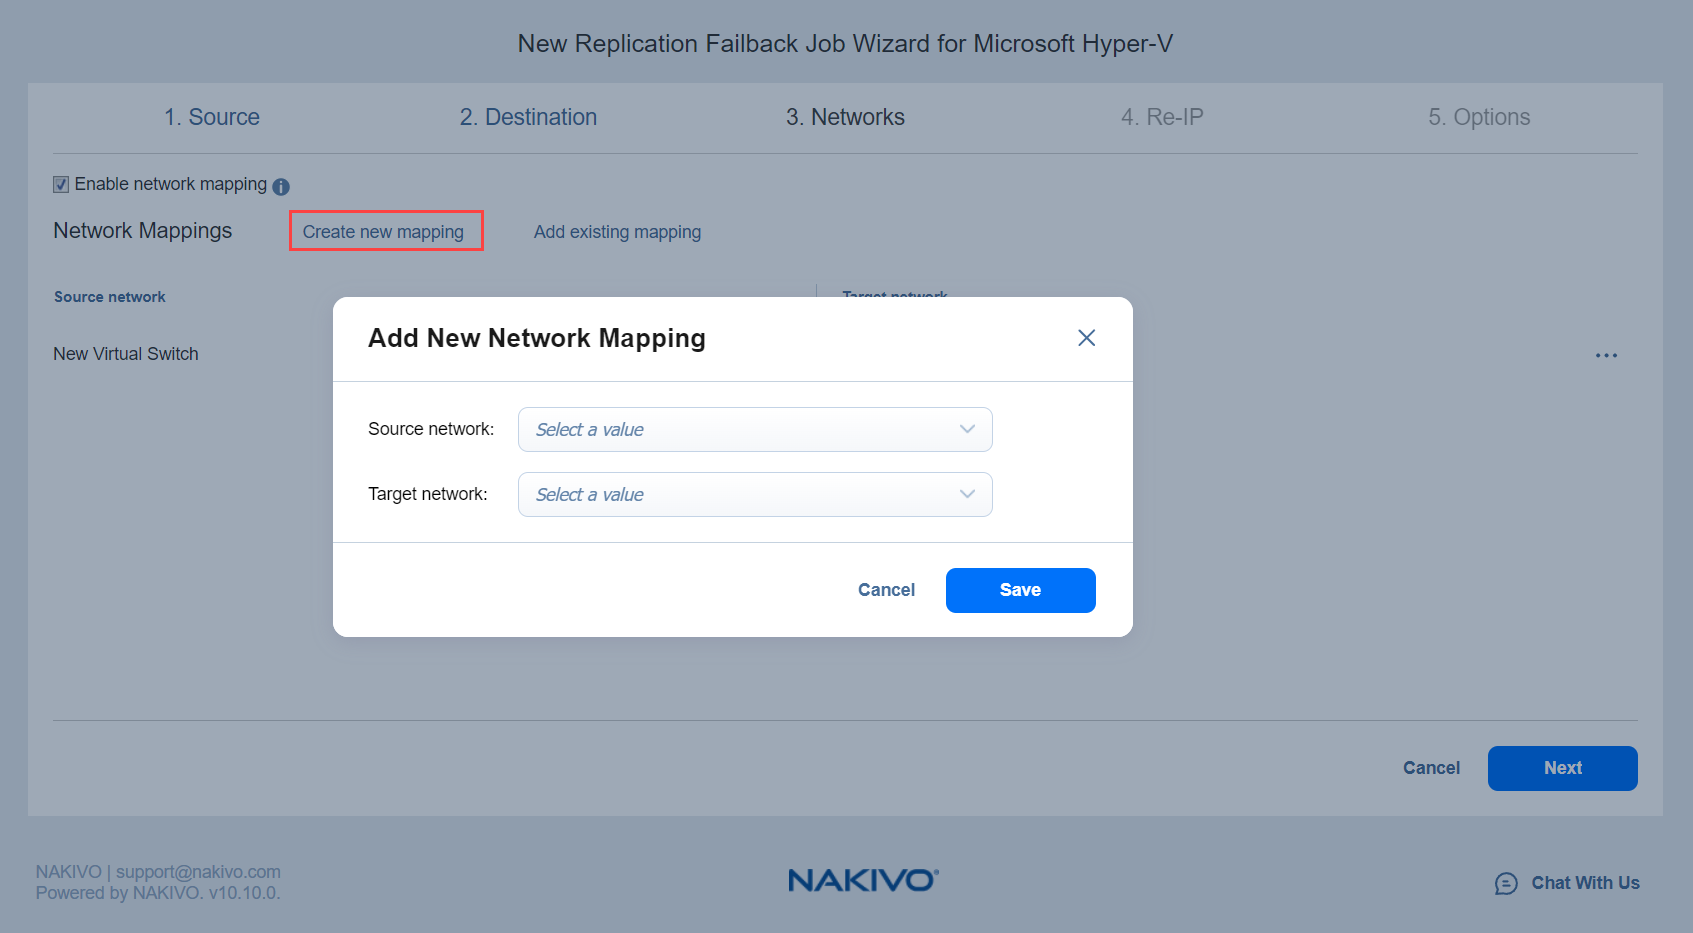
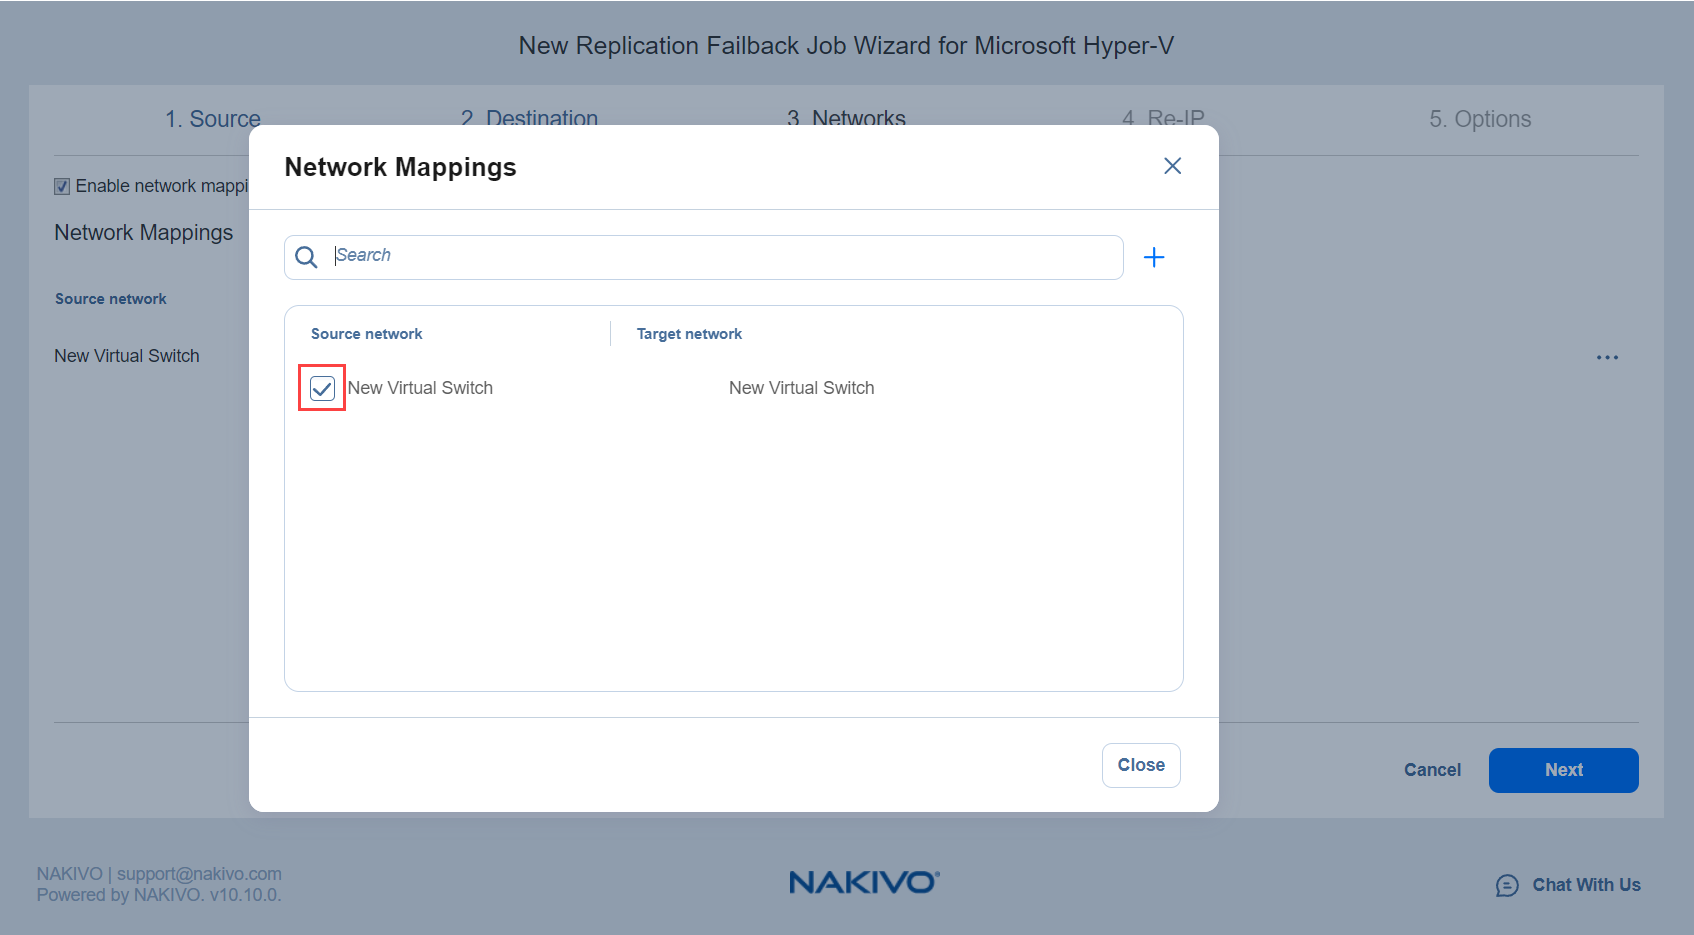
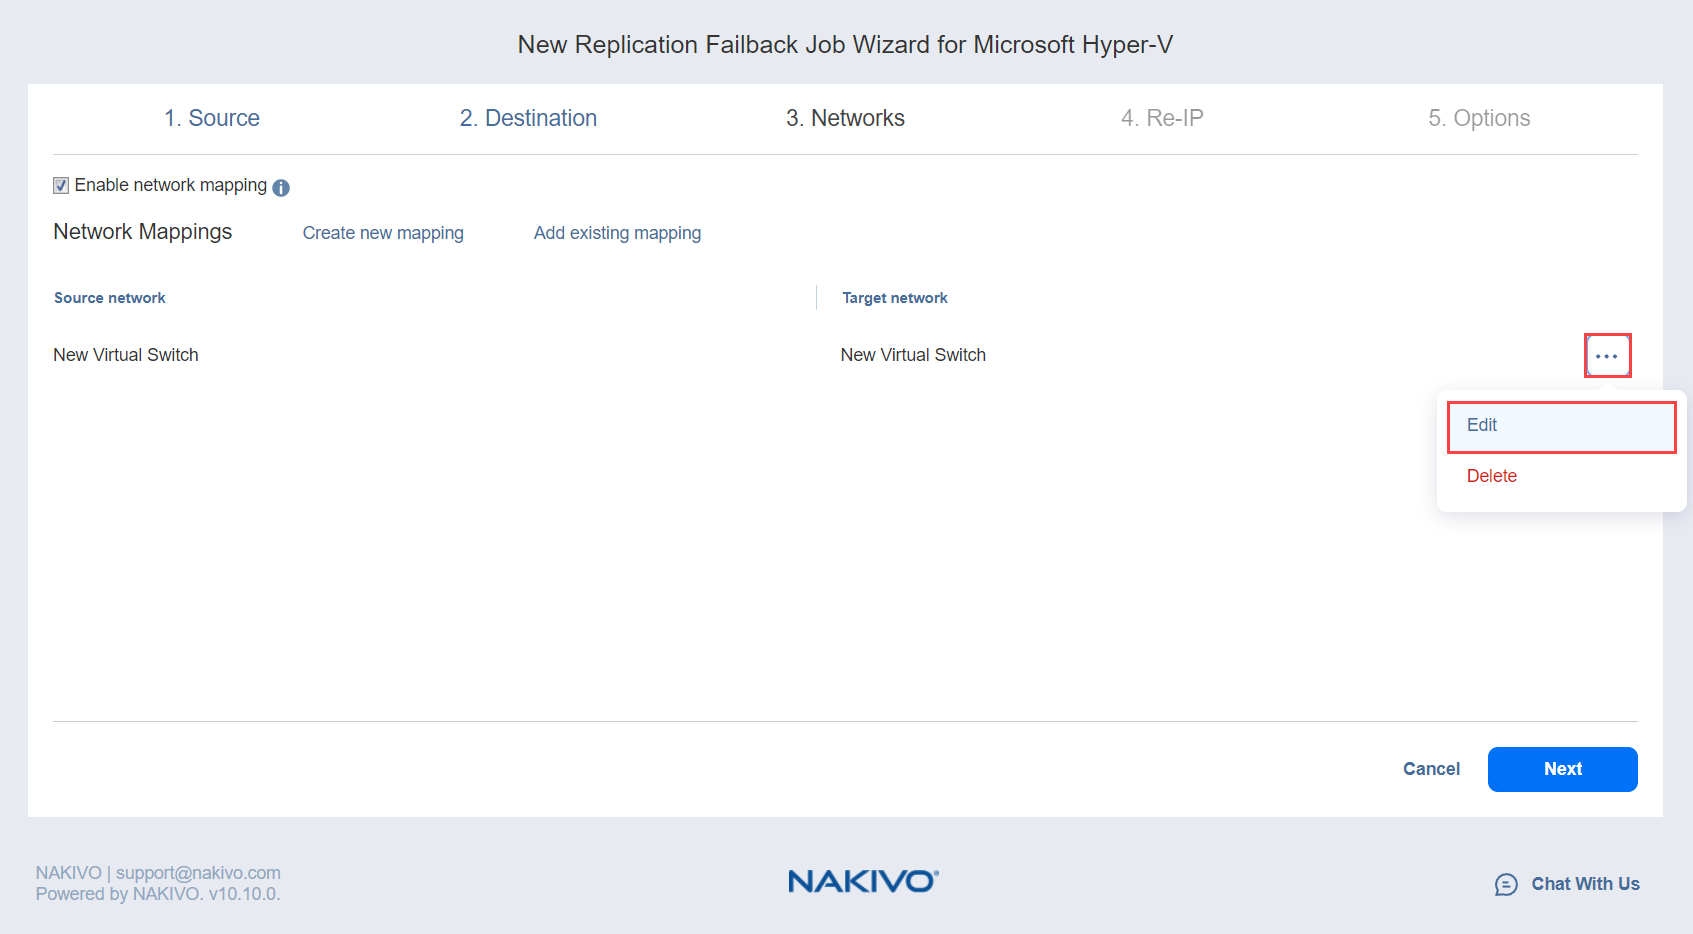
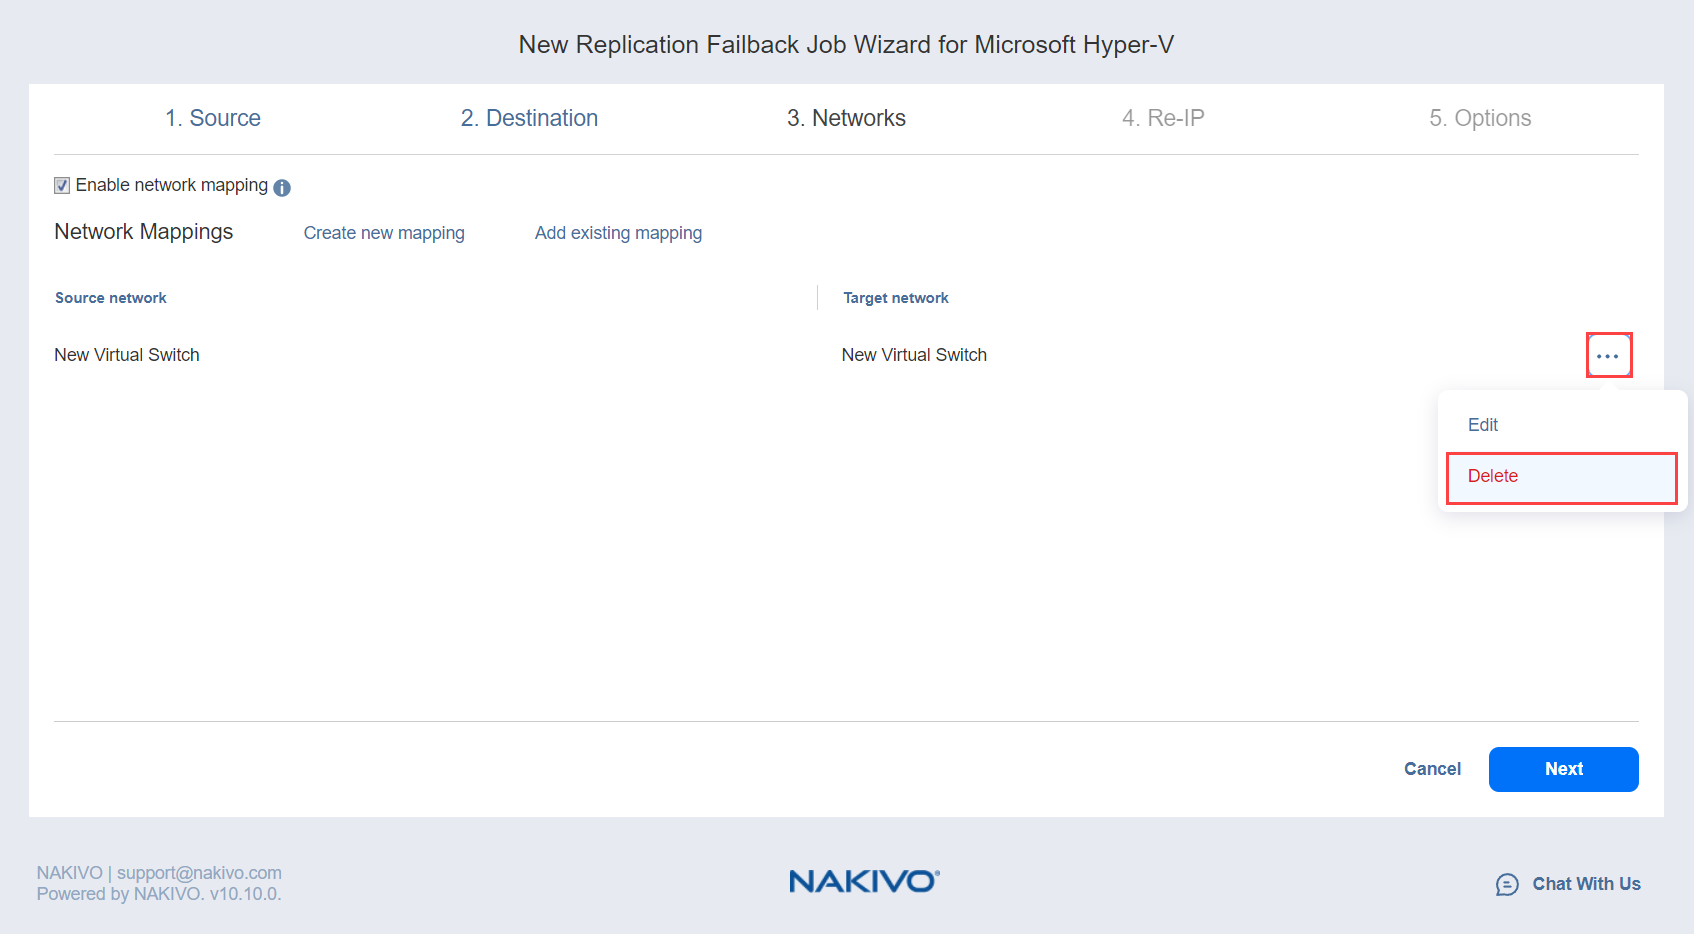
The Network Mappings section opens. You have the following options:
-
Create a new network mapping:
-
Add an existing network mapping:
-
Edit an existing network mapping:
-
Delete an existing mapping:
-
To leave the list of existing network mappings intact, go to the next page of the wizard.
-
-
Click Next to go to the next page of the wizard.


