Failover Job Wizard for Microsoft Hyper-V: Re-IP
When the IP addressing scheme for the target replica differs from the IP addressing scheme for the Hyper-V source VMs, your failover job needs to have relations between your source VMs addresses and target replica VMs addresses so that the job is performed successfully. Such relations are called Re-IP rules.
Warning
Hyper-V Integration Services must be running on source VMs to enable successful re-IP for your failover job.
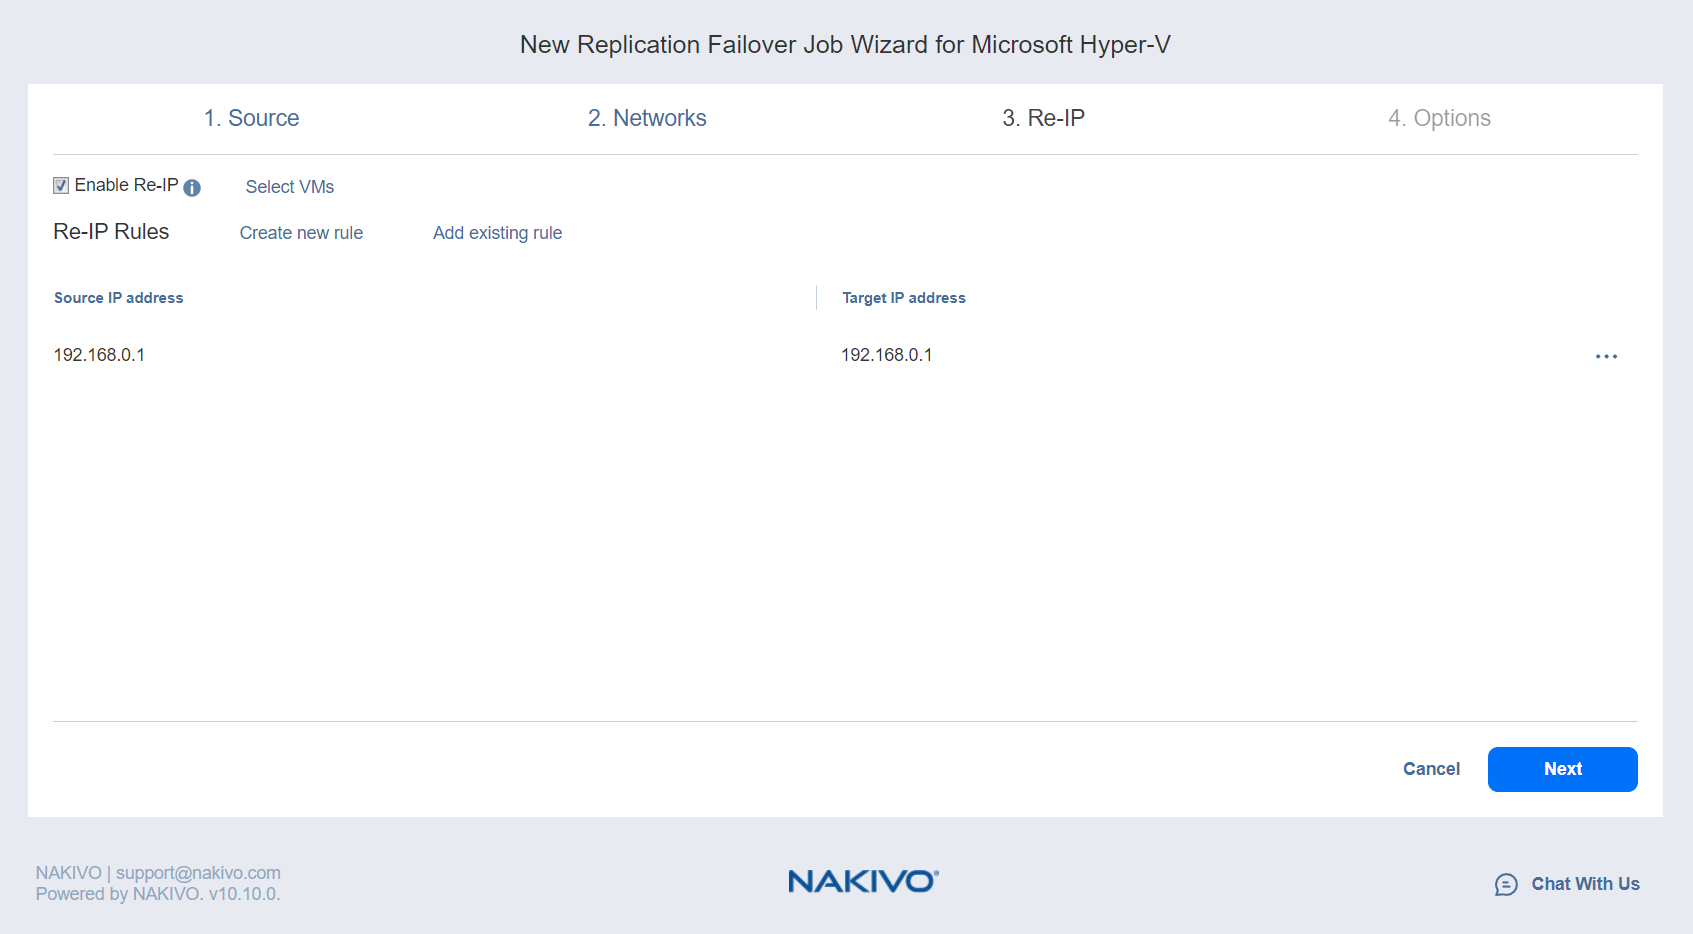
To map a source VM IP address to a specific target IP address, do the following on the Re-IP page of the wizard:
-
Select Enable Re-IP.
-
The Re-IP Rules section opens. Click the Select VMs link.
-
The Re-IP dialog box opens. In the list of your source VMs, select at least one and close the dialog box.
-
The following options are available:
-
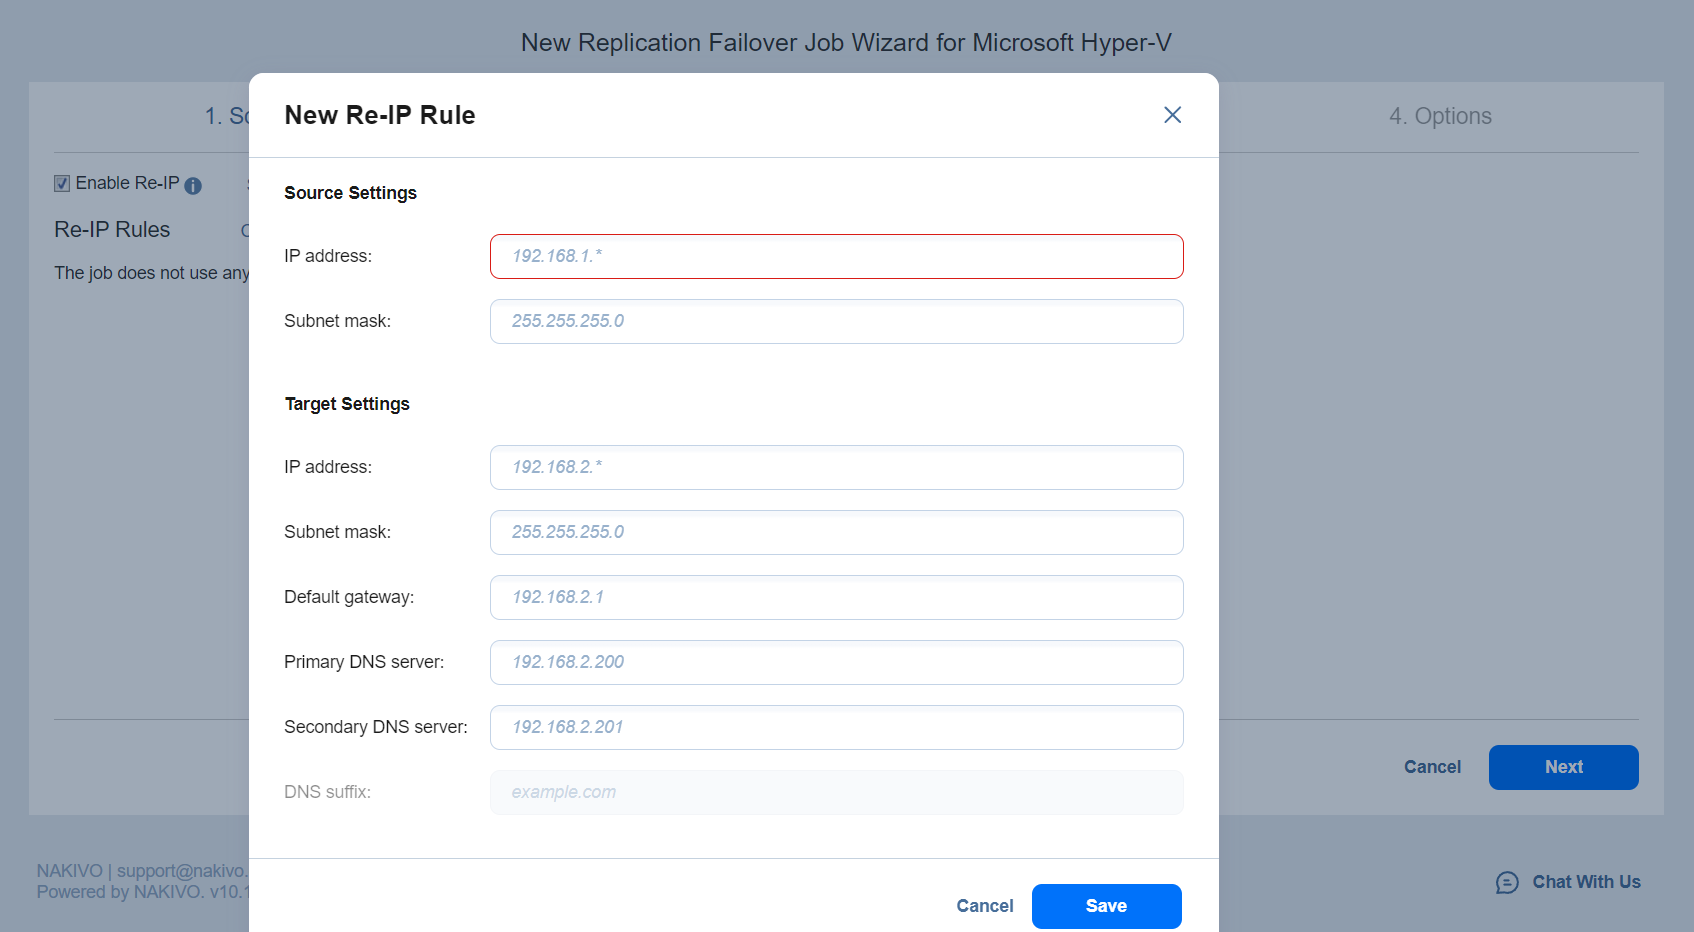
Create a new rule:
-
Click Create new rule.
-
The New Re-IP Rule dialog box opens. Enter source and target settings for the re-IP rule and click Save.

Note
You can use wildcard characters for IP addresses. For example, if you enter192.168.1.* -> 10.30.30.*for the re-IP rule, a source VM IP address such as192.168.1.50will be changed to the10.30.30.50IP address for your failover job. If several re-IP rules are applicable to your source VM, the product will define the most suitable rule and apply it to the source VM IP address.
-
-
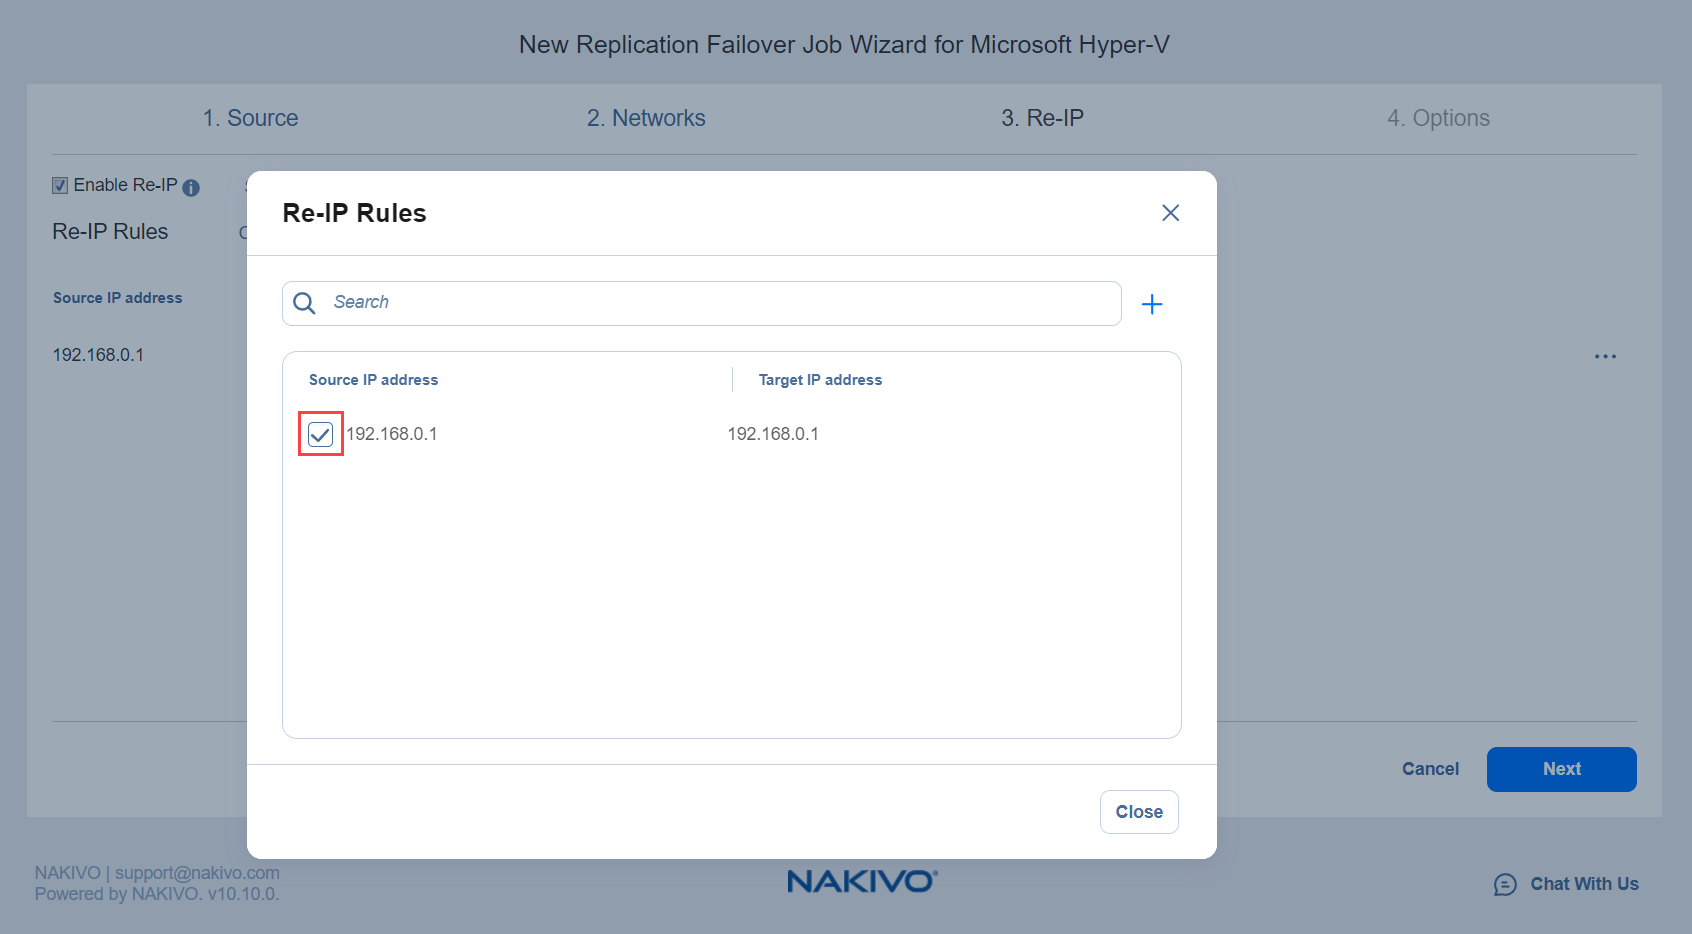
Add an existing rule:
-
Click Add existing rule.
-
The Re-IP Rules dialog box opens. Choose an appropriate re-IP rule and close the dialog box.

-
Edit an existing re-IP rule:
-
Hover over the required item in the Re-IP Rules list and click the Edit button to the right of the item.
-
The Edit Re-IP Rule dialog box opens. Edit the required properties of the re-IP rule and click Save.
-
-
Delete an existing rule: Hover over the required item in the Re-IP Rules list and click the X icon to the right of the item.
To leave the list of existing re-IP rules intact, go to the next page of the wizard.
-
-
-
Click Next to go to the next page of the wizard.