File Recovery Wizard: Recovery Server
In this page of the wizard, choose one of the following recovery methods:
- Recovering Files to Server
- Downloading Files to Browser or Sending Files via Email
- Recovering Files to File Share
Recovering Files to Server
Please do the following to recover files to a server:
-
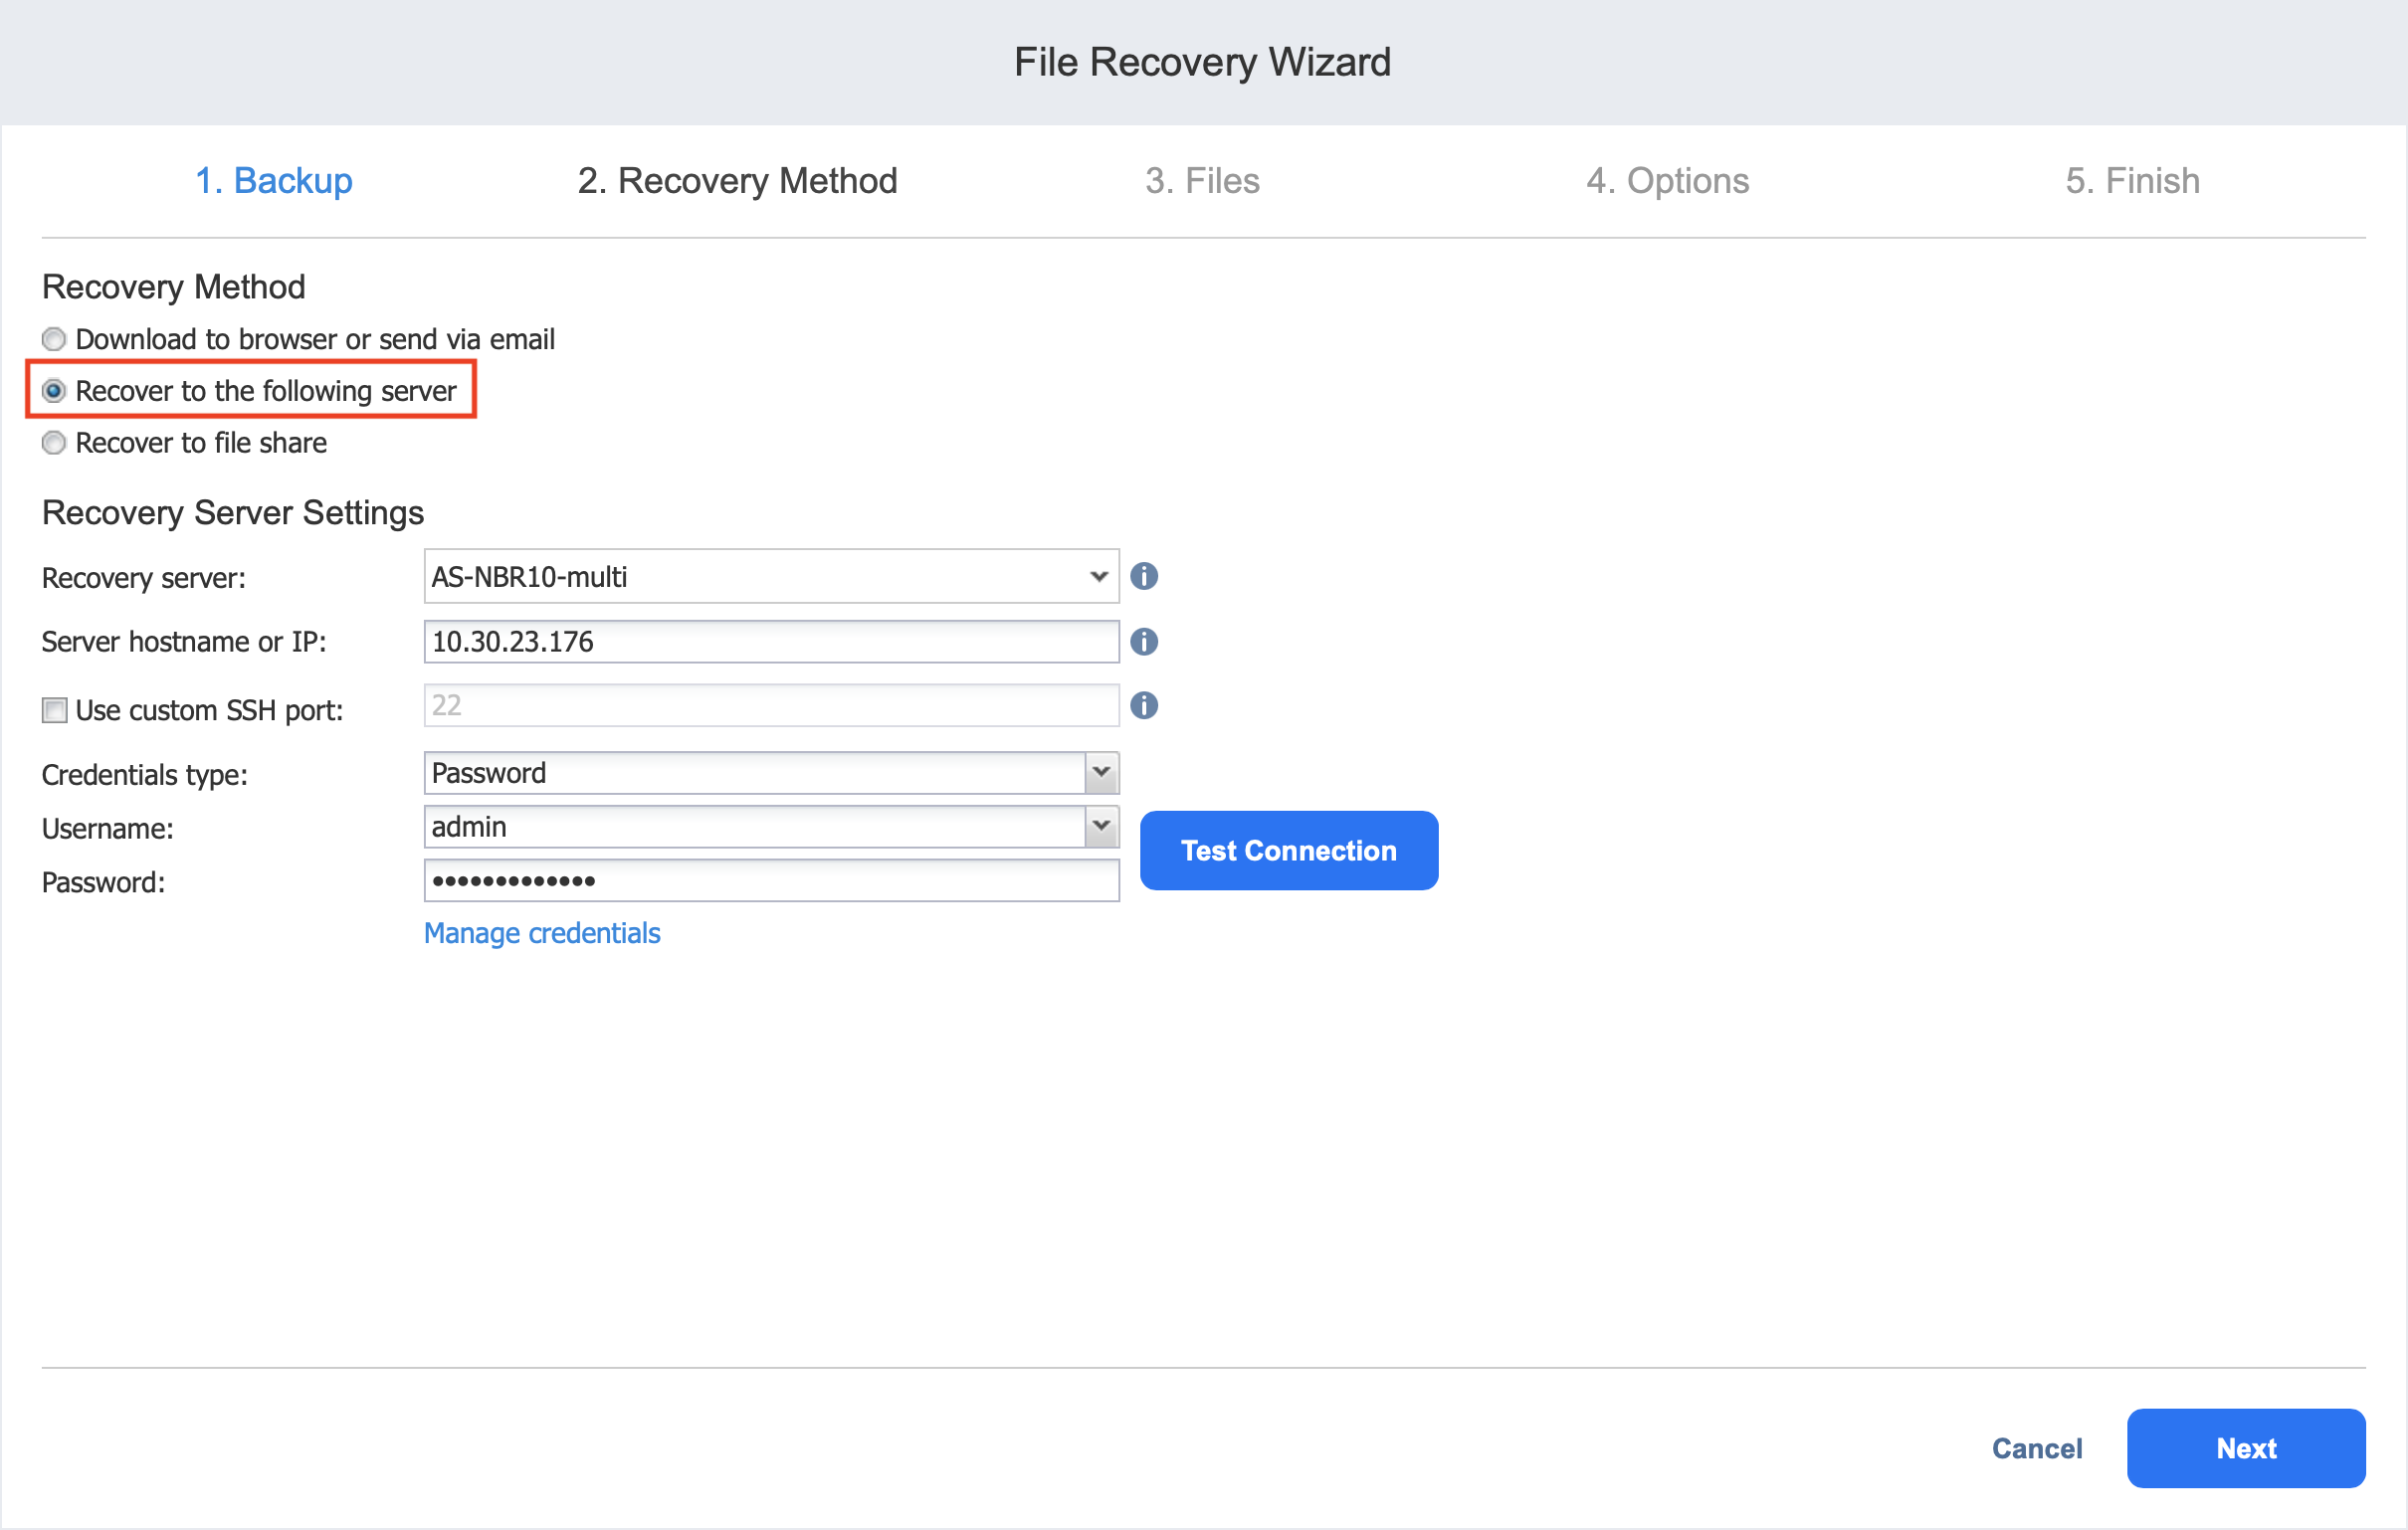
In the Recovery Method section, choose Recover to the following server.
-
The Recovery Server Settings section opens. Set the following options:
-
Recovery server: Choose the target server from the drop-down list.
Notes
-
NAKIVO Backup & Replication tries to auto-detect the IP address automatically.
-
File recovery to the original location is executed via a system account.
-
-
Server IP address: Enter the IP address of the recovery server if it is not detected by the application based on the recovery server name.
-
Use custom SSH port: If necessary, enter an SSH port to be used for connecting to the recovery server. The default value is
22. - Credentials type: Choose your preferred option and enter your respective credentials:
Password: Enter a username with administrative privileges for the file share entered above and your password.
Private key: Select your private key from the drop-down list.
-
-
Click the Test Connection button to test your credentials for the specified recovery server. If your credentials are correct, a checkmark appears to the right of the button.
-
Click Next.
After NAKIVO Backup & Replication prepares a recovery point, the next page of the wizard opens.
Downloading Files to Browser or Sending Files via Email
To download files to your browser or send them via email, follow the steps below:
-
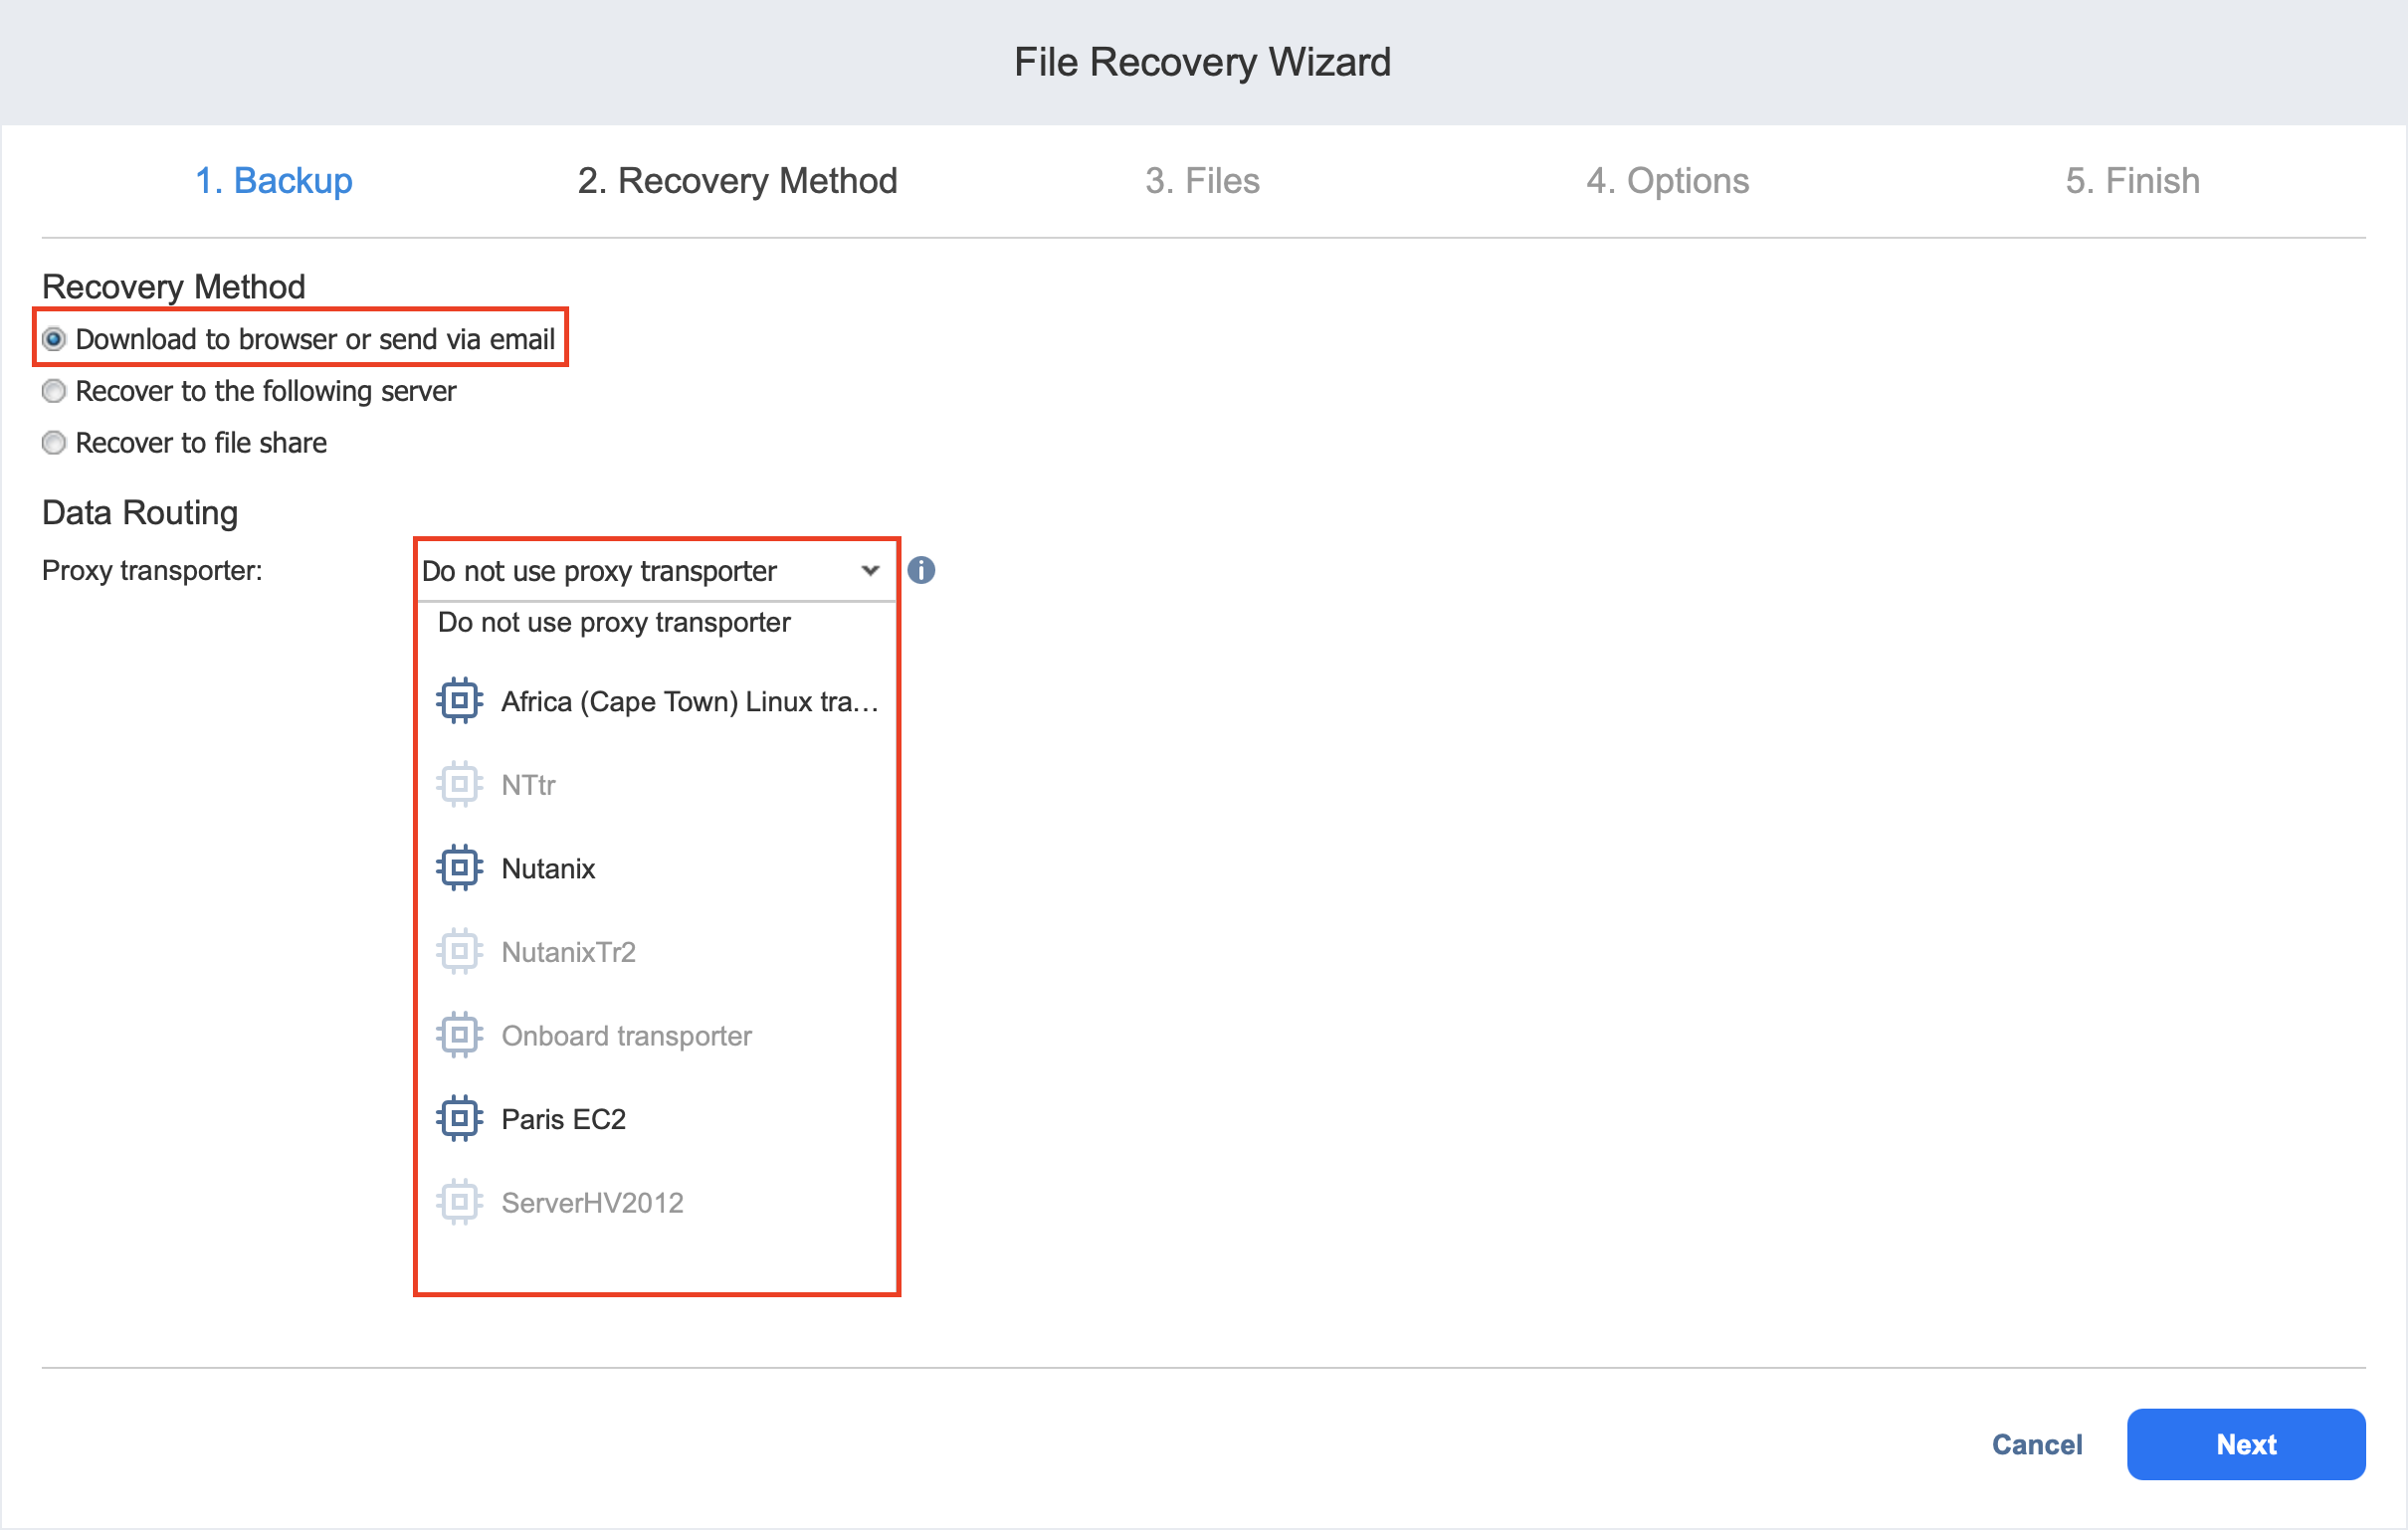
In the Recovery Method section, choose Download to browser or send via email.
-
The Data Routing section opens. In the Proxy transporter list, the Do not use proxy transporter option is chosen by default. You can also choose a proxy transporter from the list of available transporters.
-
Click Next.
Notes
NAKIVO Backup & Replication will use a proxy transporter in the following cases:
The Transporter assigned to the backup repository is missing support for some file systems.
The Transporter assigned to the backup repository is missing iSCSI packages.
NAKIVO Backup & Replication starts preparing a recovery point for the recovery. After the recovery point is prepared successfully, the next page of the wizard opens.
Recovering Files to File Share
To recovery files to a file share, do the following:
-
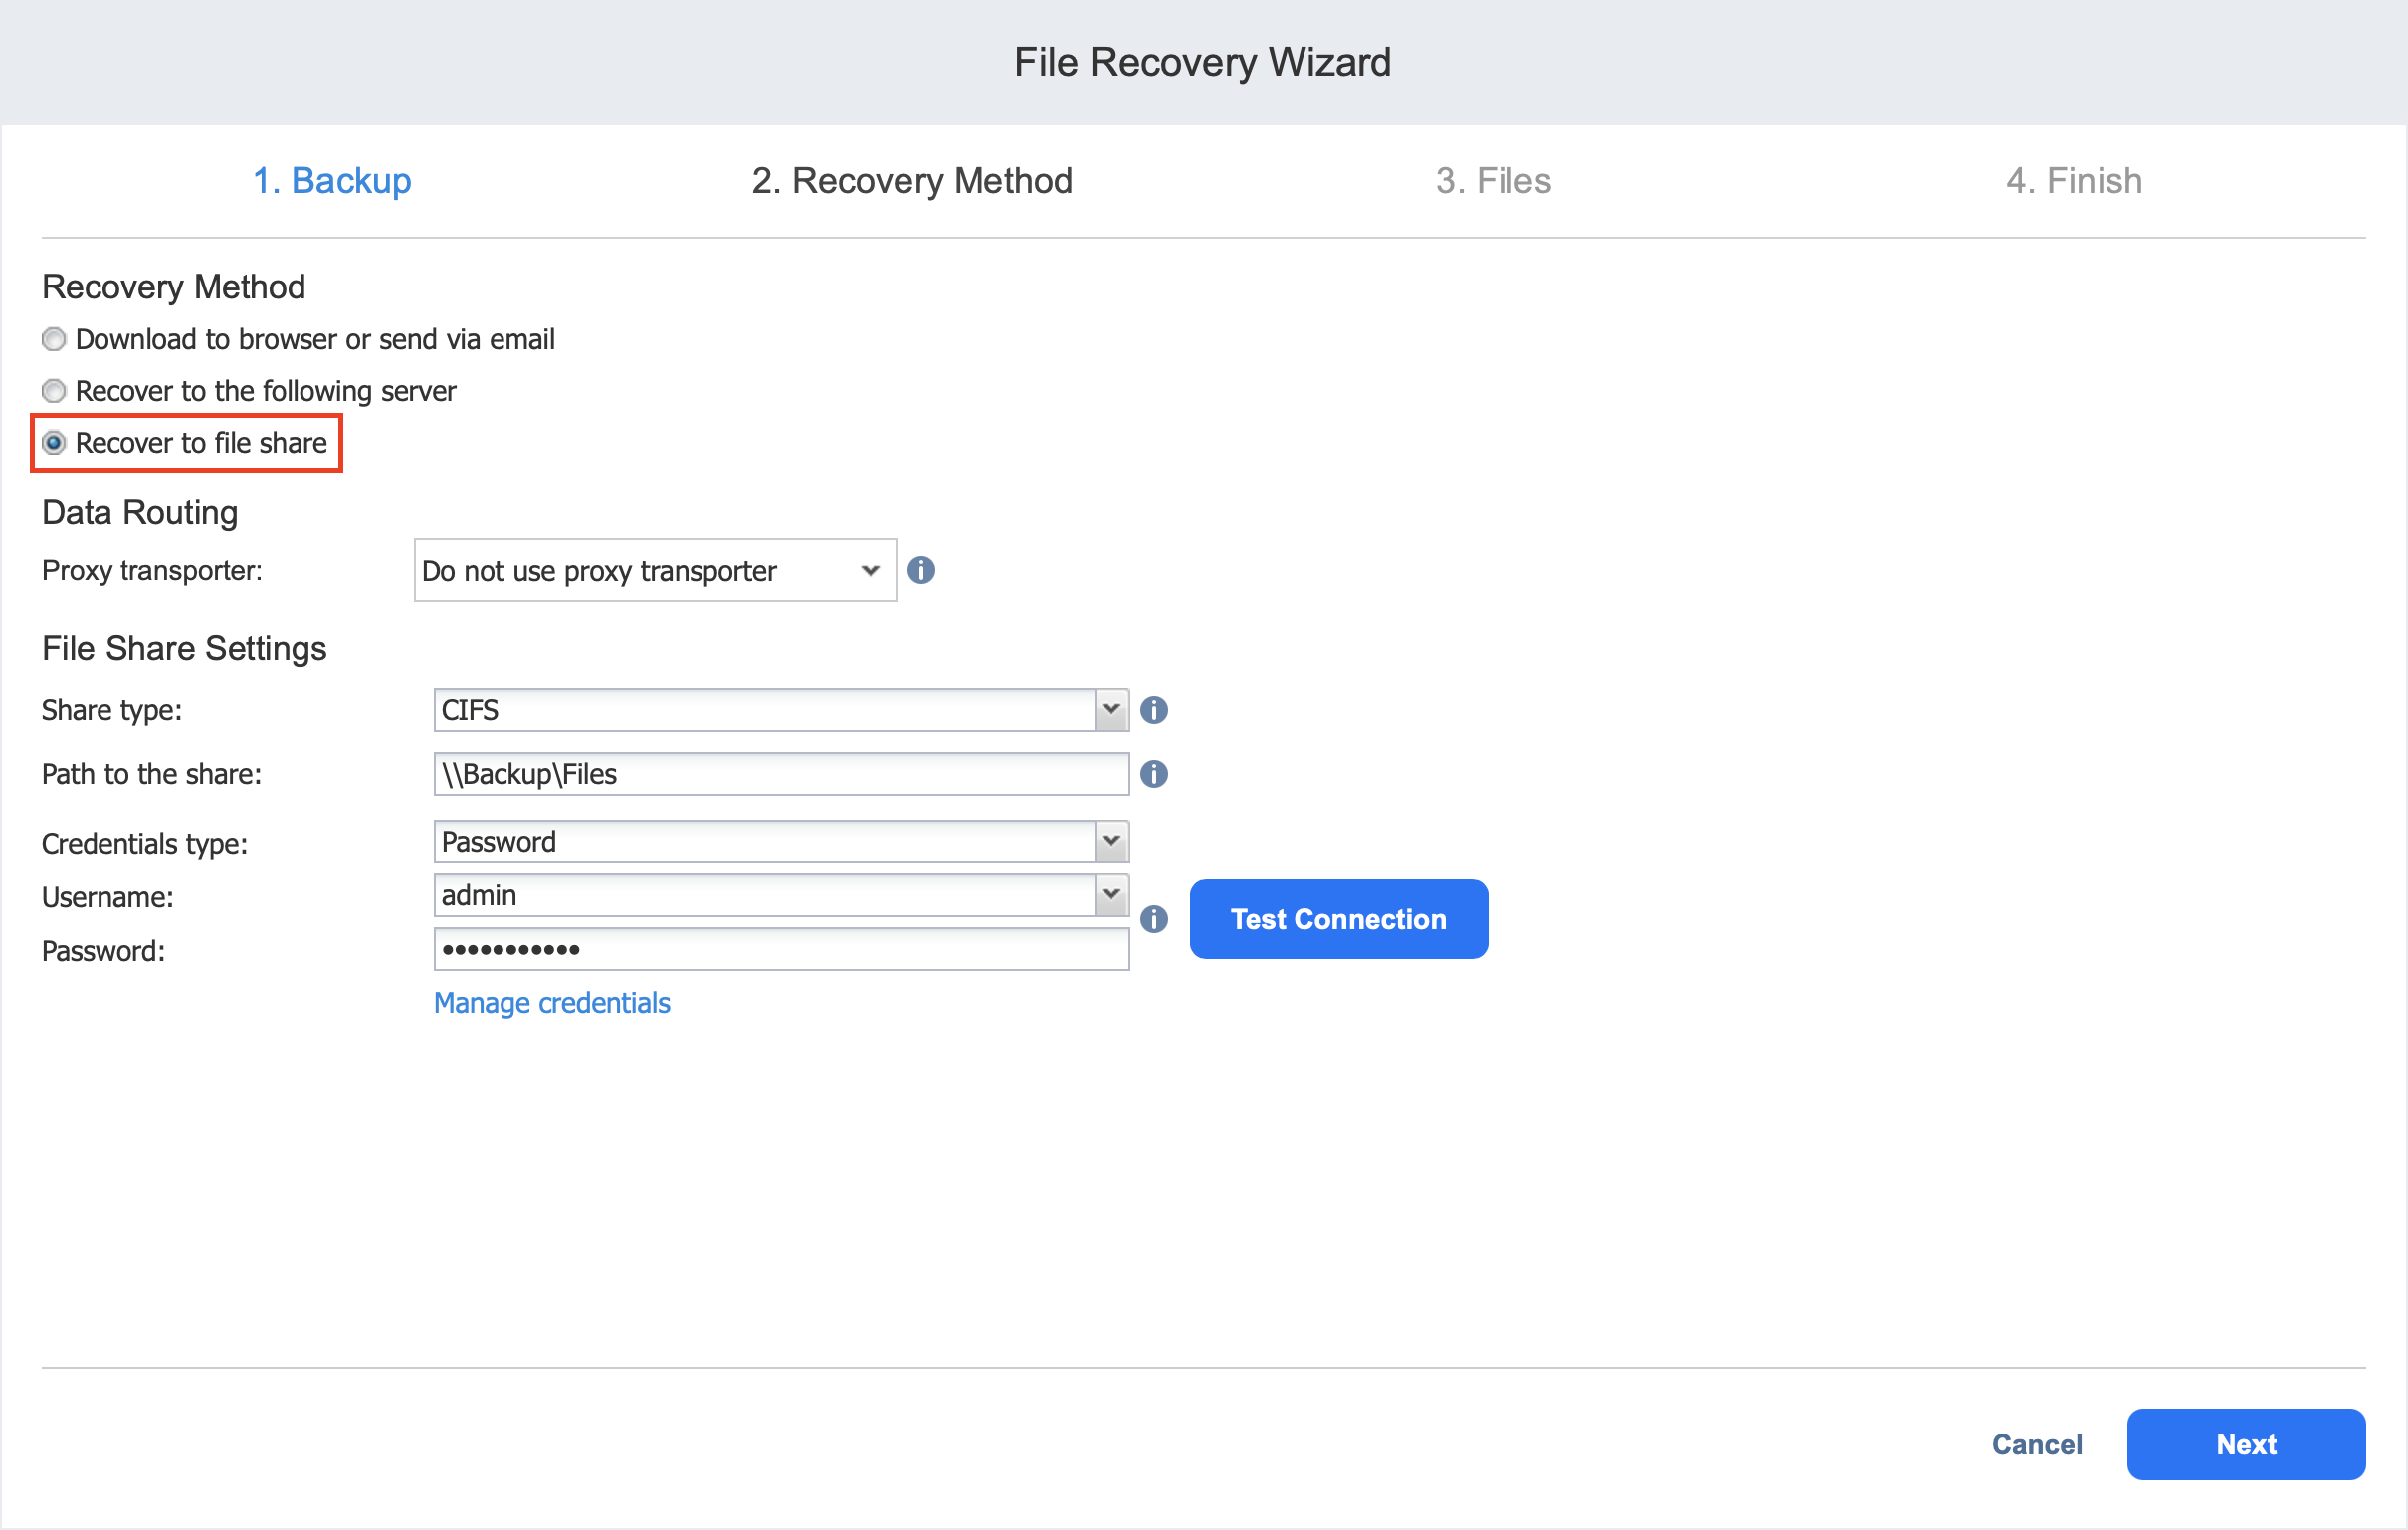
In the Recovery Method section, choose Recover to file share.
-
The Data Routing section opens. In the Proxy transporter list, the Do not use proxy transporter option is chosen by default. You can also choose a proxy transporter from the list of available transporters.
-
In the File Share Settings section, set the following options:
-
Share type: Choose the type of file share.
-
Path to the share: Enter the path to the file share.
-
Credentials type: Choose your preferred option and enter your respective credentials:
-
Password: Enter a username with administrative privileges for the file share entered above and your password.
-
Private key: Enter your private key.
-
-
-
Click the Test Connection button to test your credentials for the specified file share. If your credentials are correct, a checkmark appears to the right of the button.
-
Click Next.
Notes
File-level recovery to CIFS share may fail if network credentials are shared across multiple open CIFS connections. If you encounter issues while testing connection, try adding local host domain to the used credentials (i.e. localhost\Administrator).
In addition, NAKIVO Backup & Replication will use a proxy transporter in the following cases:
The Transporter assigned to the backup repository is missing support for some file systems.
The Transporter assigned to the backup repository is missing iSCSI packages.