Recovery Job Wizard for Physical Machines: Destination
Choose the location for storing the recovered physical machines.
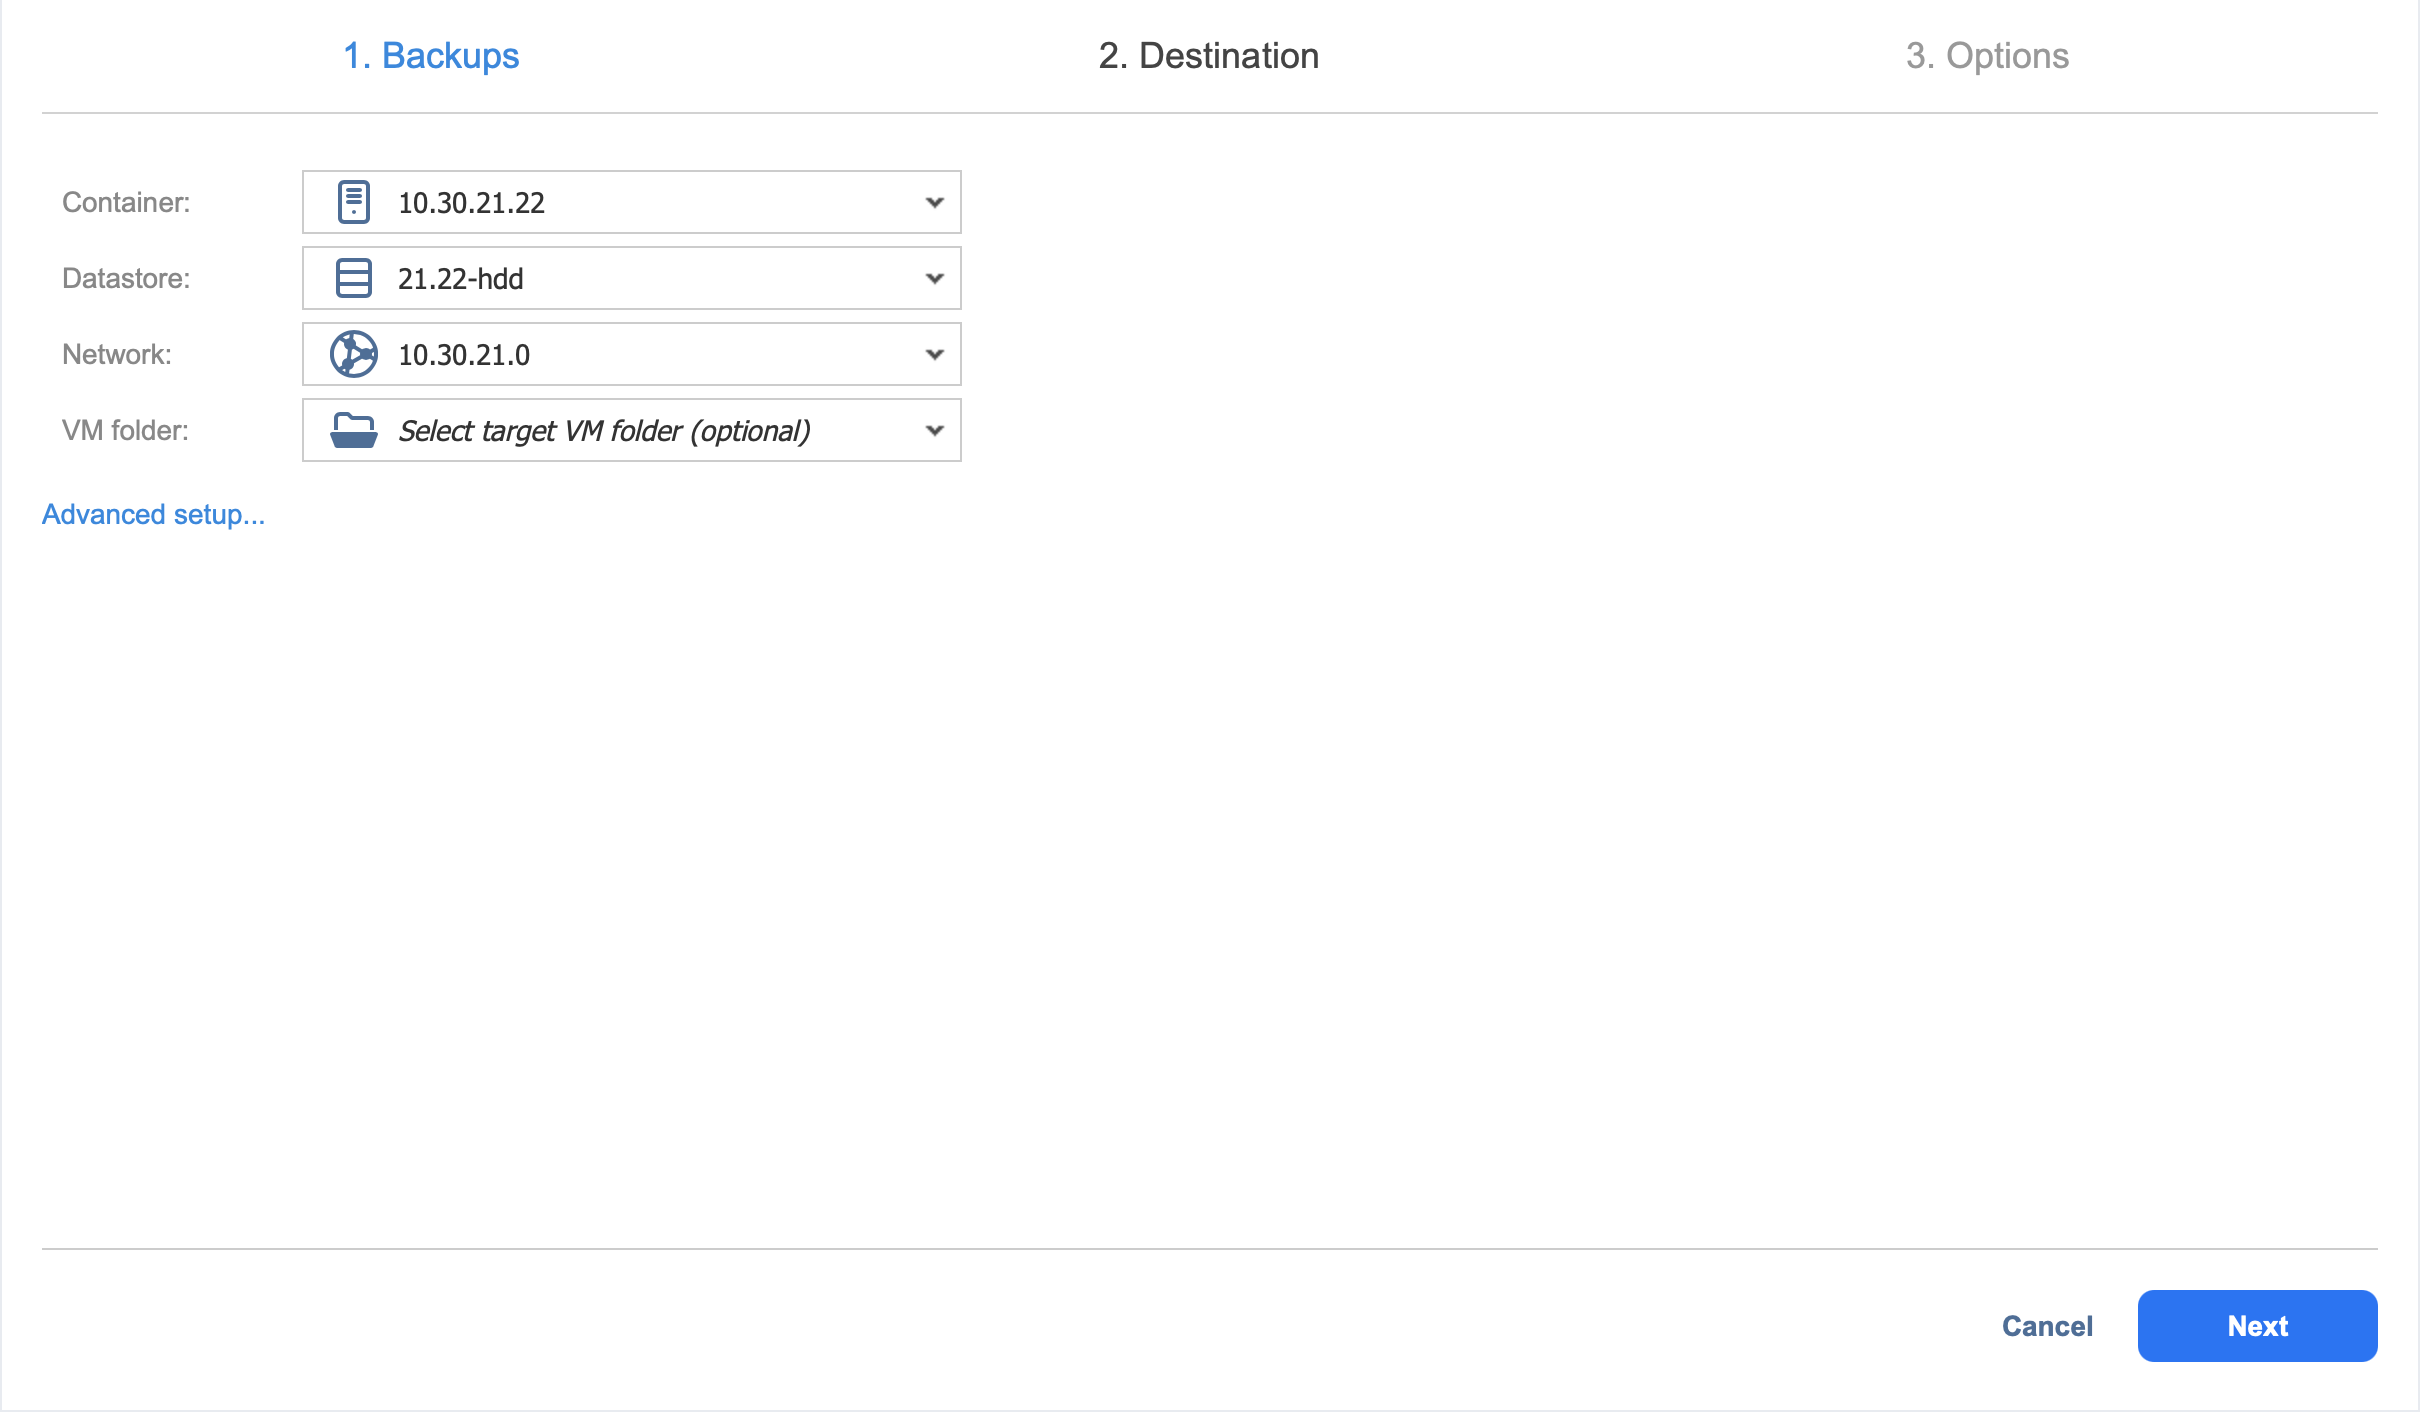
Setting the Same Host, Datastore, and Network for All Recovered Machines
To recover all machines to the same container/folder and datastore, and to connect all recovered machines to the same networks, follow the steps below:
-
If you selected a tape backup on the Backups page, select New VM(s) in the Recover to drop-down list. Otherwise, proceed directly to step 2.
-
Choose a cluster, host, or resource pool from the Container drop-down list.
-
Choose a datastore from the Datastore drop-down list.
-
Choose a network from the Network drop-down list.
-
Optionally, you can choose a folder from the VM folder drop-down list if there is one in the container.
Setting Backup Repository as Destination
If you selected a tape backup on the Backups page, you have the additional option of recovering to an existing Backup Repository. To do so, select Backup Repository from the Recover to drop-down menu and choose the appropriate repository from the Repository drop-down menu below.
Notes
You cannot perform recovery from recovery points located in an inaccessible federated repository member or those that depend on inaccessible recovery points.
You cannot select a federated repository as a destination for recovery from tape media.
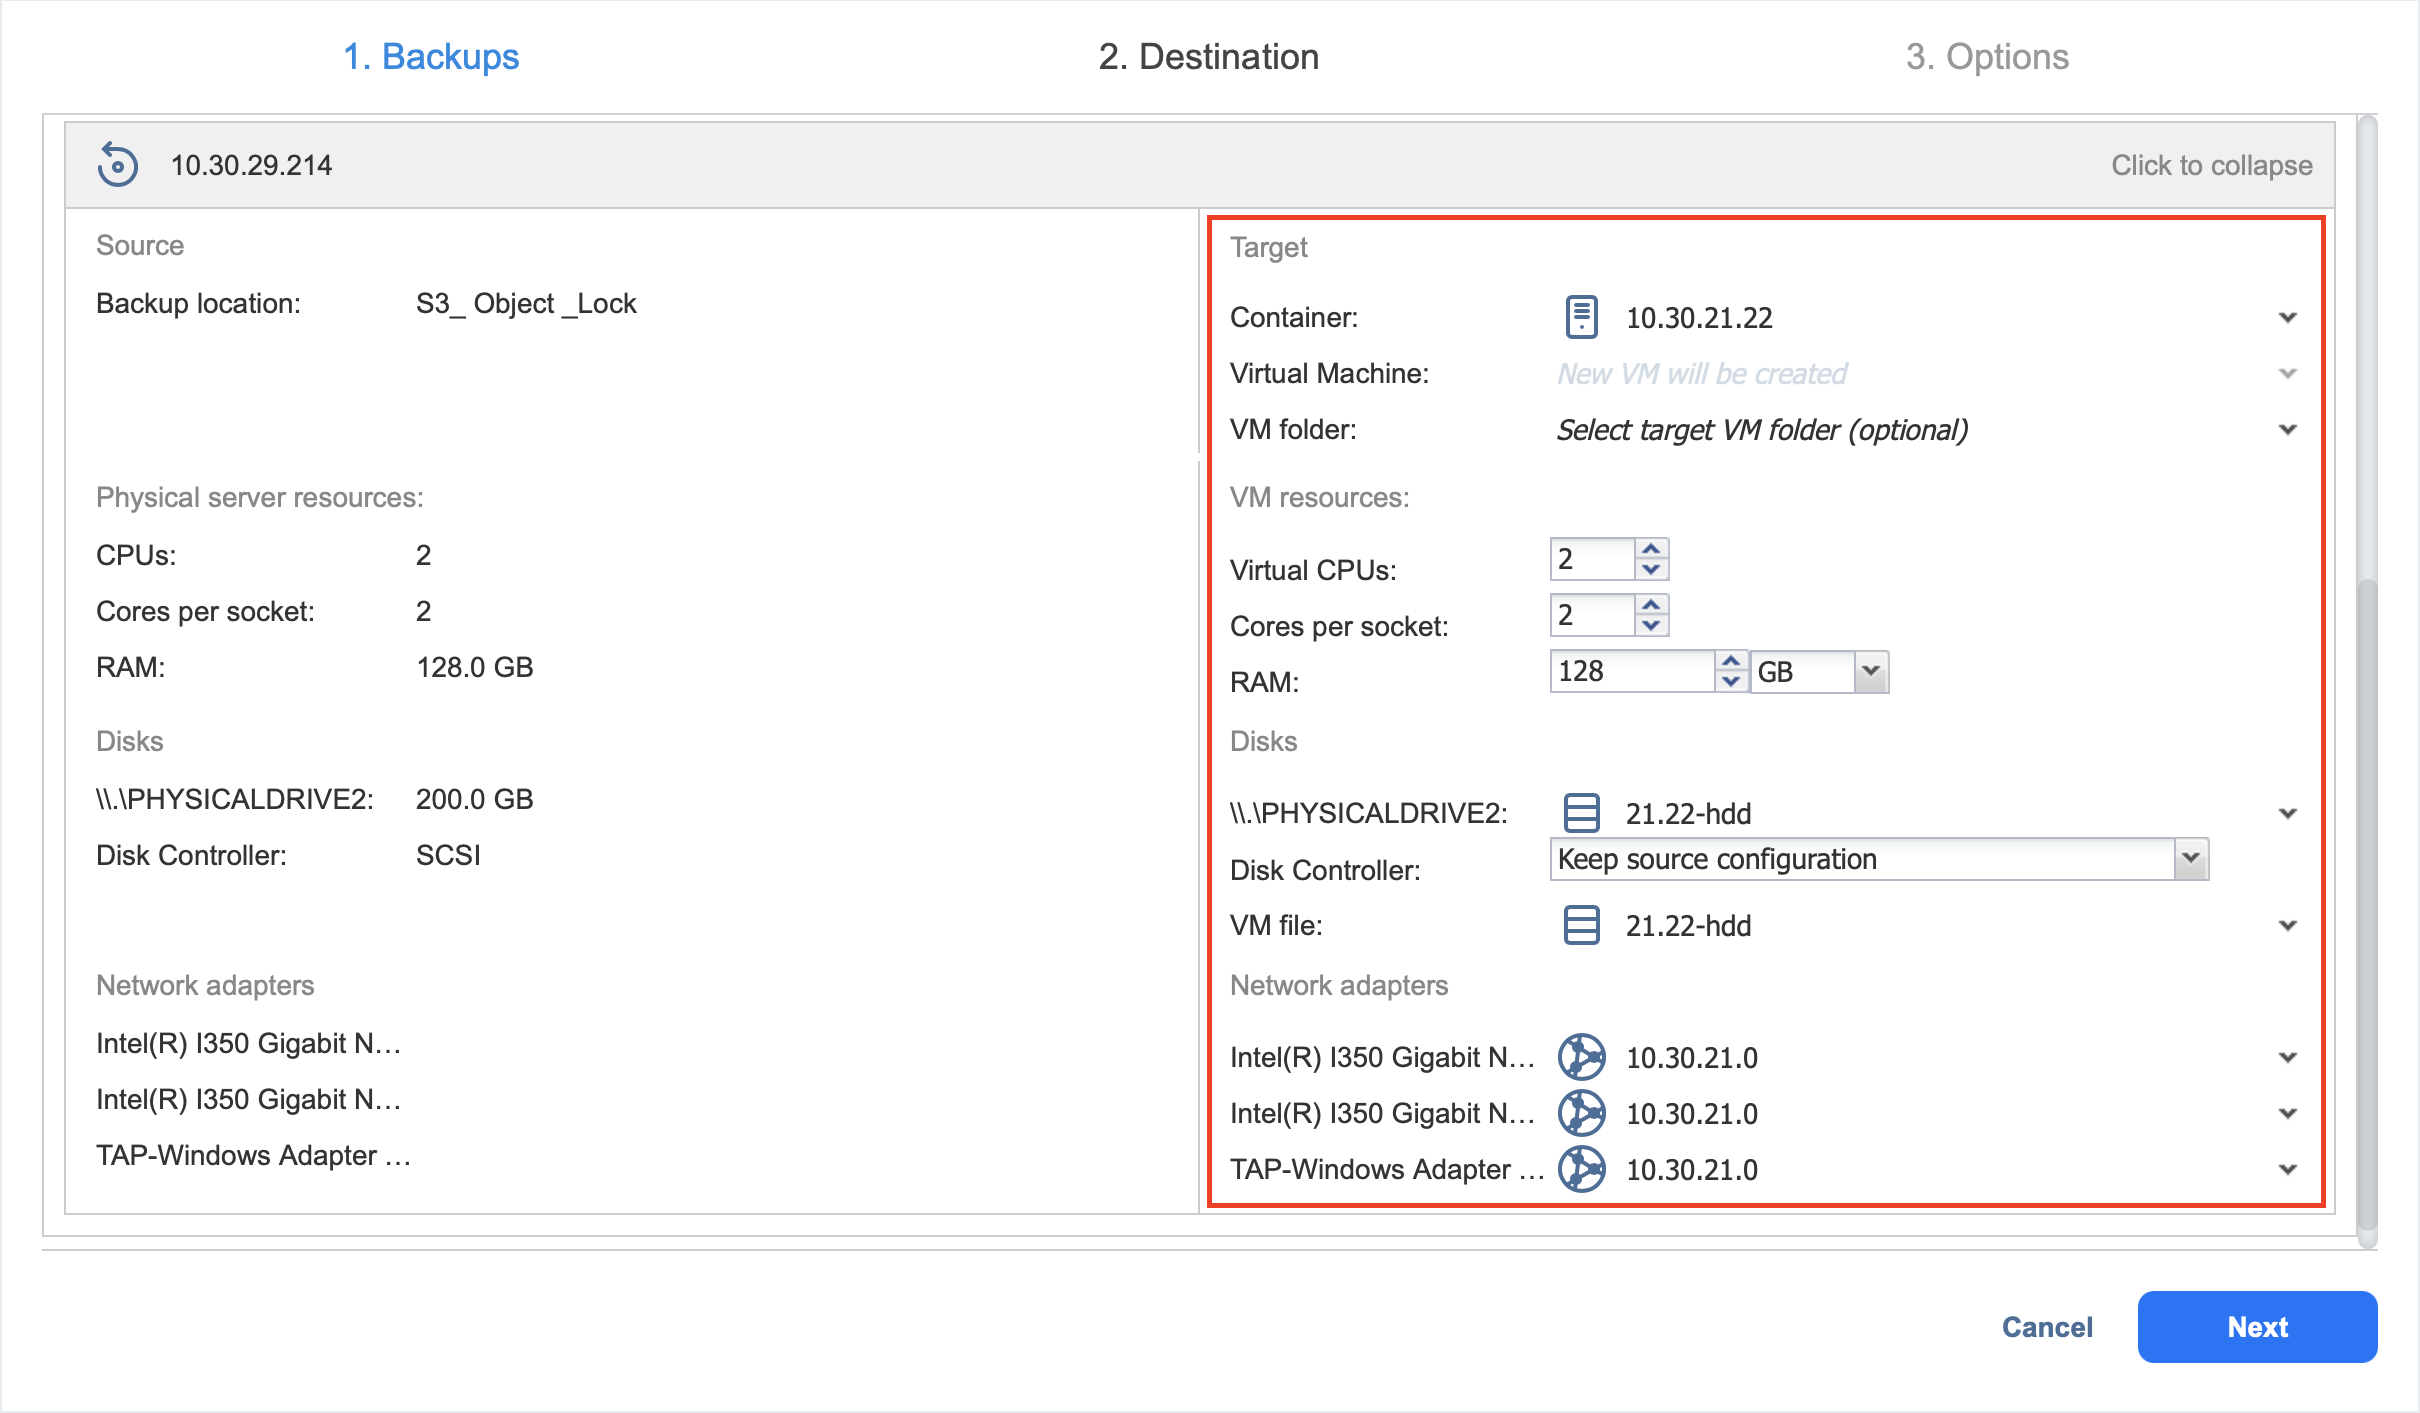
Setting Different Options for Each Recovered Machine
To specify different options for each recovered physical machine, follow the steps below:
-
Click Advanced setup.
-
Click on the backup to expand its recovery options.
-
If you selected a tape backup on the Backups page, select New VM(s) or Backup Repository in the Recover to drop-down list. Otherwise, proceed to the next step.
-
Choose a target location by selecting the necessary container, virtual machine, and folder.
-
Configure VM resources:
-
Virtual CPU
-
Cores per socket
-
RAM
By default, the displayed VM resources correspond to the source physical machine configuration.Important
If the default CPU configuration has been changed, the target VM might become unstable. In addition, the modified configuration might not comply with the licensing policy of the Guest OS.
-
-
Select a disk from the Disks drop-down list.
-
Keep a source disk controller configuration by selecting Keep source configuration from the Disk Controller drop-down list (recommended option) or select one of these types of disk controllers:
-
SCSI LSI Logic SAS
-
SCSI LSI Logic Parallel
-
SCSI VMware Paravirtual
-
SCSI BusLogic Parallel
-
IDE
-
SATA
-
NVME
Important
If for the target VM you select a disk controller type that differs from a source machine, the recovery may fail with an error and the emergency mode will be turned on on the recovered machine.
-
-
Select a VM file from the VM file drop-down list.
-
Select network adapters from the Network adapters drop-down list. For each physical network adapter, a virtual network adapter is created. The other available options are:
-
Skip this network adapter
-
Not connect to any virtual network
-
Connect to temporary isolated network
-
-
Click Next to go to the next page of the wizard.