Alert Template Management
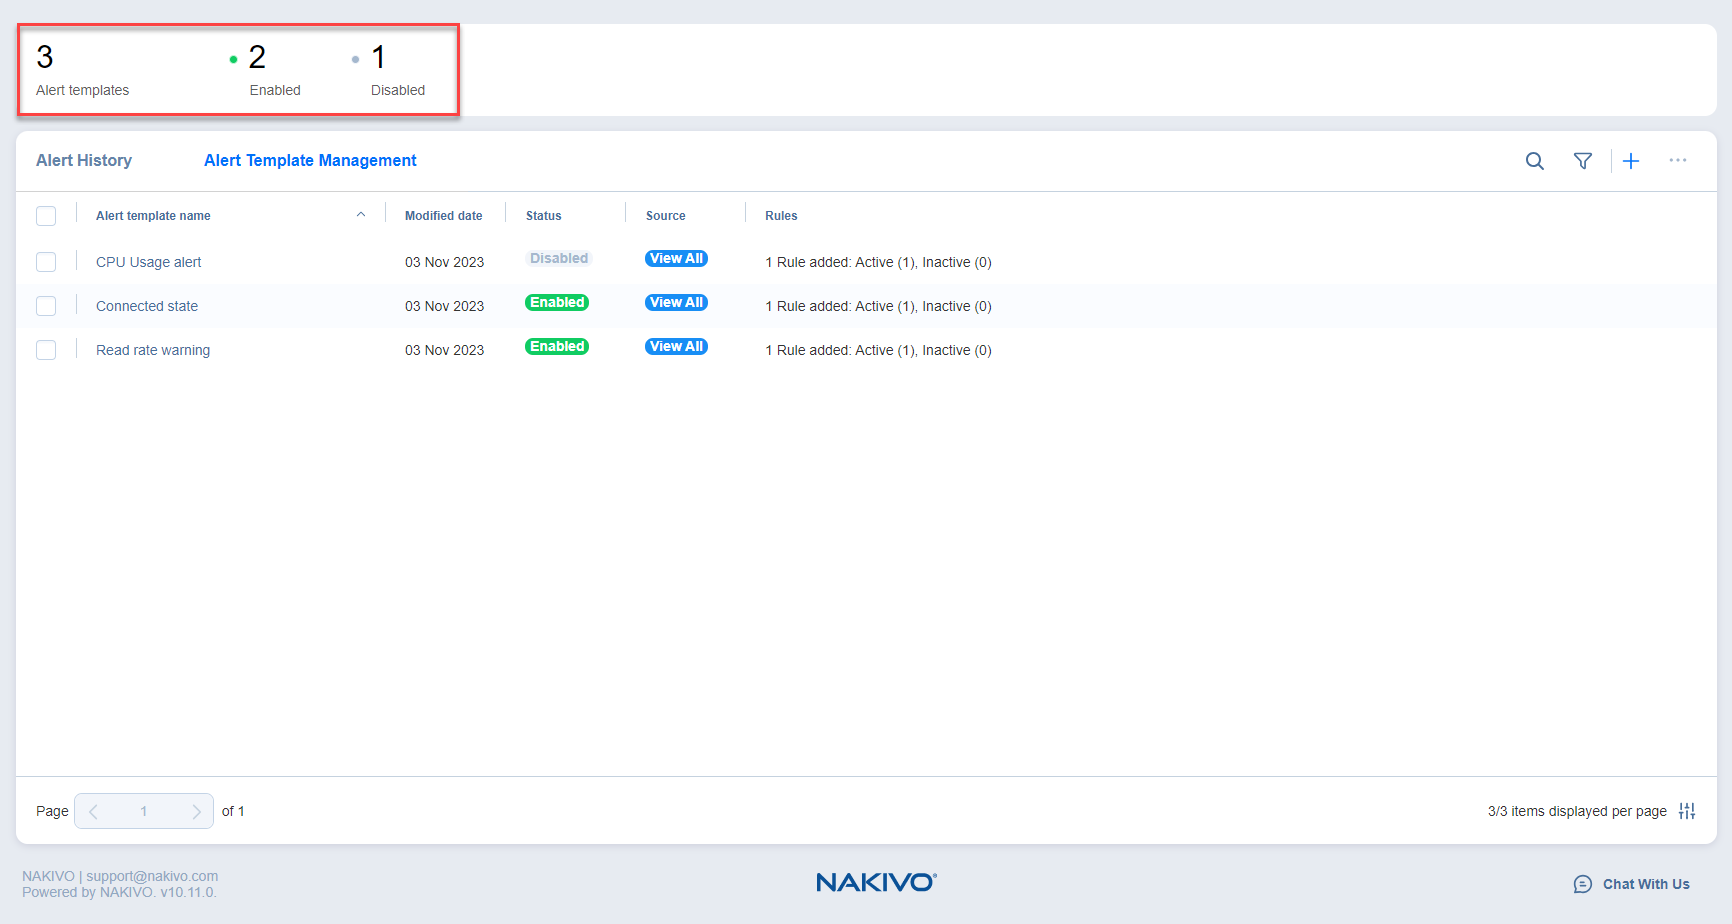
The Alert Template Management tab displays all configured alert templates. Alert templates are composed of specific rules that apply to predefined monitored items. When these rules are met in an enabled alert template, an alert is triggered. Disabled alert templates do not trigger alerts. You can configure custom alert templates for specific metrics and thresholds.
The summary bar displays the total number of alert templates and the number of enabled and disabled templates.
In the Alert Template Management tab, you can do the following:
-
View alert templates: View all enabled and disabled alert templates. You can view details by clicking on an alert template. For details, refer to Viewing Alert Template Details.
-
Search alert templates by entering the partial or full name of the alert.
-
Filter alerts by Status (enabled/disabled), Severity (Critical, Error, Caution), or Modified Date.
-
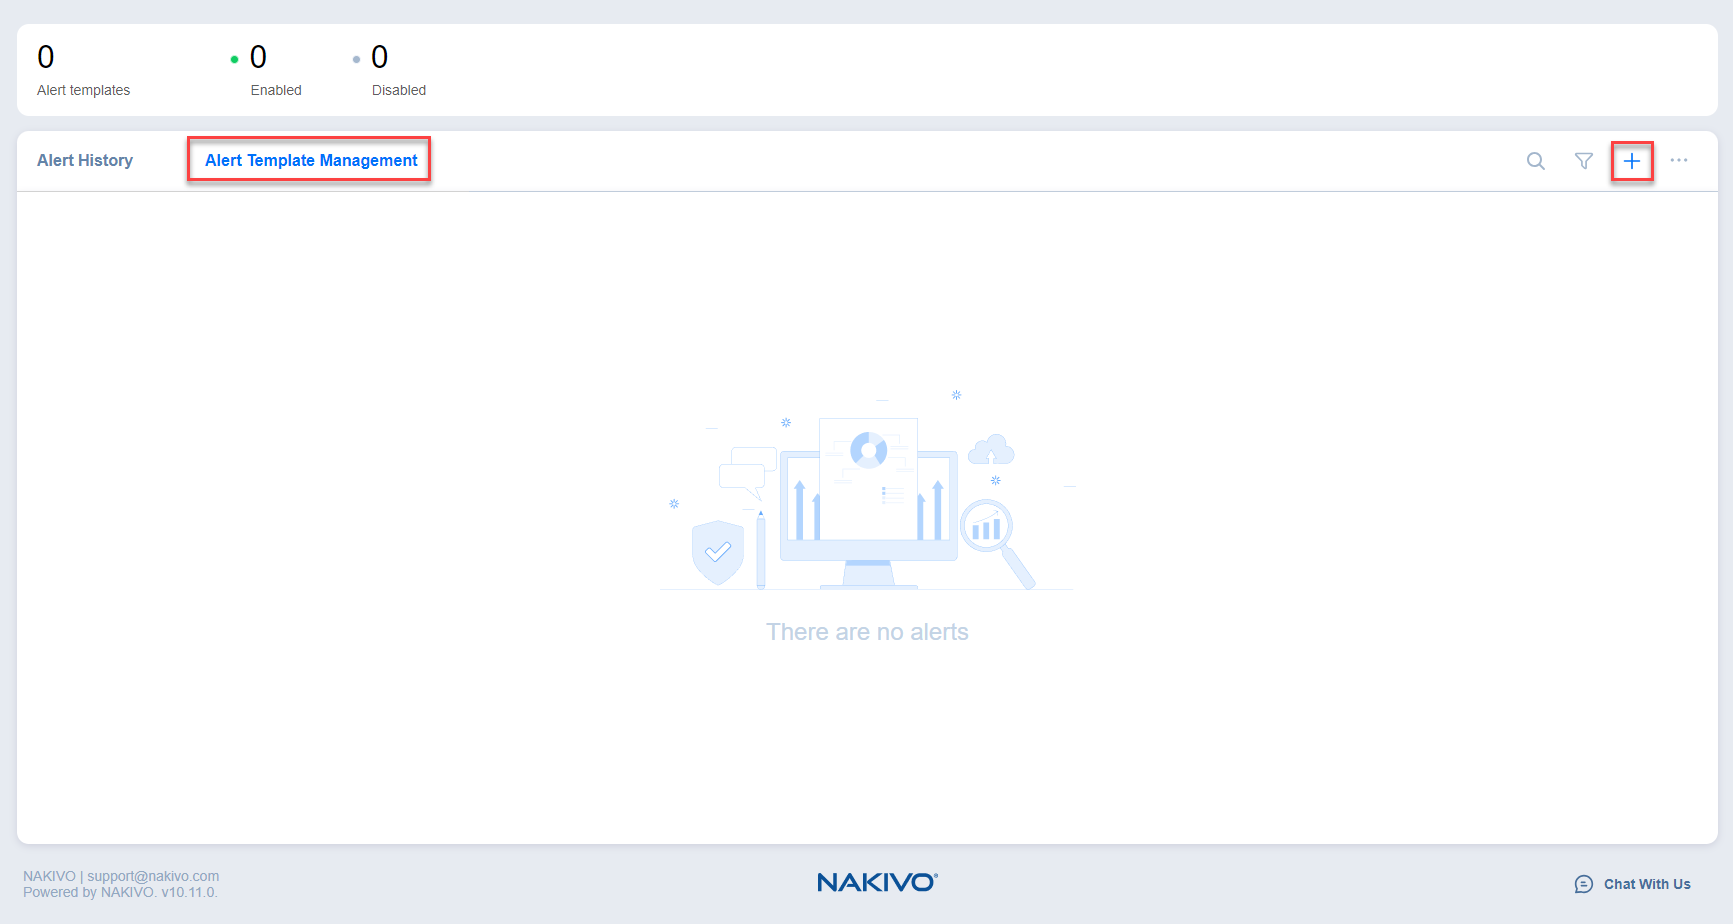
Add a new alert template by clicking the + (add) button and completing the Create New Alert Template wizard. For details, refer to Creating Alert Templates.
-
Edit or delete the alert template by clicking the ... (ellipsis) button.
The Alert Template Management table displays all configured alert templates with the following columns:
-
Alert template name: The name of the alert template.
-
Modified date: The date when the alert template was last modified.
-
Status: The status of the alert template. Click the Enabled button to change the status to Disabled and vice versa.
-
Severity: The severity of the alert when triggered. The alert severity can be Caution, Error, or Critical.
-
Source: Click View All to open the All Sources dialog window that displays a list of the VMs, datastores, and hosts selected for the alert template.
-
Rules: Total number of active and inactive rules in the alert template.
To sort the table by Name, Modified date, Status, or Severity, click the head of the column you want to sort by.
Note
The Alert Template Management table can display up to 100 records for configured alert templates. When this limit is reached, the + (add) button will be disabled.
Configuring Table Columns
You can show/hide columns or modify the number of items per page in the Alert Template Management table. In the lower right corner, click the controls icon. In the dialog window that opens, select/deselect checkboxes and click Apply. The following options are available:
-
Alert template name
-
Status
-
Source
-
Modified date
-
Severity
-
Rules
Note
You cannot modify the Alert template name column in this dialog window. Refer to Editing Alert Template to learn more about editing alert templates.

Click Cancel to exit or Reset Settings to reset to default settings.
Viewing Alert Template Details
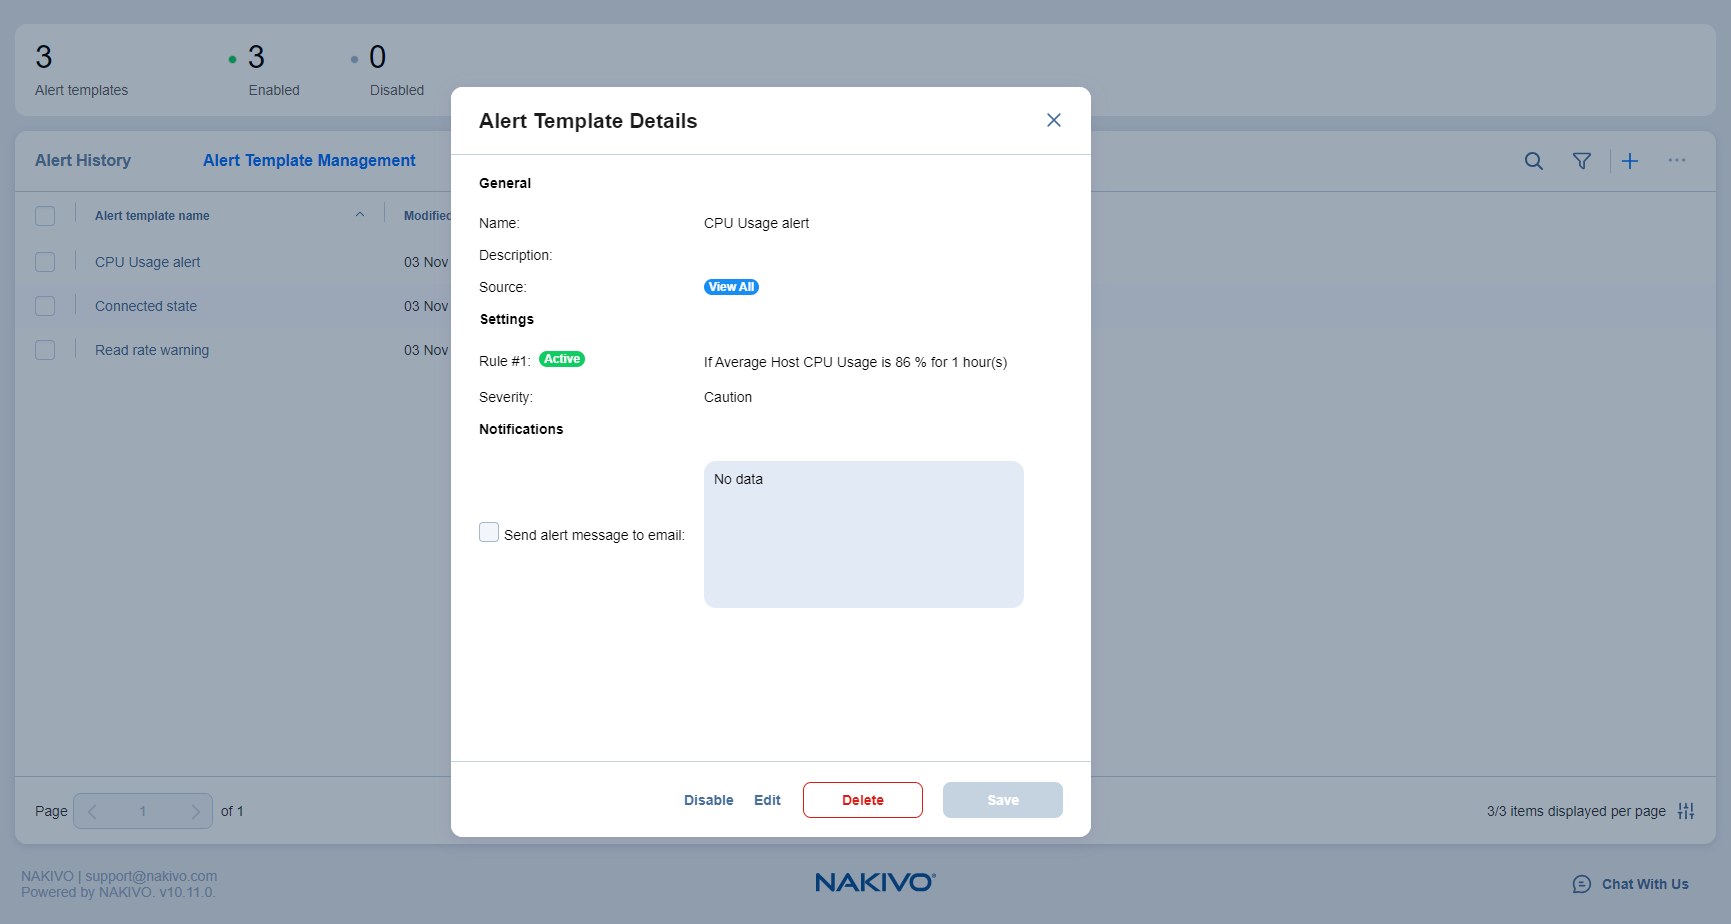
Click an alert template to view the details that were configured in the Creating Alert Templates wizard, including:
-
General section: Displays the name and description of the alert. Click View All to display all source VMs, hosts, and datastores that were selected for this alert.
-
Settings section: Lists the defined rules and severity of the alert. Click the Active button to change the status of a rule to Inactive and vice versa. Alerts will be triggered according to the active rules.
-
Notifications section: Displays all the email addresses that will receive a notification when the alert is triggered.
-
Enable/Disable button: Click to enable/disable the alert template.
-
Edit: Click to open the Edit Alert Template Wizard. For details, refer to Editing Alert Template.
-
Delete: Click to delete the alert template.
-
Save: Click to save changes.

Creating Alert Templates
To create an alert template:
-
Go to Monitoring > Alerts and click the Alert Template Management tab.
-
Click the + (add) button. The Create New Alert Template wizard opens.
-
Complete the wizard as described in the sections below:

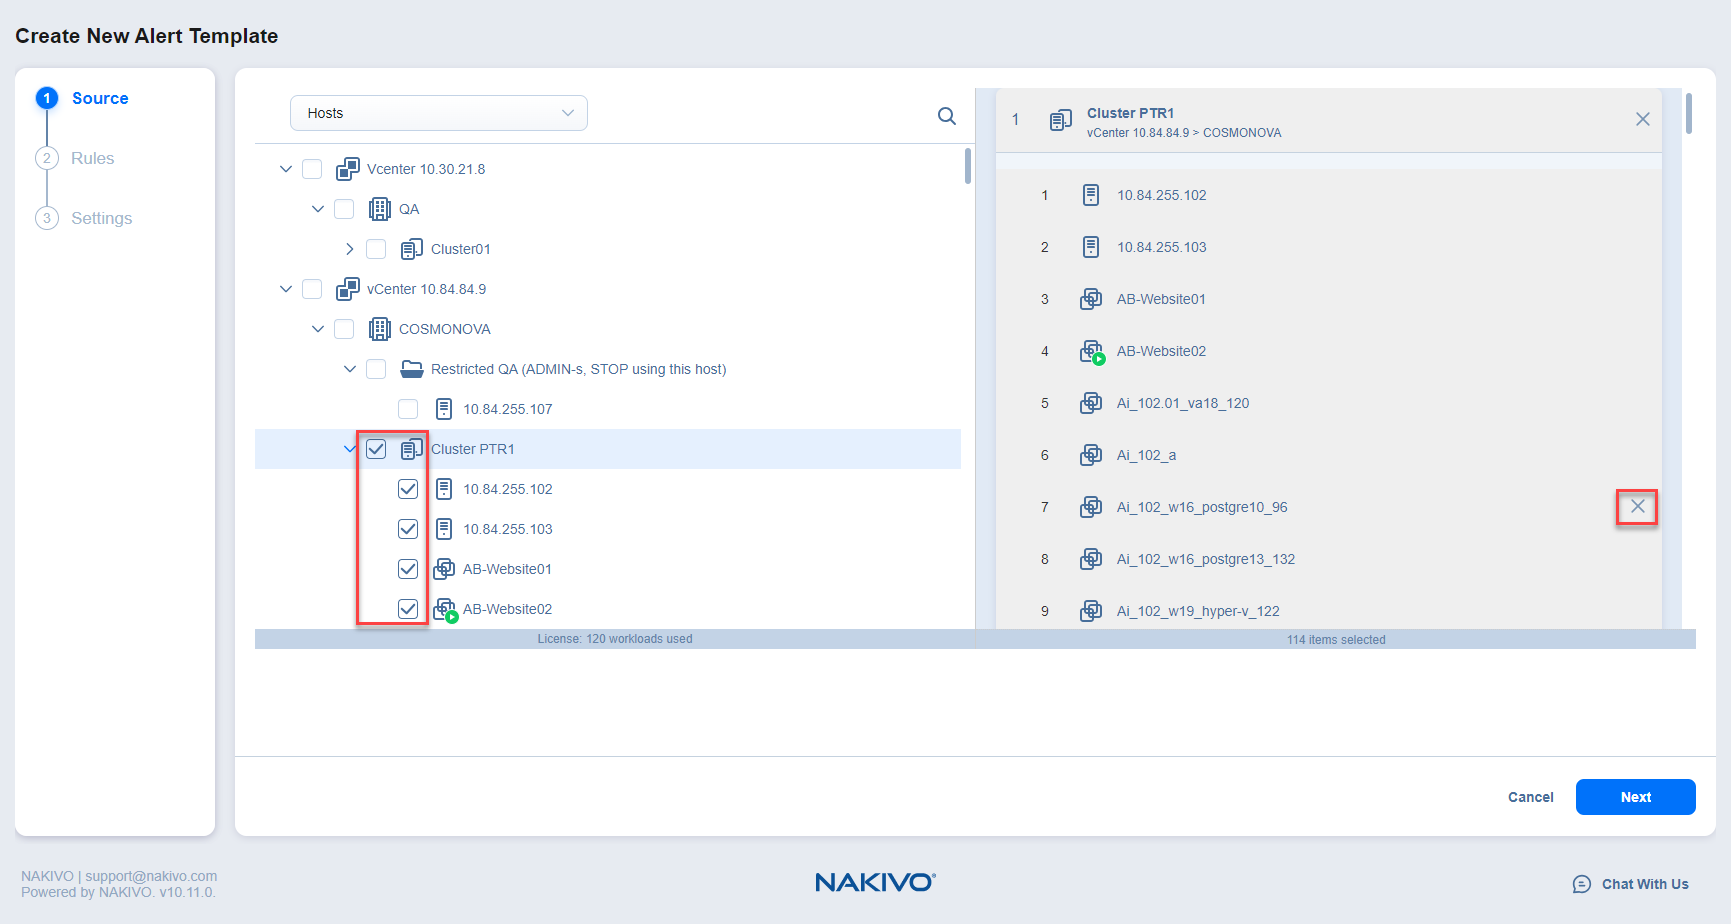
Create New Alert Template Wizard: Source
-
At the Source step of the wizard, you can select the items to be covered by the alert template:
-
Select a view in the drop-down list:
-
Hosts: Displays all hosts in the Inventory.
-
Datastores: Displays all datastores in the Inventory.
-
VM: Displays all VMs in the Inventory.
Select the needed item(s). These items will appear in the right pane. You can click the X button to the right of an item to remove it. When done, click Next.
Note
You can select only one monitored items type view at a time. If you switch to another view, items selected in the previous view are deselected.
Create New Alert Template Wizard: Rules
At the Rules step of the wizard, you can create the rules for triggering an alert for the items selected at the Source step. To add a rule, click the + (add) button.
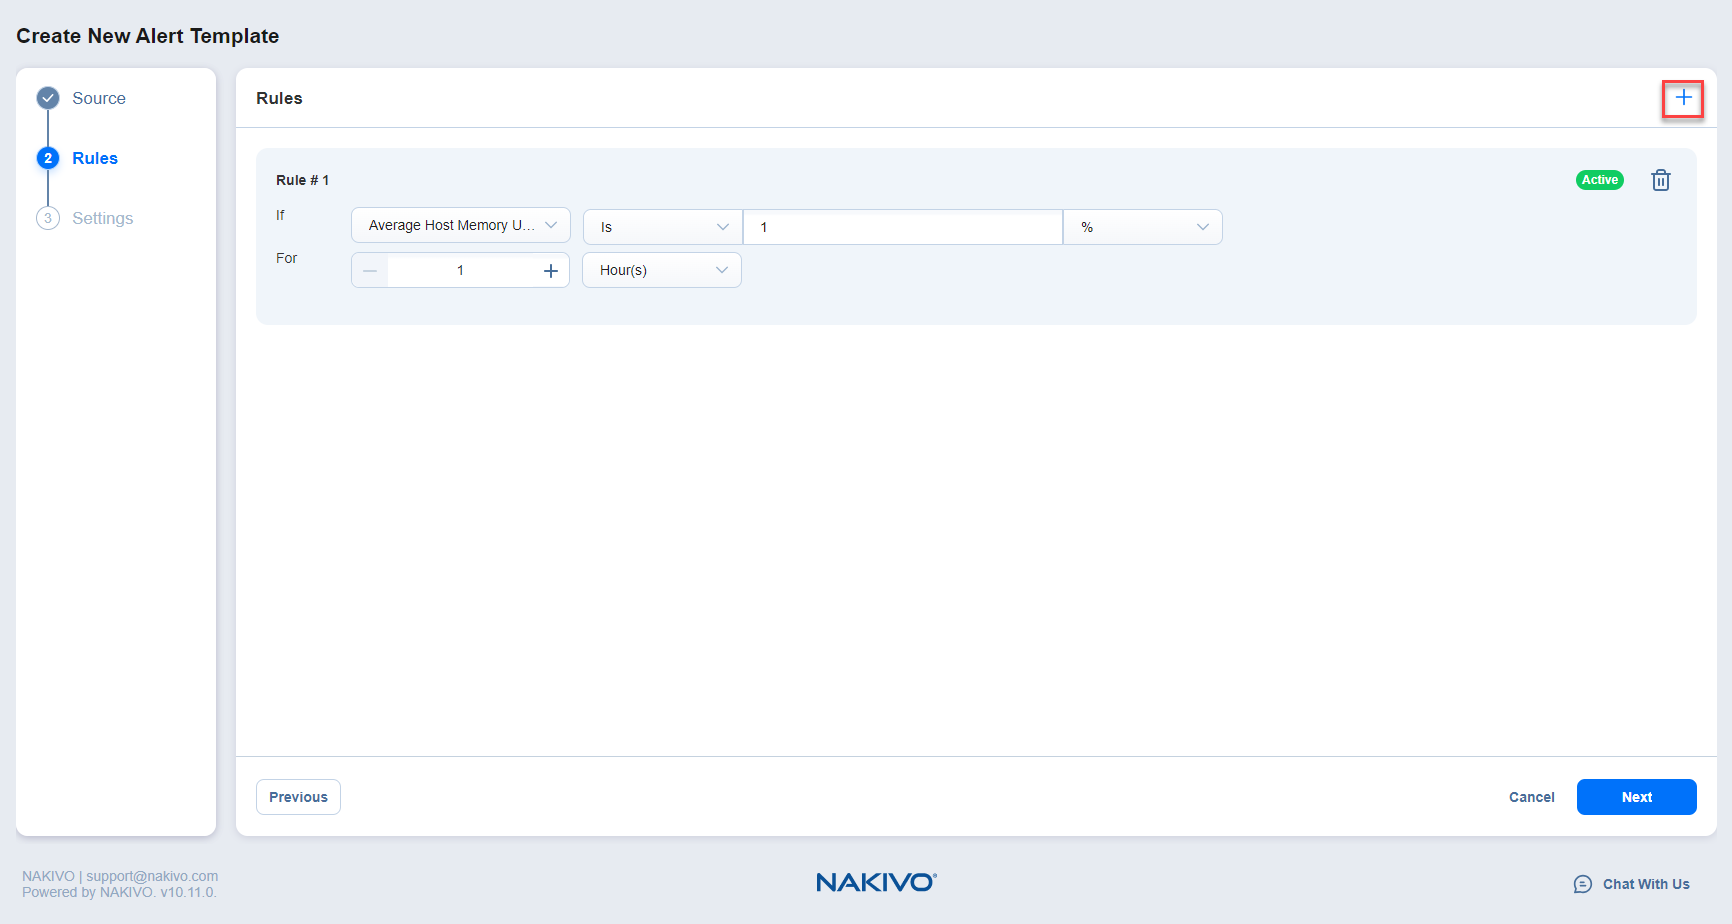
Each rule includes the following components:
-
Rule order number.
-
Active/Inactive button: Click the button to change the status of the rule.
-
Delete icon: Click the icon to delete a rule.
-
If row, including the following components:
-
Metrics: Displays a list of metrics relevant to the item type selected in the Source step.
-
Conditions: Displays a list of conditions relevant to the selected metrics in the Metrics dropdown list.
-
Metric value and unit: Displays the value field and units button.
-
-
For row: Configure a duration by selecting a unit of time and inputting a number.
You can create additional rules if needed. The maximum number of rules that you can add per template is 10. When done, click Next.
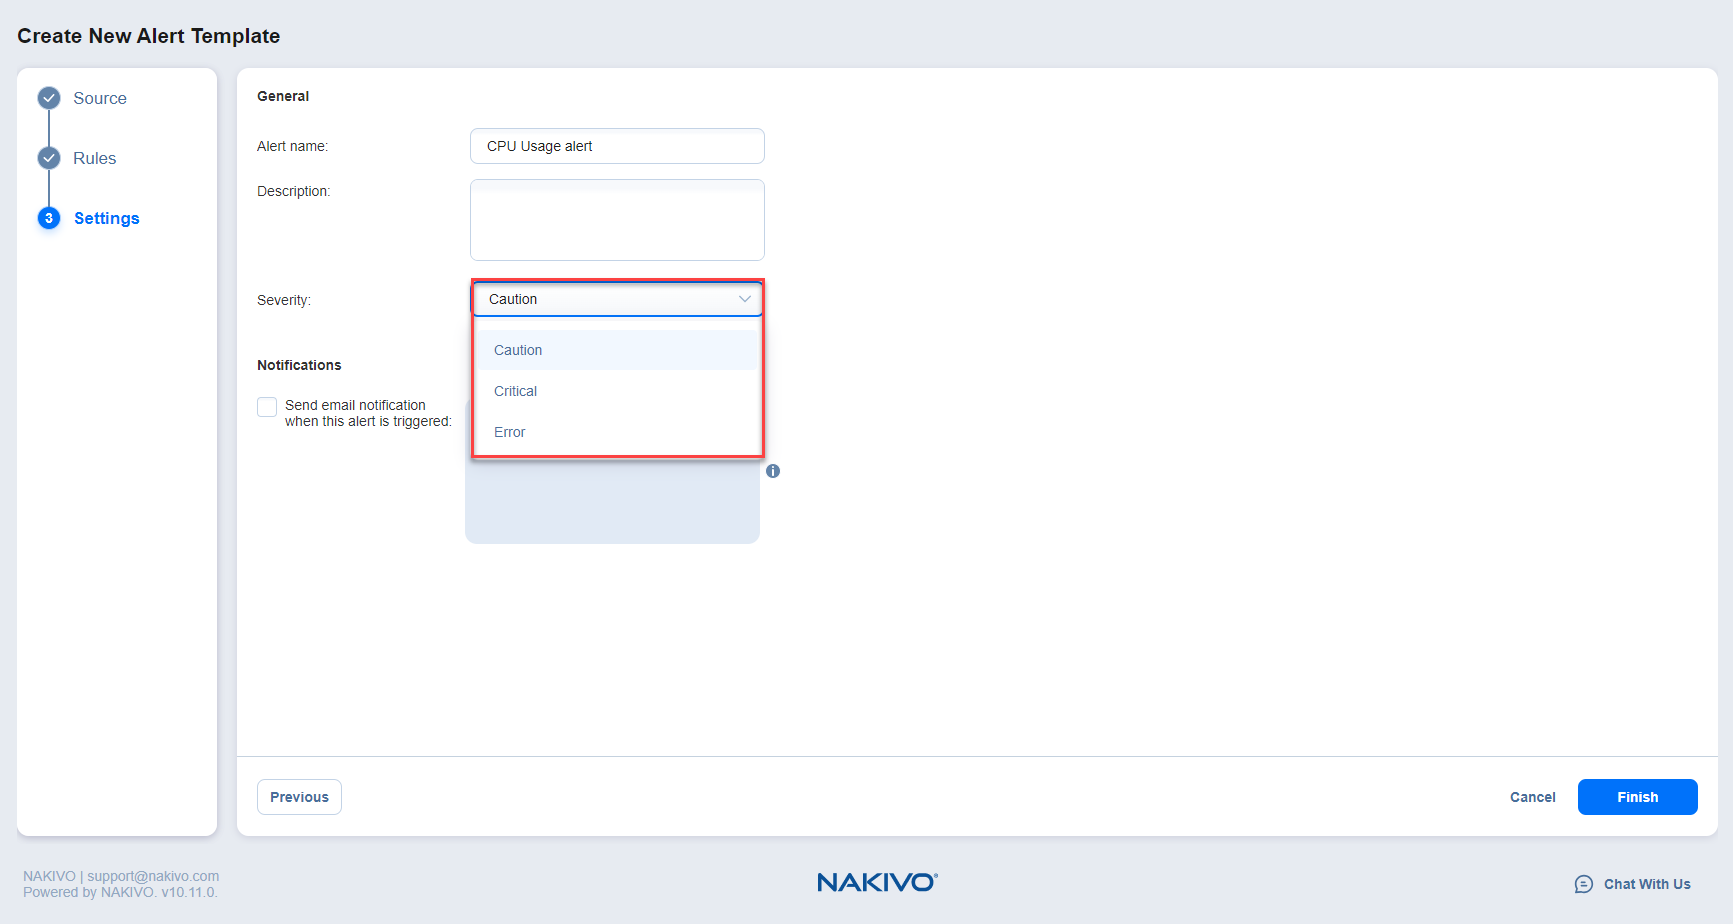
Create New Alert Template Wizard: Settings
At the Settings step of the wizard, you can specify the alert name and severity. You can also enable email notifications for triggered alerts:
-
Enter the name, description, and severity of the alert that will be displayed in the Alert History and Alert Template Management tables. For details, refer to Viewing Alert Template Details.
-
To receive alert notifications by email, select the checkbox in the Notifications section and specify the email addresses. You cannot enter more than 100 email addresses.
-
Click Finish to close the wizard. The configured alert template will be added to the Alert Template Management table.
Editing Alert Template
To edit an alert template:
Go to Monitoring > Alerts and click the Alert Template Management tab.
Select the checkbox next to the template that you want to edit, click the ... (ellipsis) button, and then select Edit in the drop-down list.
The Edit Alert Template wizard opens. Follow the same procedure as described in the Creating Alert Templates section.

Note
You cannot modify the Item types in the dropdown list of the Source tab.