Aptare IT Analytics Integration
APTARE IT Analytics is a storage resource management platform for integrating storage and backup solutions. The integration with NAKIVO Backup & Replication is based on an APTARE data collector that sends storage component information to the system’s platform. The steps for integrating NAKIVO Backup & Replication with APTARE IT Analytics are as follows:
-
On the machine where NAKIVO Backup & Replication is deployed, do the following:
-
Install APTARE StorageConsole Data Collector with NAKIVO connector.
-
When the installation has been successfully completed, make sure that the APTARE Agent service is running.
-
-
Open your NAKIVO Backup & Replication instance and run your backup jobs.
-
Log in to the APTARE portal.
-
Go to the ADMIN tab and take the following steps:

-
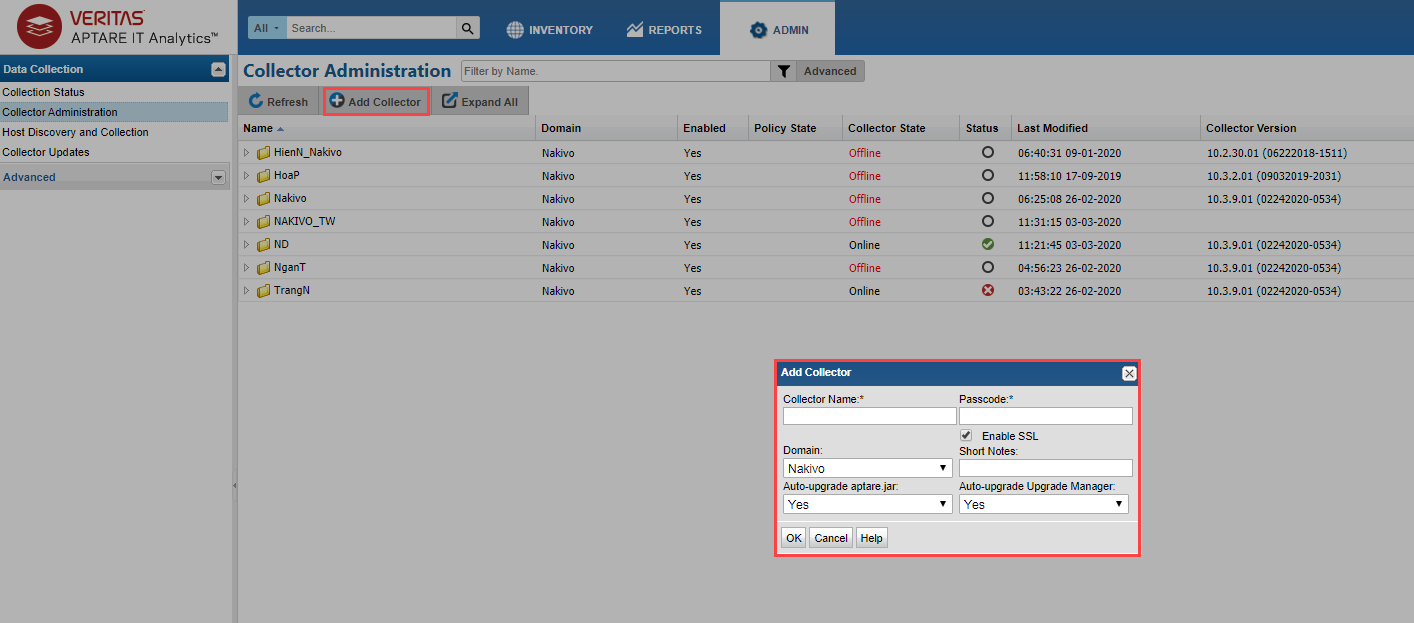
Add a Collector. For details, refer to the Managing and Monitoring Data Collection subsection of the APTARE IT Analytics User Guide.

-
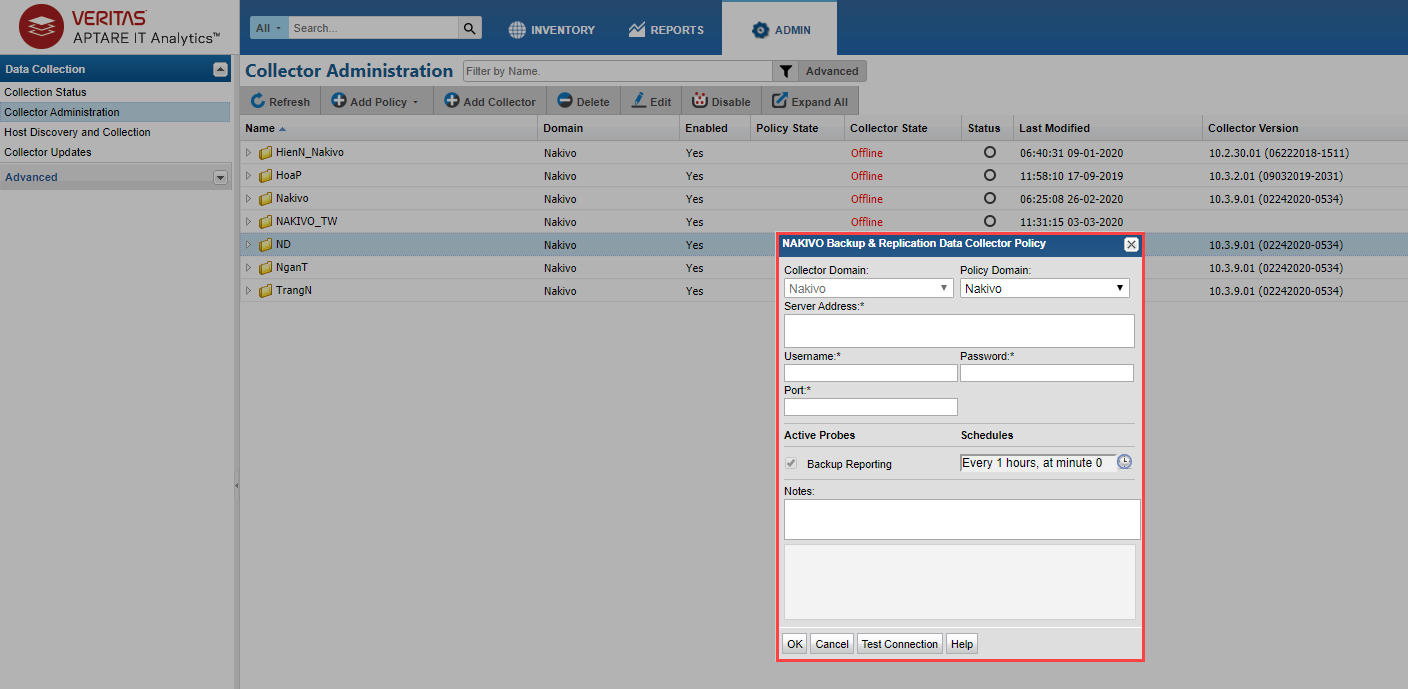
Add a NAKIVO Backup & Replication data protection policy with a connection to your NAKIVO Backup & Replication instance. For details, refer to the Pre-Installation Setup for Generic Backup subsection of the APTARE IT Analytics User Guide.
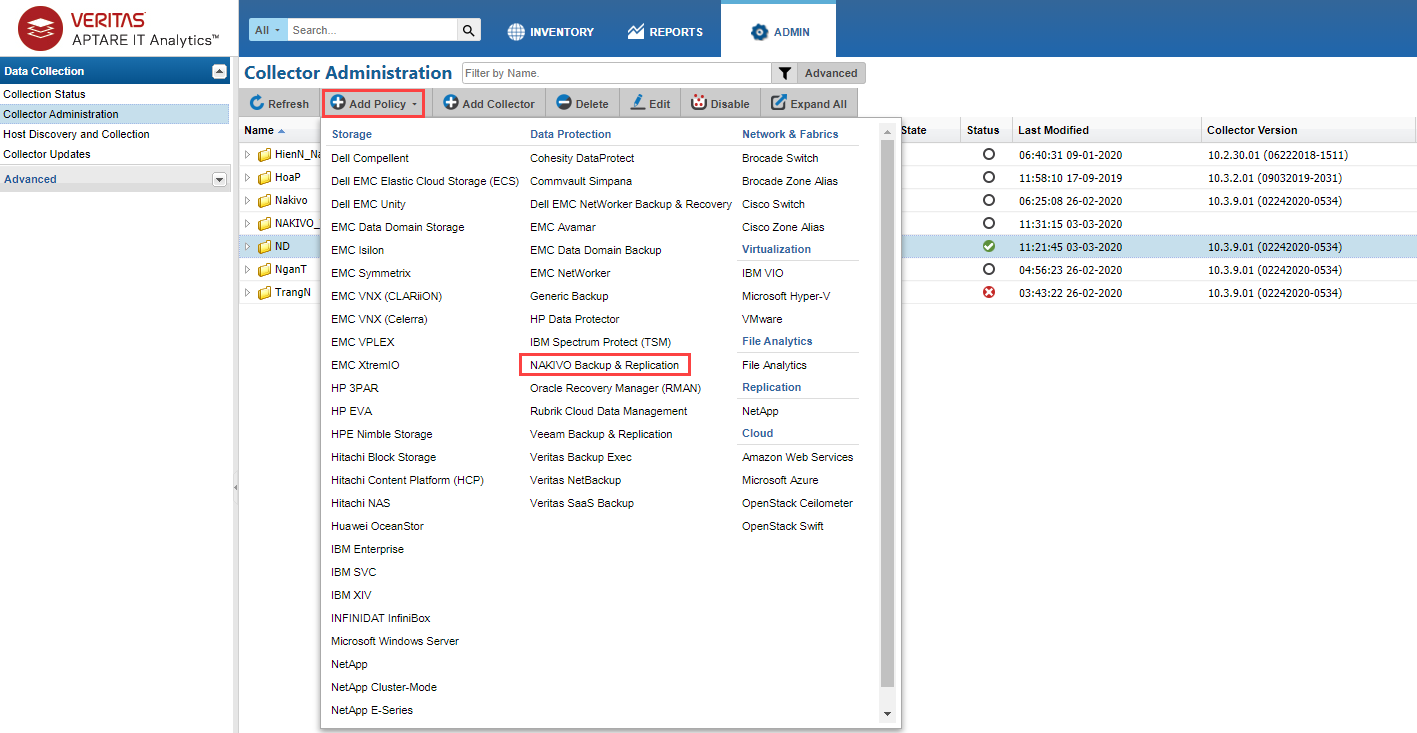

-
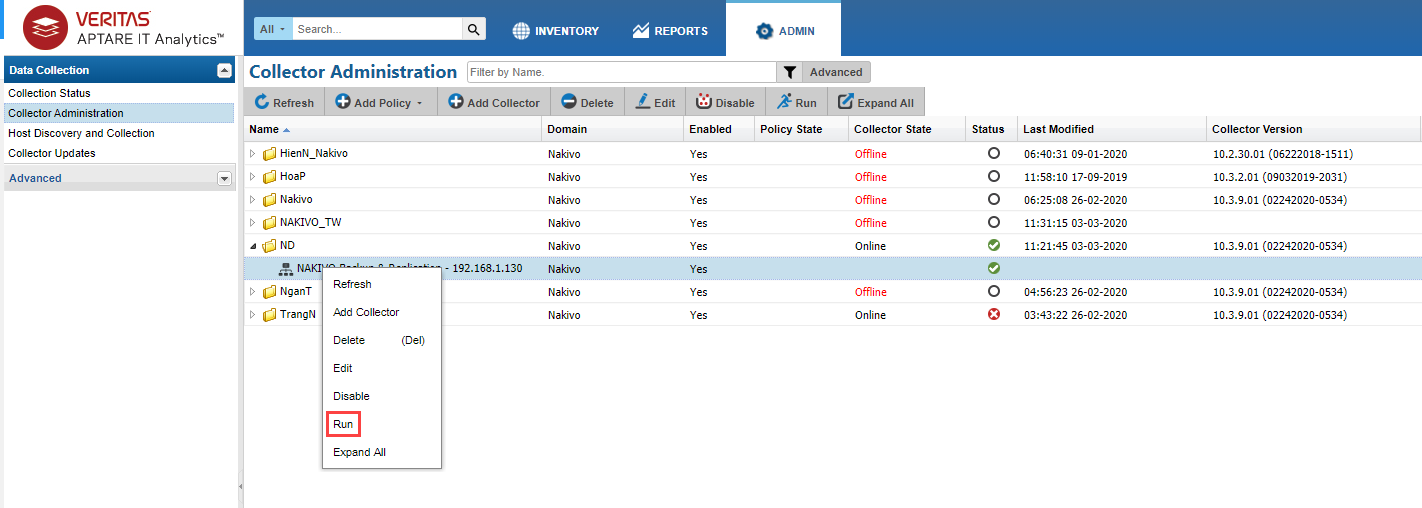
Run your policy.
-
-
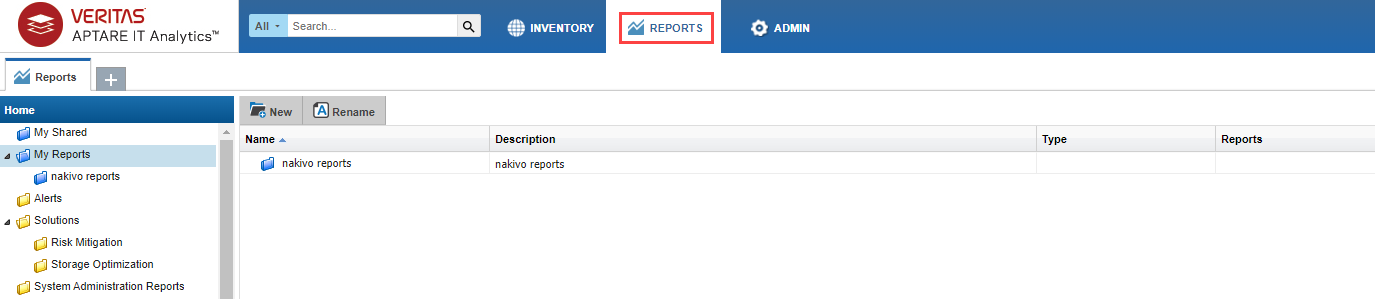
Go to the REPORTS tab in the APTARE portal and take the following actions:
-
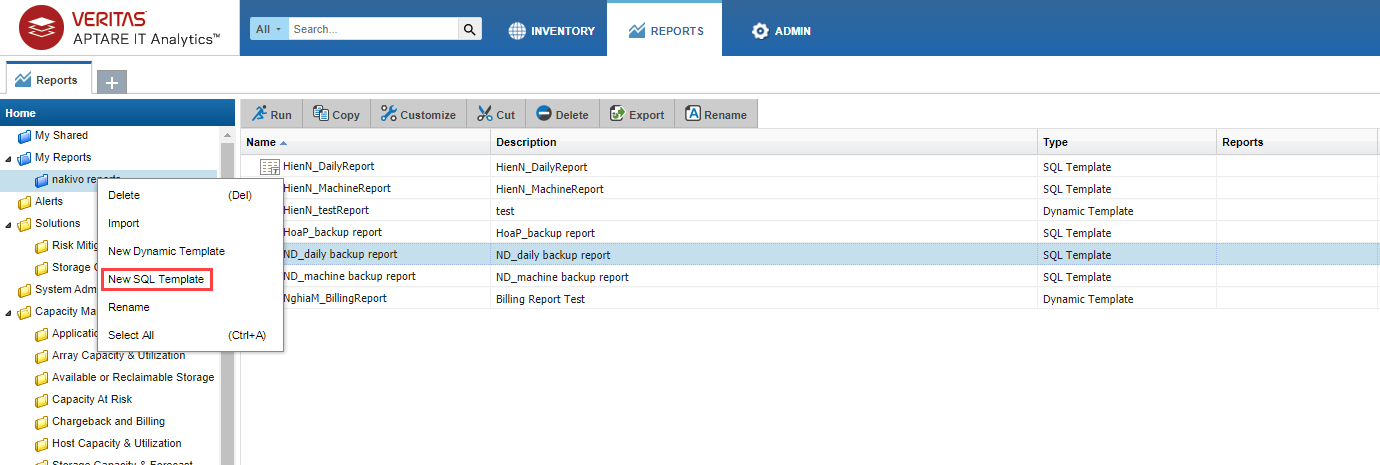
Create and configure the report for your backup job the following way:
-
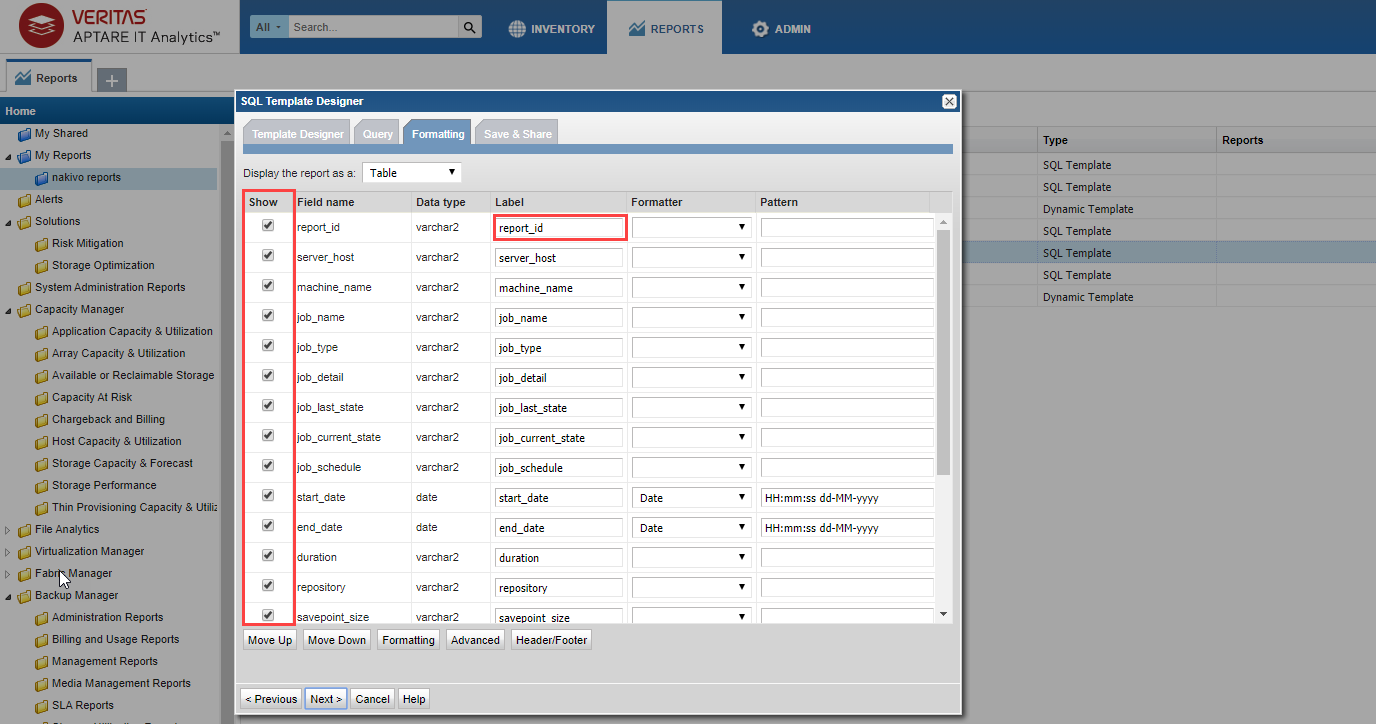
Right-click on your report folder and select New SQL Template.
-
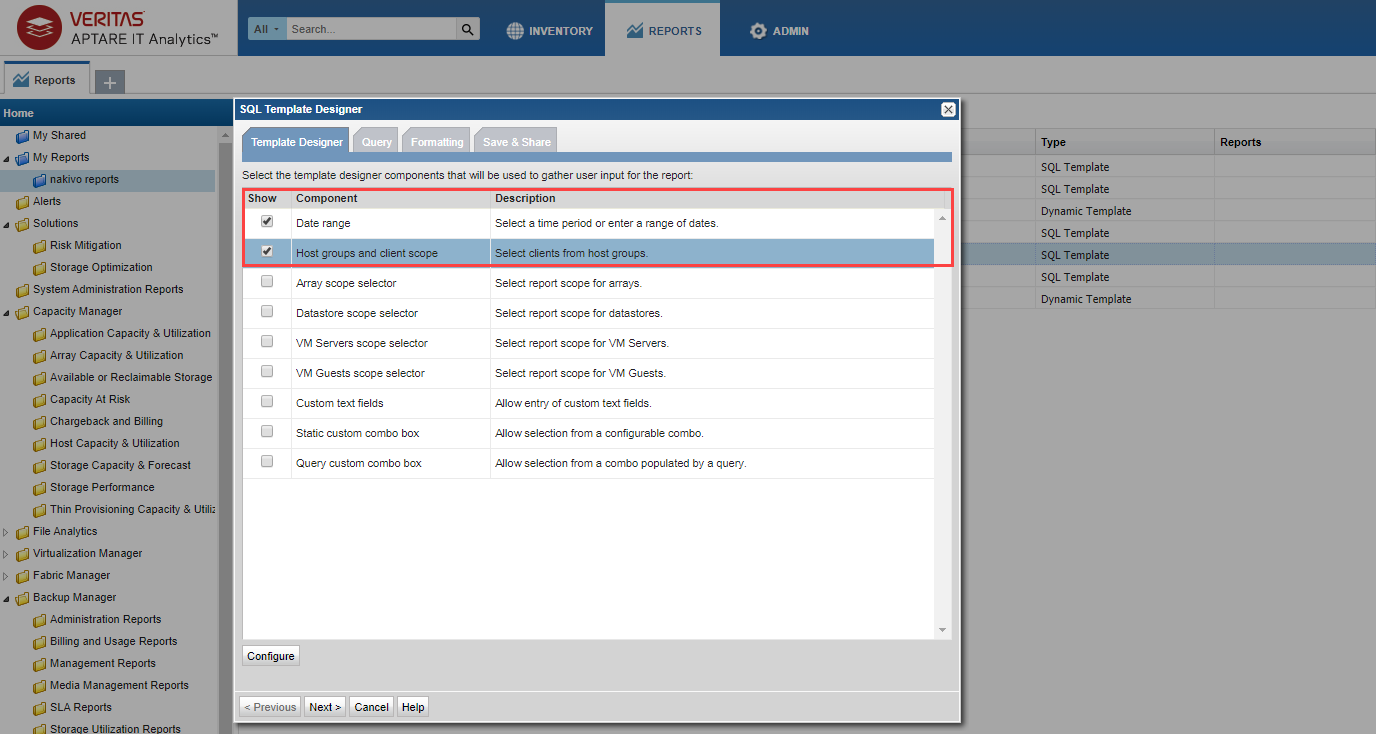
Select the template designer that will be used to gather user input for the report.
-
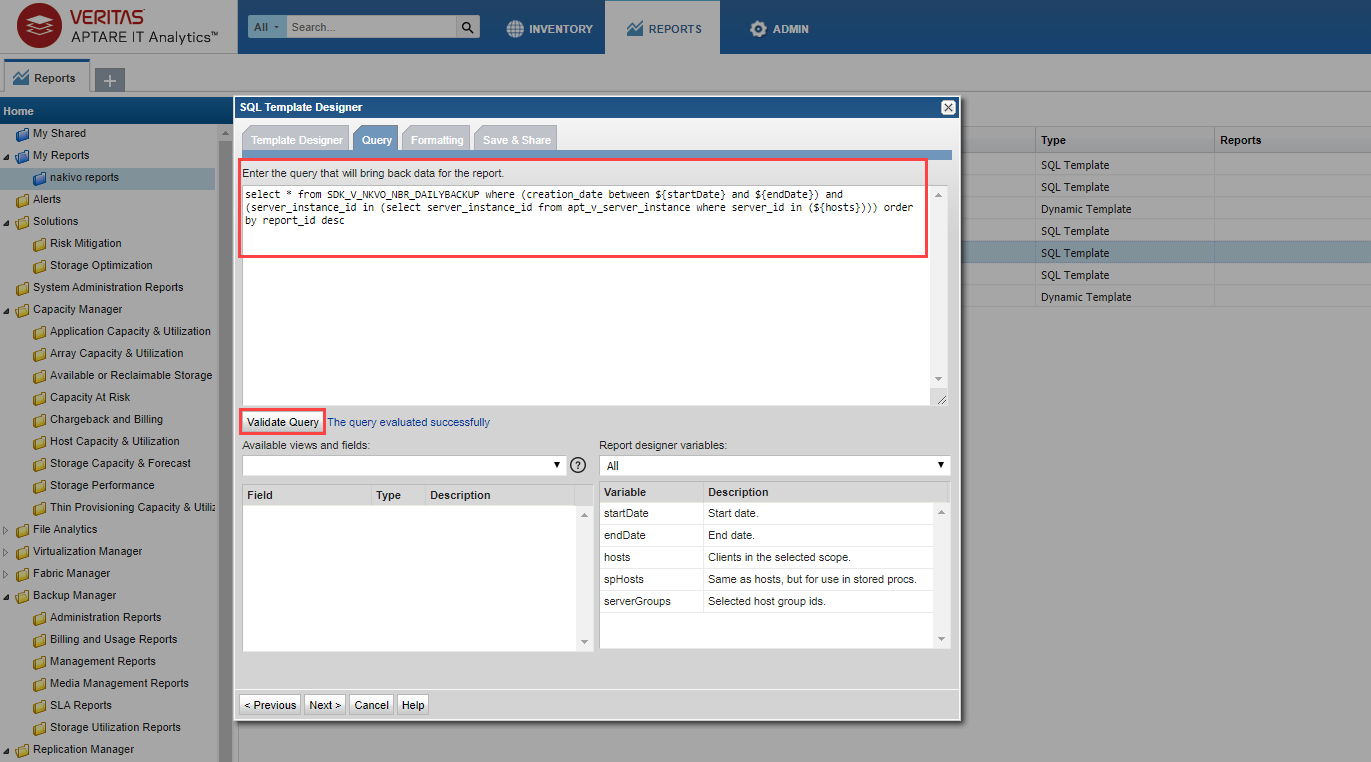
Build an SQL query for your machine backup report or daily backup report, use either:
Daily Backup Reportselect * from SDK_V_NKVO_NBR_DAILYBACKUP where (creation_date between ${startDate} and ${endDate}) and (server_instance_id in (select server_instance_id from apt_v_server_instance where server_id in (${hosts}))) order by report_id desc
Machine Backup Reportselect * from SDK_V_NKVO_NBR_MACHINEBACKUP where (creation_date between ${startDate} and ${endDate}) and (server_instance_id in (select server_instance_id from apt_v_server_instance where server_id in (${hosts}))) order by report_id desc
-
Change formatting options if necessary.

-
Provide a name and description of the report and select users to share it with. Click Finish.

-
-
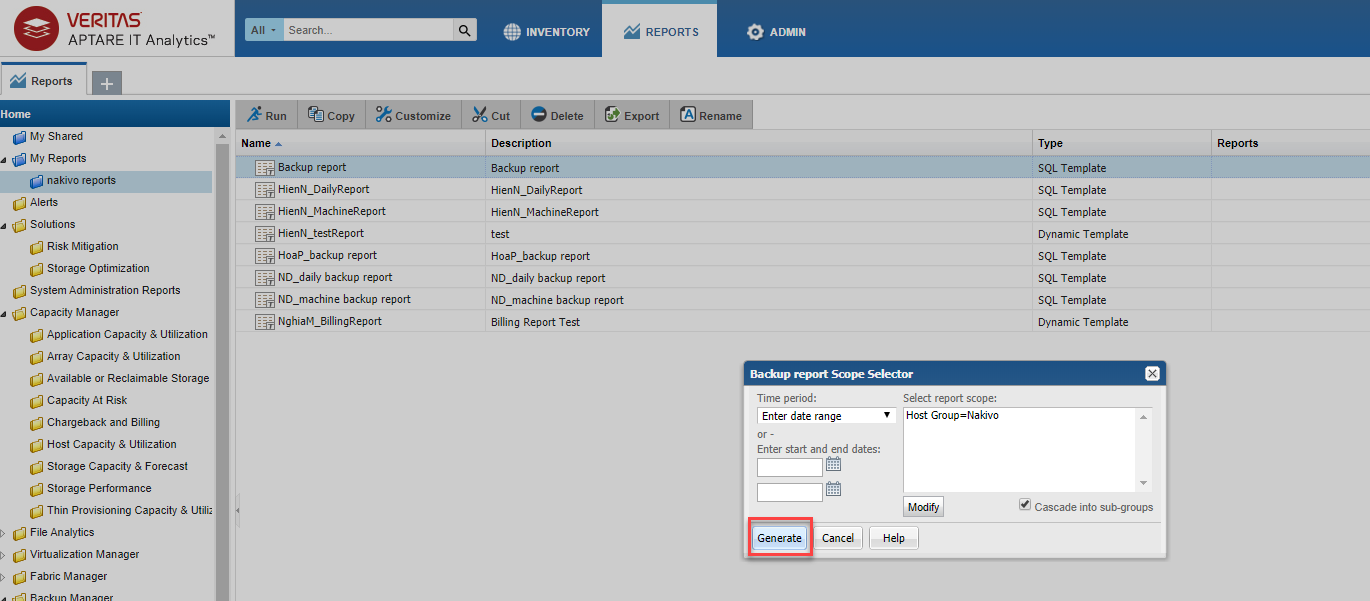
Double-click on the report. In the dialog box that opens, enter the necessary time and report scope. Click Generate to generate your report. For details, refer to the Generating and Maintaining Reports subsection of the APTARE IT Analytics User Guide.

-


To know more about APTARE IT Analytics, refer to the APTARE IT Analytics User Guide.