Using Calendar
The Calendar allows you to schedule and view the history of past job runs.
Understanding Calendar Formatting
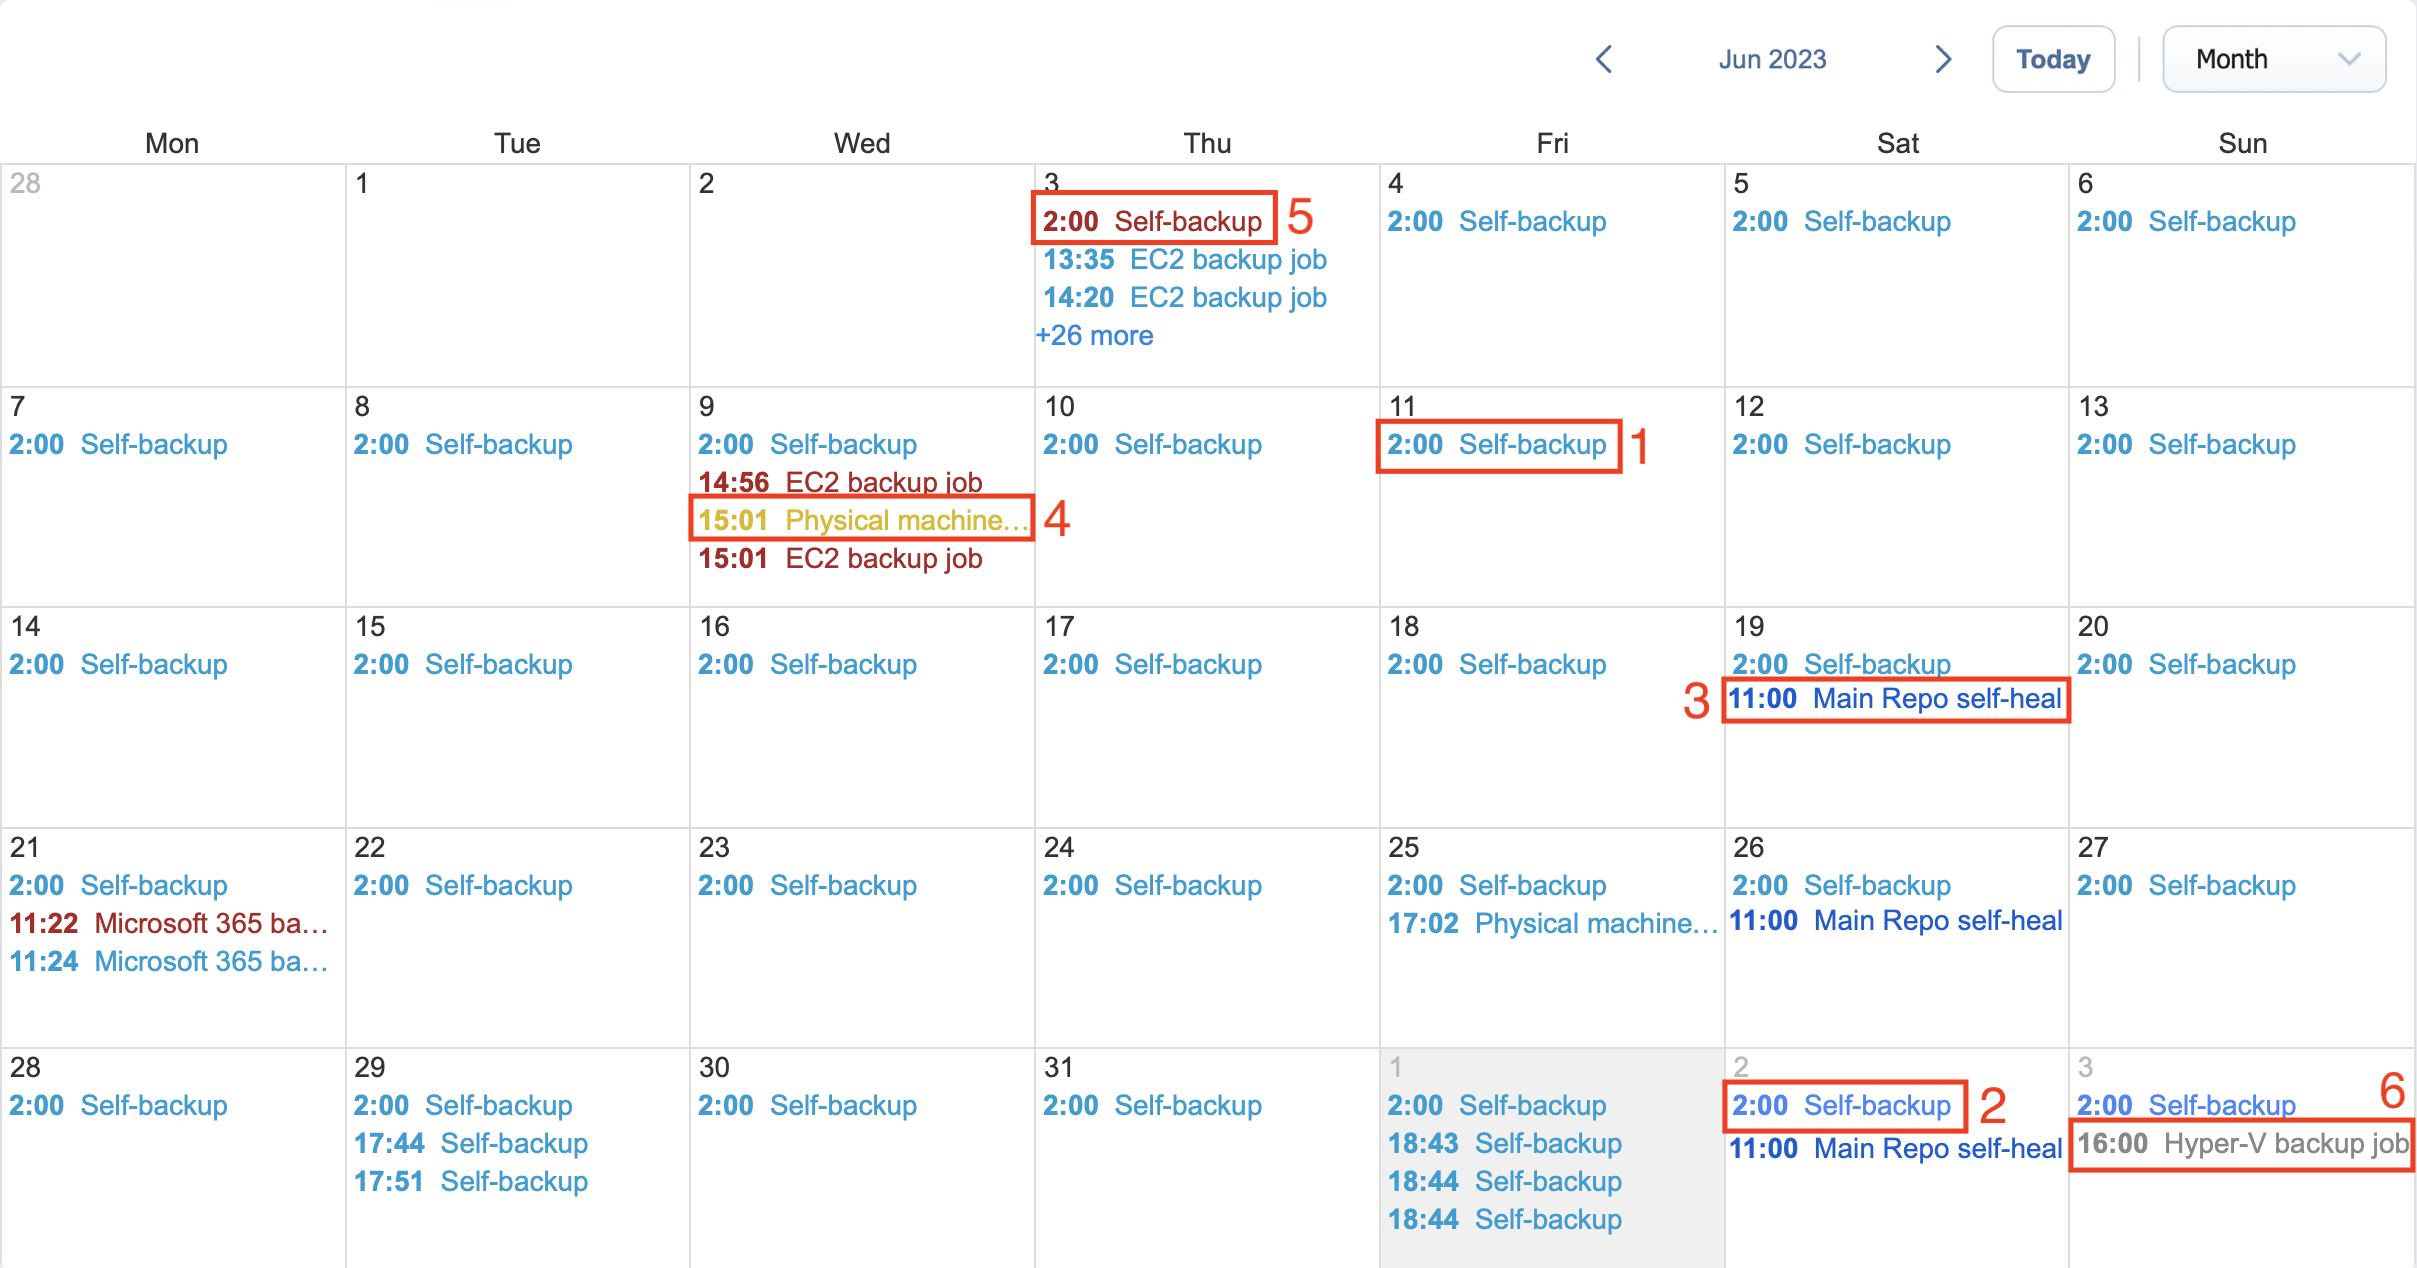
Jobs in the Calendar view are formatted by start/end time and color coded by status. The color coding format is as follows:
-
Successful job runs are marked in teal.
-
Future scheduled job runs and currently running jobs are marked in sky blue.
-
Repository maintenance jobs (such as scheduled self-healing) are marked in navy blue.
-
Stopped job runs are marked in yellow.
-
Failed job runs are marked in red.
-
Job runs belonging to disabled jobs are marked in gray.
Note
Job runs that complete later than their start date are marked in the Calendar for the appropriate number of days. In Month view, such jobs are also marked with background fill. For example, a job that started on a Monday and finished on a Wednesday will be marked in one continuous solid light blue line across three days.
Creating Jobs with Calendar
To create a job:
-
Click on the date and time when you’d like to run the job
-
Select the type of job you need.
-
On the Schedule page of the wizard, the time you've selected in the Calendar will be selected.
Editing Jobs with Calendar
If you click on the job title on the Calendar dashboard, the Job Actions and Job info menus appear.
Using them, you can:
-
Run a job on demand.
-
Edit a job.
-
Clone a job.
-
Delete a job. If the job repeats on schedule, this action will affect all job runs.
-
Disable/Enable a job. If the job repeats on schedule, this action will affect all job runs.
-
Open the Job Dashboard.
-
Create a report.
-
View the job info.

