Installing on QNAP NAS Manually
Before you begin installing NAKIVO Backup & Replication on a NAS, make sure your NAS model is supported and you have downloaded the installer (.qpkg file) for QNAP NAS.
Note
Installing updates of NAKIVO Backup & Replication on your NAS-based backup appliance requires accurate knowledge of the hardware system information.
Refer to the following page to learn how to identify your QNAP device CPU model: How to Identify the CPU Architecture of a QNAP NAS Processor.
To install NAKIVO Backup & Replication on a NAS:
-
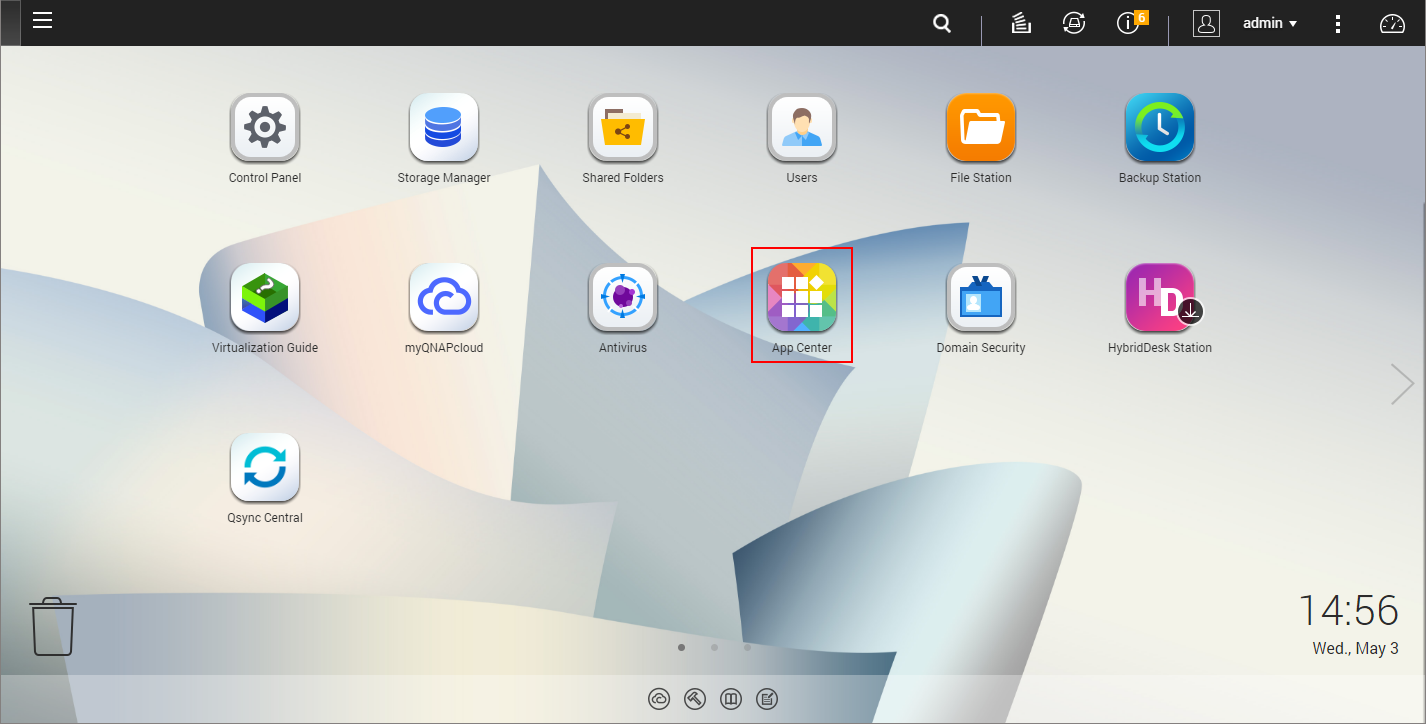
Open the QNAP Desktop in your browser by entering the IP address of your QNAP NAS.
-
Go to App Center.
-
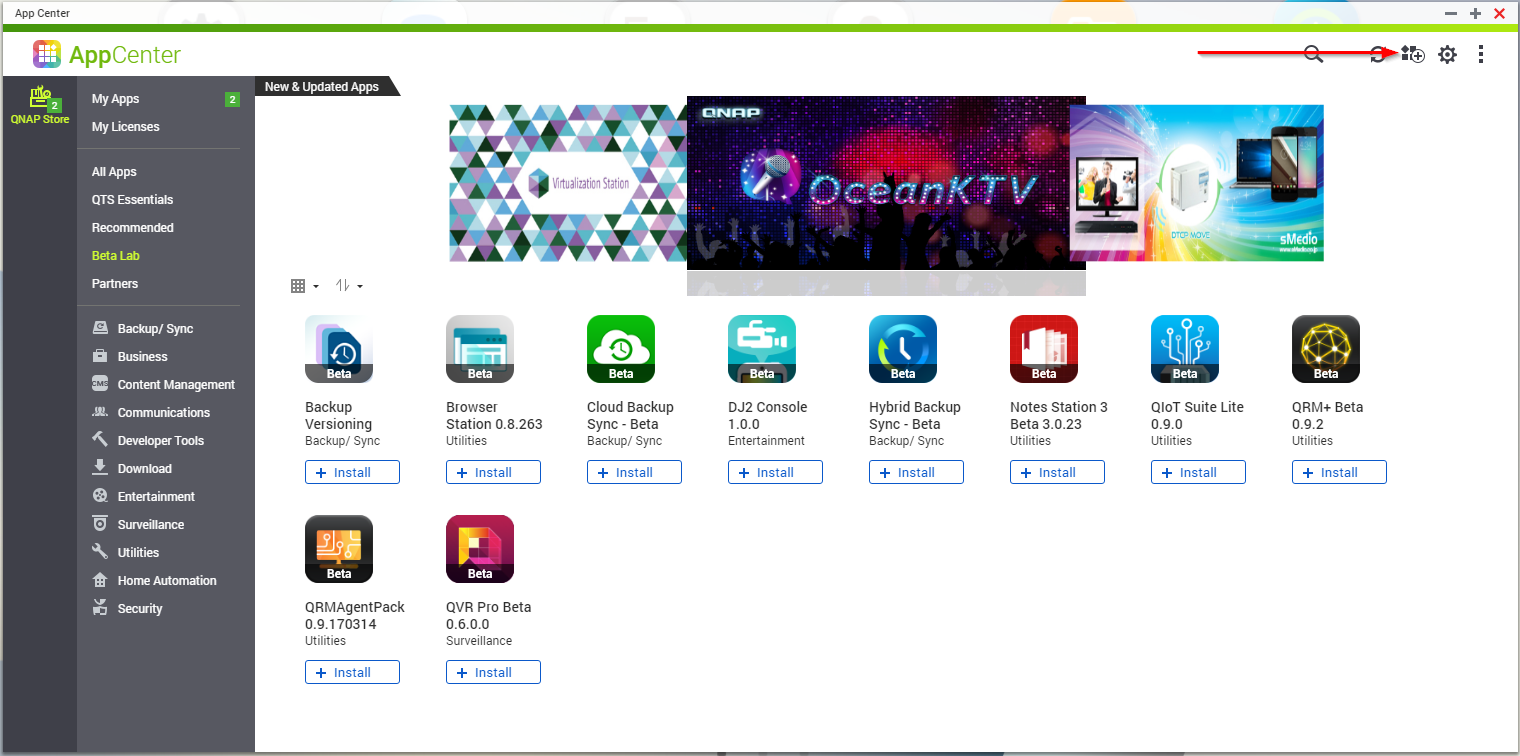
Click the Install Manually icon.
-
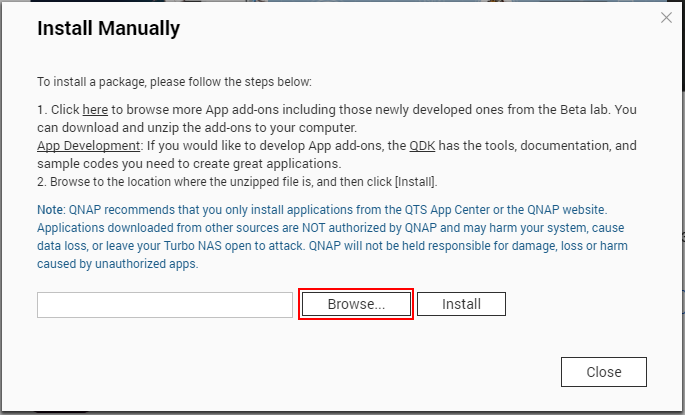
Click Browse in the window that appears and locate the installer (
.qpkgfile) on your computer. -
Click Install.
-
Wait until the installation is complete.
By default, NAKIVO Backup & Replication interface is available at the IP address of your QNAP NAS on the port 4443: https://<IP_address_of_QNAP_NAS>:4443.
Note
If you installed NAKIVO Backup & Replication on an ARM-based NAS, an additional Transporter needs to be added to your application outside of the ARM-based NAS to allow it to work with VMware vCenters and ESXi hosts. Please refer to the Adding VMware vCenters and ESXi Hosts topic for details.
Refer to Getting Started to better understand how to continue working with NAKIVO Backup & Replication.


