Backup Job Wizard for VMware: Destination
On the Destination page of the wizard, you can select one or different Backup Repositories to back up your VMs. Proceed as described in the sections below:
- Setting a Single Backup Repository for All VMs
- Setting Different Backup Repositories for VMs
- Mapping Source VMs to Existing Backups
- Excluding VM Disks from the Backup Job
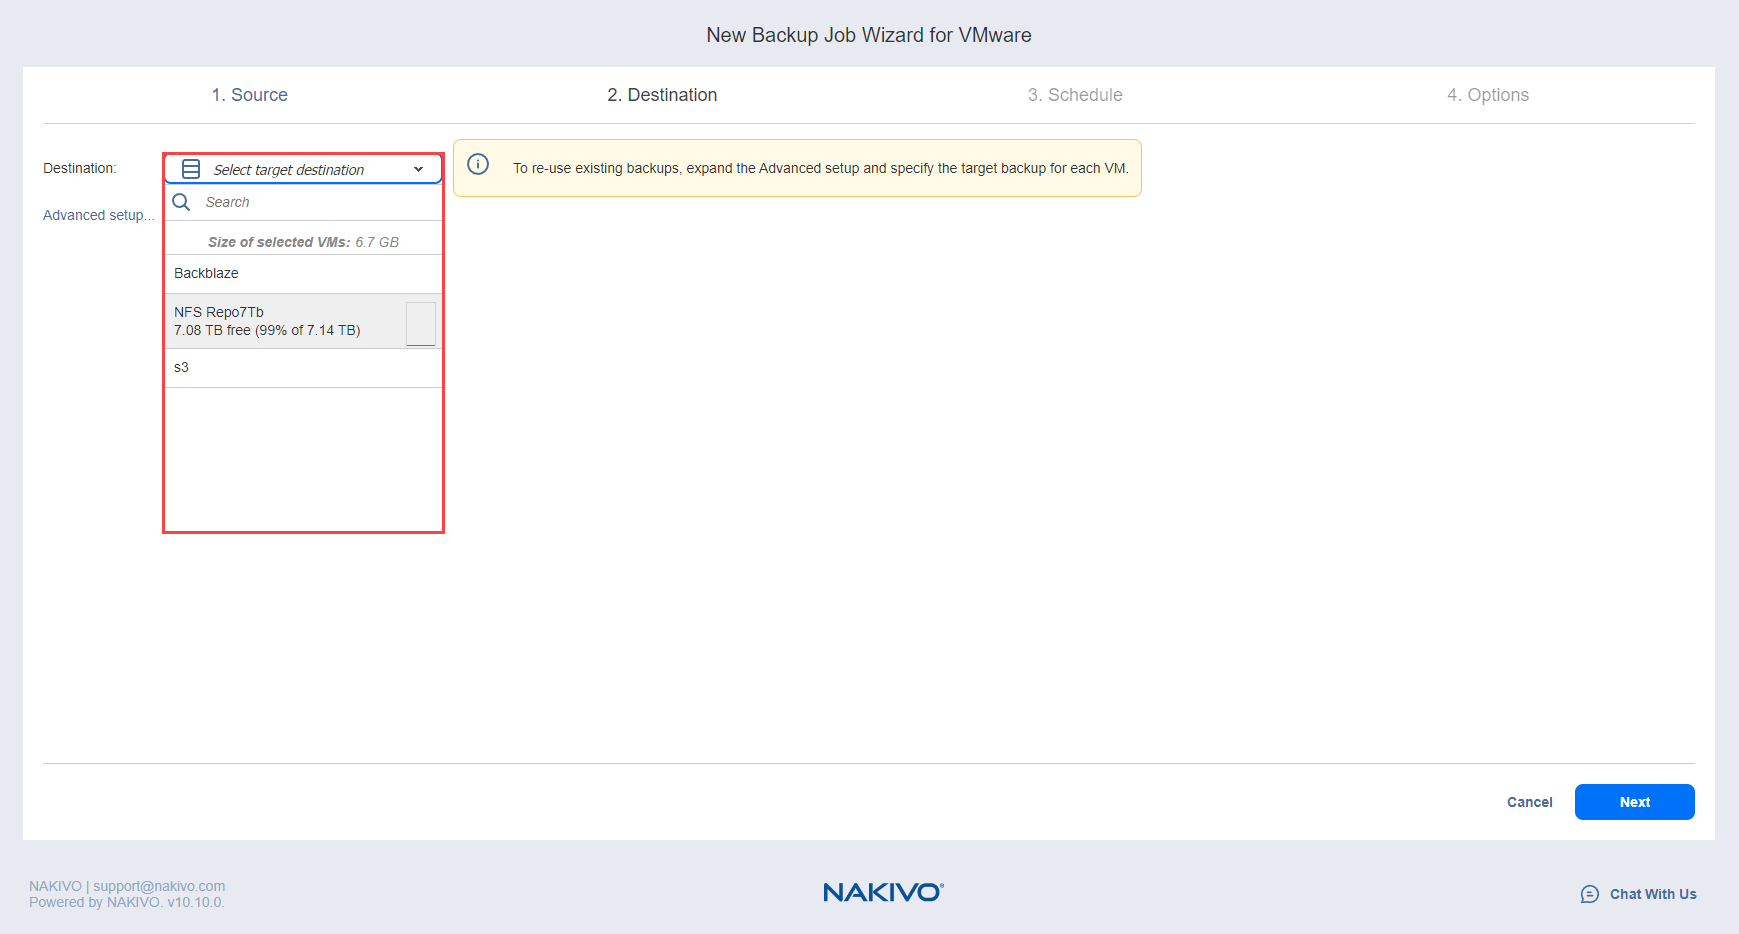
Setting a Single Backup Repository for All VMs
To back up the VMs selected on the previous page to a single Backup Repository, choose a Backup Repository from the Backup repository drop-down list.
Notes
Both federated repositories and standalone repositories (those not used as members of federated repositories) can be selected.
If a federated repository is selected as the destination, the product automatically selects an available qualified federated repository member during the job run.
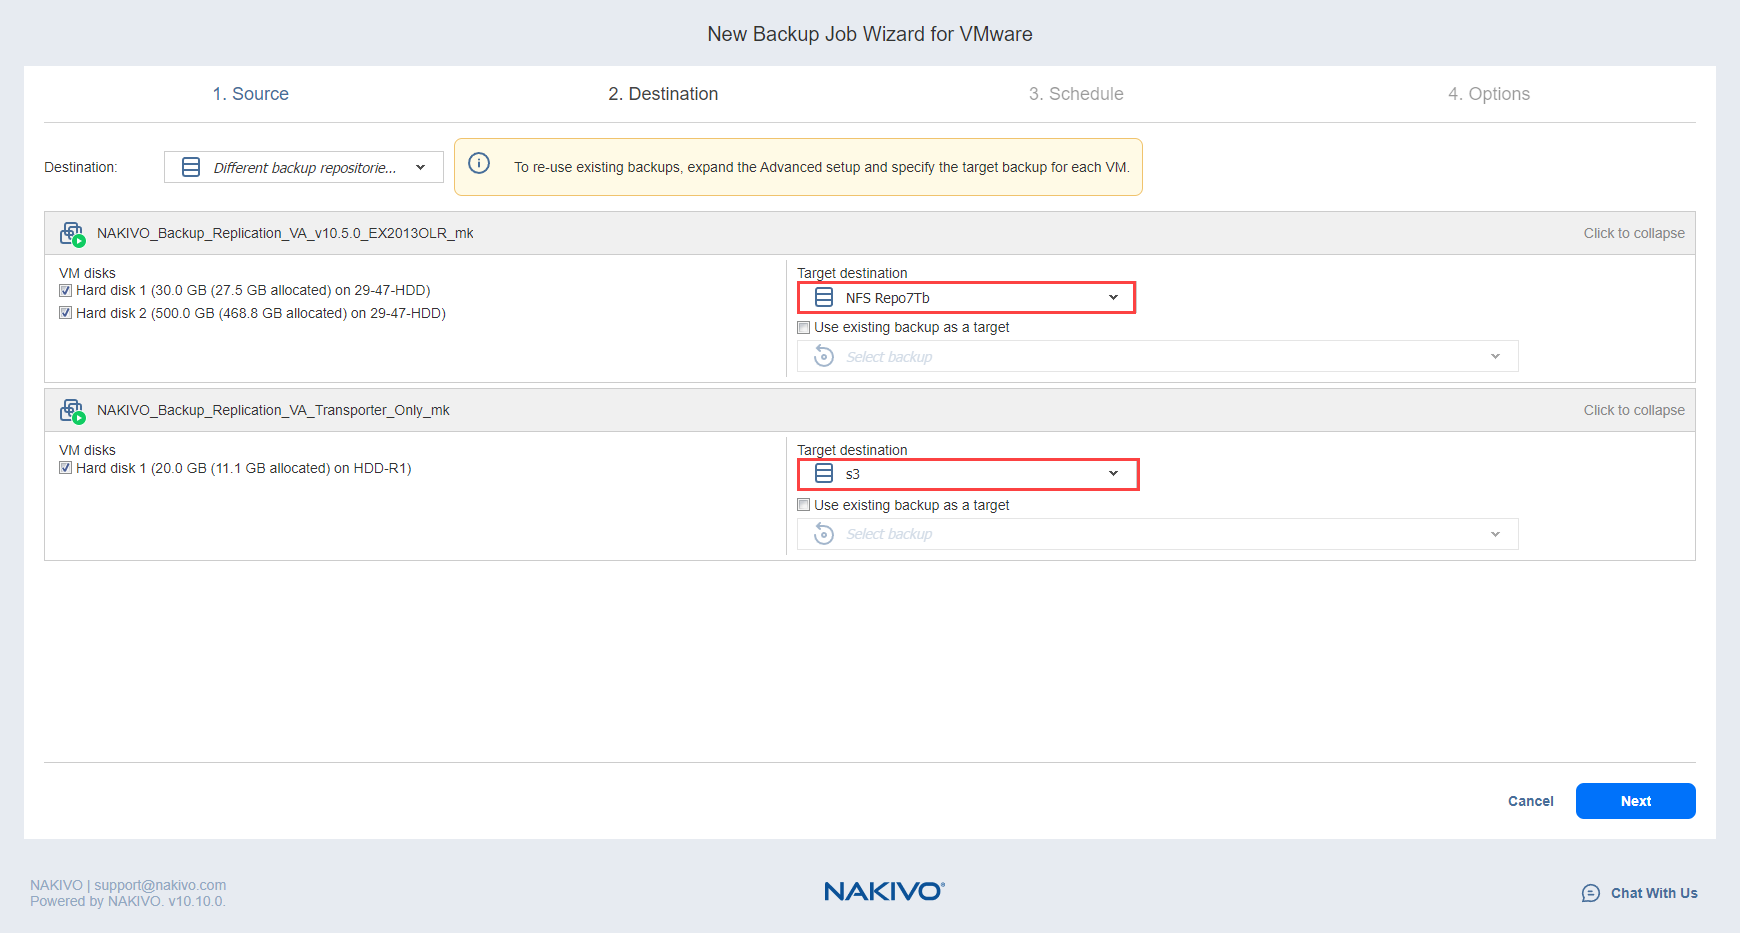
Setting Different Backup Repositories for VMs
To back up the selected VMs to different Backup Repositories, follow the steps below:
-
Click Advanced setup
-
In the VM boxes, choose a Backup Repository for each VM individually from the Target destination drop-down list.

Mapping Source VMs to Existing Backups
If you have previously backed up a VM and then lost the backup job due to accidental job deletion or a need to recreate jobs in a new copy of the product, you can map source VMs to existing backups in order to avoid running full VM backups again.
To map source VMs to existing backups, follow the steps below:
-
Click Advanced setup.
-
From the Backup repository drop-down list, choose a Backup Repository that contains an existing VM backup.
-
Select the Use existing backup as a target option and choose an existing backup from the drop-down list.

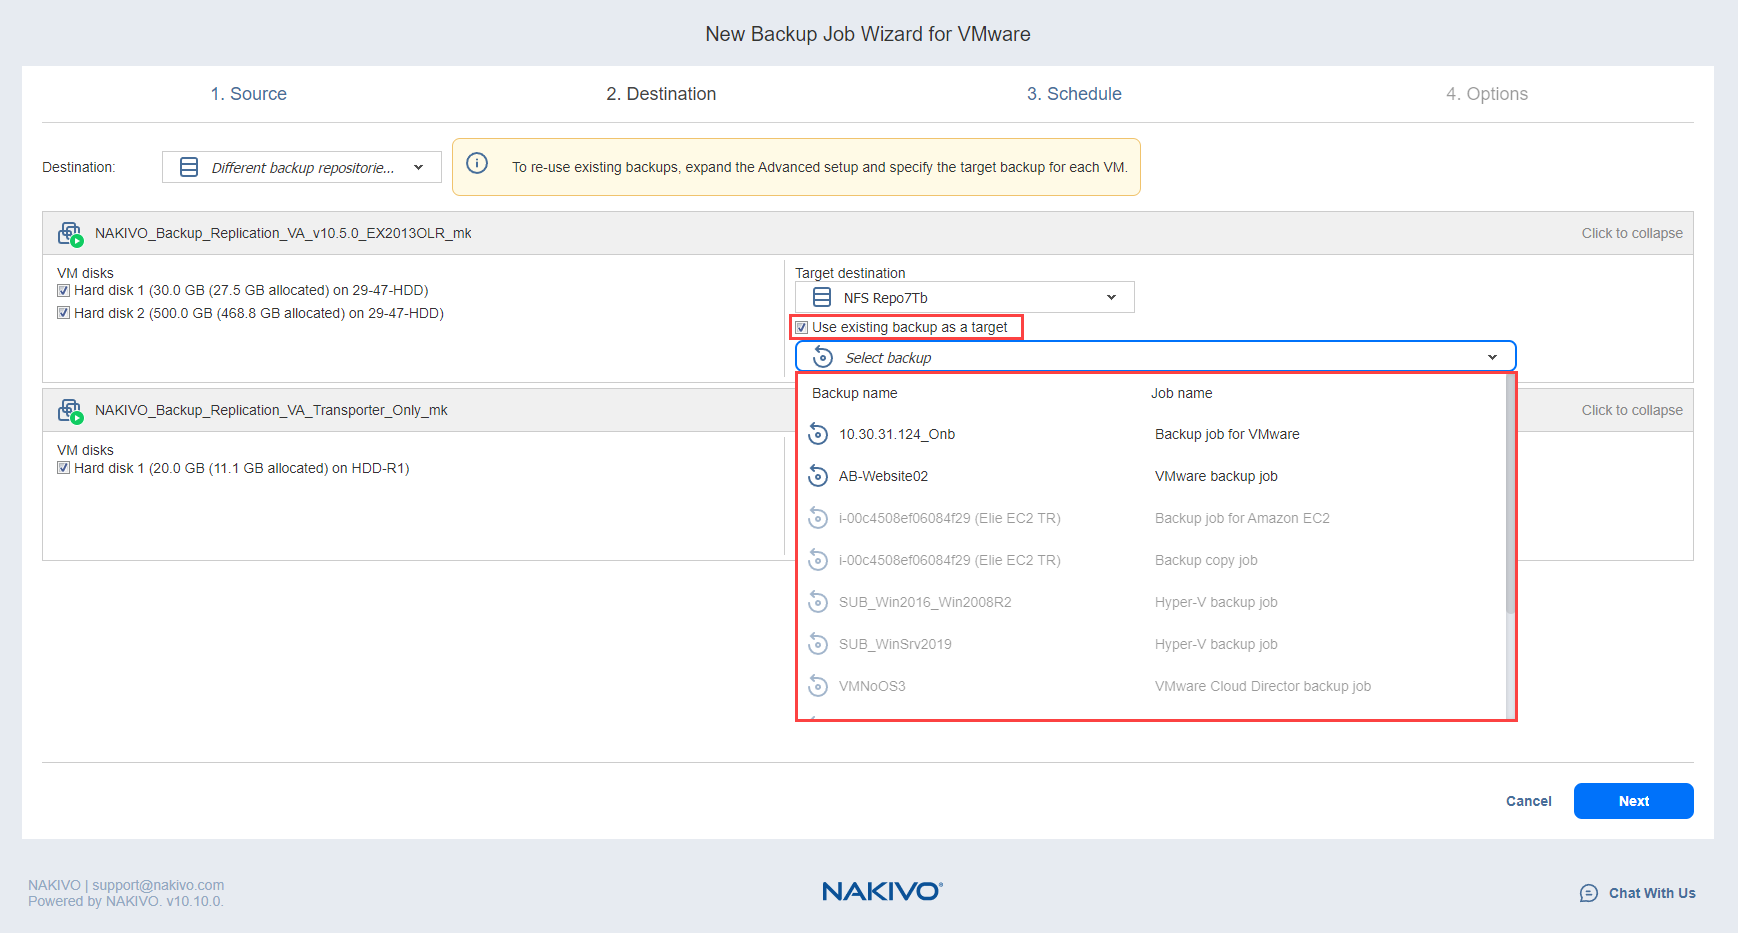
When you run the job, the product will analyze the target VM you have selected, determine how it is different from the source VM, and transfer only the differential data.
VM backup mapping can be a time-consuming process that can be equal to the time required to create a full VM backup.
After the job is completed, a new recovery point will be created and existing recovery points will not be changed or overwritten.
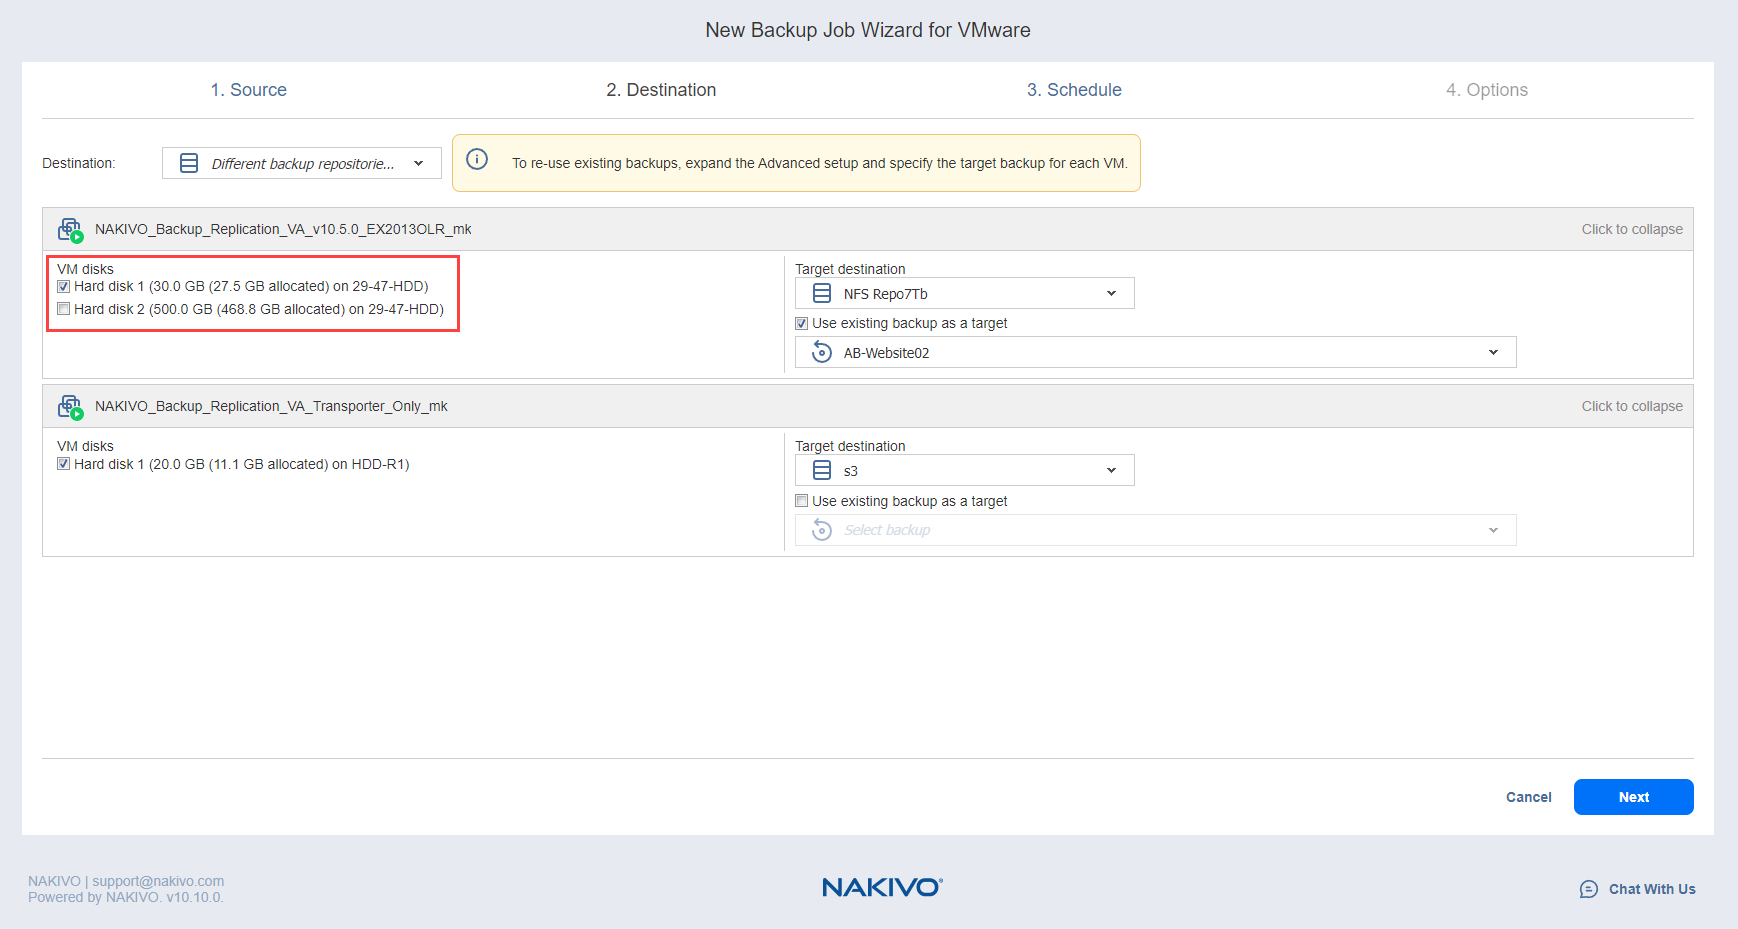
Excluding VM Disks from the Backup Job
If you do not want to back up certain VM disks, you can exclude those disks from the backup job by following the steps below:
-
Click Advanced setup
-
Cancel the selection of the VM disks that you do not want to back up.