Backup Job Wizard for Nutanix AHV: VMs
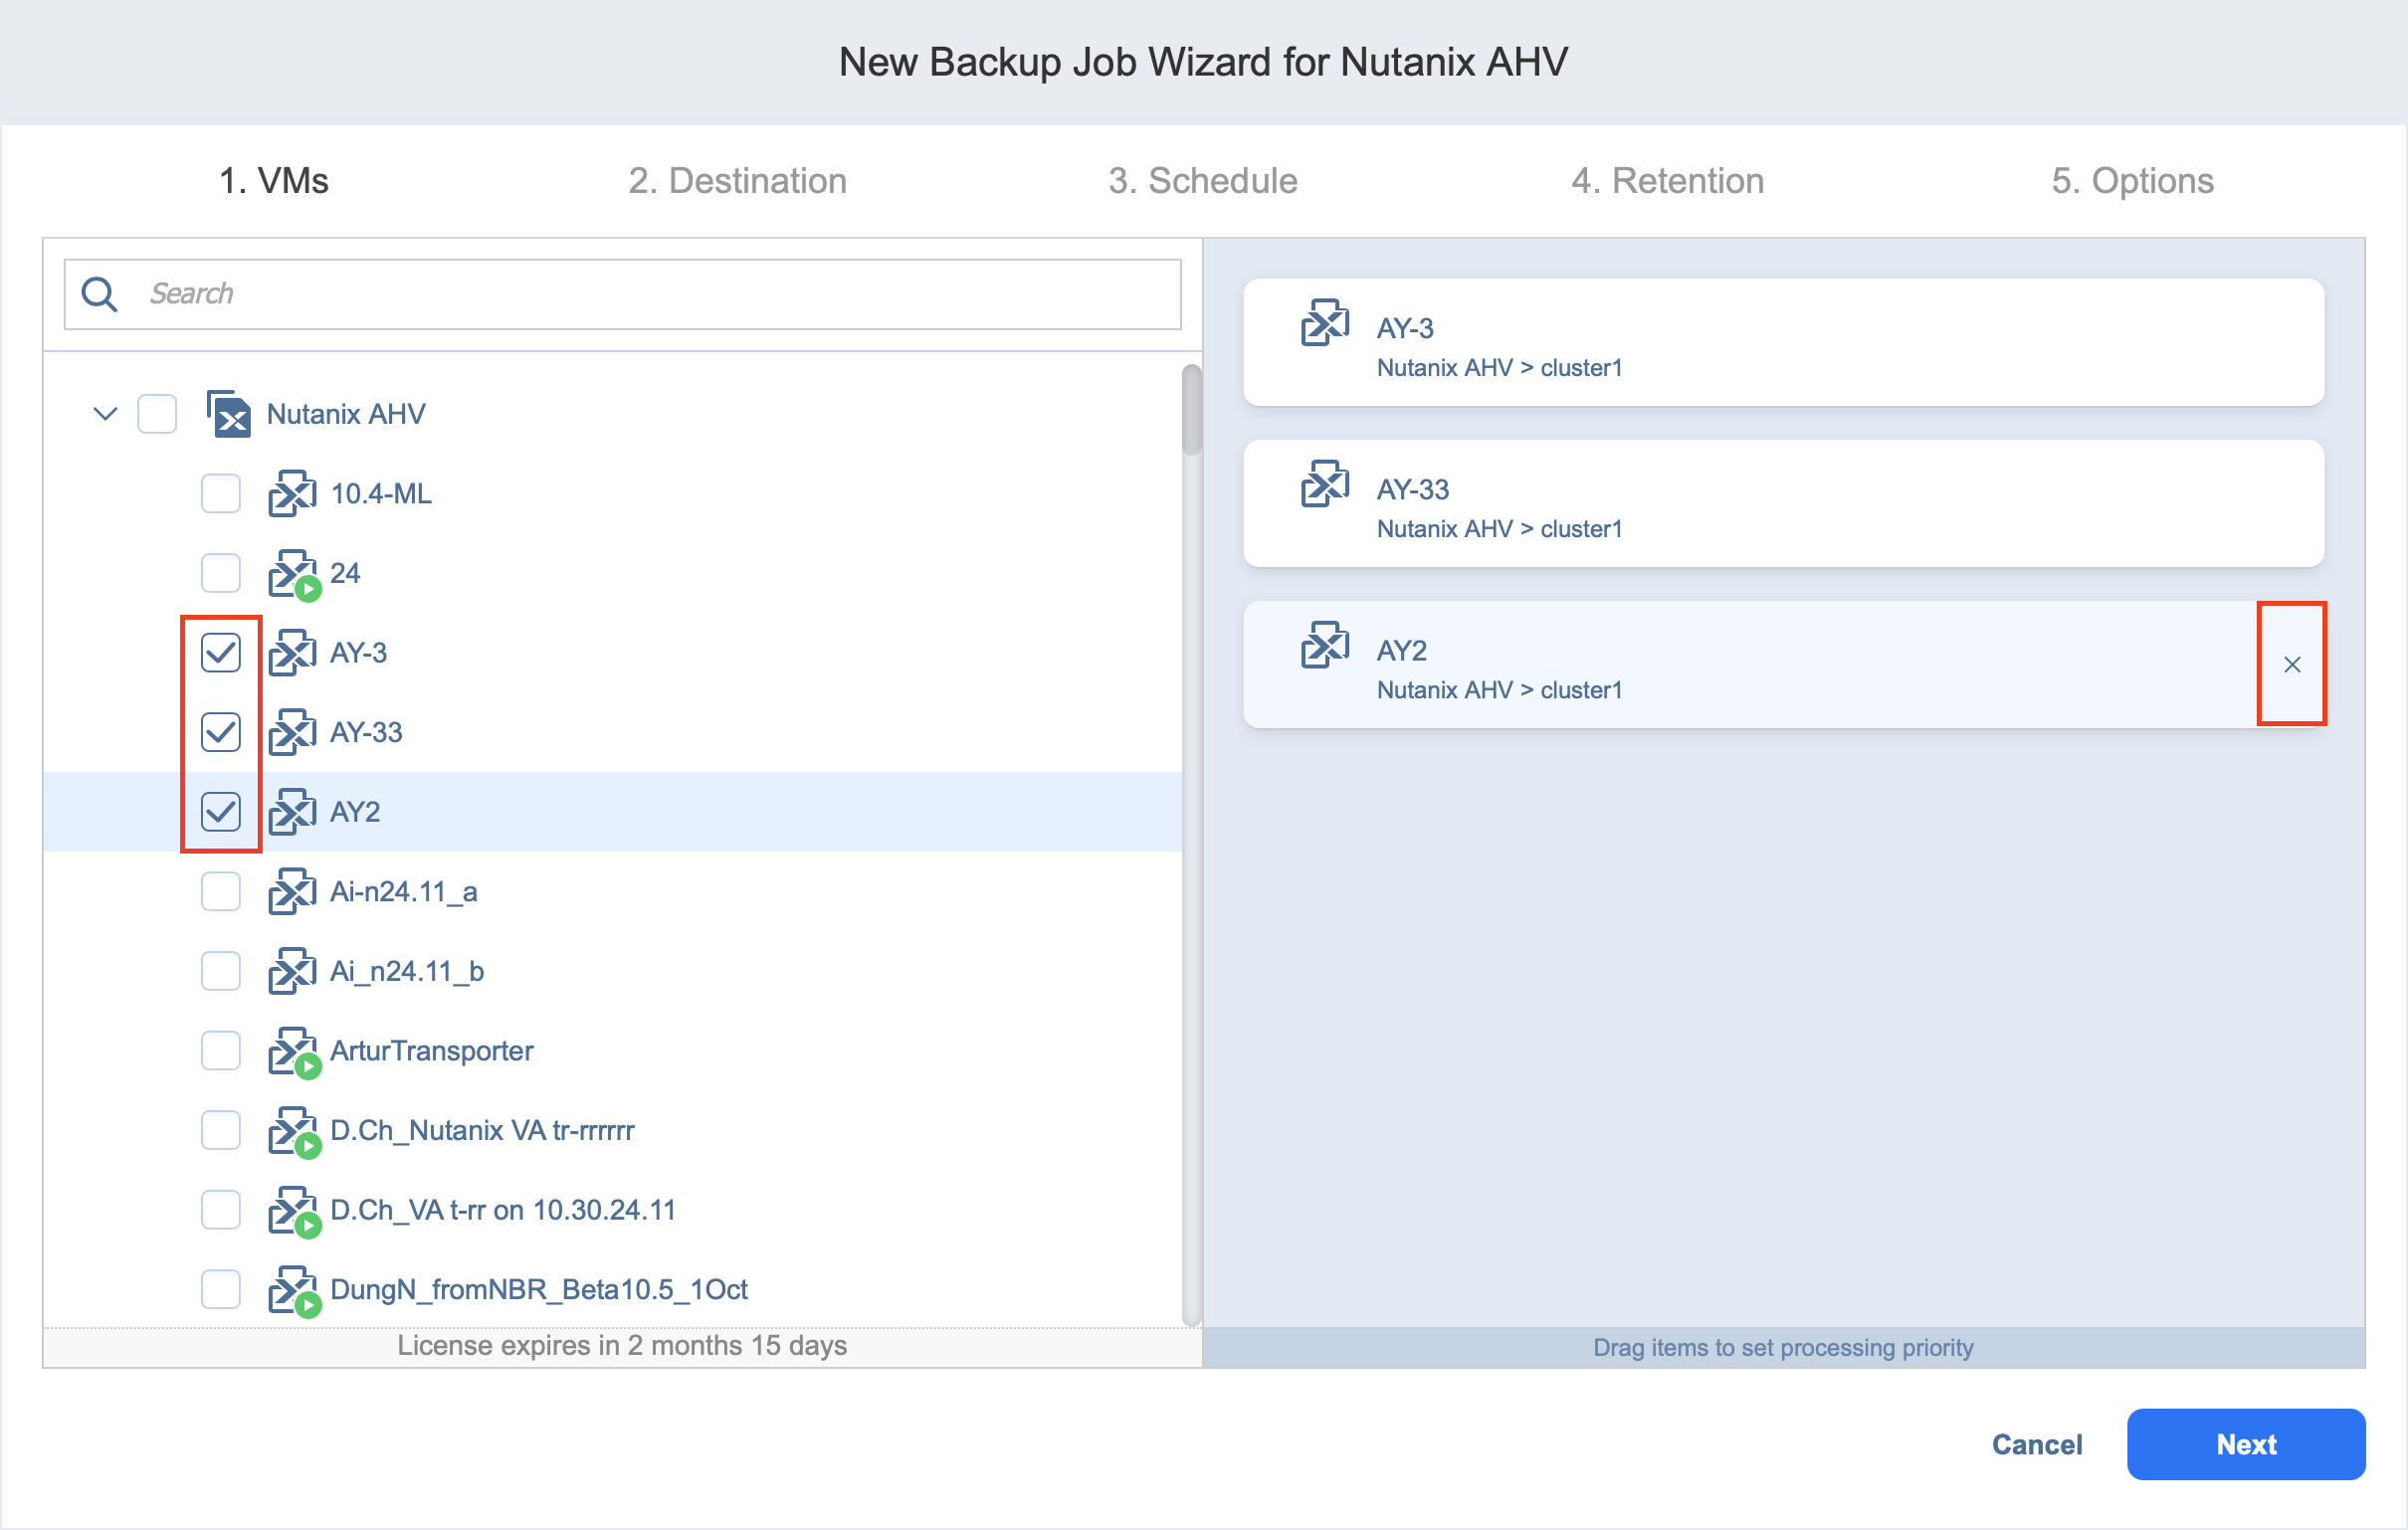
The first step in the creation of a backup job is selecting VMs you would like to back up. You can select individual VMs to be backed up by selecting the checkboxes next to their names, or you can select all VMs for backing up within the cluster by selecting a checkbox next to a cluster name. Adding a Nutanix cluster to the job ensures that important VMs are always protected. If you add a Nutanix cluster to the job, then all VMs currently available in the selected cluster will be backed up and all new VMs that are created in (or moved to) the cluster in the future will be automatically added to the job and backed up as well. If you cannot find a particular VM or cluster, make sure the corresponding Nutanix cluster is added to the Inventory or try refreshing the Inventory.
The selected VMs and clusters are displayed in the right pane of the page.
Notes
Not all VMs can be added to the selection. The following restrictions apply to:
Some or all disks of a VM that belong to a Volume Group.
VMs that have no disks at all.
Such VMs appear dimmed and are not available for backing up. Hovering over a VM displays the reason in a tooltip.
The following operations are available with the selected items:
-
Exclusion: If necessary, you can exclude VMs from the backup by deselecting them in the left pane or by clicking the Delete icon to the right of the VM’s name in the right pane.
-
Changing processing priority: You can set the processing priority for the VM by dragging it to the higher or lower position—by doing so, you can specify to back up the most important VMs first. The processing priority of the whole cluster can also be changed by dragging. The order in which VMs are backed up is important if the Transporter performing the backup cannot process all VMs of the job simultaneously—either because the Transporter is processing other jobs at the same time or because the number of VM disks in the job exceeds the Transporter’s Maximum Load specified during the Transporter creation.
When you finish with VMs selection, click Next to proceed to the next page.