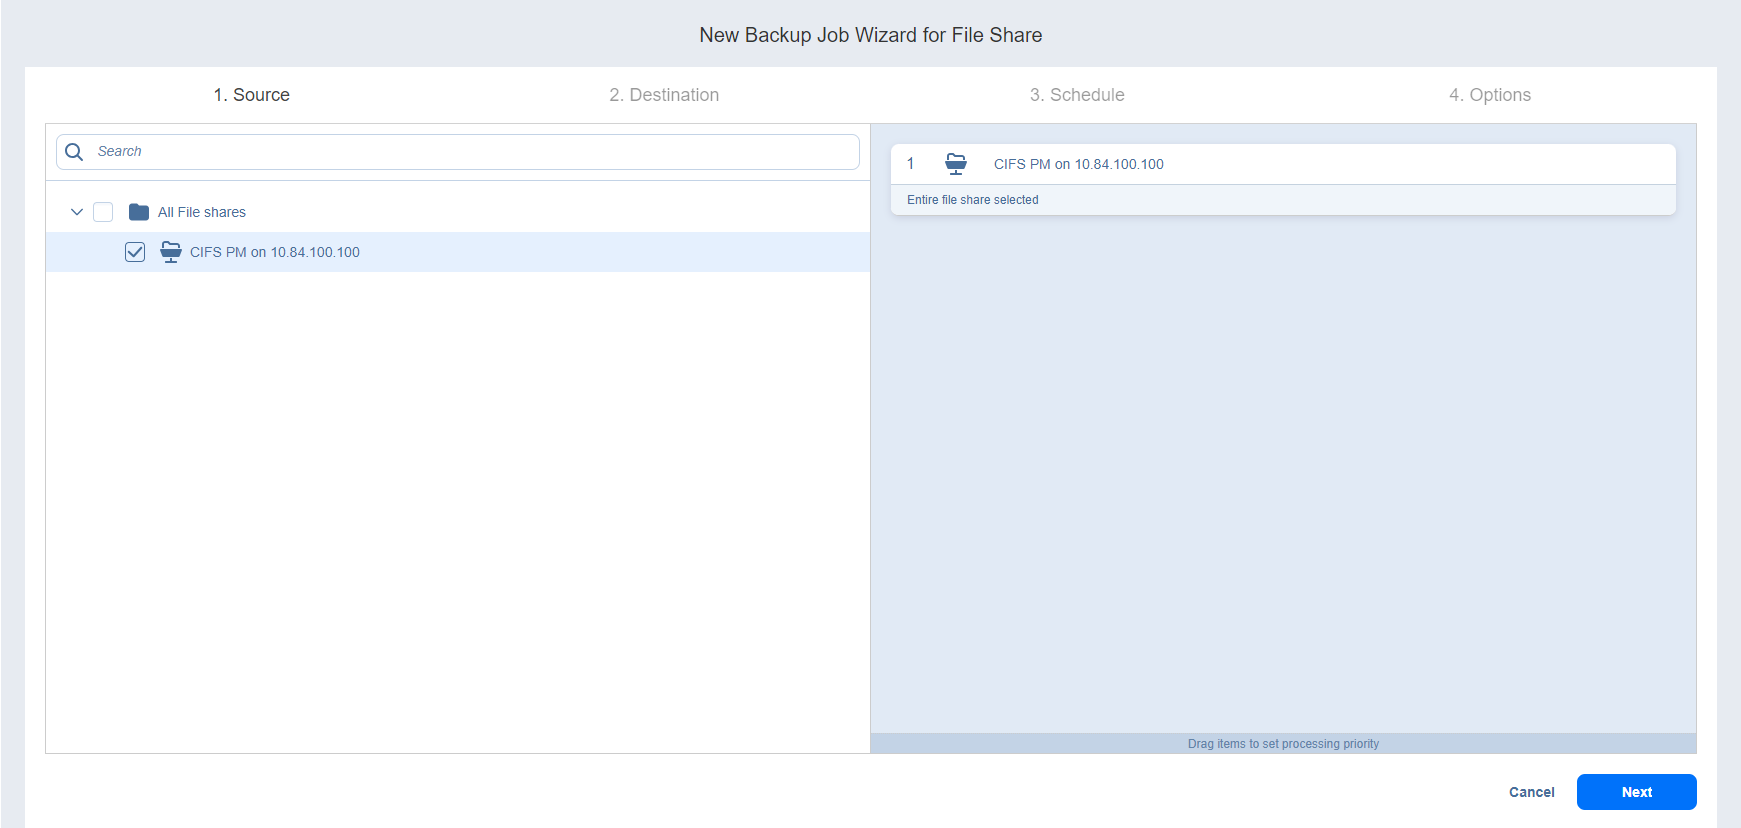
Backup Job Wizard for File Share: Source
On the Source page of the wizard, add a file share to your backup job. To do this, proceed as follows:
-
In the left pane of the page, select the file shares you want to back up. Use the Search functionality to find shares by name.
Notes
-
When All File Shares is selected, all the file shares that were added to Inventory are added to the job. New items created in or moved to the source group are automatically added to this job.
-
Due to Microsoft limitations, Windows files and folders whose names end in a space or period cannot be opened or created. If a Windows-based transporter is used to execute a file share backup job that includes file shares containing such files or folders, the job fails.
-
-
Optionally, instead of backing up an entire file share, you can view and select individual folders of a share. To do this, proceed as follows:
-
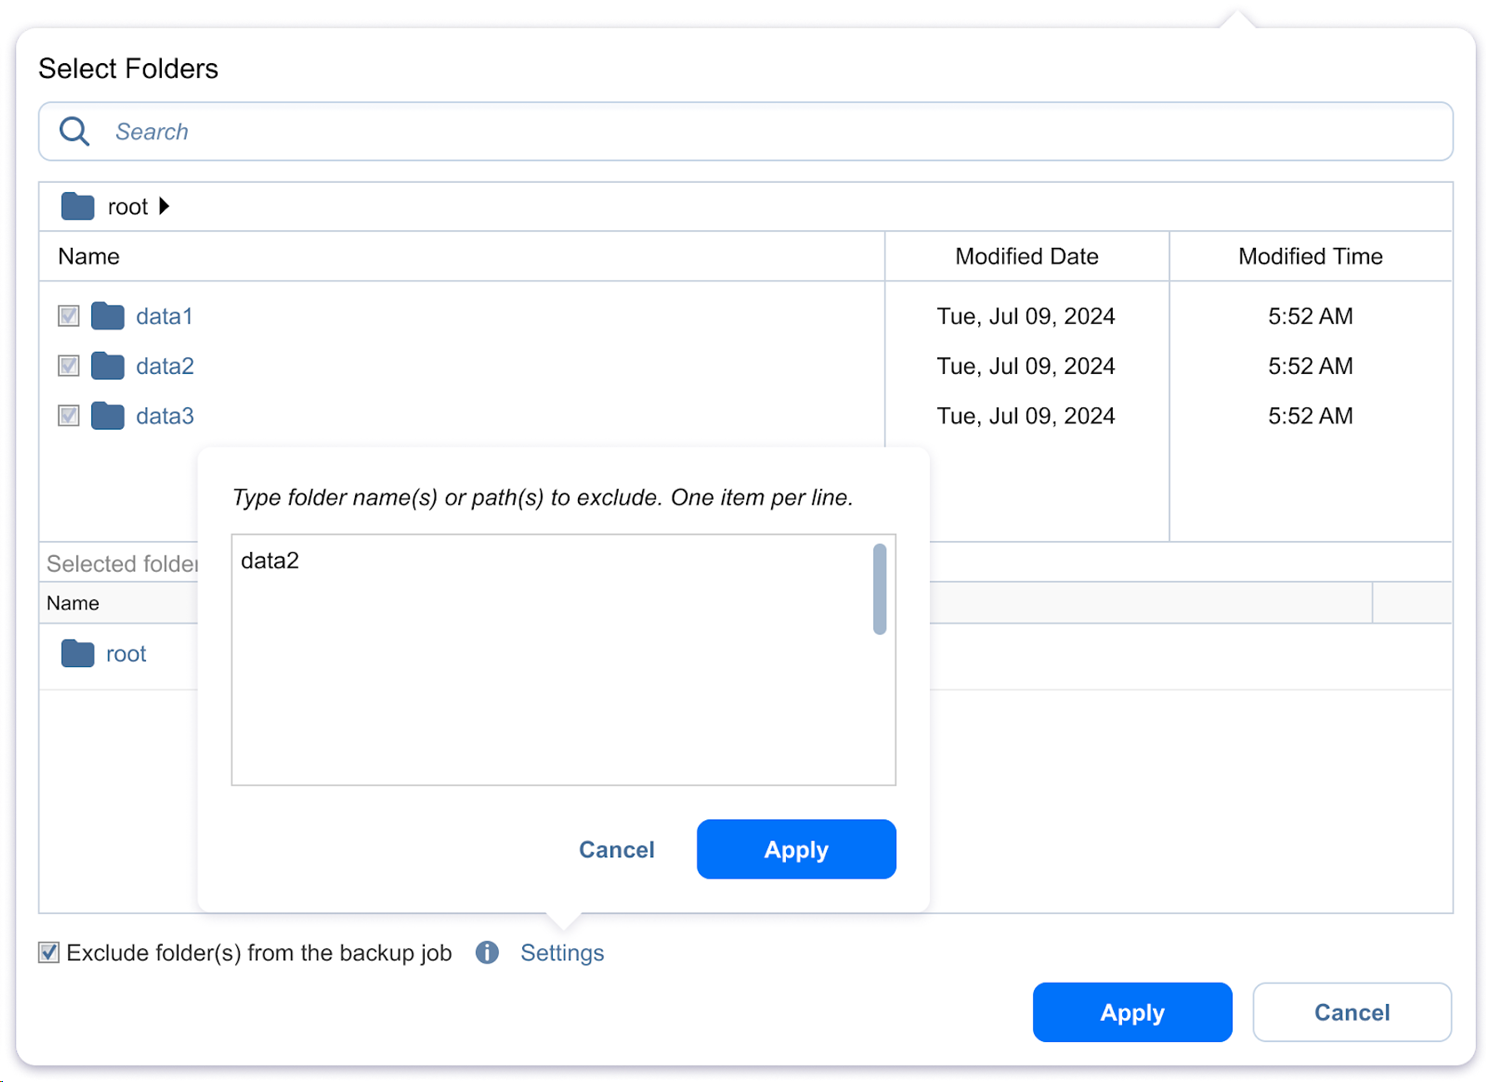
Hover over the selected share and click the Edit icon. The Select Folders dialog box opens.
-
Select the folders you want to back up by selecting the checkbox next to them. To see the list of the selected folders, click Show. To cancel the selection, click Clear selection.
Note
Selecting the root folder automatically selects all the current folders and new folders under it. You can deselect the root folder to manually select the folders you want to add to the file share backup job.
-
Optionally, select the Exclude item(s) from the backup job checkbox to specify folders or files that should be skipped during the backup process. The Settings link is displayed.
-
Click the Settings link to add a list of the folders or file paths.
-
When the items are added to the list, click Apply.
Notes
-
The items to be excluded should be added one per line. Press Enter to go to the next line. Empty lines are not allowed.
-
You can use relative and absolute paths to the items that must be excluded.
-
Use "/" as a path separator. Wildcards and file masks are not supported.
-
The exclusion list applies to the contents within the selected sources (such as folders or file shares), not to the sources themselves.
-
If an item is selected in the Selected folders section and added to the exclusion list in the Exclude item popup, it remains selected.
-
If all child items of a parent folder are excluded, the parent folder itself will not be backed up as an empty folder — it will be excluded from the backup job entirely.
-
Selected items are always included in the backup job.
-
-
Click Apply to save the settings and close the window.
Notes
-
The Select Folders dialog box also displays hidden folders, if any.
-
To edit the selected items or add more folders to back up, click the Edit button for the selected file share in the right pane, select more folders in the Select Folders dialog box, and click Apply.
-
The deleted local folders/sub-folders are also removed from the list of backup items.
-
The selected items are skipped during the file share backup job in case of:
-
Insufficient permissions to access certain files and/or folders
-
Internal error while attempting to read file data
-
Network connectivity issues
-
Files and/or folders with prohibited characters in their name
-
-
-
-
Click Next to move to the next page of the wizard.

