How to Back Up and Recover Proxmox VM Data Using Agent-Based Approach
Product version: 11.0
Last modified: 19 June 2024
Question
How can you back up and then recover Proxmox VM data using an agent-based approach in NAKIVO Backup & Replication?
Answer
NAKIVO supports backing up Proxmox VM data and then recovering it to a VM on the same hypervisor or performing file- or object-level recovery. You may use the following instructions for backing up and recovering Proxmox VM data using an agent-based approach in NAKIVO Backup & Replication:
Prerequisites
The following environment setup is used in this walkthrough:
-
NAKIVO Backup & Replication deployed on Linux Ubuntu running on a Proxmox VM. The complete NAKIVO Backup & Replication solution is installed with the onboard backup repository, renamed from “Onboard repository” to “Proxmox Onboard”.
Note
NAKIVO Backup & Replication can be installed on any supported machine or device. For detailed installation instructions, please refer to the user guide.
-
A bare-metal Proxmox server based on Proxmox 8.1.4.
-
Local datastores:
-
Local
-
Local-lvm
-
-
Shared datastore configured on the repository used for creating backup copy jobs.
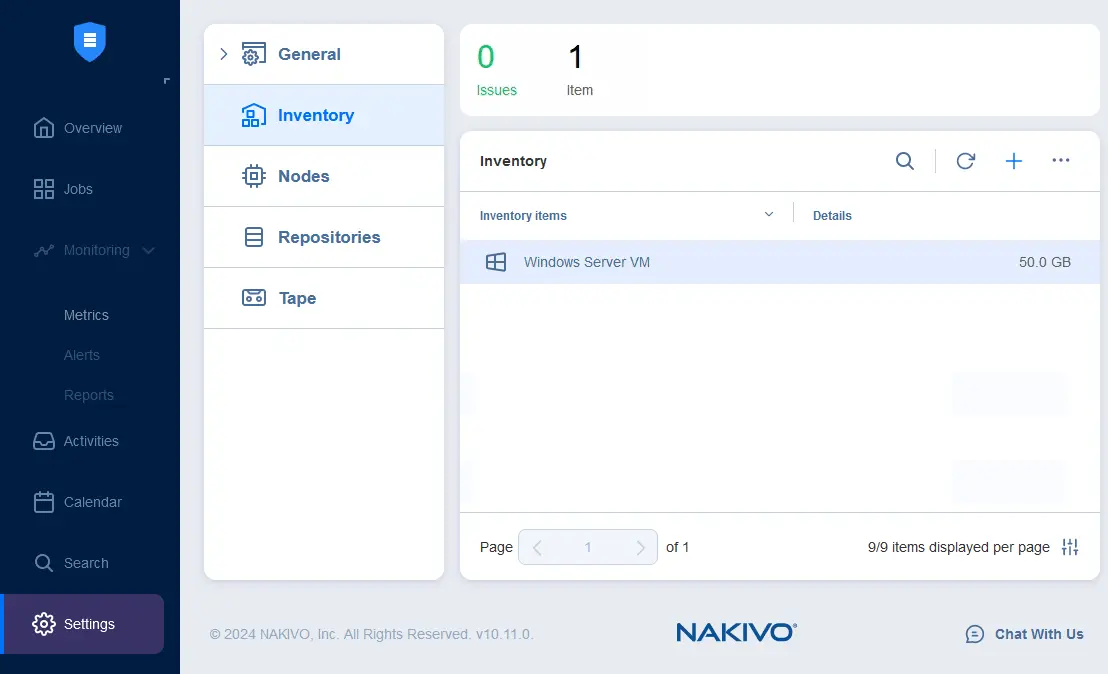
Adding Proxmox VMs to Inventory
To add Proxmox VMs to the NAKIVO Backup & Replication inventory:
-
Access Inventory Settings:
-
Navigate to Settings > Inventory in the NAKIVO web interface.
-
Click the + button to add a new item.

-
-
Add a Linux VM:
-
Select Physical to use the agent-based approach.
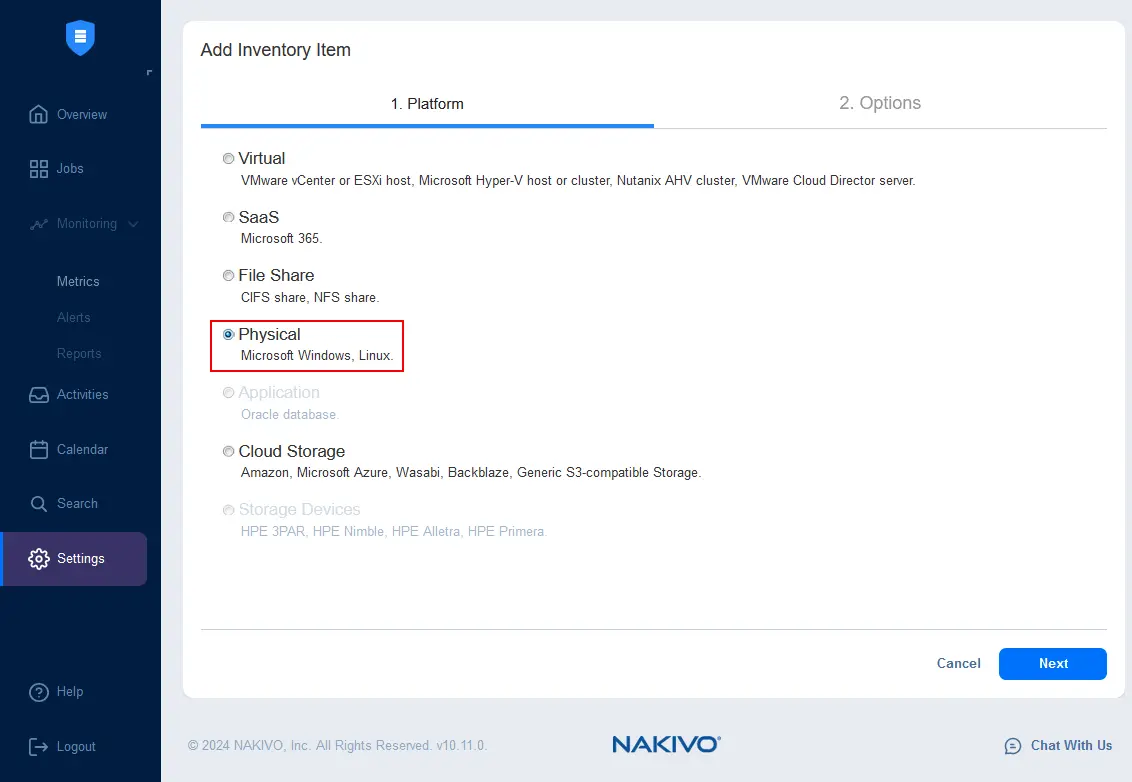
Note
This method involves installing a Transporter agent in each Proxmox VM. This approach is similar to adding physical Linux or Windows machines.
-
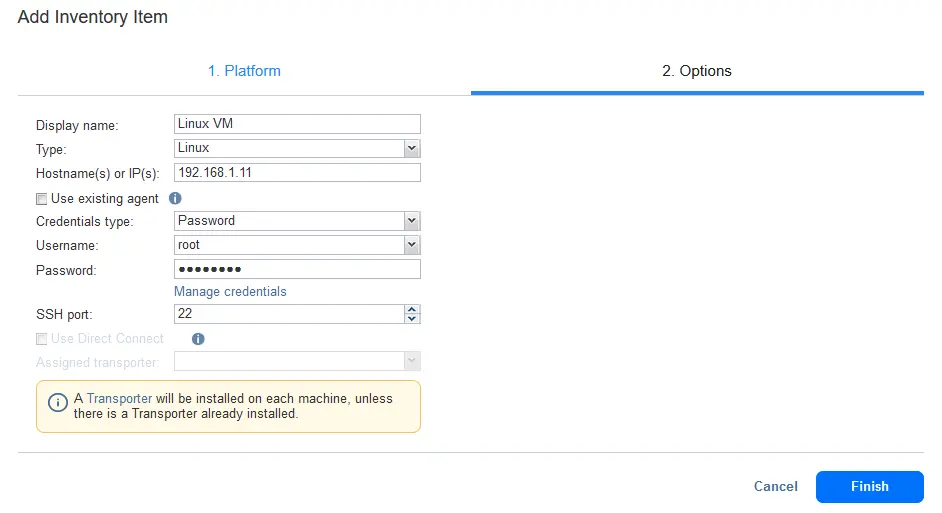
Enter the following details:
-
Display name: Linux VM
-
Type: Linux
-
Credentials type: Password
-
Username: root
-
Password: *********
-
SSH port: 22
-
-
A NAKIVO Transporter will be installed on the machine. If automatic installation fails, manually install the Transporter.
-
-
Finalize Addition:
-
Click Finish to complete the addition.
-
-
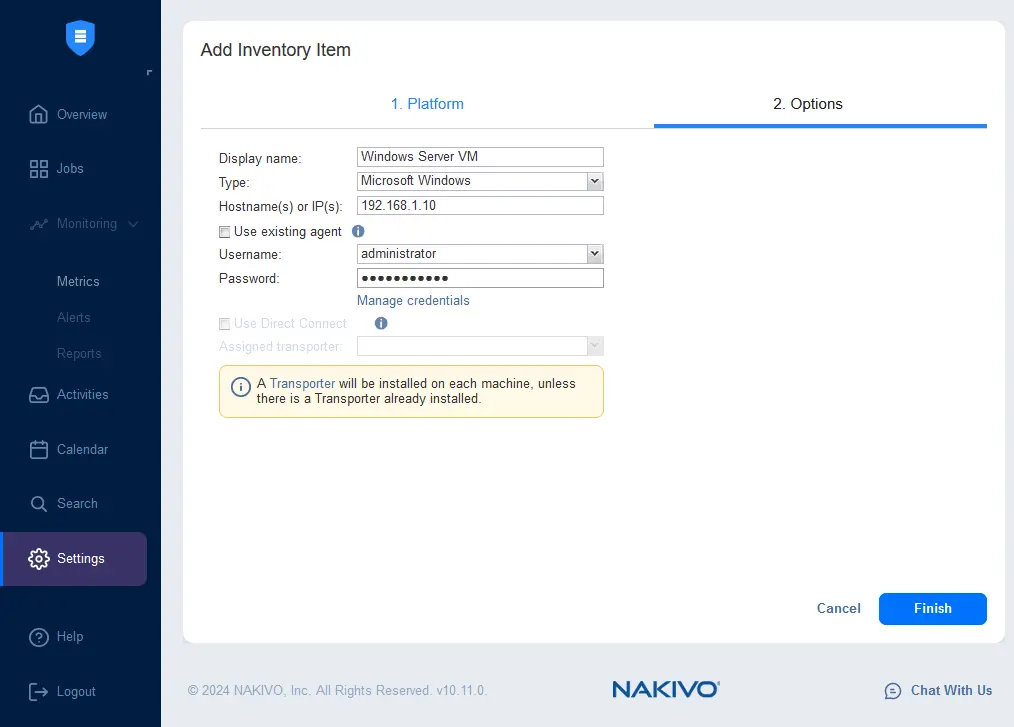
Add a Windows Machine:
-
Follow the same steps, selecting Microsoft Windows and entering the IP address and credentials.
-


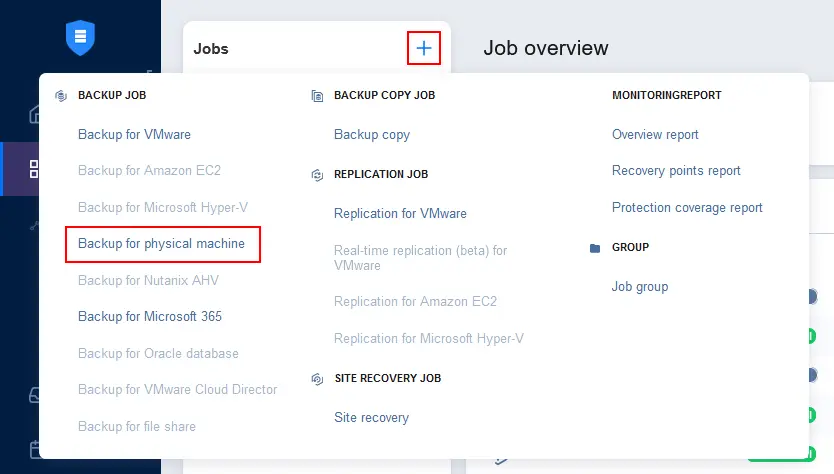
Creating a Backup Job
To create a backup job for Proxmox VMs:
-
Create a New Backup Job:
-
Go to the Jobs tab, click +, and select Backup for physical machine.
-
-
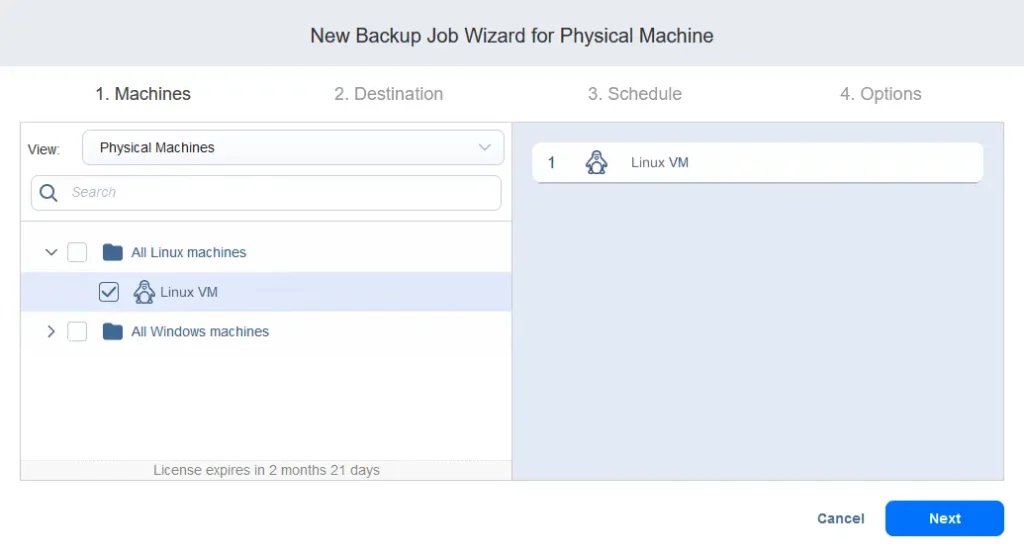
Select VM to Back Up:
-
Choose the Proxmox VM(s) to back up. For example, select the Linux VM.
-
-
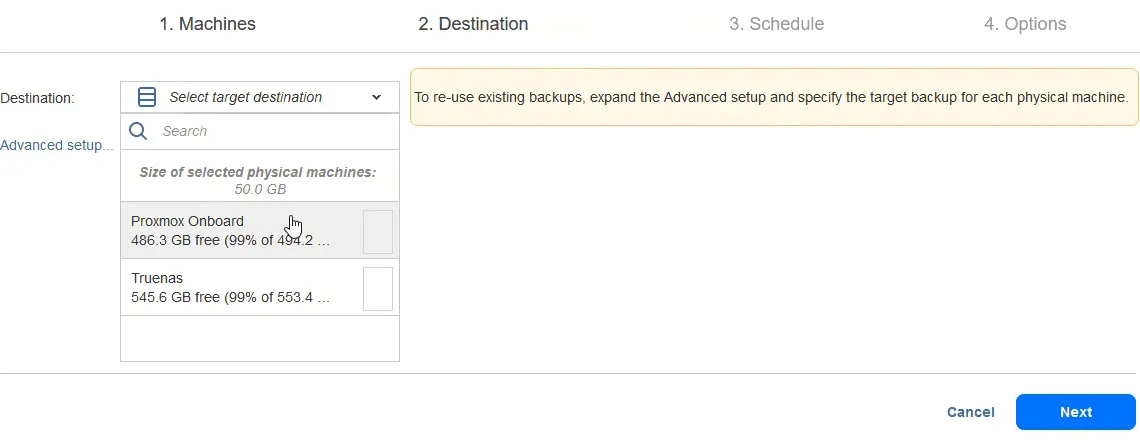
Select Backup Destination:
-
Choose the "Proxmox Onboard" repository. Optionally, create a backup copy job to a remote iSCSI repository on TrueNAS.

-
-
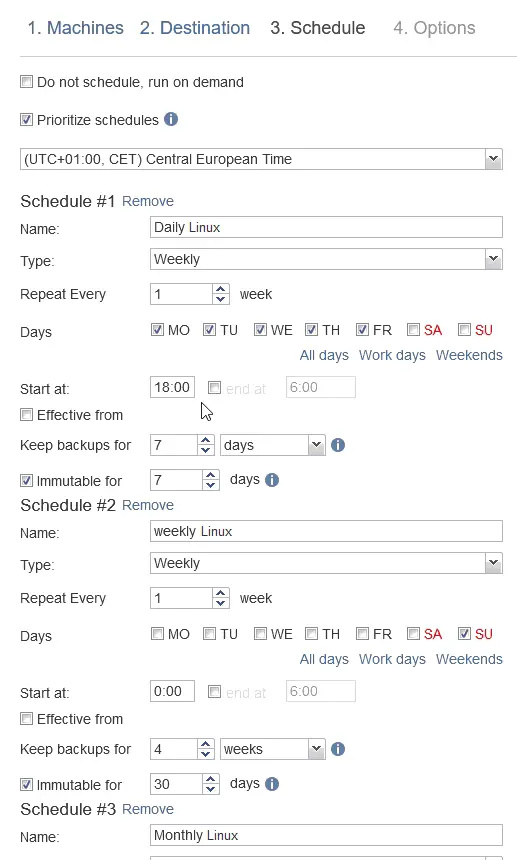
Configure Schedule and Retention:
-
Set the schedule and retention settings or choose on-demand execution. Use a grandfather-father-son scheme.
-
-
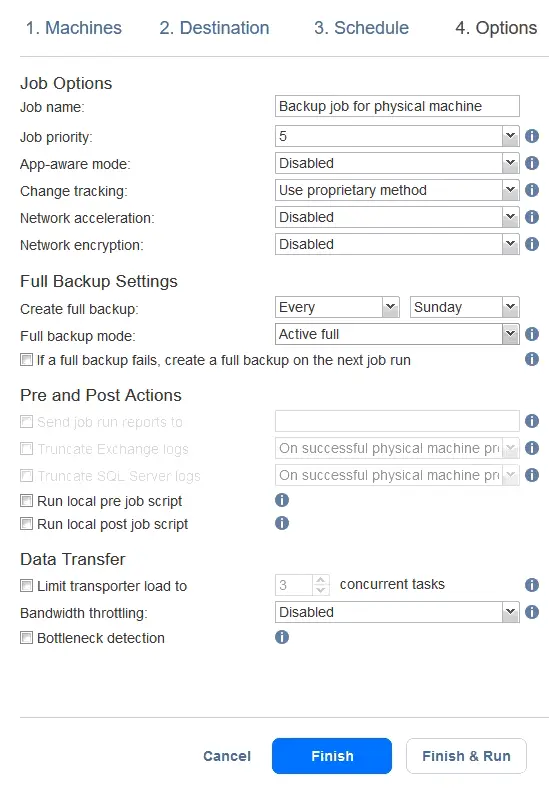
Backup Job Options:
-
Job name: Enter a name.
-
Change tracking: Select the proprietary method.
-
Full backup intervals: Define the intervals and type.
-
-
Run Backup Job:
-
Click Finish & Run. Review the job scope, scheduling, and retention. Click Run to confirm.


Granular Recovery of Proxmox VM Data
To recover specific files from a Windows VM:
-
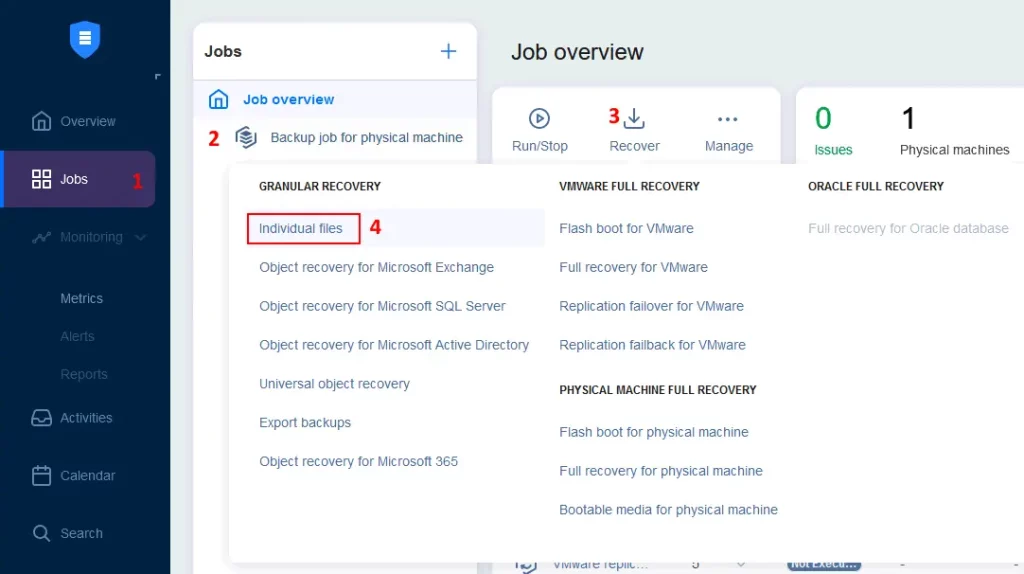
Select Recovery Job:
-
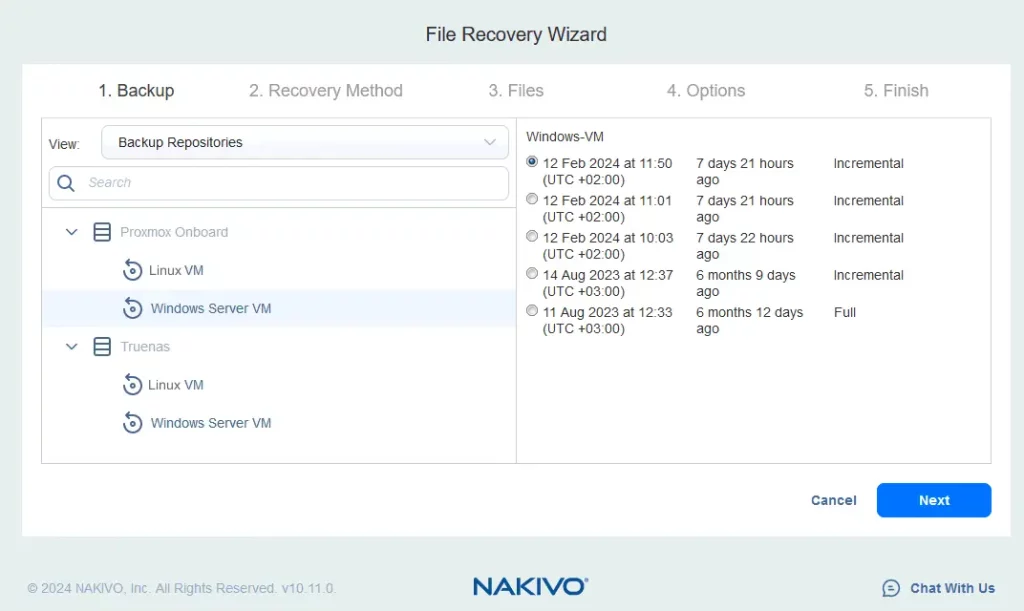
Go to the Jobs tab, select the Windows VM backup job, and click Recover > Individual files.
-
-
Select Recovery Point:
-
In the Backup Repositories view, choose the appropriate backup and proceed through the wizard.
-
-
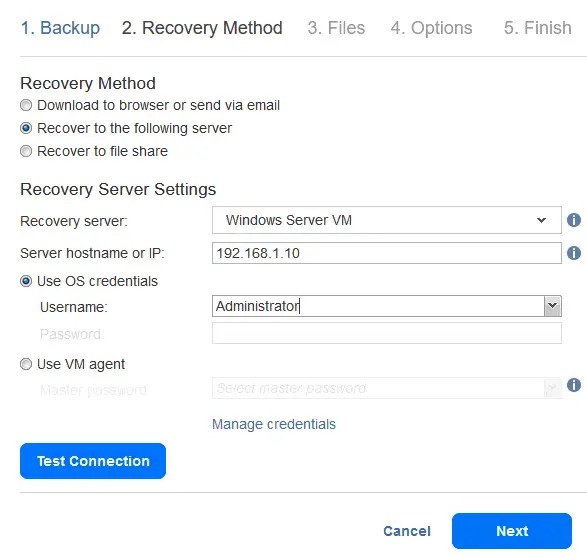
Select Recovery Method:
-
Choose Recover to the following server.
-
-
Enter Recovery Details:
-
Select the Windows Server VM from the inventory, enter the IP address, and provide OS credentials.
-
-
Test Connection:
-
Click Test connection. If successful, click Next to proceed.
-
-
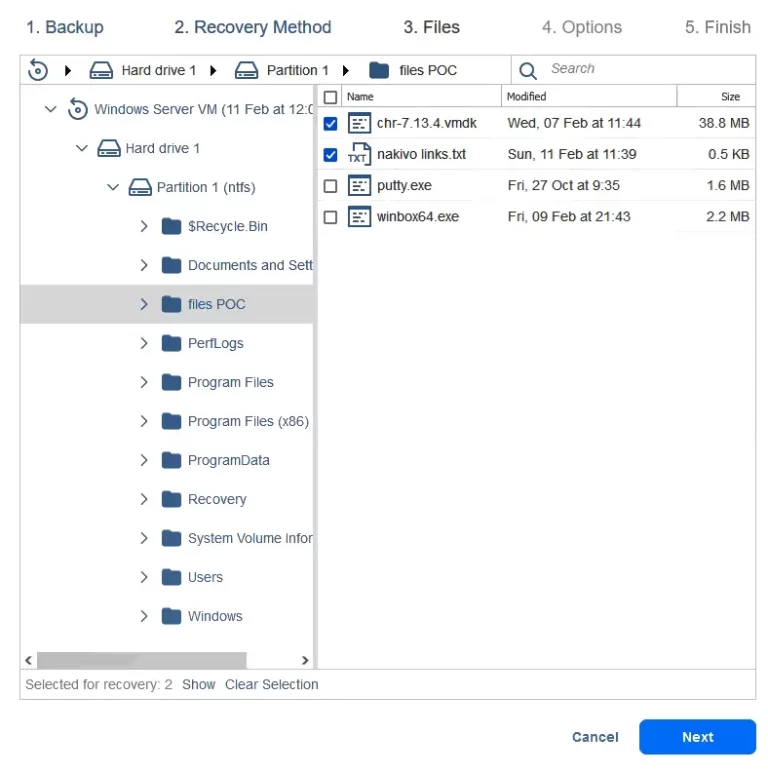
Select Files to Recover:
-
Navigate the file system structure to select the desired files.
-
-
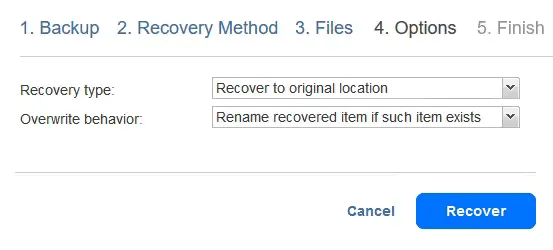
Define Recovery Options:
-
Choose Recover to original location, set overwrite behavior, and click Recover.

Full Recovery Using Bare Metal Restore
For full recovery of Proxmox VM data:
-
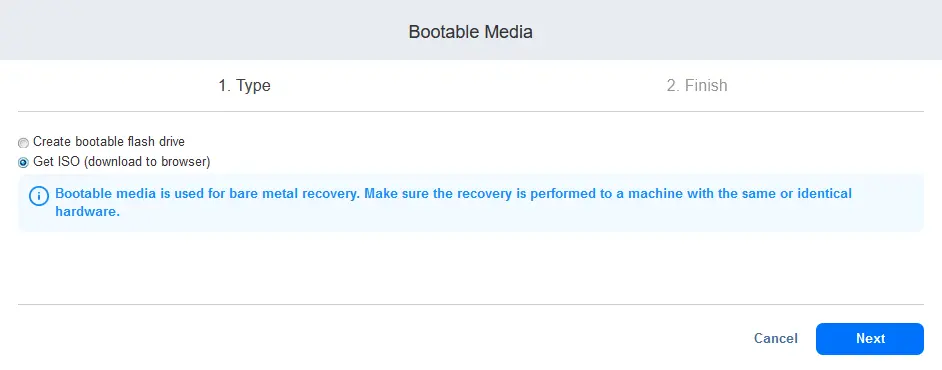
Create Bootable Media:
-
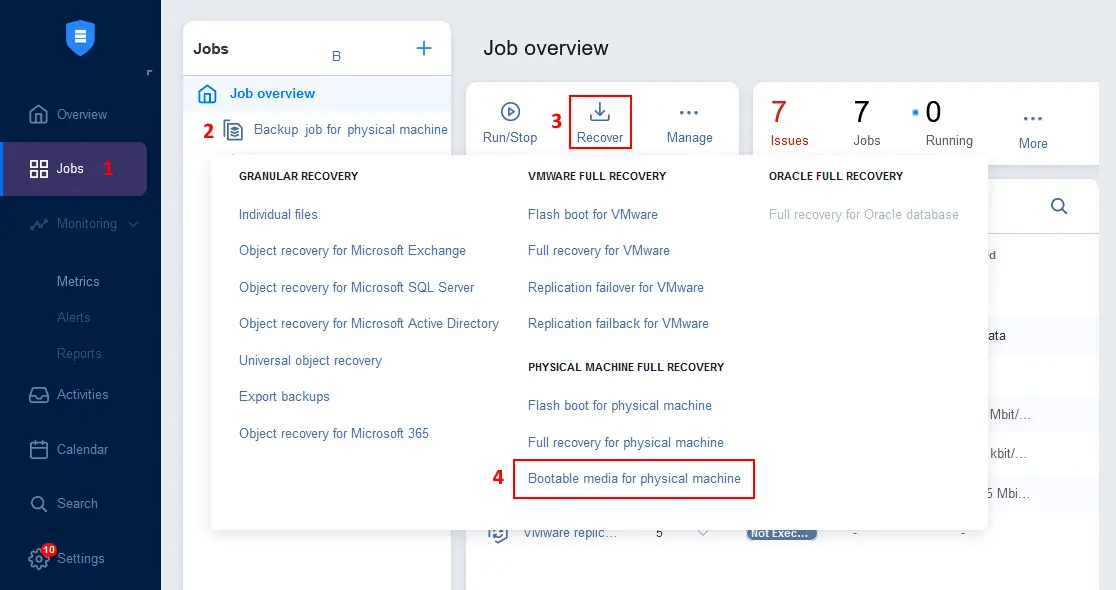
In the NAKIVO web interface, go to Jobs, select the VM backup job, click Recover, and choose Bootable media for physical machine.
-
Select Get ISO (download to browser) and follow the wizard to download the ISO.
-
-
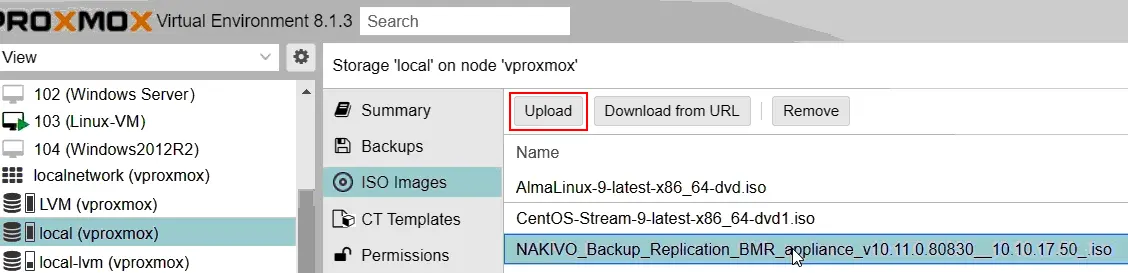
Upload ISO to Proxmox Datastore:
-
In the Proxmox web interface, open the ISO Images tab and upload the ISO image to the datastore.
-
-
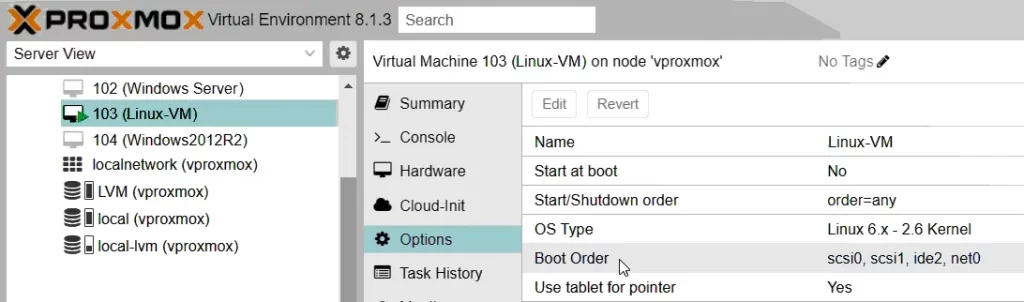
Configure VM to Boot from ISO:
-
Select the VM, go to Hardware, and set the CD/DVD Drive to use the ISO, then confirm.

-
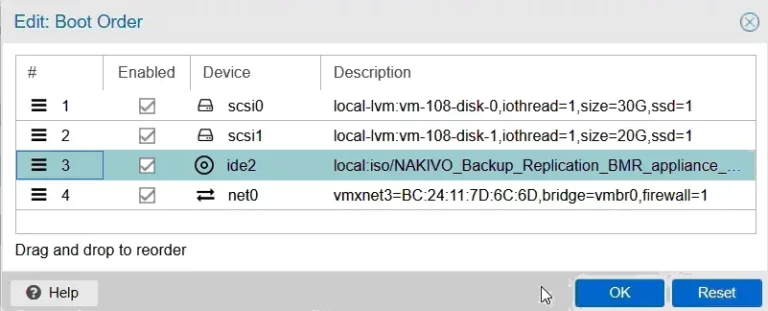
Click Options of the VM you want to recover and double-click Boot Order to edit the VM boot order.
-
Adjust the VM's boot order to prioritize the CD/DVD drive. Click OK to save the settings.

-
-
Boot and Recover:
-
Reboot the VM from the ISO.

-
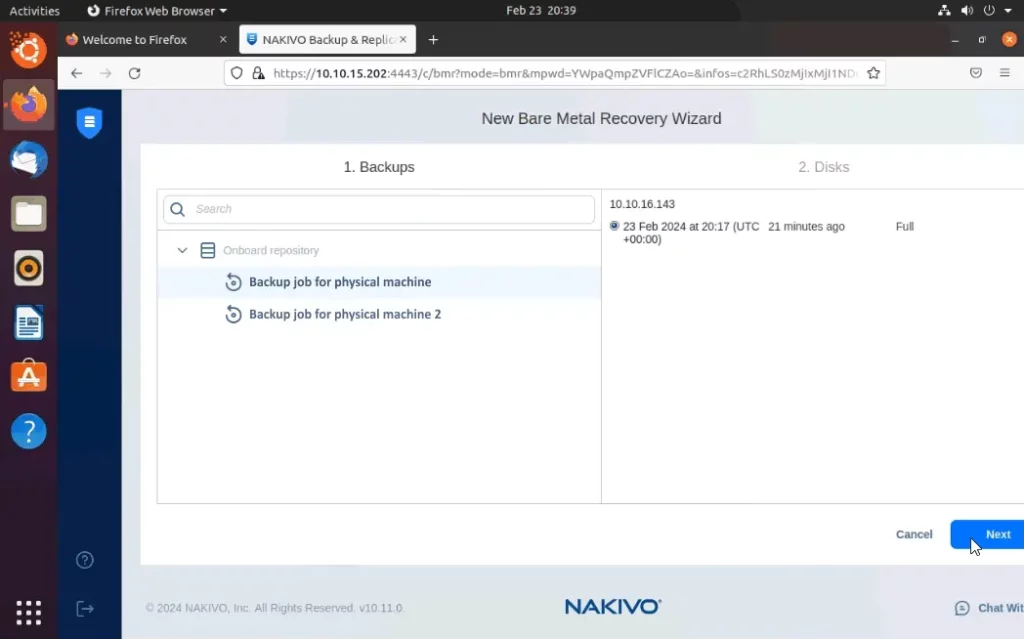
Open the VM console in the Proxmox web interface.
-
In the VM, open Firefox. Ensure the URL in Firefox points to the NAKIVO Backup & Replication backup appliance.
-
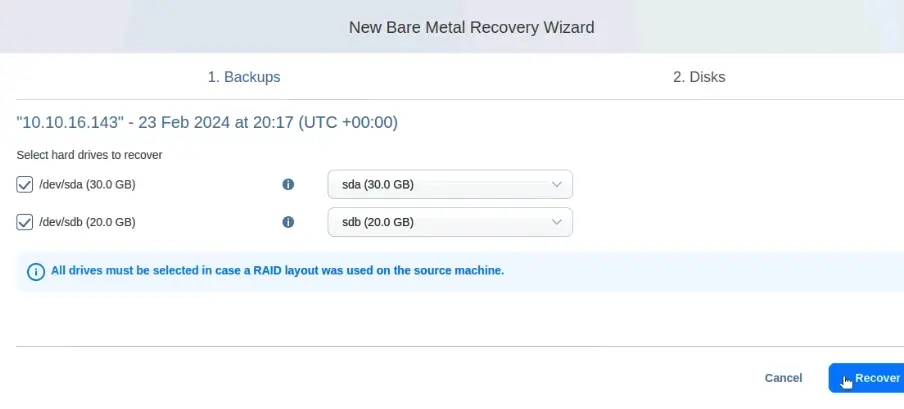
Log in to the NAKIVO Backup & Replication web interface, select the VM backup, and proceed with the recovery.
-
Ensure the target disks match and click Recover.

-
-
Finalize Recovery:
-
After successful recovery, go back to the Proxmox web interface, and revert the VM's boot order to its original settings.
-
-
Reboot the VM to start from its virtual disk.
-