Running Jobs on Demand
Use the Jobs menu to start and stop jobs on demand.
Starting Jobs
To start a job, follow the steps below:
-
Go to the Jobs menu, select the job from the list of jobs, and click Run Job.
-
Choose one of the following options:
-
Run for all VMs/backups/physical machines/items: The job will run for all VMs/backups/physical machines/ items.
-
Run for selected VMs/backups/physical machines/items: The job will run for the VMs/backups/physical machines/items you select.
-
Run for failed VMs/backups/physical machines/items: If applicable, the job will run for previously failed VMs/backups/physical machines/ items only.
-
Run for stopped VMs/backups/physical machines/items: If applicable, the job will run for previously stopped VMs/backups/physical machines/items only.
-
-
If backups in the Backup Repository selected for your job are stored in separate files, you will have to choose between the following backup types:
-
Incremental: Your job will create an incremental backup.
-
Full: Your job will create a full backup. If you choose this option, please choose the full backup mode:
-
Synthetic full: The application will first perform an incremental backup – that is, will transfer only the VM data that changed since the last backup, – and will then transform the available data into a full backup.
-
Active full: Will read all source VM data and transfer it to the backup repository.
-
-
-
You can modify the retention period for job recovery points. The recovery points created as a result of this particular job run are kept for the specified period of time and then expire. The expired recovery points are removed during the following job run. Select Keep recovery points for and specify the relevant time period.
-
Click the Run button to confirm your operation.
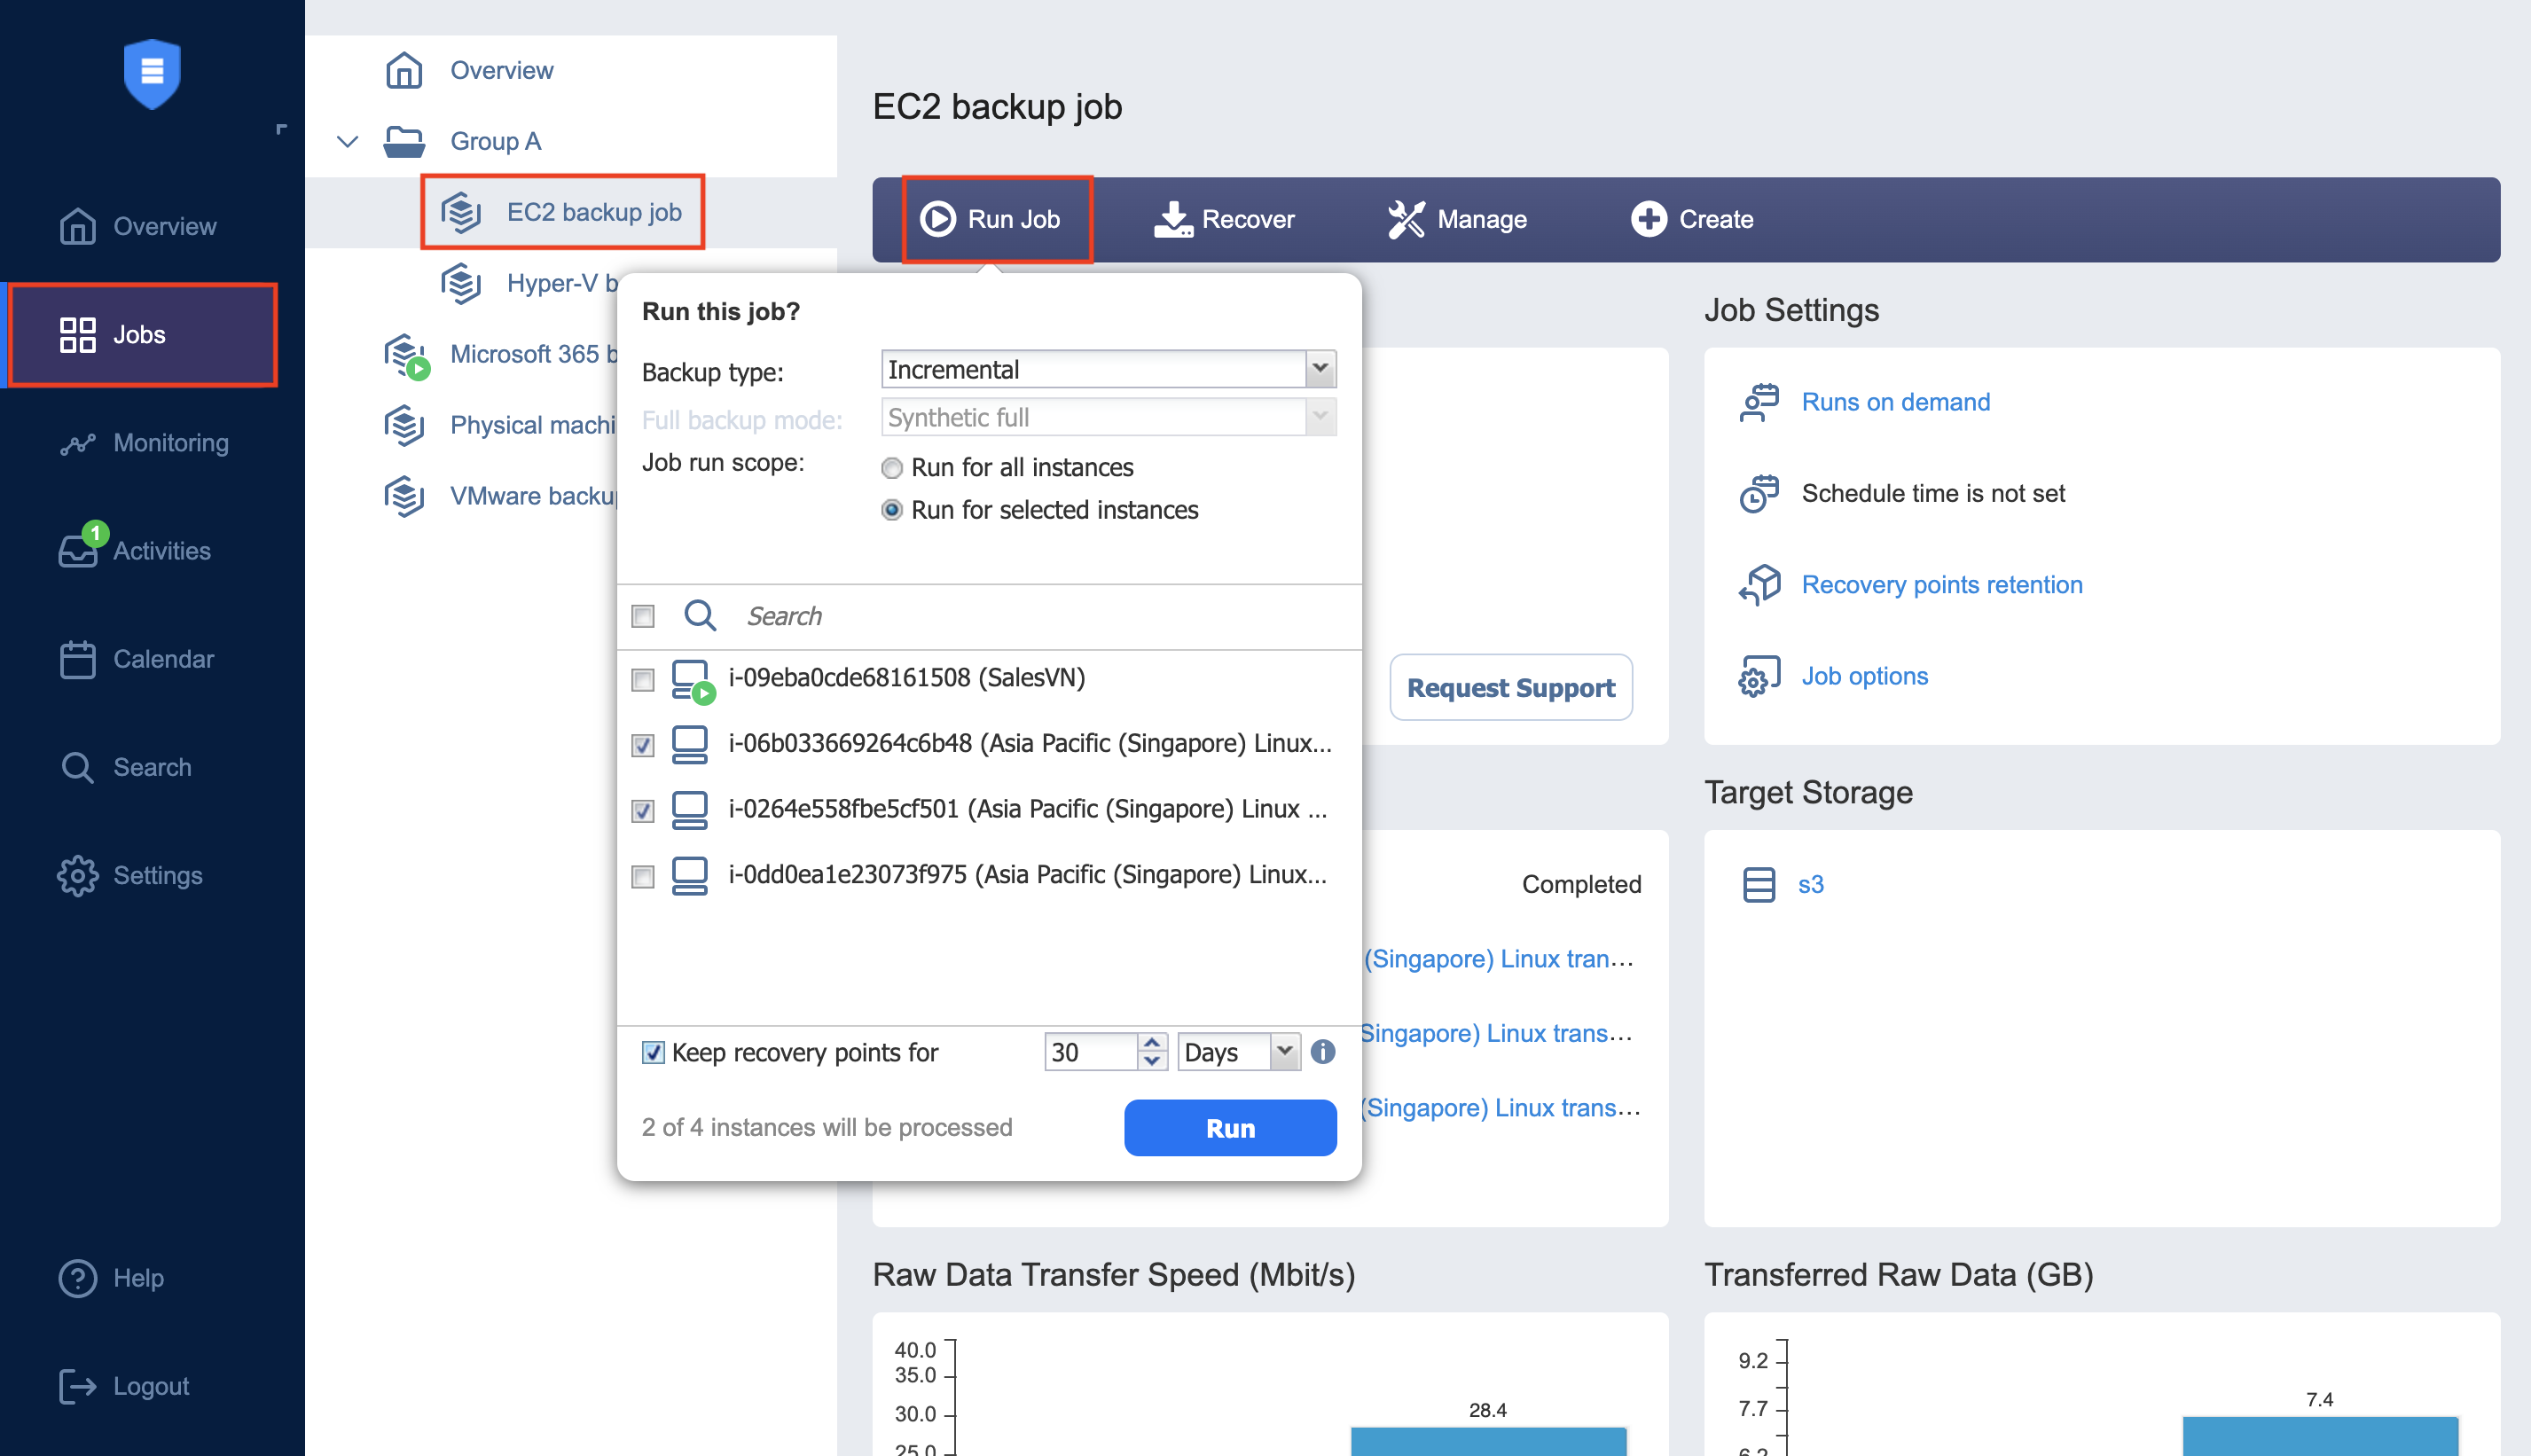
The product will close the dialog box and start running your job.
Stopping Jobs
To stop a job that is currently running, follow the steps below:
-
Go to the Jobs menu, select the job from the list of jobs, and click Stop Job.
-
In the dialog that opens, choose either of the following:
-
Stop for all VMs/backups/physical machines/items: Your job will stop for all VMs/backups/physical machines/items.
-
Stop for selected VMs/backups/physical machines/items: Your job will stop for the VMs/backups/physical machines/items you select.
-
-
Click the Stop button in the dialog to confirm your operation.
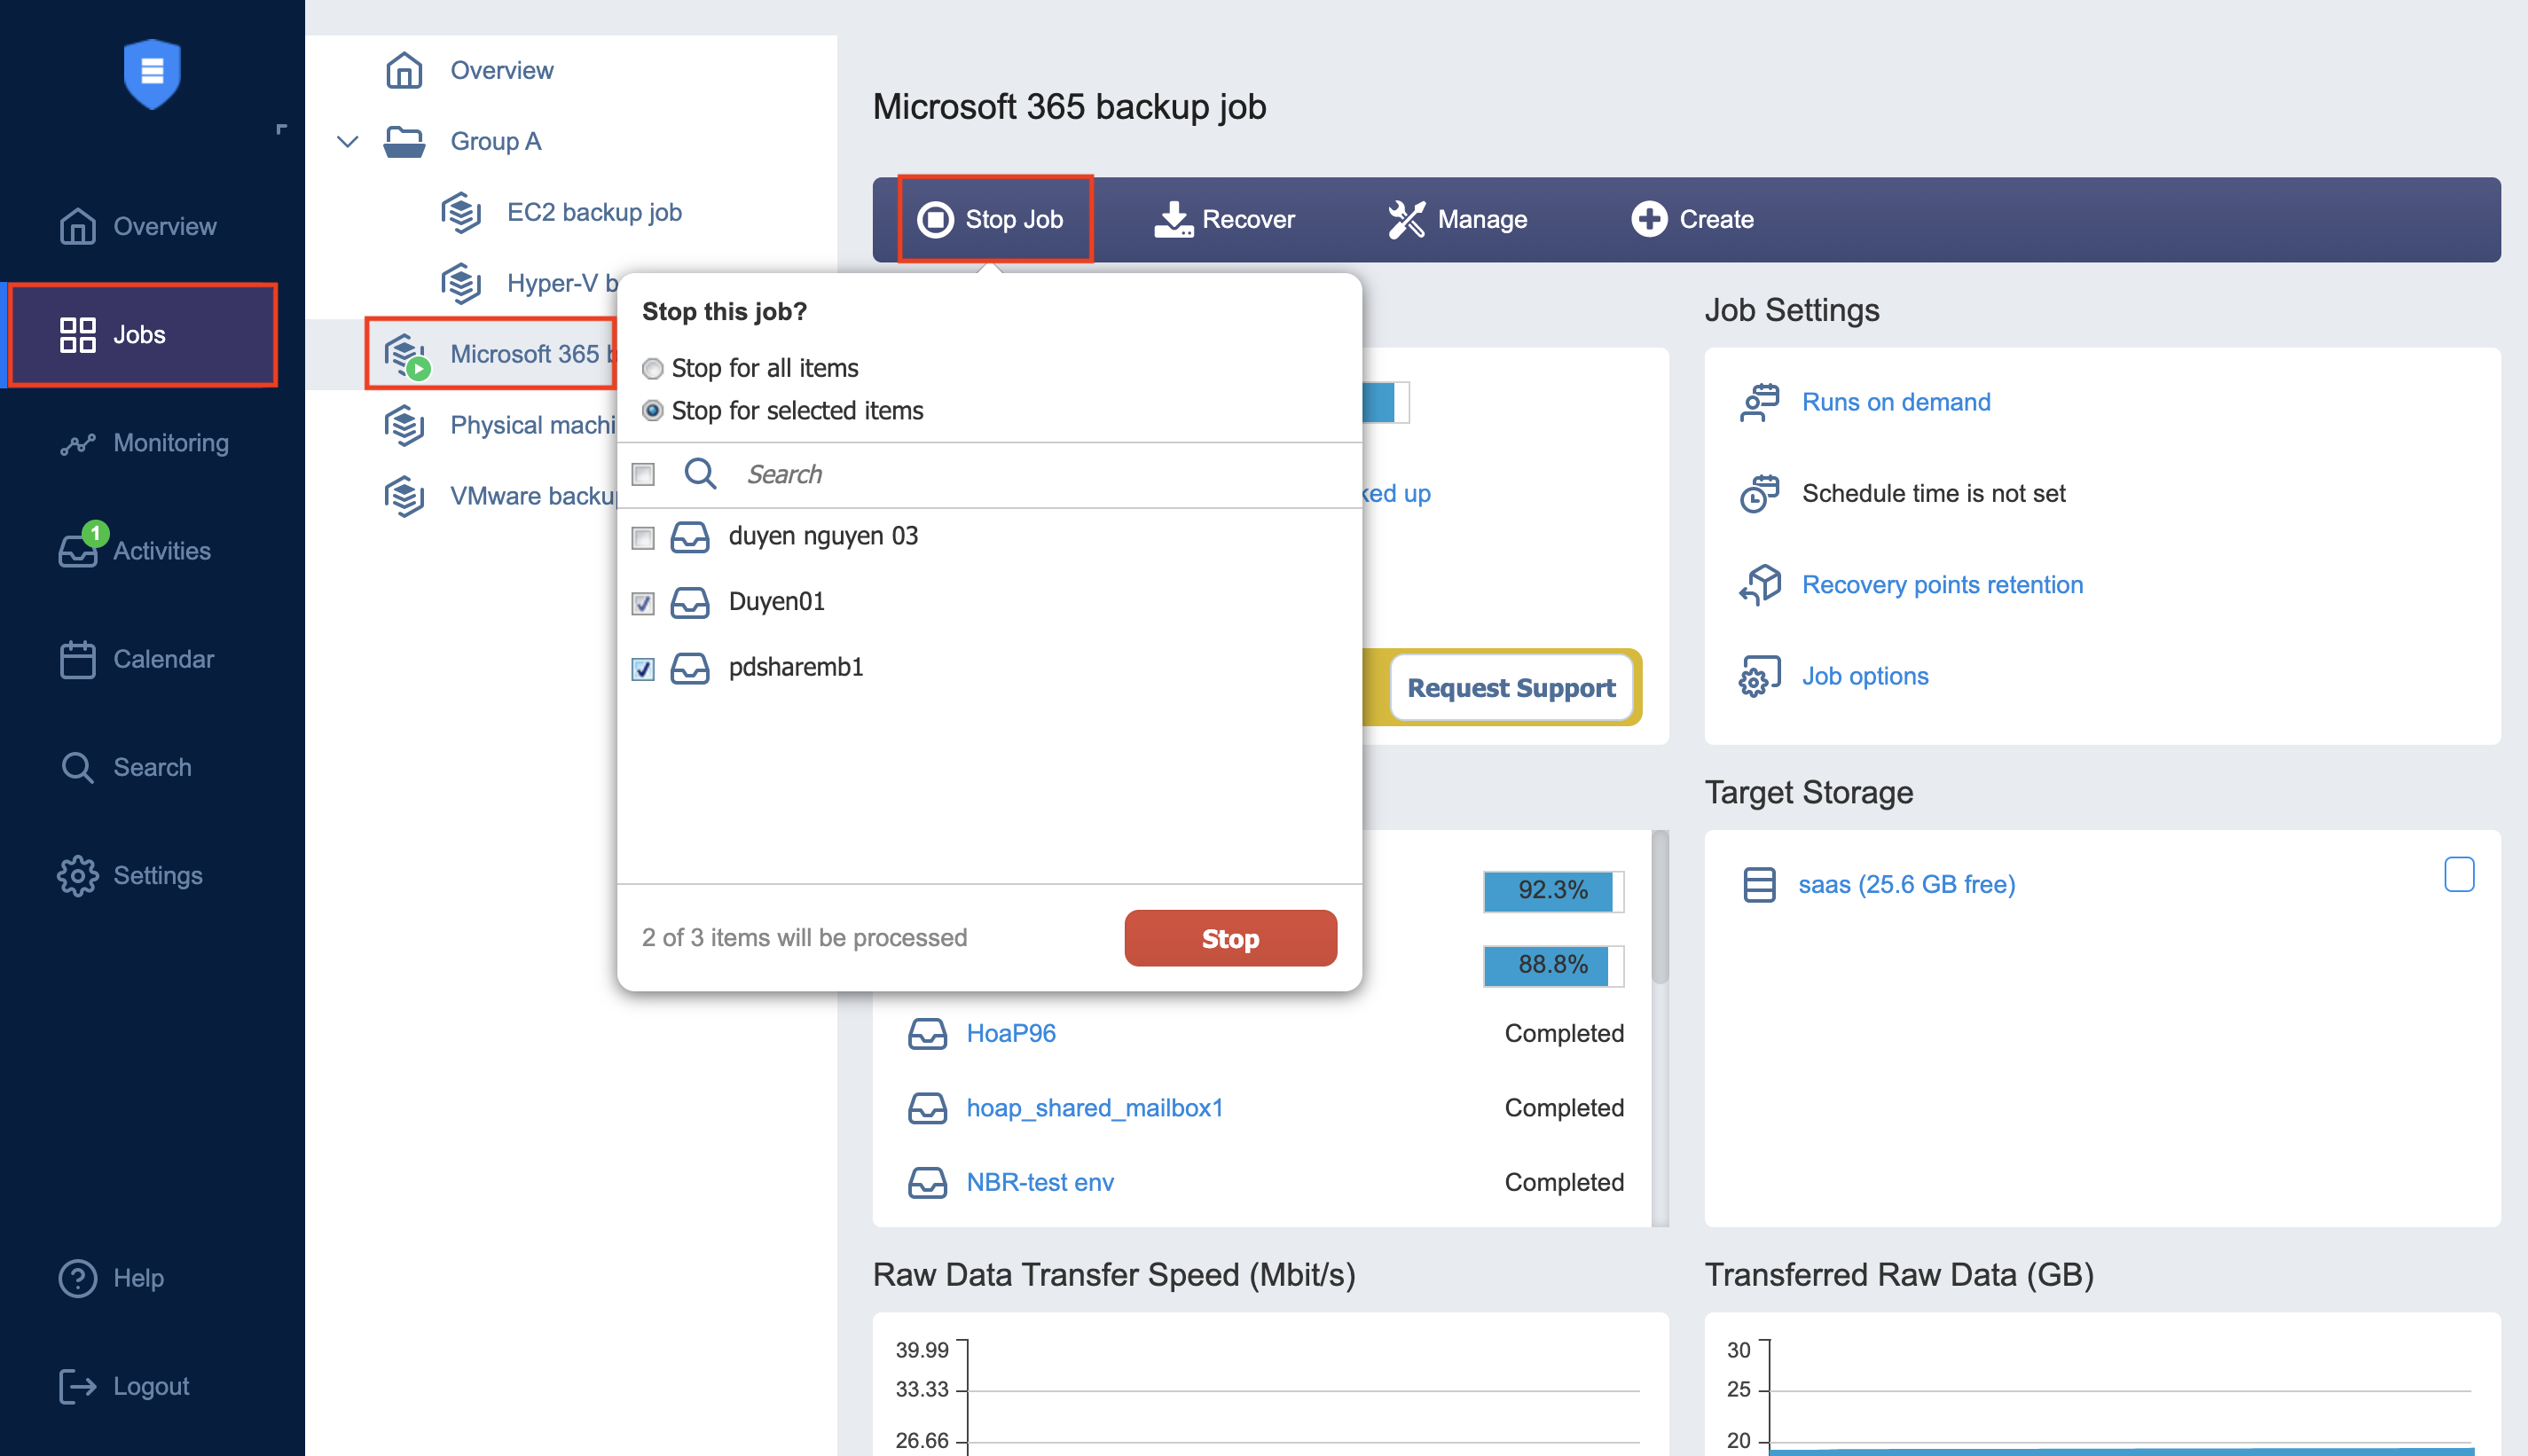
The product will close the dialog box and stop your job.
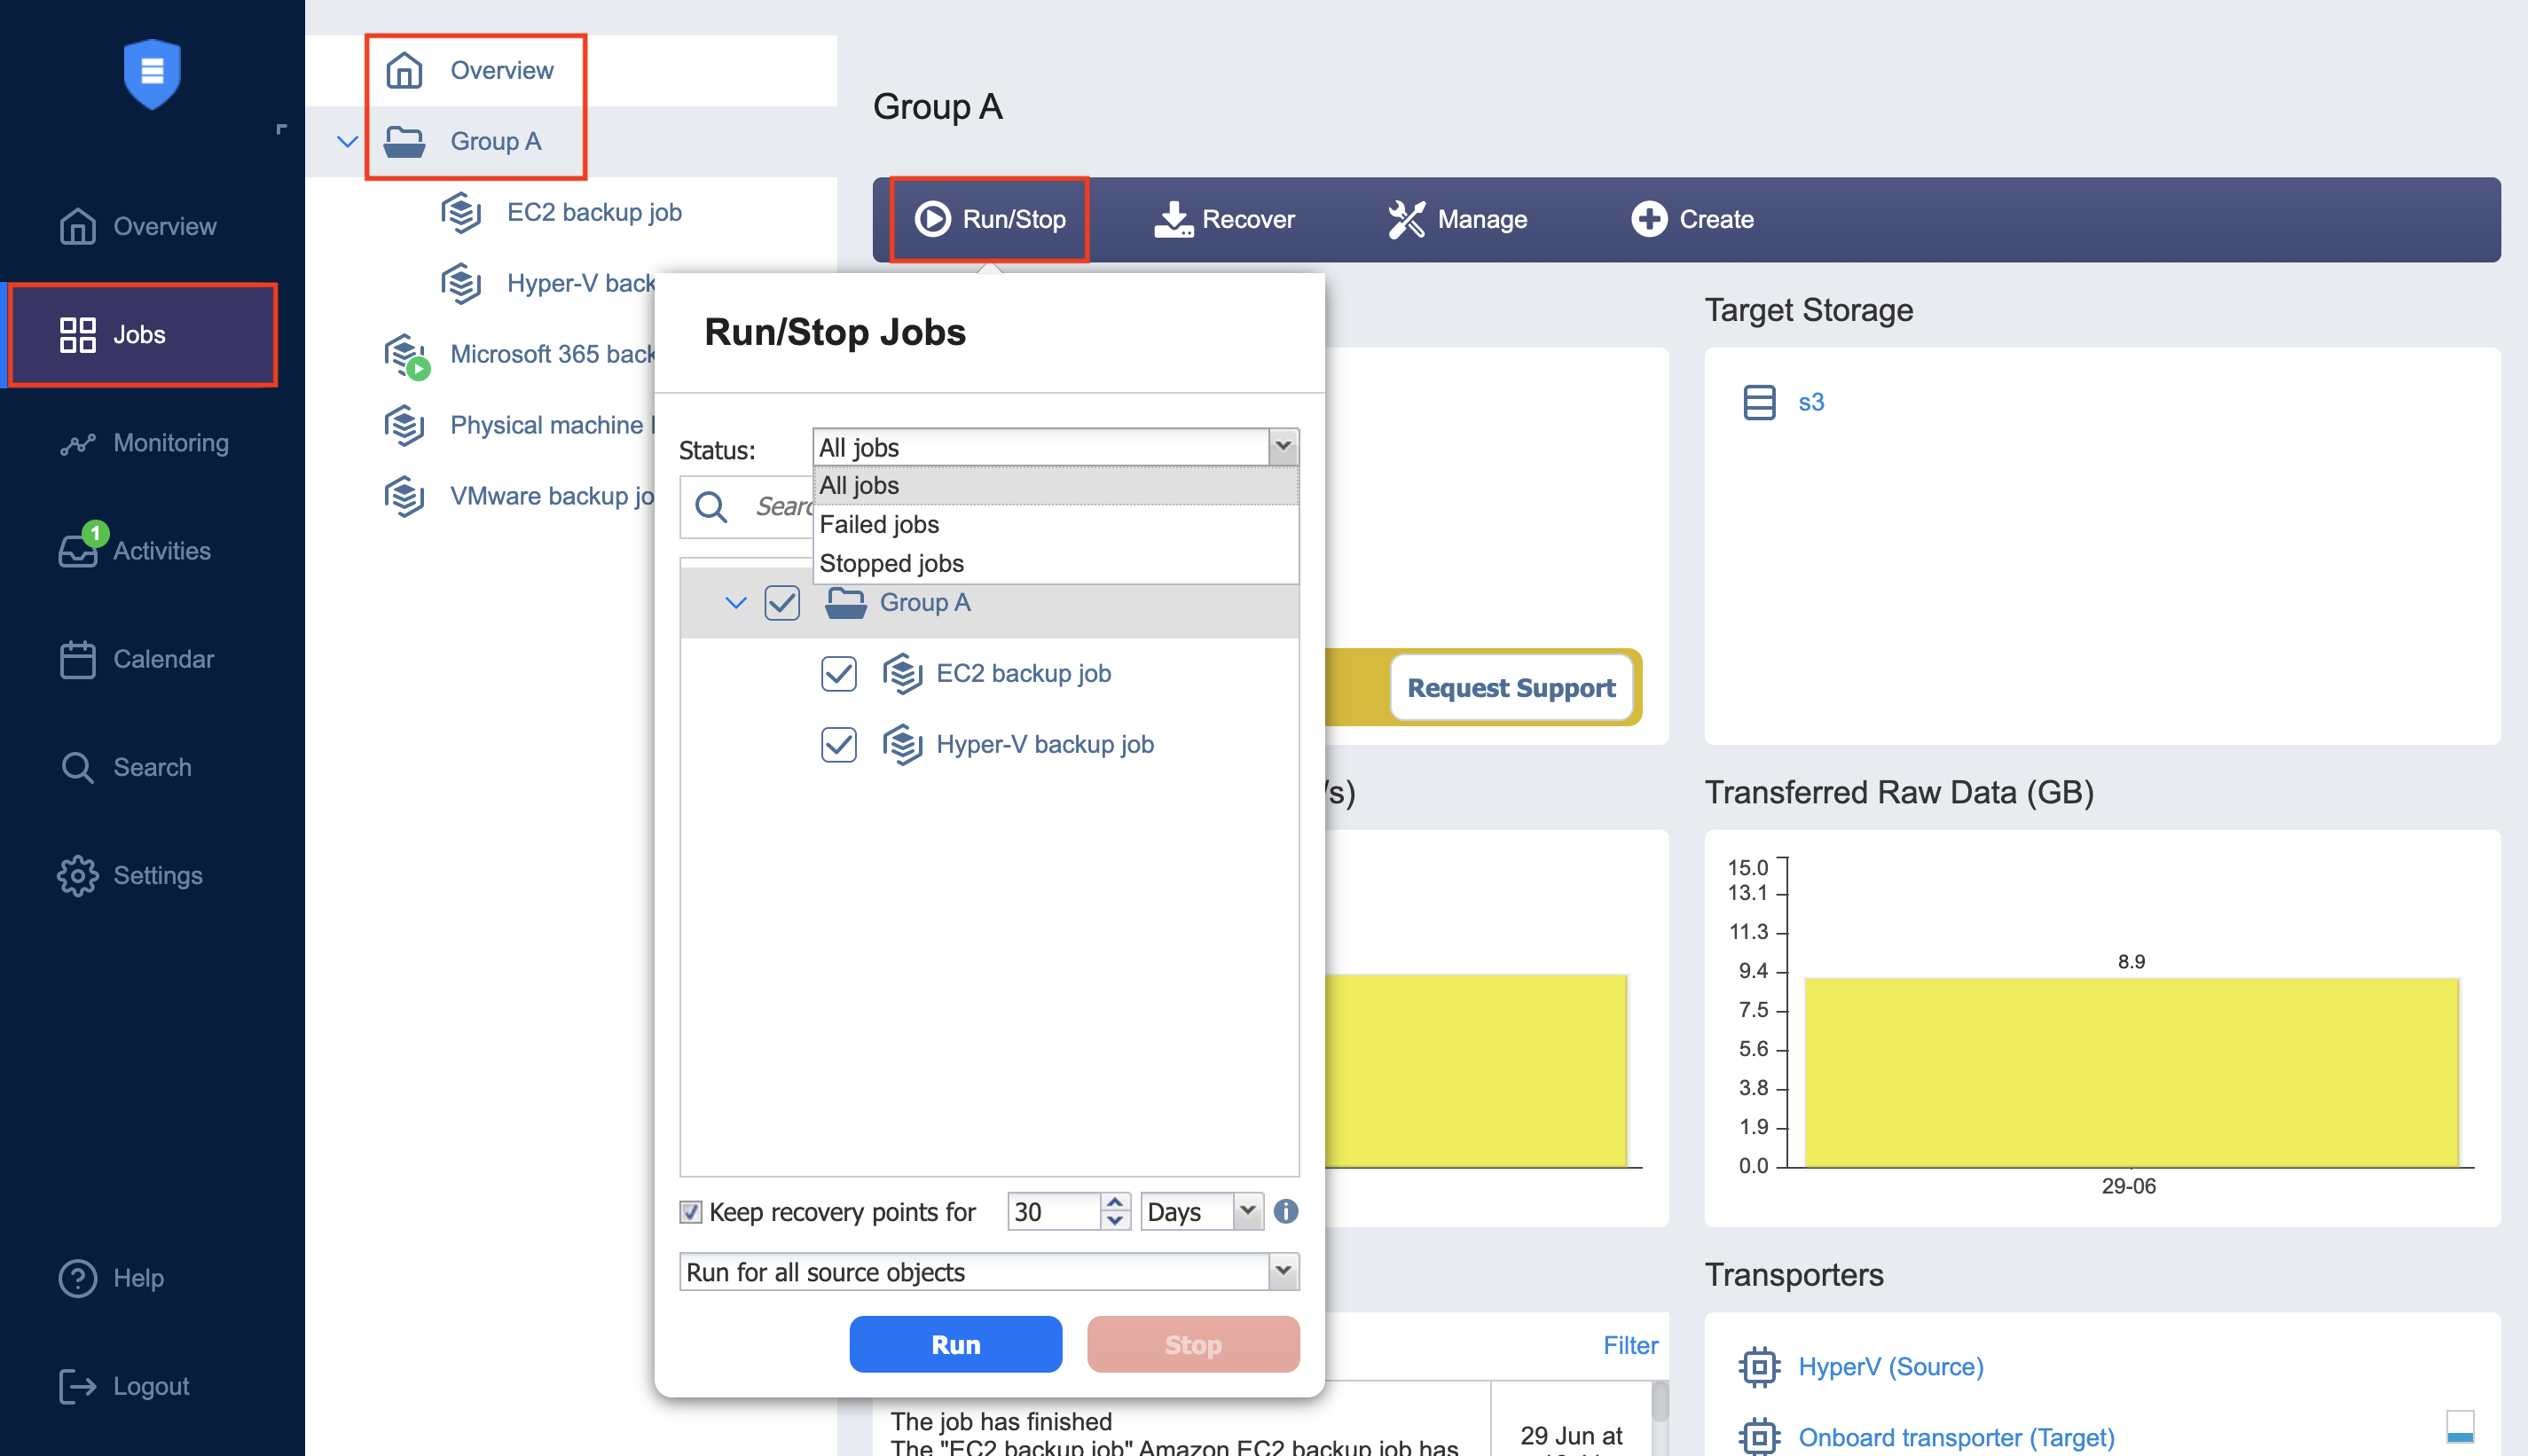
Managing Grouped Jobs
To efficiently start or stop jobs in bulk (run all failed jobs, for example), follow these steps:
-
From the Jobs menu, select the desired job group and click Run/Stop. To manage all jobs and groups at once, select Overview and click Run/Stop.
-
In the drop-down Status menu, select one of the following:
-
All jobs: Displays all jobs in the group.
-
Failed jobs: Displays all failed jobs in the group.
-
Stopped jobs: Displays all stopped jobs in the group.
-
-
Select the jobs you want to run/stop.
-
If you’re running backup jobs, specify the retention period for your recovery points with the Keep recovery points for option.
-
In the lowest drop-down menu, specify (if applicable) whether you want the operation to run for failed source objects, stopped source objects, or all source objects.
-
-
Click the Run or Stop button to confirm your operation.