Email Settings
On this page, you can configure your email settings. Do this by following the steps below:
-
Log in to NAKIVO Backup & Replication.
-
Click Settings in the left pane of the product.
-
Go to the General tab.
-
Click Email Settings to configure email settings on the page that opens.
Important
If you use an email with two-factor authentication, grant access permissions to NAKIVO Backup & Replication via your account security settings and generate a unique password. As an example, use instructions for Google accounts provided in the Create & use App Passwords article. When configuring email setting of the product, enter this password in the SMTP password box.
-
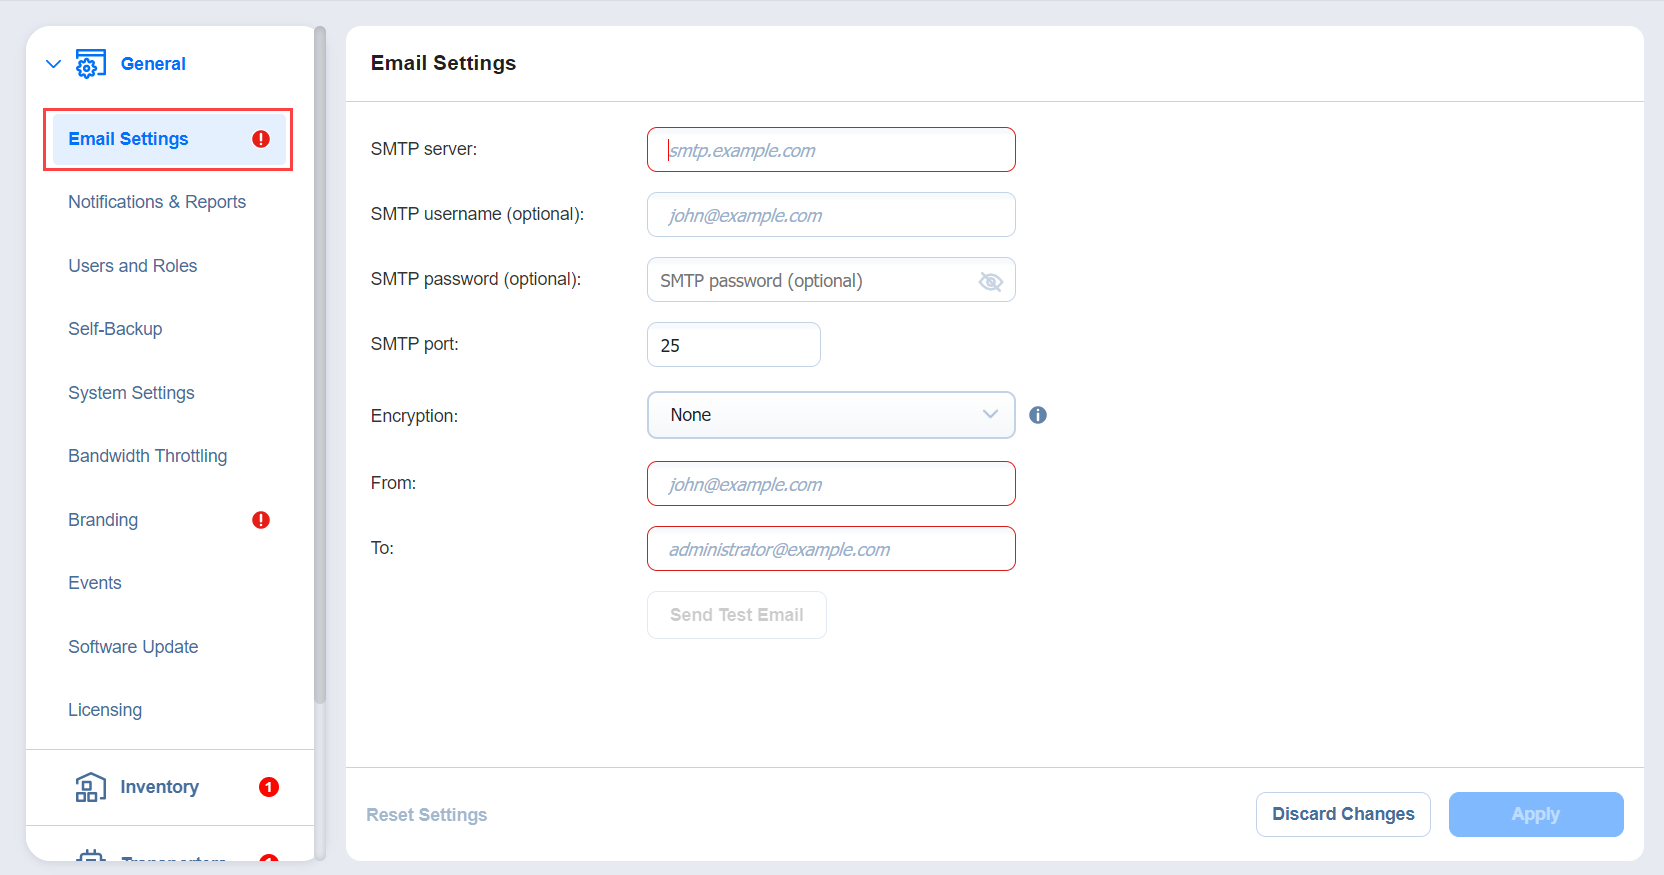
To set email settings, fill out the fields in the Email settings section:
-
SMTP server: The address of the server responsible for sending emails.
-
SMTP username: The username on the server (usually the same as the email username).
-
SMTP password: Usually the same as the password to your email.
-
SMTP port: Depends on encryption type.
-
Encryption: Select the type of encryption:
-
None: Always use a plaintext connection. Not recommended.
-
TLS, if possible: Start with plaintext, then use STARTTLS to switch to secure connection if supported by the server.
-
TLS, required: Start with plaintext, then use STARTTLS to switch to secure connection; drop the connection if not supported by the server.
-
SSL, required: Use the SSL-encrypted connection.
-
-
From: Specify the sender email address
-
To: Specify the receiver email address
Click Send Test Email to verify that the settings are correct.
Note
If you want to use a Gmail account to receive email notifications, turn on the Less secure apps access setting by navigating to Manage your Google Account > Security in your Google account. -
-
Click Apply to save the settings.
-
Alternatively, click Discard Changes to discard any changes you have made to the email configuration.
-
Optionally, click Reset Settings to return all the settings to their default values.