Adding Oracle Database to Inventory
To add an Oracle Database to the inventory, follow the steps below:
-
Make sure you meet the necessary requirements.
-
Click Settings in the left pane of NAKIVO Backup & Replication.
-
Go to the Inventory page and click Add New.
-
On the Platform page of the wizard, select Application and click Next to proceed.
-
On the Options page of the wizard, provide the following information:
-
Display name: Enter the preferred name for the database.
-
Hostname or IP: Specify the hostname or IP address of the Oracle database you want to add.
-
OS username: Enter your OS username.
-
OS password: Enter your OS password.
-
Database SID: Enter your database SID, that is, the Oracle System Identifier specific to that database.
-
Oracle username: If the OS credentials do not belong to special Oracle groups (OSDBA/OSOPER), enter your Oracle username. Otherwise, leave the field empty.
-
Oracle password: If the OS credentials do not belong to special Oracle groups (OSDBA/OSOPER), enter your Oracle password. Otherwise, leave the field empty.
-
-
Click Finish. The Oracle database is added to the inventory.

Obtaining Oracle Database SID
To obtain your Oracle Database SID, follow the steps below:
-
Open the Run command box (Windows key+R key).
-
To open the registry editor, type
regeditin the Run command dialog box and click OK.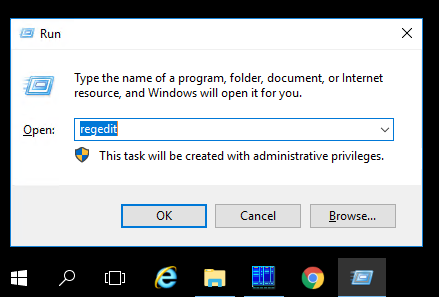
-
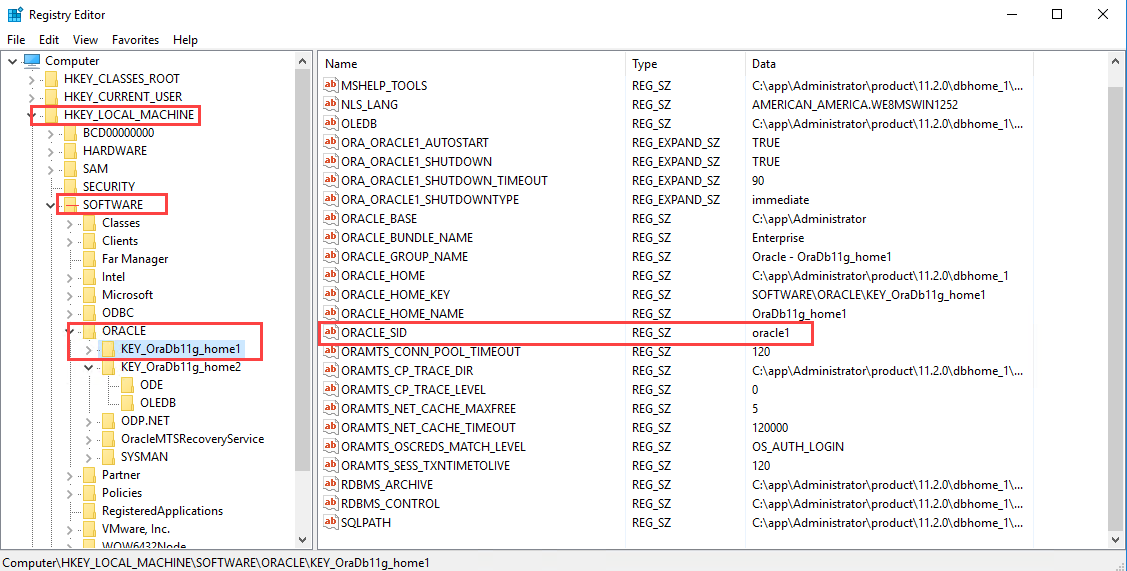
Navigate to the Key Registry of your Oracle Home. The location path is the following: HKEY_LOCAL_MACHINE >SOFTWARE >ORACLE>
-
The ORACLE_SID entry shows your SID.