Adding VMware vCenters and ESXi hosts
To add VMware vCenter servers and standalone ESXi hosts to the product, follow the steps below:
-
Navigate to Settings.
-
Go to the Inventory tab and click Add New.
-
In the dialog that opens, click VMware vCenter or ESXi host.
-
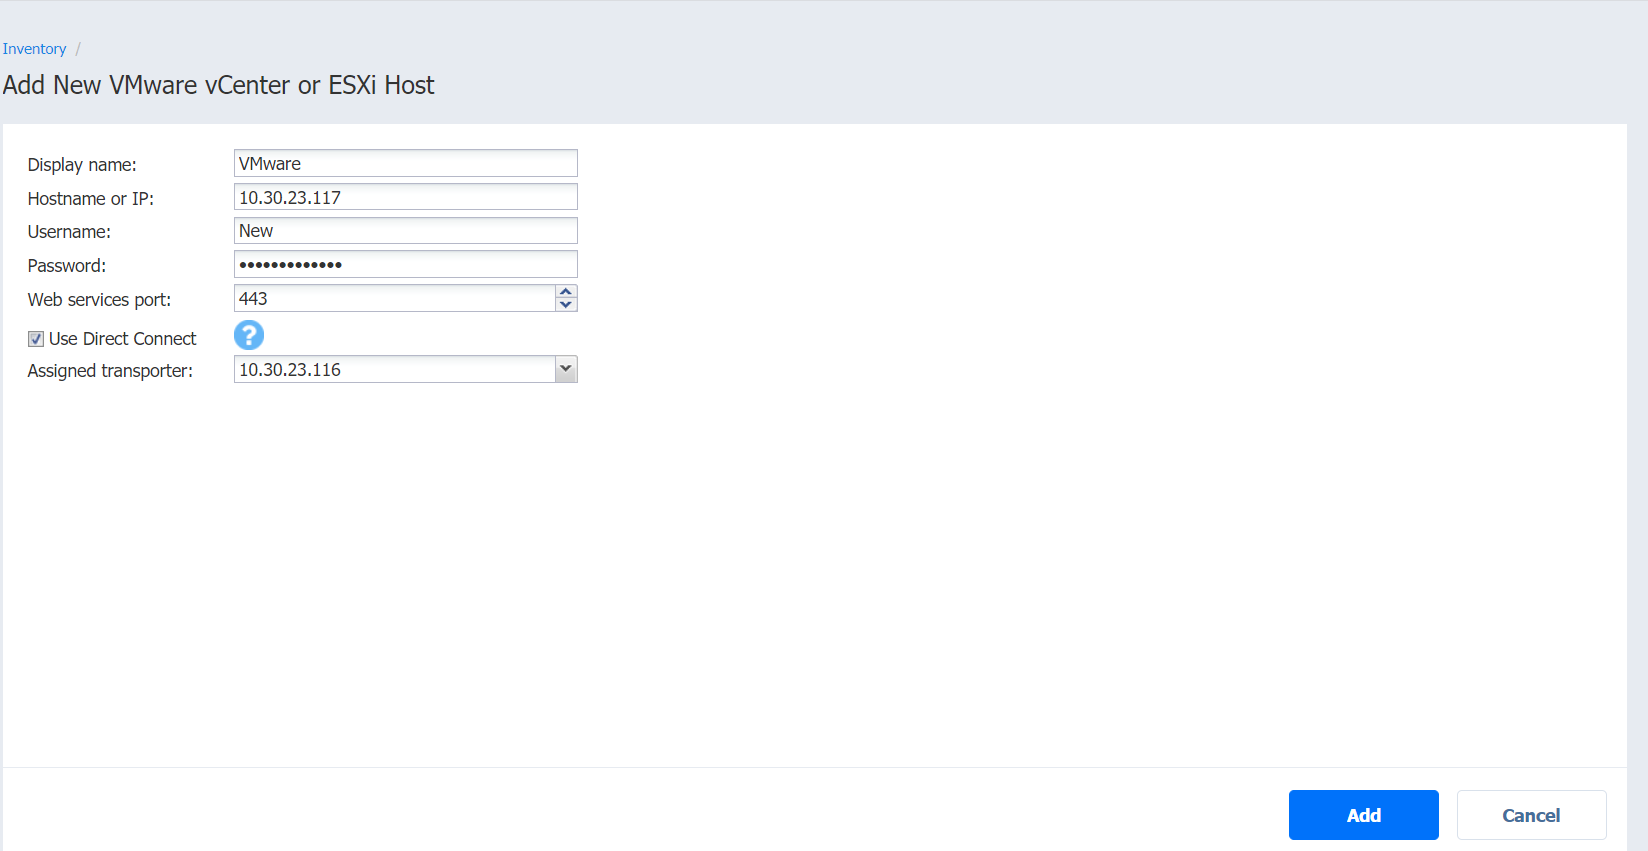
The Add New VMware vCenter or ESXi Host page opens. Proceed as follows:
-
In the Hostname or IP field, specify the hostname or IP address of the vCenter server or standalone ESXi host that you wish to add to the inventory.
Note
vCenter-managed ESXi hosts should not be discovered directly by their IP addresses or hostnames. Instead, you should add the vCenter that manages such ESXi hosts. -
In the Username and Password fields, specify credentials of the vCenter server or standalone ESXi host that you want to add to the inventory.
Note
The credentials you specify should have full administrative privileges to the vCenter server or standalone ESXi host. -
Specify the Web services port in the appropriate field.
-
Optionally, you can enable the Use Direct Connect option for this item to use the Direct Connect functionality. To do this:
-
Select Use Direct Connect.
-
In the Assigned transporter drop-down list, choose the Transporter with the enabled Direct Connect functionality.
Notes
-
This option is available only if there is a Transporter with Direct Connect enabled. For details, refer to Adding Installed Transporters.
-
vSphere tags support is not available via Direct Connect.
-
-
-
Click Add. After the process has completed successfully, you can exit Settings and create jobs with the newly discovered VMs.
-
A dialog box may open informing you that the current Transporter does not support VMware vSphere and asking you to deploy an additional Transporter. This is the case for NAKIVO Backup & Replication when it is deployed on an ARM-based NAS. Click Got It to close the dialog. Refer to Deploying Transporter as VMware Appliance for more details about deploying additional Transporters that support VMware vSphere.