Adding Local Users
Follow the steps below to add a local user:
-
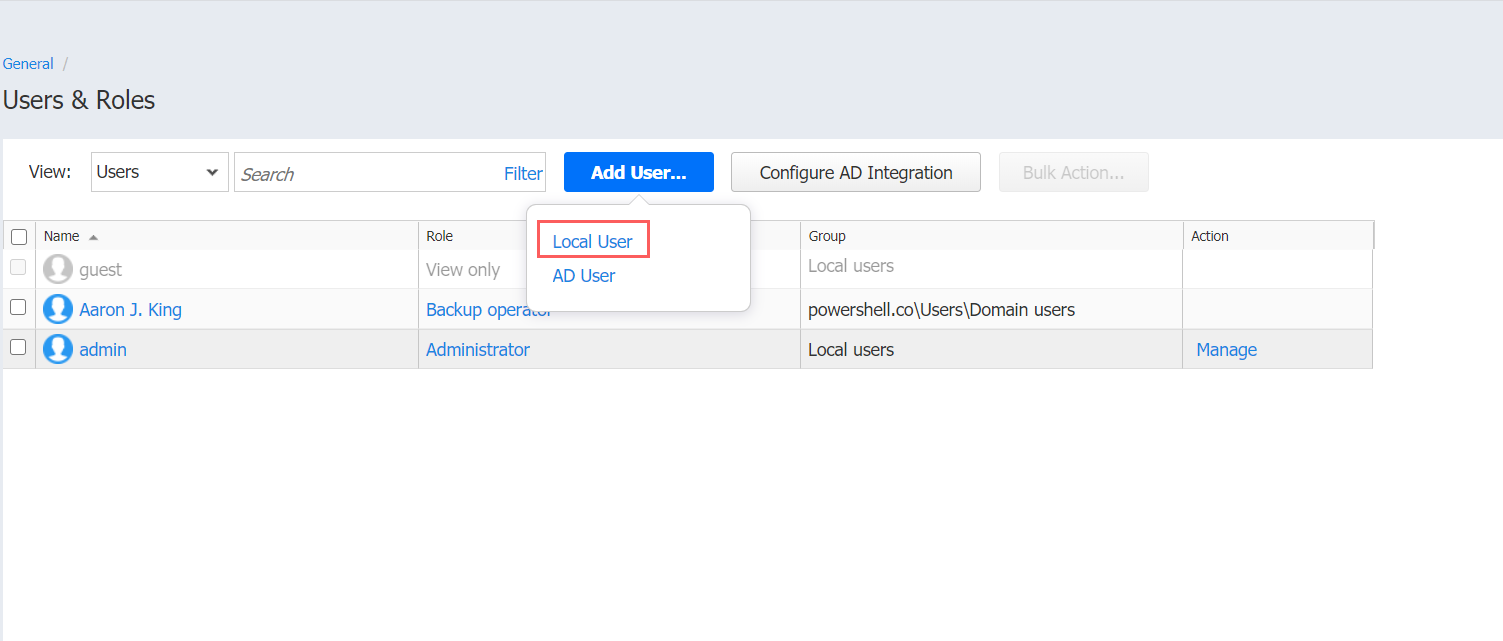
Go to Settings > General > Users and Roles
-
The Users and Roles page opens in the Users view. Click Add User.
-
In the menu that opens, click Local User.
-
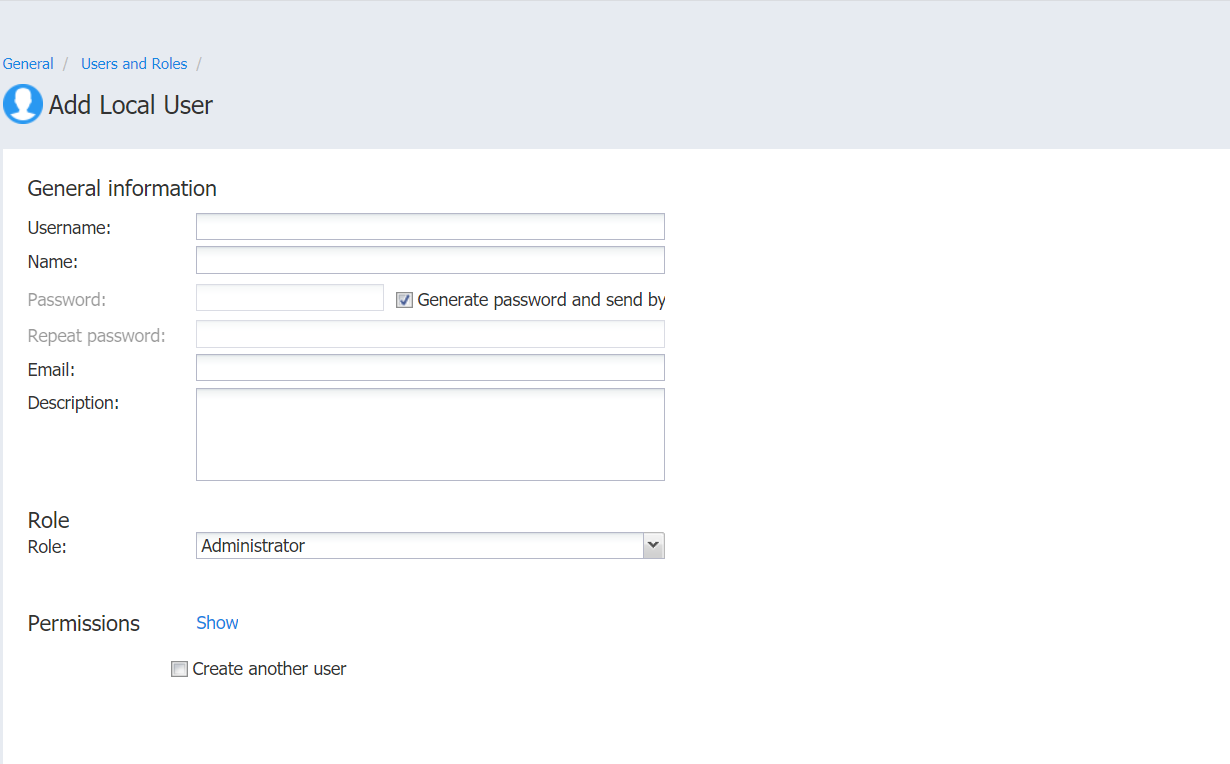
The Add Local User page opens. Proceed as follows:
-
In the Username box, enter the user name.
-
In the Name box, enter the user’s real name.
-
In the Password box, enter the user password. To generate a password automatically and send it to the user, select Generate password and send by.
-
In the Repeat password box, re-enter the user password.
-
In the Email box, enter the user’s email address.
-
In the Description box, optionally enter a user description.
-
In the Access level dropdown list, select an access level for the new user (for multi-tenant solutions only).
-
In the Role dropdown list, select a user role. Refer to Managing User Roles for more details about user roles.
-
To unhide permissions granted to the user based on the role assigned, click the Show button beside the Permissions label. To hide the user permissions again, click Hide.
-
To proceed with creating another user after creating the current one, select Create another user.
-
In the lower right corner of the page, click Add.
-
The local user appears in the list of users.